
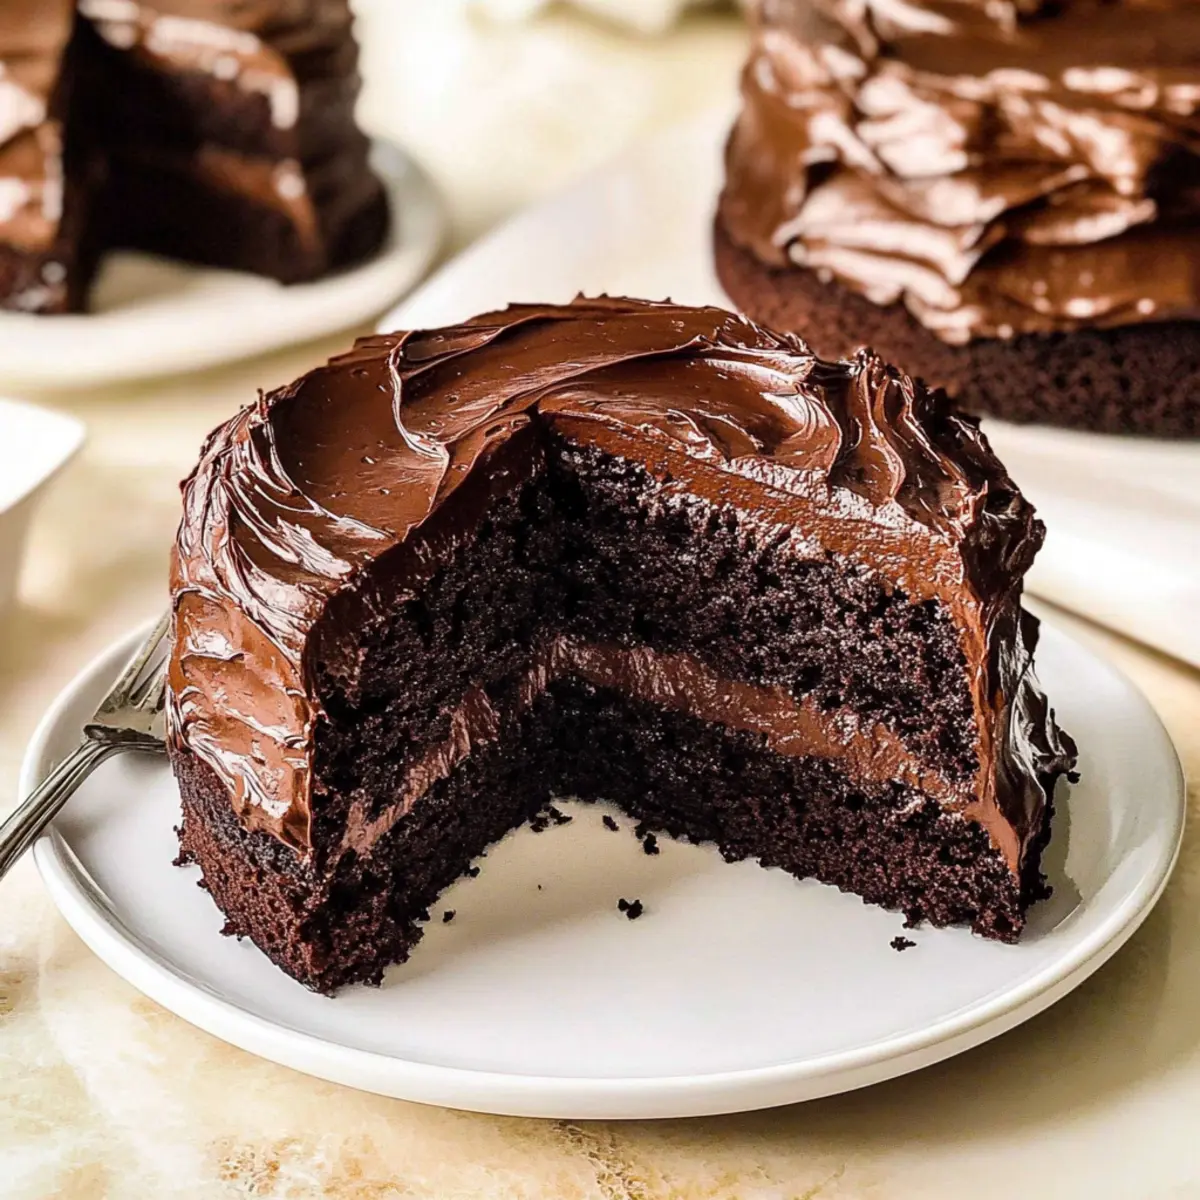
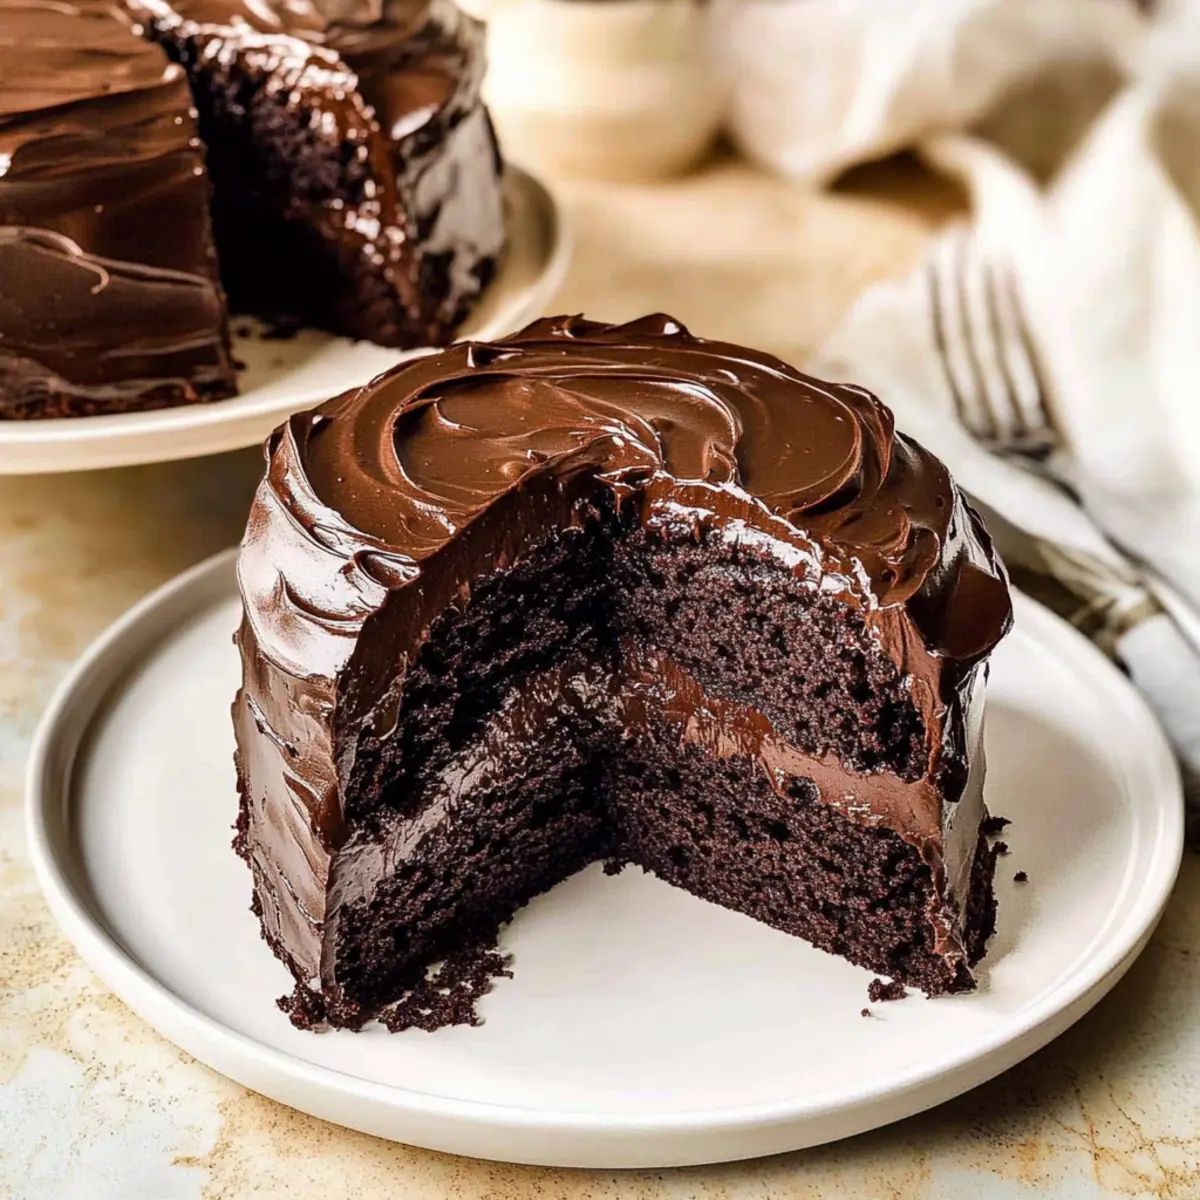
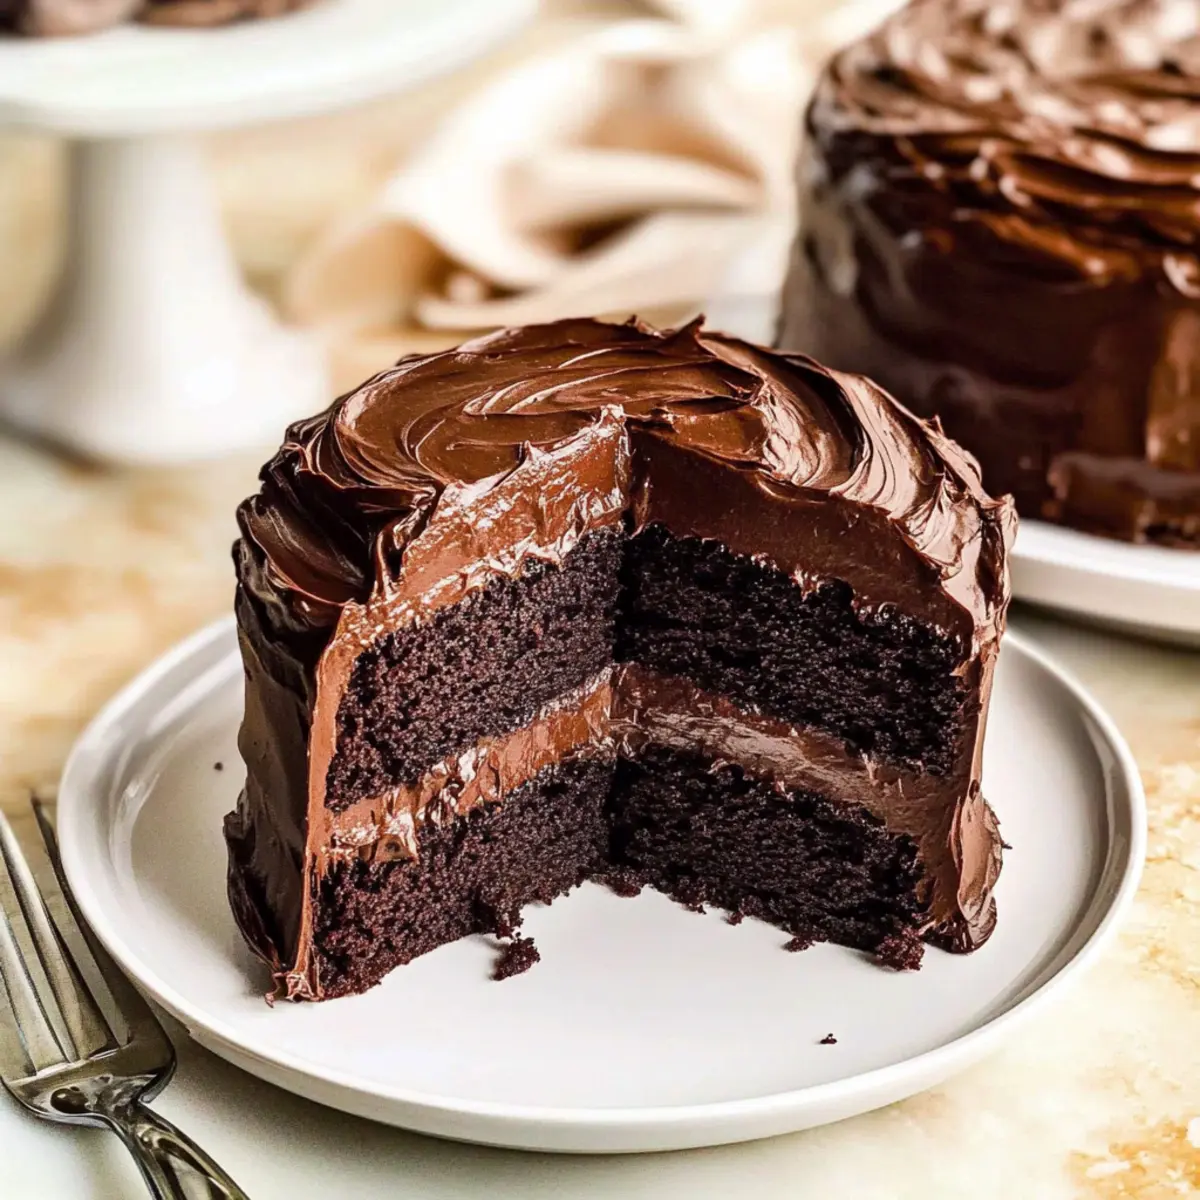
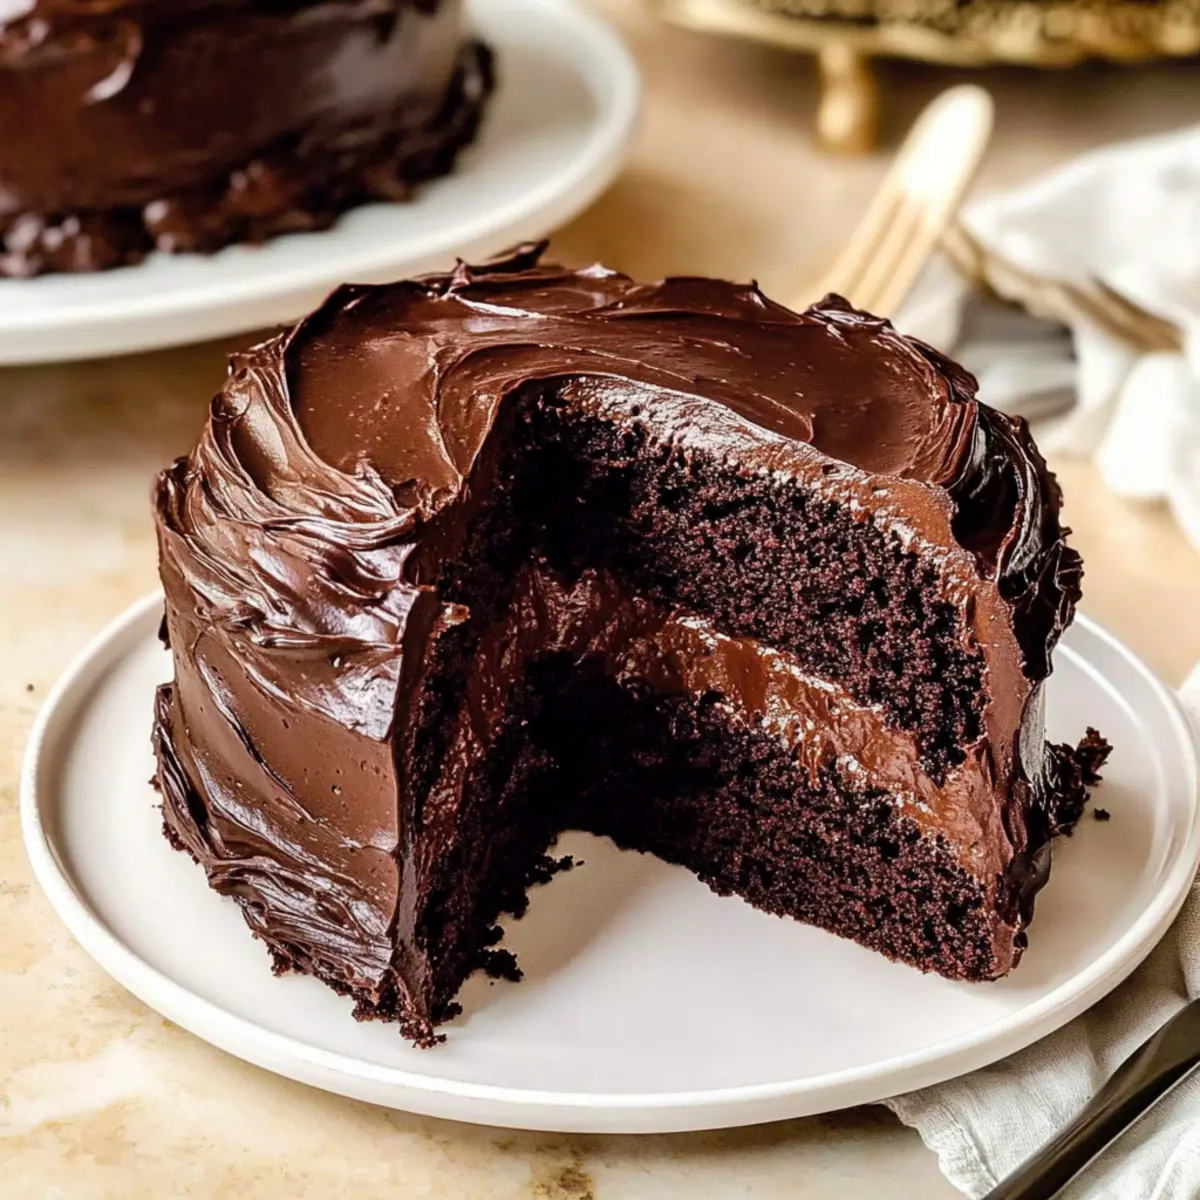
“Can you keep a secret? The most indulgent cake you’ll ever make doesn’t require a mixer! Enter my version of Matilda’s Chocolate Cake—a delightful no-mixer recipe so easy that even novice bakers will shine. Rich, moist layers of chocolate sponge come together beautifully with a glossy fudge frosting, creating a dessert that rivals any bakery creation. It’s perfect for celebrations or a well-deserved treat after a long day, and you’ll appreciate how quickly it comes together. Get ready to impress your friends and family with this luscious cake that’s not only a showstopper but also incredibly rewarding to whip up. Are you ready to dive into the world of chocolatey bliss?”
Why is Matilda’s Chocolate Cake So Special?
Decadent Flavor: Each bite of this chocolate cake is flooded with rich, velvety goodness that chocolate lovers crave.
No Mixer Needed: You can easily whip it together with just a whisk, making it accessible for bakers of all skill levels.
Moist & Tender: Thanks to the buttermilk and oil, your cake will stay incredibly moist, ensuring that every slice is as delightful as the last.
Versatility: Dress it up with fresh berries or a scoop of vanilla ice cream, just like serving the Cream Cheese Chocolate Chip Cookies for a unique twist!
Perfect for Celebrations: Whether it’s a birthday or a casual weekday indulgence, this cake impresses every time. Enjoy the satisfaction of creating a showstopping dessert that tastes as amazing as it looks!
Matilda’s Chocolate Cake Ingredients
For the Cake
• All-Purpose Flour – Provides necessary structure for the cake. Note: Ensure accurate measurement for best results.
• Dutch-Processed Cocoa Powder – Delivers a rich chocolate flavor and dark color. Substitution: Natural cocoa may yield a lighter color and different texture.
• Granulated Sugar – Sweetens the cake and helps keep the crumb tender.
• Baking Soda & Baking Powder – Essential leaveners for proper rise.
• Fine Sea Salt – Enhances the flavors and balances sweetness.
• Buttermilk – Adds moisture and acidity for a tender crumb. Substitution: 1 cup milk + 1 tablespoon vinegar can be used as a buttermilk replacement.
• Vegetable Oil – Keeps the cake moist since it remains liquid at room temperature. Note: Can substitute canola oil.
• Large Eggs – Binds the ingredients together and adds richness.
• Hot Brewed Coffee – Blooms cocoa for deeper flavor without imparting a coffee taste. Substitution: Boiling water can be used in place of coffee for cocoa blooming.
• Pure Vanilla Extract – Adds depth of flavor to the cake.
For the Frosting
• Semi-Sweet Chocolate – Enhances the fudge frosting’s richness. Note: High-quality chocolate bars (60%-70% cocoa) are recommended over chips.
• Unsalted Butter – Adds creaminess to the frosting.
• Heavy Cream – Incorporates into the frosting for a smooth finish.
• Powdered Sugar – Ensures a smooth texture for the frosting. Note: Always sift before use to avoid graininess.
Feel the excitement as you gather these simple yet essential ingredients to create the best Matilda’s Chocolate Cake you’ve ever baked!
Step‑by‑Step Instructions for Matilda’s Chocolate Cake
Step 1: Preheat and Prepare
Begin by preheating your oven to 350°F (175°C). Grease two 8-inch round cake pans thoroughly and line the bottoms with parchment paper to prevent sticking. This ensures a smooth release as you bake Matilda’s Chocolate Cake, retaining its beautiful shape and moist texture.
Step 2: Bloom the Cocoa
In a small bowl, combine half of the Dutch-processed cocoa powder with the hot brewed coffee. Whisk the mixture until it is completely smooth and free of lumps. This step is crucial, as blooming the cocoa in coffee intensifies the chocolate flavor of your cake.
Step 3: Combine Dry Ingredients
In a large mixing bowl, sift together the all-purpose flour, remaining cocoa powder, granulated sugar, baking soda, baking powder, and fine sea salt. Make sure all dry ingredients are well mixed; this will ensure even rising and a tender crumb in your decadent Matilda’s Chocolate Cake.
Step 4: Mix Wet Ingredients
After the dry ingredients are combined, add the large eggs, buttermilk, vegetable oil, and pure vanilla extract to the mixture. Use a whisk to blend everything together until smooth and homogenous. This is where the magic begins, giving life to your rich and moist chocolate batter!
Step 5: Incorporate the Coffee Mixture
Pour the bloomed cocoa-coffee mixture into the cake batter and mix gently until it’s fully incorporated and reflects a deep chocolate hue. Take care not to over-mix, as this could affect the cake’s tender texture. Your batter for Matilda’s Chocolate Cake should now be rich and silky.
Step 6: Bake the Cakes
Divide the batter evenly between the prepared cake pans. Place them in the preheated oven and bake for 30 to 35 minutes, or until a toothpick inserted in the center comes out clean. When done, the top should spring back lightly when touched.
Step 7: Cool the Cakes
Once baked, remove the pans from the oven and allow them to cool on a wire rack for about 10 minutes. Afterward, gently turn the cakes out from the pans and let them cool completely on the rack. This cooling period is essential to maintain the moisture of the Matilda’s Chocolate Cake.
Step 8: Make the Frosting
To prepare the frosting, melt chopped semi-sweet chocolate, unsalted butter, heavy cream, and sifted powdered sugar in a saucepan over low heat. Stir continuously until the mixture transforms into a smooth and glossy frosting. Patience here is key to achieve that delectable texture for your chocolate cake.
Step 9: Chill the Frosting
Once the frosting is smooth, strain it through a mesh strainer into a bowl to eliminate any lumps. Place the bowl in the refrigerator and chill until it thickens to a spreadable consistency, about 30 minutes. This step is important for a velvety finish on your beautiful Matilda’s Chocolate Cake.
Step 10: Assemble the Cake
Take the first cooled cake layer and place it on a serving plate. Generously frost the top with the chocolate frosting, then carefully add the second layer on top. Apply the remaining frosting to cover the entire cake, smoothing it out for a stunning appearance that’s sure to impress.
Step 11: Set and Serve
Allow the assembled cake to sit at room temperature for about 15 minutes prior to slicing. This helps the frosting set perfectly and makes each piece easy to serve. Your Matilda’s Chocolate Cake is now ready to share—each slice revealing rich, dark layers paired with a glossy, decadent frosting!
Matilda’s Chocolate Cake Variations
Feel free to explore these delightful twists and adjustments to elevate your famous cake even further!
-
Three-Layer Cake: Create a stunning three-layer design by dividing the batter into three pans and baking for 22-26 minutes. The extra layer adds an enticing presentation that will impress your guests!
-
Chocolate Type Swap: Dark to Milk Chocolate: For a sweeter twist, swap dark chocolate for milk chocolate in the frosting. It will create a noticeable sweetness that pairs beautifully with the rich cake layers.
-
Gluten-Free Option: Flour Adjustments: Make this cake gluten-free by substituting a high-quality 1-to-1 gluten-free flour blend. Your cake will remain just as delicious, ensuring everyone can enjoy a slice of the magic!
-
Espresso Boost: Flavor Enhancement: Elevate the chocolate flavor by adding 1 tablespoon of instant espresso powder to the dry ingredients. This simple addition will create a delectable depth in flavor that’s irresistible!
-
Nutty Twist: Add Chopped Nuts: Fold in some chopped walnuts or pecans into the batter for added texture and a delightful crunch. This makes each bite a little more exciting, adding to the overall enjoyment!
-
Fragrant Citrus: Zesty Variation: Incorporate the zest of one orange into the frosting for a refreshing citrus aroma that contrasts beautifully with the chocolate. A unique flavor fusion that chocolate lovers will adore!
-
Spicy Chocolate: Heat It Up: Add a pinch of cayenne pepper to the dry ingredients for a subtle kick. This unexpected heat complements the rich chocolate splendidly, making it a conversation starter at your gatherings!
-
Decadent Toppings: Fruity Finish: Top the frosted cake with fresh berries, or drizzle with a raspberry sauce for a pop of color and contrast. Decorate lavishly—just like with White Chocolate Blueberry Truffles for an elegant dessert presentation!
Embrace the creativity that baking offers, and transform your Matilda’s Chocolate Cake into something that uniquely reflects your taste!
How to Store and Freeze Matilda’s Chocolate Cake
Room Temperature: Keep leftover cake in an airtight container at room temperature for up to 5 days to maintain its moistness and flavor.
Fridge: If the cake is frosted, it can be stored in the refrigerator for 3-4 days. Cover with plastic wrap to prevent it from drying out.
Freezer: Slice your Matilda’s Chocolate Cake and freeze in an airtight container or freezer bag for up to 3 months. This helps preserve its rich flavor and texture.
Thawing: For the best texture, thaw slices at room temperature for about an hour before enjoying.
What to Serve with Matilda’s Chocolate Cake
Indulge in a delightful feast that complements the richness of your chocolate cake perfectly.
-
Fresh Berries: Their tartness balances the decadence, providing a refreshing contrast that enhances each bite.
-
Vanilla Ice Cream: Melting over the warm cake, this creamy addition creates an irresistible blend of chocolate and sweetness.
-
Chocolate Sauce: Drizzle a bit more chocolate for a truly decadent experience; it enhances the chocolate flavor without overpowering it.
-
Whipped Cream: Light and airy, whipped cream adds a luxurious touch and helps temper the rich layers of cake.
-
Coffee: A warm cup of coffee brings out the flavors of chocolate, making for a cozy pairing that feels indulgent.
-
Mint Leaves: Fresh mint sprinkled on top can brighten the dessert visually and add a refreshing hint that cuts through the richness.
Consider these delightful pairings to elevate your dessert experience and impress your family and friends!
Expert Tips for Matilda’s Chocolate Cake
-
Measure Accurately: Use a kitchen scale for the flour to ensure you have the right amount. Too much flour can make the cake dry.
-
Bloom with Coffee: Always bloom your cocoa powder in hot coffee to deepen the flavor profile of Matilda’s Chocolate Cake—don’t skip this step!
-
Don’t Overmix: Mix the batter just until combined to keep the cake light and tender. Overmixing can lead to a gummy texture.
-
Cool Completely: Allow the cakes to cool completely before frosting; this helps the layers hold their shape and ensures the frosting stays intact.
-
Chill Your Frosting: If your frosting is too runny, give it time in the fridge to thicken for a smoother finish that’s easy to spread beautifully.
-
Slice with Care: Use a sharp, serrated knife to cut into your beautifully frosted cake. A delicate sawing motion will yield perfect slices without squishing!
Make Ahead Options
These Matilda’s Chocolate Cake components are perfect for meal prep! You can bake the cakes up to 3 days in advance; simply cool them completely, wrap each layer tightly in plastic wrap, and refrigerate to maintain moisture. You can also prepare the frosting up to 24 hours ahead—just chill it in the fridge and give it a quick re-whisk before spreading it on your cake. When you’re ready to serve, simply assemble the layers and frost the cake according to the instructions, allowing it to sit for 15 minutes at room temperature for the best presentation. This way, you’ll have a deliciously rich chocolate cake ready to enjoy with minimal effort on the day of serving!
Matilda’s Chocolate Cake Recipe FAQs
How do I choose the best cocoa powder for Matilda’s Chocolate Cake?
Opt for Dutch-processed cocoa powder for a rich flavor and dark color; it truly enhances the depth of this cake. Be sure to check for freshness—look for a vibrant color and fine texture. If you’re in a pinch, natural cocoa can work, but it may result in a lighter cake both in color and flavor.
What’s the best way to store leftovers of Matilda’s Chocolate Cake?
You can keep any leftover cake in an airtight container at room temperature for up to 5 days. If unfrosted, it stores better; simply wrap it in plastic wrap or foil to lock in moisture. For frosted cake, place it in the fridge for 3-4 days, covering it loosely with plastic wrap to prevent it from drying out.
Can I freeze Matilda’s Chocolate Cake, and how?
Absolutely! Slice your cake first for easy thawing. Place the slices in an airtight container or well-sealed freezer bag, making sure to separate layers with parchment paper to prevent sticking. It can be frozen for up to 3 months. When you’re ready to indulge, simply thaw at room temperature for about an hour, and you’ll have a moist treat waiting for you!
What should I do if my cake layers domed while baking?
If your layers domed up instead of remaining flat, don’t fret! You can easily level them once they’ve cooled completely. Using a serrated knife, gently trim the tops so they are even. This will ensure the frosting spreads beautifully and each slice looks picture-perfect!
Are there any dietary considerations I should keep in mind for Matilda’s Chocolate Cake?
Yes! For those with gluten sensitivities, you can use a high-quality gluten-free flour blend to make this cake gluten-free without cake texture compromise. If someone is lactose intolerant, you can swap out buttermilk for a dairy-free milk with a splash of vinegar as a substitute. Always check all packaged ingredients for possible allergens.
How can I make my frosting smooth and glossy?
To achieve that perfect glossy finish, always melt the chocolate and butter over low heat, stirring continuously to prevent separation. Once you make the frosting, strain it through a mesh sieve before chilling. This step eliminates lumps and ensures a silky-smooth texture that glides beautifully on your layers!
Irresistibly Moist Matilda's Chocolate Cake Recipe to Indulge
Ingredients
Equipment
Method
- Preheat your oven to 350°F (175°C). Grease two 8-inch round cake pans thoroughly and line the bottoms with parchment paper.
- In a small bowl, combine half of the Dutch-processed cocoa powder with the hot brewed coffee. Whisk until smooth.
- In a large mixing bowl, sift together the all-purpose flour, remaining cocoa powder, granulated sugar, baking soda, baking powder, and fine sea salt.
- Add the large eggs, buttermilk, vegetable oil, and pure vanilla extract to the mixture and whisk until smooth.
- Pour the bloomed cocoa-coffee mixture into the cake batter and mix gently until fully incorporated.
- Divide the batter evenly between the prepared cake pans and bake for 30 to 35 minutes, until a toothpick comes out clean.
- Once baked, allow the cakes to cool on a wire rack for about 10 minutes before turning them out.
- Melt the semi-sweet chocolate, unsalted butter, heavy cream, and sifted powdered sugar in a saucepan over low heat until smooth.
- Strain the frosting through a mesh strainer into a bowl and chill in the refrigerator until thickened, about 30 minutes.
- Assemble the cake by frosting the top of the first layer, placing the second layer on top, and covering the entire cake with frosting.
- Allow the assembled cake to sit at room temperature for about 15 minutes before slicing.
Leave a Reply