
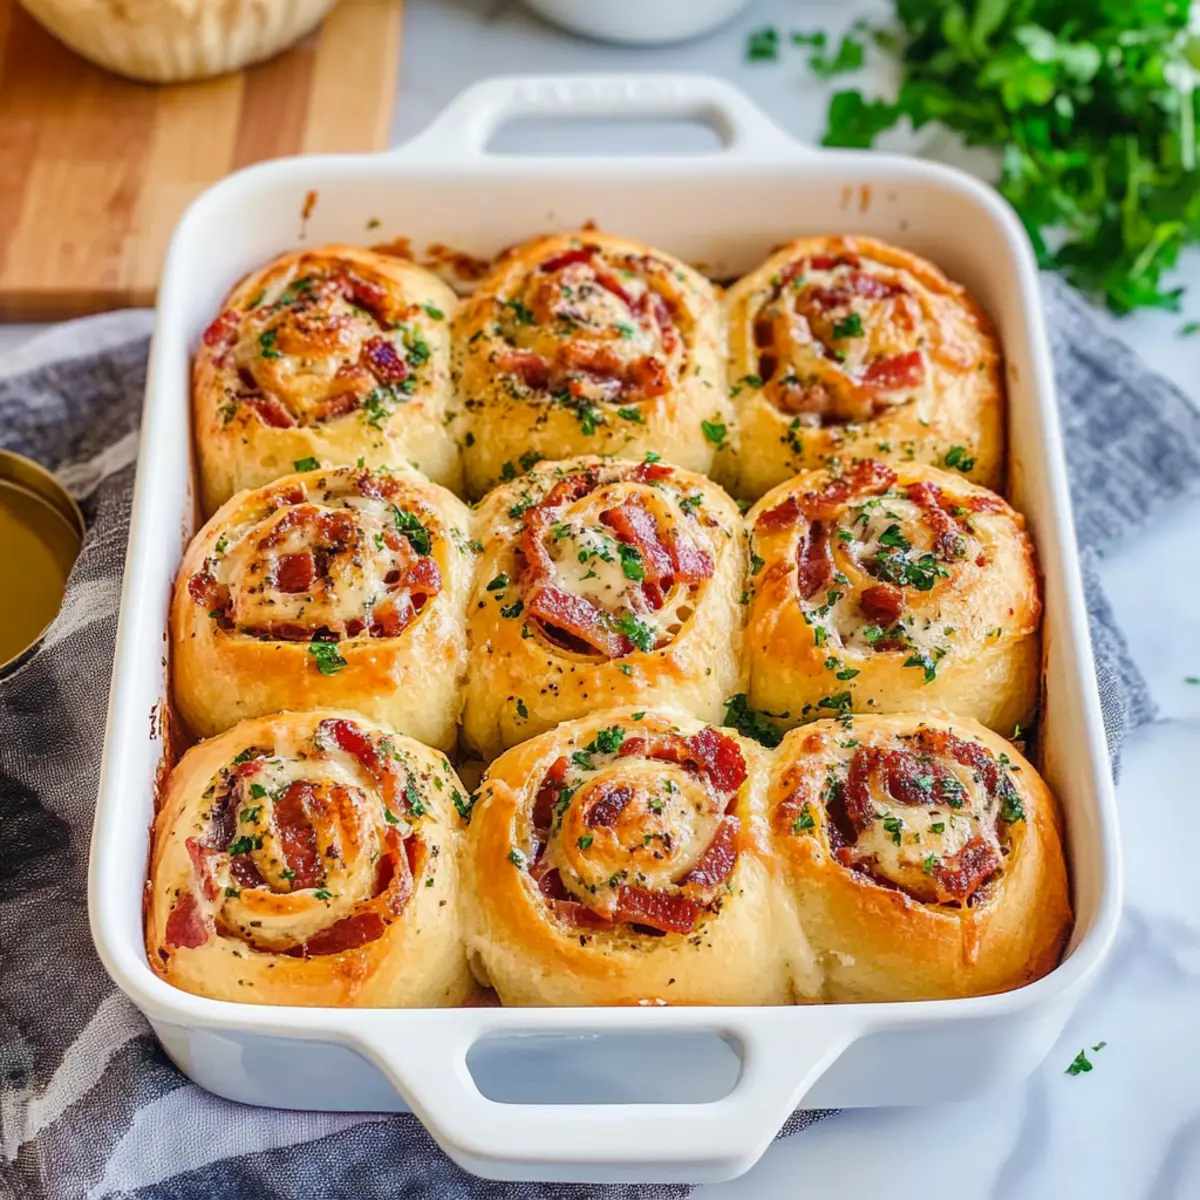
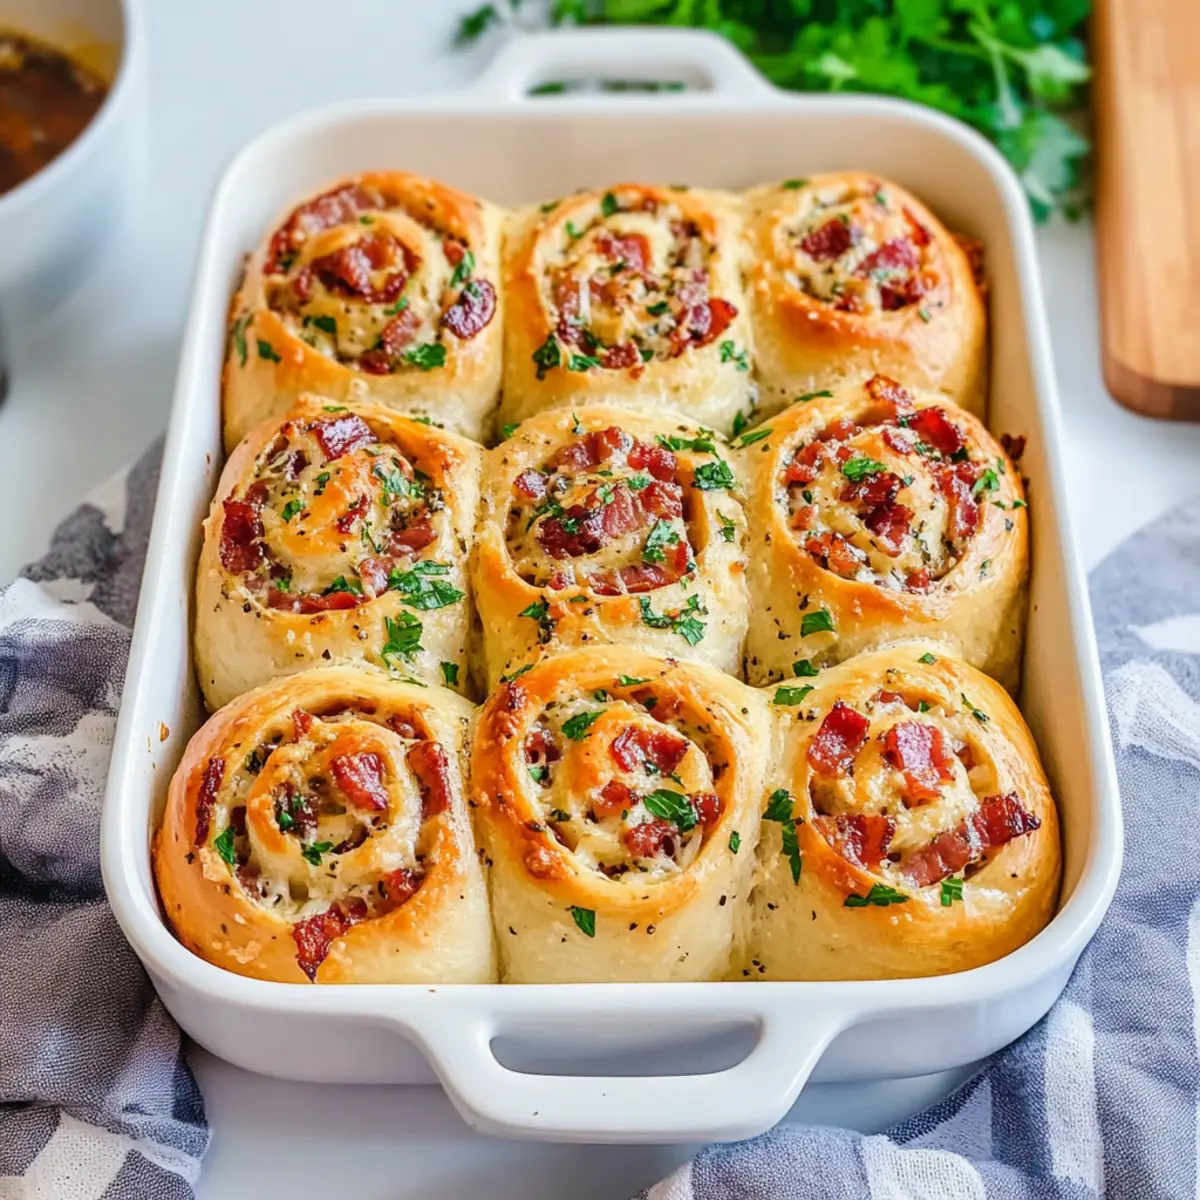
As I pulled the warm, golden rolls from the oven, the inviting aroma of smoky bacon and melted cheese enveloped my kitchen like a cozy blanket. These Fluffy Bacon & Cheese Rolls with Garlic Butter are not just a feast for the senses; they’re a slice of homemade comfort that will instantly transport you to a happy place. Perfect for weekend brunches or as a crowd-pleasing appetizer, this savory delight is a breeze to whip up ahead of time, letting you savor every bite without the stress. Plus, you can easily customize the fillings to suit your taste, making these rolls an adventure in flavor. Ready to bring that comforting warmth to your table? Let’s dive into the recipe that might just become your new favorite go-to!

Why Will You Love These Rolls?
Irresistible Flavor: Each bite of these Bacon & Cheese Rolls with Garlic Butter is a delightful burst of savory goodness that brings all your favorite comfort food elements together.
Easy and Flexible: This recipe is simple enough for even beginner bakers, plus you can tailor the fillings to include different cheeses or even fresh vegetables, like spinach or mushrooms, to mix things up.
Perfect for Any Occasion: Whether it’s brunch, dinner, or a cozy snack, these rolls shine as a versatile dish, beautifully complementing soups or just served warm.
Make-Ahead Magic: Want to save time? You can prepare the rolls ahead of time and store them for later, making the morning rush a breeze! For a tasty side dish, why not also try these Garlic Butter Dinner rolls?
Crowd-Pleaser: With their comforting aroma and delicious flavor, these rolls are sure to wow family and friends, making them your next go-to for gatherings or special occasions!
Bacon & Cheese Rolls Ingredients
Experience the joy of homemade comfort with these delightful rolls!
For the Dough
• Whole Milk – Provides moisture and activates yeast; substitute with almond milk for a dairy-free option.
• Dry Active Yeast – Essential for rising; ensure it’s fresh for the best results.
• White Granulated Sugar – Feeds the yeast and adds sweetness; can be replaced with honey or agave syrup.
• Sea Salt – Enhances overall flavor; kosher salt makes a good alternative.
• Butter (melted) – Adds richness and moisture to the dough; coconut oil works as a dairy-free option.
• Large Eggs – Contributes structure and richness; use a flax egg for a vegan alternative.
• All-Purpose Flour – Forms the dough structure; for a chewier texture, consider bread flour.
For the Filling
• Smoked Bacon – Provides a savory flavor; vegetarian bacon is a viable substitute if preferred.
• Cheddar Cheese – Offers a creamy, tangy taste; swap it with mozzarella for a milder flavor.
• Parmesan Cheese – Adds a sharp, nutty flavor; nutritional yeast can replicate this for a vegan option.
• Dried Herbs (various) – Imparts depth of flavor; feel free to use fresh herbs for a brighter taste.
• Fresh Parsley & Dill – Brings freshness to the filling; change it up with other herbs as desired.
• Green Onion – Adds a mild onion flavor; red onion can serve as a substitute.
• Garlic – Key ingredient in the garlic butter topping; garlic powder can be used if fresh isn’t available.
Each of these ingredients plays a crucial role in creating those irresistible Bacon & Cheese Rolls with Garlic Butter that you won’t want to miss!
Step‑by‑Step Instructions for Bacon & Cheese Rolls with Garlic Butter
Step 1: Prepare Dough
Begin by gently heating the whole milk to around 120–130°F, ensuring it’s warm but not boiling. In a mixing bowl, combine the warm milk, sugar, and dry active yeast, then let this mixture proof for 5 minutes until it becomes foamy, signaling that your yeast is active and ready to rise in your Bacon & Cheese Rolls.
Step 2: Mix Ingredients
Once your yeast mixture is frothy, stir in the melted butter, large eggs, and sea salt. Gradually incorporate all-purpose flour, one cup at a time, mixing with a wooden spoon until a soft and slightly sticky dough begins to form. This dough will be the foundation of your delightful rolls.
Step 3: Knead
Transfer the dough onto a floured surface and knead it for about 5–6 minutes. As you work the dough, it will become smooth and elastic, which is crucial for that fluffy texture in your Bacon & Cheese Rolls. If it’s too sticky, sprinkle a little more flour as needed.
Step 4: Proof
Shape the kneaded dough into a ball and place it in a large, greased bowl. Cover the bowl with a clean kitchen towel and let it rise in a warm spot for about 1 hour or until it has doubled in size. This step is essential for developing the soft, airy texture that you’ll love in your rolls.
Step 5: Cook Bacon
While the dough is rising, cook the diced smoked bacon in a skillet over medium heat. Stir occasionally until the pieces are crispy and browned, about 5-7 minutes. Remove the bacon from the skillet and let it cool on a plate lined with paper towels, allowing excess grease to drain away.
Step 6: Prepare Filling
In a mixing bowl, combine softened butter with your choice of dried herbs and spices to create a savory filling. Chop fresh parsley, dill, and cheese, then add them along with the crispy bacon to the butter mixture. This rich filling will elevate the flavors of your Bacon & Cheese Rolls.
Step 7: Shape Rolls
After the dough has risen, punch it down gently to release air pockets. Roll it out on a floured surface into a large rectangle about ½ inch thick. Spread the filling evenly over the surface, then sprinkle the reserved bacon and herbs. Carefully roll the dough tightly from one end to the other and cut it into 12 equal sections.
Step 8: Second Proof
Place the cut rolls in a greased baking dish. Cover them loosely with a kitchen towel, and let them rise for an additional 30–45 minutes. Keep an eye out for the rolls to double in size; this second proofing is essential for achieving that incredible fluffiness in your Bacon & Cheese Rolls.
Step 9: Bake
Preheat your oven to 350°F. Once the rolls have risen beautifully, bake them in the preheated oven for 35–40 minutes until they are golden brown and the tops are slightly crispy. The aroma wafting through your kitchen will be irresistible, hinting at the savory treat that awaits.
Step 10: Top Rolls
While the Bacon & Cheese Rolls are baking, prepare your garlic butter by melting additional butter and mixing in minced garlic. As soon as the rolls are out of the oven, brush the garlic butter generously over the tops. Allow the rolls to cool slightly before serving them warm, and savor the burst of flavors!
Make Ahead Options
These Bacon & Cheese Rolls with Garlic Butter are perfect for busy weeknights and meal prep! You can prepare the dough and shape the rolls up to 24 hours in advance. Simply allow them to rise, then cover and refrigerate until you’re ready to bake. For longer storage, freeze the shaped rolls for up to 3 months; just thaw and let them proof for about 30-45 minutes before baking to ensure they rise properly. If you want to maintain their freshness, consider baking them on the same day you’re ready to serve. When it’s time to enjoy, preheat your oven and bake the chilled or thawed rolls as directed, brushing with garlic butter right out of the oven. Enjoy homemade comfort with minimal fuss!
How to Store and Freeze Bacon & Cheese Rolls
Fridge: Store your Bacon & Cheese Rolls in an airtight container for up to 3 days. Reheat in the microwave or oven to enjoy the fluffy goodness again.
Freezer: For longer storage, freeze the rolls wrapped tightly in plastic wrap and aluminum foil for up to 3 months. Thaw in the fridge overnight and allow to proof before baking.
Make-Ahead: You can prepare the rolls, shape them, and refrigerate for up to 48 hours before baking. Just let them come to room temperature and rise for about 30 minutes before placing them in the oven.
Reheating: To reheat, pop them in a preheated oven at 350°F for about 10-15 minutes until warmed through and crispy on the outside. Enjoy the comforting flavors!
What to Serve with Bacon & Cheese Rolls with Garlic Butter
There’s nothing quite like savoring the enticing aroma of freshly baked rolls, and pairing them with the perfect sides will elevate your meal to new heights.
-
Fresh Green Salad: A vibrant salad with mixed greens, cherry tomatoes, and a light vinaigrette adds a refreshing contrast to the savory rolls. The crunchiness of the veggies complements the fluffy texture beautifully.
-
Creamy Tomato Soup: This classic combination adds a comforting touch, with the rich, creamy soup providing a delightful contrast to the cheesy, buttery rolls. Dip those rolls to savor every bite.
-
Roasted Vegetables: A medley of seasonal vegetables tossed in olive oil and herbs brings earthiness that pairs perfectly with the rolls’ richness. Their slightly caramelized edges enhance the overall flavor.
-
Cheesy Garlic Bread: If you’re a cheese lover, serve additional cheesy garlic bread for a flavorful feast that melts in your mouth. The buttery, garlicky goodness mirrors the flavors of the rolls, making an irresistible combination.
-
Stuffed Mushrooms: Flavorful stuffed mushrooms filled with herbs and cheese make a tasty appetizer or side to accompany the rolls. They bring a delightful umami flavor that balances the richness.
-
Pickles or Olives: A side of tangy pickles or marinated olives will brighten the meal with their acidity, cutting through the rich flavors and adding an extra layer of complexity.
-
Craft Beer or Sparkling Water: Pair your meal with a chilled craft beer for adults or refreshing sparkling water with lemon for a non-alcoholic option. Both will cleanse the palate and complement the savory elements beautifully.
-
Chocolate Chip Cookies: For a sweet ending, serve warm chocolate chip cookies alongside coffee or tea. The sweetness contrasts with the savory rolls and will be loved by all ages.
With these flavorful pairings, you’re set for a delightful meal that will warm hearts and create lasting memories!
Expert Tips for Bacon & Cheese Rolls
-
Fresh Yeast Check: Make sure your dry active yeast is fresh to ensure proper rising. Old yeast can result in dense rolls.
-
Proper Proofing: Let the dough rise in a warm, draft-free area to maximize fluffiness. Too cold an environment can hinder the rising process.
-
Kneading Technique: Knead just until the dough is smooth; over-kneading can lead to tough rolls. Aim for a soft, elastic texture in your Bacon & Cheese Rolls.
-
Avoid Overfilling: When spreading the filling, avoid overloading with bacon or cheese; too much filling can cause the rolls to burst while baking.
-
Cooling Before Slicing: Allow the rolls to cool slightly before slicing them. This step keeps them from becoming doughy and ensures a beautiful presentation.
-
Multiple Variations: Feel free to experiment with different cheeses and herbs based on your preferences; variety keeps the flavor exciting in your Bacon & Cheese Rolls!
Bacon & Cheese Rolls with Garlic Butter Variations
Feel free to unleash your creativity and customize these rolls to suit your taste preferences and dietary needs!
-
Cheese Swap: Experiment with different cheeses like Gruyère or pepper jack for a unique twist. Each cheese offers its own layer of flavor that can elevate the overall experience.
-
Veggie Delight: Add spinach or roasted mushrooms along with the bacon for a lightened-up version! These ingredients play beautifully with the richness of the cheese, giving you a satisfying and colorful addition.
-
Spicy Kick: Toss in some chopped jalapeños or chili flakes for those who crave heat in their rolls. The spice complements the savory filling, making each bite a thrilling flavor adventure.
-
Herb Infusion: Mix in fresh herbs like basil or chives into the filling for a fresh and aromatic touch. Herbs can brighten the overall experience, making the rolls feel even more indulgent.
-
Dairy-Free Option: Substitute the regular cheese with vegan cheese and use coconut oil instead of butter. This way, everyone can enjoy these comforting rolls without missing out!
-
Whole Wheat Twist: For a healthier spin, replace half of the all-purpose flour with whole wheat flour. This not only adds a delightful nutty flavor but also increases the nutritional value of your rolls.
-
Savory Additions: Consider mixing in caramelized onions or fresh garlic into the filling for extra depth of flavor. These ingredients blend beautifully with the roll’s base, resulting in a harmony of savory notes.
-
Breakfast Version: Transform these rolls into a breakfast treat by adding scrambled eggs and crumbled sausage as the filling. It’s a hearty, all-in-one breakfast option that will make your mornings feel special!
For a comforting side dish, why not pair your rolls with these Rosemary Garlic Mashed potatoes? They’ll complement your rolls perfectly, creating a cozy meal that everyone will love.

Bacon & Cheese Rolls with Garlic Butter Recipe FAQs
What type of milk should I use for the dough?
You can use whole milk for optimal moisture during baking, but if you’re looking for a dairy-free option, almond milk works perfectly as a substitute. Just ensure it’s unsweetened to keep the flavor balance intact!
How do I store leftover bacon and cheese rolls?
Store your Bacon & Cheese Rolls in an airtight container at room temperature for up to 3 days. If you want to keep them fresher for longer, you can refrigerate them; they’ll stay good for about 5 days. Just reheat before enjoying!
Can I freeze the rolls, and how should I do it?
Absolutely! To freeze your Bacon & Cheese Rolls, wrap each roll tightly in plastic wrap, then in aluminum foil, and store them in a freezer-safe bag. They can be frozen for up to 3 months. When you’re ready to enjoy, simply thaw them in the fridge overnight and allow them to proof for about 30 minutes before baking or reheating.
What if my dough doesn’t rise properly?
If your dough isn’t rising, it might be due to inactive yeast. Make sure your yeast is fresh and that you’ve activated it correctly. If you find the environment is too cold, try placing the dough in a warm spot, such as an oven that has been lightly warmed and turned off, or near a sunny window. Letting it rise longer may also help!
Are there any dietary considerations for the ingredients?
For dietary needs, feel free to swap the smoked bacon with vegetarian bacon if needed. You can also use dairy-free substitutes for cheese and butter. Make sure to check the labels for allergy information to avoid any harmful ingredients, especially if serving to guests with allergies.
Can I make these rolls ahead of time?
Yes! You can prepare the Bacon & Cheese Rolls up to 48 hours in advance by shaping the rolls and refrigerating them. Just take them out to rest at room temperature for about 30 minutes before baking to allow them to rise. This way, fresh, warm rolls are just a bake away!
Melt-in-Your-Mouth Bacon & Cheese Rolls with Garlic Butter
Ingredients
Equipment
Method
- Gently heat the whole milk to around 120–130°F and combine with sugar and yeast; let it proof for 5 minutes.
- Once frothy, stir in melted butter, eggs, and salt; gradually add flour until a soft dough forms.
- Knead the dough on a floured surface for 5–6 minutes until smooth and elastic.
- Shape dough into a ball, place in a greased bowl, cover with a towel, and let it rise for about 1 hour.
- Cook diced bacon in a skillet over medium heat until crispy, about 5–7 minutes; drain on paper towels.
- Combine softened butter with herbs, then mix in parsley, dill, cheese, and bacon.
- Roll out the dough, spread filling over it, then roll tightly and cut into 12 equal sections.
- Place rolls in a greased baking dish, cover loosely with a towel, and let rise for an additional 30–45 minutes.
- Preheat oven to 350°F; bake the rolls for 35–40 minutes until golden brown.
- Prepare garlic butter by melting butter and mixing in minced garlic; brush over baked rolls.
Leave a Reply