
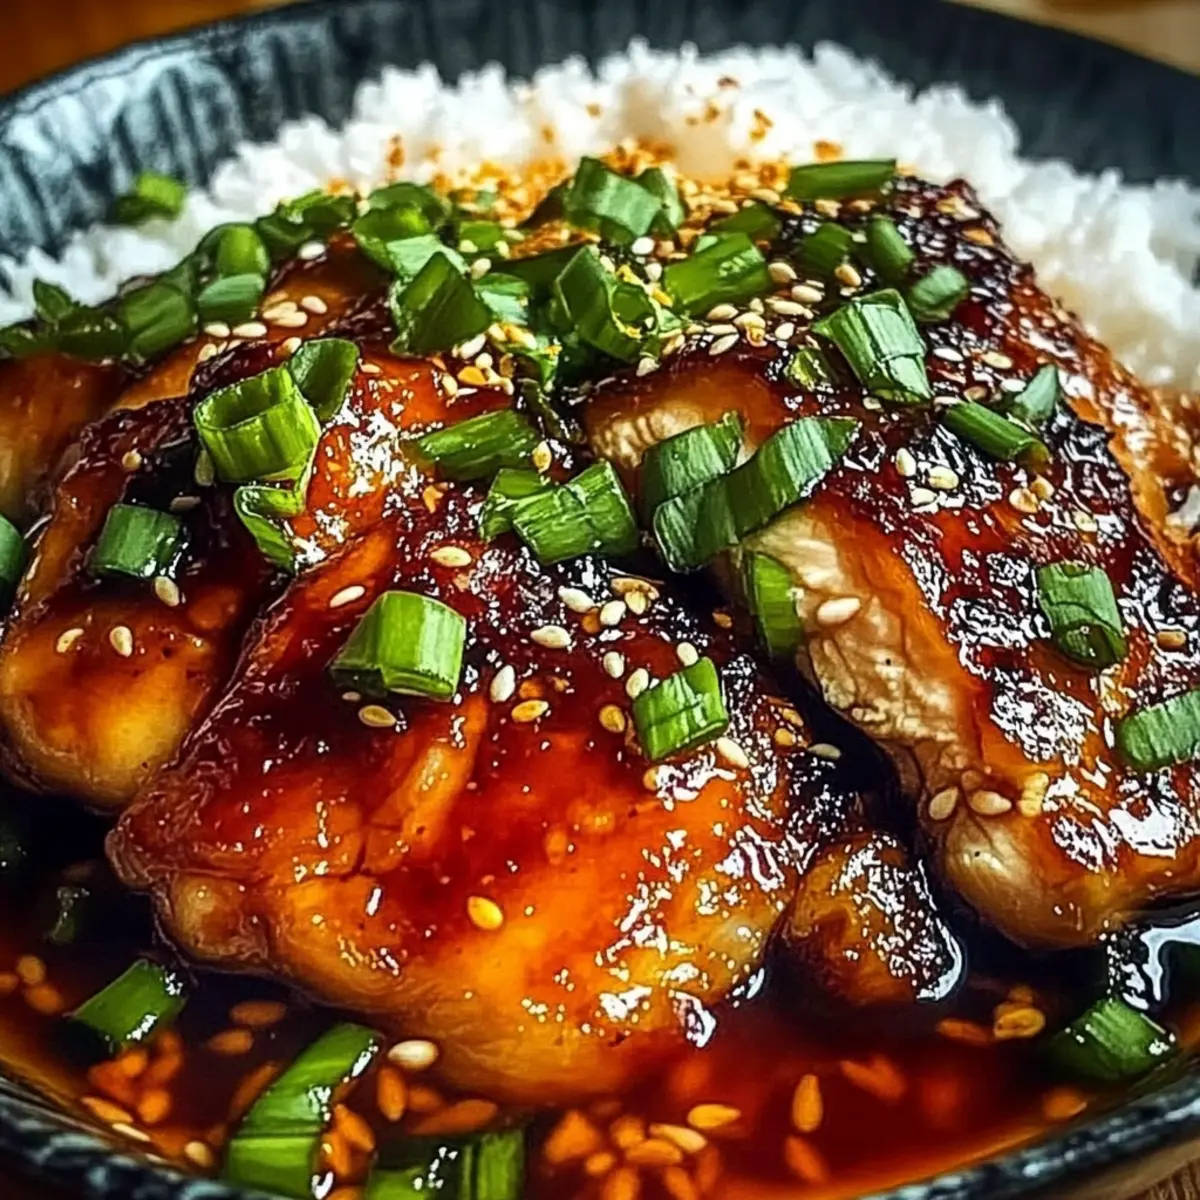
There’s something truly magical about the heavenly scent of soy, garlic, and ginger wafting through my kitchen. It’s like a warm embrace that draws you in, promising a delightful meal ahead. Today, I’m excited to share my quick and easy recipe for Soy Chicken Garlic Ginger. This dish marries tender chicken thighs with a vibrant marinade, creating a delightful balance of sweet, salty, and spicy flavors that will transport your taste buds straight to Asia. Perfect for those busy weeknights, this recipe not only saves you time but guarantees a flavorful dinner that’s sure to impress anyone at your table. Ready to create a dish that’s both satisfying and simple? Let’s dive in!
Why is Soy Chicken Garlic Ginger Amazing?
Quick and Easy: This recipe is perfect for those busy weeknights when you crave homemade goodness without the hassle.
Explosive Flavor: The blend of soy sauce, garlic, and ginger creates a robust sauce that tantalizes your taste buds.
Customizable Variations: Feel free to adjust the spice levels or swap in veggies to personalize your dish. Try it with some stir-fried vegetables or a side of Rosemary Garlic Mashed for a complete meal.
Healthy Comfort: Enjoy a satisfying dish that’s not only gluten-free but also wholesome, ensuring you don’t have to compromise on nutrition.
Crowd-Pleasing Dish: Whether it’s family dinner or hosting friends, this flavorful chicken dish is sure to leave everyone asking for seconds!
Soy Chicken Garlic Ginger Ingredients
For the Marinade
• Chicken Thighs – Tender, boneless, and skinless thighs work best for flavor absorption and juiciness.
• Low-Sodium Soy Sauce – The main flavor base; using low-sodium keeps it gluten-free and allows better control over saltiness.
• Rice Vinegar – Adds a tangy kick; you can substitute with apple cider vinegar if needed.
• Fresh Ginger (grated) – Essential for warmth and spice; fresh ginger truly enhances the dish’s aroma and flavor profile.
• Garlic (minced) – Delivers robust flavor; always opt for freshly minced garlic for the best results.
• Brown Sugar – Balances out the savory notes; this can be substituted with honey or maple syrup for a sweet touch.
• Sesame Oil – Gives a nutty richness; use pure sesame oil for a true taste of Asian cuisine.
• Red Pepper Flakes (optional) – Offers a hint of heat; adjust based on your spice preference for the perfect kick.
• Cornstarch – Used to thicken the sauce; ensure it’s fully dissolved in the marinade for a smooth finish.
For Cooking
• Chicken Broth – Enhances moisture and flavor depth; go for low-sodium broth to maintain a healthier profile.
• Vegetable Oil – Ideal for frying; any neutral oil will work well in this recipe.
For Garnish
• Green Onion – Adds freshness and color; you can also experiment with cilantro for a different flavor profile.
• Sesame Seeds (optional) – A delightful garnish that adds crunch and visual appeal; perfect for that restaurant-style finish.
Serving Base
• Cooked Rice – The perfect complement; fluffy white rice or brown rice will create a solid base for this delicious Soy Chicken Garlic Ginger.
Step‑by‑Step Instructions for Soy Chicken Garlic Ginger
Step 1: Prepare Marinade
In a mixing bowl, combine low-sodium soy sauce, rice vinegar, grated ginger, minced garlic, brown sugar, sesame oil, red pepper flakes, and cornstarch. Whisk these ingredients together until smooth and fully incorporated, forming a flavorful marinade. This step creates the rich base that will infuse your Soy Chicken Garlic Ginger with mouthwatering flavor.
Step 2: Marinate Chicken
Take your boneless, skinless chicken thighs and coat them thoroughly in the prepared marinade. Make sure each piece is generously covered to absorb all the delicious flavors. Cover the bowl tightly with plastic wrap and refrigerate for at least 30 minutes, or up to 4 hours for maximum flavor infusion, allowing the chicken to tenderize beautifully.
Step 3: Prepare Sauce
Once your chicken is marinated, it’s time to prepare a sauce that will elevate your dish. In a separate bowl, mix low-sodium soy sauce, chicken broth, honey, rice vinegar, grated ginger, and minced garlic. Stir well until everything is evenly mixed and set it aside. This sauce will bring an extra layer of flavor to your Soy Chicken Garlic Ginger.
Step 4: Cornstarch Slurry
In a small bowl, prepare a cornstarch slurry by mixing cornstarch with a bit of water. Stir until smooth, ensuring there are no lumps. This slurry will help thicken the sauce later, giving it the rich consistency that perfectly coats your chicken in the finished dish.
Step 5: Heat Oil
In a large skillet or wok, heat vegetable oil over medium-high heat until shimmering, which should take about 2 minutes. A properly heated pan is crucial for achieving that beautiful sear on your chicken. Pay attention to the oil; it should glide easily in the pan, indicating readiness for cooking.
Step 6: Cook Chicken
Carefully add the marinated chicken thighs in a single layer to the hot skillet. Cook them for 3-4 minutes on each side, or until they turn a golden brown and reach an internal temperature of 165°F (74°C). Once cooked, remove the chicken from the skillet and set aside. The enticing aroma will surely fill your kitchen!
Step 7: Simmer Sauce
With the chicken removed, pour the prepared sauce mixture into the same skillet, scraping the browned bits from the bottom. These bits add incredible flavor. Bring the sauce to a simmer over medium heat, allowing it to gently bubble for about 2-3 minutes, which deepens its palate and thickens slightly.
Step 8: Thicken Sauce
Once the sauce has simmered, stir in the cornstarch slurry gradually. Keep stirring until the sauce reaches your desired thickness, which should take around 1-2 minutes. The sauce will transform into a glossy texture that clings perfectly to the chicken, making it a gorgeous topping for your dish.
Step 9: Adjust Seasoning
Taste the sauce once it has thickened, and feel free to adjust the flavor as needed. Add additional soy sauce, honey, or red pepper flakes to suit your preference. This step ensures the balance of flavors in your Soy Chicken Garlic Ginger is just right, inviting everyone to have a taste.
Step 10: Combine Chicken and Sauce
Return the cooked chicken to the skillet, tossing it gently to ensure every piece is fully coated in the thick sauce. Heat everything through for about 1-2 minutes. This step marries the chicken and sauce, allowing the flavors to meld beautifully, resulting in a dish that’s utterly mouthwatering.
Step 11: Garnish and Serve
Stir in a splash of sesame oil for an aromatic finish and garnish your Soy Chicken Garlic Ginger with chopped green onions and optional sesame seeds. Serve immediately over fluffy cooked rice. The vibrant colors and enticing aromas make this dish as delightful to the eyes as it is to the palate!
What to Serve with Soy Chicken Garlic Ginger
As the tantalizing aroma of your soy chicken fills the air, let’s explore complementary sides that will elevate your dining experience.
-
Steamed Broccoli: A classic pairing that adds a fresh, vibrant crunch and bright green color to your plate. The slight bitterness of broccoli beautifully balances the savory flavors of the soy chicken.
-
Fried Rice: This dish works perfectly as a base, with its fluffy grains absorbing the rich sauce and enhanced by the addition of vegetables. Toss in peas, carrots, and scrambled egg for added texture and taste.
-
Cucumber Salad: A refreshing contrast to the rich chicken, this salad brings a crisp, cool element. Drizzle with a light soy sauce sesame dressing for cohesion without overwhelming flavors.
-
Stir-Fried Vegetables: A colorful medley of bell peppers, snap peas, and carrots stir-fried to perfection adds texture and variety. They soak up some of the delicious sauce, elevating the entire meal.
-
Miso Soup: A warm bowl of miso soup creates a comforting experience. The umami flavors harmonize wonderfully with the soy chicken while cleansing the palate between bites.
-
Chilled Jasmine Rice: For a more fragrant side, opt for jasmine rice. Its subtle floral notes and soft texture complement the dish perfectly, making every bite delightful.
-
Sweet Potato Mash: Creamy and slightly sweet, this mash introduces a beautiful contrast to the saltiness of the chicken. It’s a comforting option that fills you with warmth and satisfaction.
-
Lychee Iced Tea: Cap off your meal with this refreshing drink. The natural sweetness of lychee balances the savory tastes and adds a lovely fruity twist to your dining experience.
Expert Tips for Soy Chicken Garlic Ginger
- Fresh Ingredients: Always use fresh garlic and ginger to maximize the flavor impact in your Soy Chicken Garlic Ginger dish. Dried alternatives won’t offer the same vibrancy.
- Don’t Overcrowd: Avoid overcrowding the skillet when cooking the chicken; this prevents steaming and ensures a lovely sear. Cook in batches if necessary.
- Marinate Longer: For a more intense flavor profile, consider marinating your chicken thighs longer—up to 4 hours—so they absorb every bit of the savory marinade.
- Sauce Consistency: If your sauce thickens too much, simply adjust it with a bit of chicken broth or water. Aim for a glossy finish that clings beautifully to the chicken.
- Adjust Spice: Make it your own! If you like heat, increase the red pepper flakes or add a dash of chili oil when preparing the sauce.
Make Ahead Options
These Soy Chicken Garlic Ginger is perfect for meal prep, making your busy weeknights a breeze! You can marinate the chicken thighs up to 24 hours in advance, locking in those savory flavors; just cover the marinated chicken and refrigerate. Additionally, you can prepare the sauce and store it separately in the fridge for up to 3 days to maintain its freshness. When you’re ready to serve, simply cook the chicken as instructed, simmer the sauce, and then combine them in the skillet. This way, you’ll get that delicious, homemade taste without the last-minute rush—perfect for a flavorful dinner to impress your family!
Soy Chicken Garlic Ginger Variations
Feel free to play with this recipe and make it your own, exploring unique flavors and textures you’ll love!
-
Heat Level: Increase red pepper flakes or add chili oil to turn up the heat, making every bite a spicy delight. Don’t be afraid to find your perfect spice level—it enhances the dish beautifully!
-
Sweetness Boost: For a sweeter flavor, add extra honey or swap in sweet teriyaki sauce. This twist allows for a delightful balance between savory and sweet!
-
Vegetarian Option: Replace chicken with firm tofu and use maple syrup instead of brown sugar for a tasty vegan alternative. It’s a fantastic way to enjoy the same rich flavors!
-
Add-ins: Toss in vegetables like bell peppers, broccoli, or snap peas for added nutrition and vibrant color. This incorporation not only boosts the dish but adds a satisfying crunch too!
-
Serving Ideas: Try serving it in lettuce wraps, as a filling for tacos, or over your favorite noodles for a unique spin. Each option makes for a fun dining experience!
-
Side Suggestions: Pair it with steamed broccoli, stir-fried vegetables, or a crisp green salad to create a complete meal. These sides complement the flavor beautifully and add to your wholesome dinner!
For a hearty side, consider pairing it with some delicious Rosemary Garlic Mashed. You’ll have a meal that feels comforting and truly special.
Explore these variations and discover your favorite way to enjoy Soy Chicken Garlic Ginger!
How to Store and Freeze Soy Chicken Garlic Ginger
Fridge: Store leftovers in an airtight container in the refrigerator for up to 3-4 days. Reheat gently in a skillet or microwave until heated through for the best texture.
Freezer: For longer storage, freeze the marinated chicken in a sealed freezer bag for up to 3 months. Thaw in the fridge overnight before cooking for optimal flavor and texture.
Reheating: When reheating, add a splash of chicken broth or water to the skillet to restore moisture and prevent drying out. Enjoy your Soy Chicken Garlic Ginger at its best!
Meal Prep: Consider batch cooking and freezing portions to enjoy quick weeknight meals. Just reheat and serve with rice or steamed veggies for a speedy dinner.
Soy Chicken Garlic Ginger Recipe FAQs
How do I select the best chicken thighs for this recipe?
Absolutely! Look for boneless, skinless chicken thighs that are plump and firm to the touch. They should be a vibrant pink color without any dark spots or discoloration. Fresh chicken thighs not only absorb flavor better but also ensure a tender, juicy dish.
What’s the best way to store leftovers of Soy Chicken Garlic Ginger?
Store any leftovers in an airtight container in the refrigerator for up to 3-4 days. This helps retain its flavors and moisture. When you’re ready to enjoy it again, gently reheat it in a skillet over low heat or in the microwave, adding a splash of water or chicken broth to keep it moist.
Can I freeze Soy Chicken Garlic Ginger?
Yes, you can! For freezing, place the marinated chicken in a sealed freezer bag, removing as much air as possible to prevent freezer burn. It can be frozen for up to 3 months. When you’re ready to cook it, simply thaw the chicken in the refrigerator overnight before proceeding with the cooking instructions.
What should I do if my sauce is too thick?
No worries! If you find your sauce has thickened too much, you can easily adjust it. Simply add a small amount of chicken broth or water to the skillet while stirring gently over low heat until you reach your desired consistency. The goal is to achieve a glossy sauce that clings beautifully to the chicken.
Are there any dietary considerations for this recipe?
Very! This recipe is gluten-free when using low-sodium soy sauce, making it suitable for those with gluten sensitivities. Additionally, if you have a garlic allergy, try eliminating it or using garlic-infused oil for flavor. For a vegetarian option, substitute the chicken with firm tofu and follow the same marinating and cooking process. Just ensure to use maple syrup instead of brown sugar to keep it vegan-friendly.

Soy Chicken Garlic Ginger: A Quick Dinner You'll Love
Ingredients
Equipment
Method
- In a mixing bowl, combine low-sodium soy sauce, rice vinegar, grated ginger, minced garlic, brown sugar, sesame oil, red pepper flakes, and cornstarch. Whisk these ingredients together until smooth.
- Take your boneless, skinless chicken thighs and coat them thoroughly in the prepared marinade. Cover the bowl tightly and refrigerate for at least 30 minutes.
- In a separate bowl, mix low-sodium soy sauce, chicken broth, honey, rice vinegar, grated ginger, and minced garlic. Stir well and set aside.
- In a small bowl, prepare a cornstarch slurry by mixing cornstarch with a bit of water until smooth.
- In a large skillet or wok, heat vegetable oil over medium-high heat until shimmering.
- Carefully add the marinated chicken thighs in a single layer to the hot skillet. Cook for 3-4 minutes on each side.
- Pour the prepared sauce mixture into the skillet, scraping the browned bits from the bottom, and bring to a simmer.
- Once simmering, stir in the cornstarch slurry gradually, stirring until the sauce reaches your desired thickness.
- Taste the sauce and adjust the flavor as needed with additional soy sauce, honey, or red pepper flakes.
- Return the cooked chicken to the skillet, tossing gently to ensure every piece is fully coated in sauce. Heat through.
- Stir in a splash of sesame oil and garnish with chopped green onions and optional sesame seeds. Serve immediately over cooked rice.
Leave a Reply