
The aroma of frying chicken wafts through the air, bringing back memories of family gatherings where everyone’s laughter mixed with the sizzle of something delicious. Today, I’m sharing my take on the Crispy Chicken Caesar Sandwich that perfectly balances that nostalgic comfort with an exciting twist. With golden-fried chicken, a satisfying crunch, and a luscious homemade Caesar dressing, this meal is both a handheld masterpiece and a fun way to elevate lunchtime enjoyment. Plus, it’s a breeze to adapt to various dietary needs, making it a go-to recipe whether you’re running short on time or entertaining friends. Ready to transform your kitchen into a casual eatery? Let’s dive into this mouthwatering creation that guarantees you’ll never crave fast food again!

Why is this Chicken Caesar Sandwich irresistible?
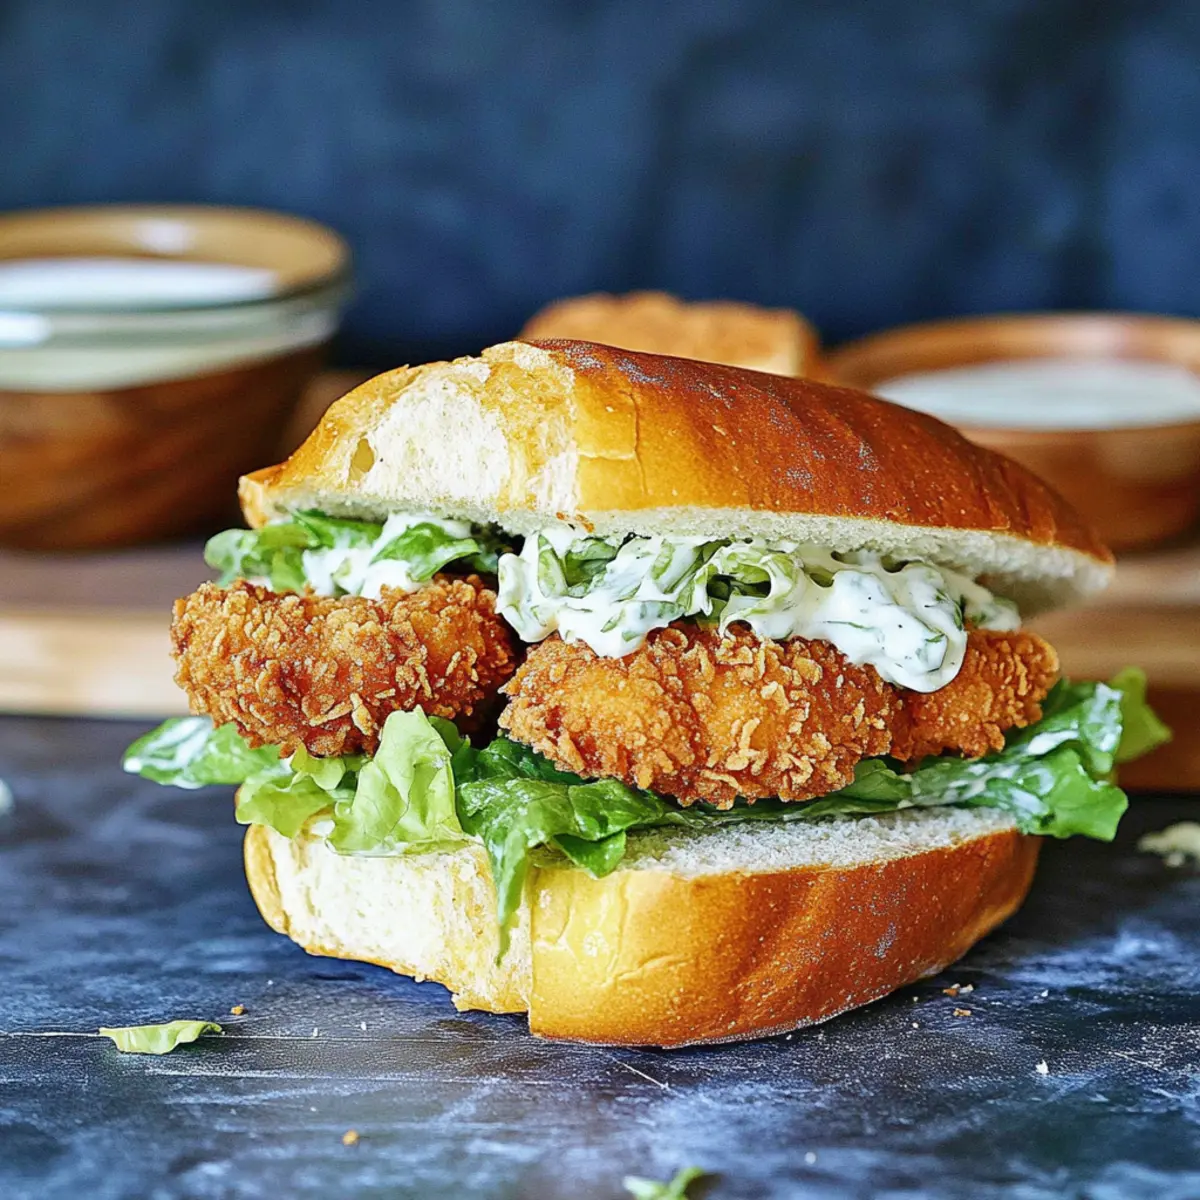
Irresistible Crunch: The golden-fried chicken delivers a satisfying crunch that contrasts beautifully with the crispness of fresh romaine lettuce.
Homemade Flavor: Enjoy the rich, creamy taste of homemade Caesar dressing without the mystery ingredients often found in store-bought versions.
Meal Flexibility: It’s perfect not only for lunch but also for dinner gatherings—pair it with savory sides like French fries or potato wedges for a complete experience.
Diet-Friendly: Easily adaptable for gluten-free diets, simply swap in gluten-free flour and panko for a guilt-free indulgence.
Time-Saving: With a straightforward prep process, this recipe proves that deliciousness doesn’t have to take hours in the kitchen!
Ready to add more flavorful options to your meal rotation? Check out my Chicken Caesar Wraps for another twist on a classic!
Crispy Chicken Caesar Sandwich Ingredients
For the Dressing
- Full-Fat Mayonnaise – Adds creamy richness to the dressing; substitute with Greek yogurt for a lower-fat option.
- Greek Yogurt – Supplies tangy flavor and creaminess; can be replaced with sour cream if desired.
- Dijon Mustard – Provides a slight sharpness; use whole grain mustard for added texture.
- Worcestershire Sauce – Gives umami depth; omit for a vegetarian dressing.
- Lemon Juice – Adds brightness and acidity; if unavailable, white vinegar works well.
- Parmesan Cheese (freshly grated) – Gives rich flavor; Grana Padano can be swapped for a milder option.
- Garlic Cloves (minced) – Infuses aromatic flavor; garlic powder is a quick alternative.
- Black Pepper – Adds spice; adjust according to your taste preference.
For the Chicken
- Chicken Cutlets – The star protein providing heartiness; ensure even thickness for optimal cooking.
- All-Purpose Flour – For dredging chicken; substitute with gluten-free flour if needed.
- Salt & Smoked Paprika – Enhance flavors in the flour mix; adjust amounts to your liking.
- Eggs – Essential for binding the breadcrumb coating; no substitutes recommended.
- Panko Crumbs & Bread Crumbs – Create the irresistible crispy texture; crushed cornflakes can be used for a gluten-free option.
- Dried Parsley, Black Pepper, Dried Oregano, Garlic Powder – Flavor enhancers for the breadcrumb mix; fresh herbs can intensify the flavor.
For the Assembly
- Romaine Hearts – Adds freshness and crunch; substitute with spinach for a variation.
- French Baguettes – Creates a sturdy base for sandwiches; consider ciabatta or sourdough for different flavors.
Each of these ingredients contributes to making your Crispy Chicken Caesar Sandwich the satisfying and delightful meal it promises to be!
Step‑by‑Step Instructions for Crispy Chicken Caesar Sandwich
Step 1: Prepare the Caesar Dressing
In a mixing bowl, combine full-fat mayonnaise, Greek yogurt, Dijon mustard, Worcestershire sauce, fresh lemon juice, grated Parmesan, minced garlic, black pepper, and a pinch of salt. Whisk these ingredients until smooth and creamy. Reserve some of the dressing for drizzling over your assembled sandwich later. This homemade concoction is the heart of your Crispy Chicken Caesar Sandwich.
Step 2: Prepare the Romaine
Chop the romaine hearts into bite-sized pieces and place them in a large bowl. Drizzle with the reserved Caesar dressing, tossing gently to ensure even coverage. Cover the bowl with plastic wrap and refrigerate for at least 20 minutes; this allows the flavors to meld and keeps the lettuce crisp for your sandwich assembly.
Step 3: Prepare the Chicken Cutlets
Use a meat mallet or rolling pin to pound the chicken cutlets until they are evenly thick—about half an inch—ensuring they cook evenly. Season both sides with salt and freshly cracked black pepper. This step is crucial for creating the well-seasoned crispy chicken that will take center stage in your Crispy Chicken Caesar Sandwich.
Step 4: Set Up the Breading Station
Create a breading station by arranging three shallow bowls: one with all-purpose flour mixed with smoked paprika and salt, another with beaten eggs for dipping, and the last filled with panko and bread crumbs stirred together with dried parsley and oregano. This organized setup helps streamline the breading process for your crispy chicken.
Step 5: Heat the Oil for Frying
In a large frying pan, heat vegetable oil over medium heat until it reaches 175-180°C (350-360°F). To test the oil, drop a small amount of flour in; if it sizzles, it’s ready for frying. Maintaining the right oil temperature is essential to achieve that crispy coating without burning it, giving your Crispy Chicken Caesar Sandwich the perfect crunch.
Step 6: Bread the Chicken Cutlets
Dredge each chicken cutlet first in the flour mixture, shaking off any excess, then dip it into the beaten eggs, allowing the excess to drip off. Finally, coat the chicken in the panko-breadcrumb mixture, pressing gently to adhere. This triple layer creates the irresistible crunch that distinguishes your crispy chicken in the sandwich.
Step 7: Fry the Chicken
Carefully place the breaded chicken cutlets in the hot oil, ensuring you do not overcrowd the pan. Fry for about 4-5 minutes on each side or until golden brown and crispy. Use a slotted spoon to remove the cutlets and drain them on a wire rack; this keeps them crispy while you finish assembling the Crispy Chicken Caesar Sandwich.
Step 8: Assemble the Sandwiches
Slice the French baguettes to create sandwich halves. Spread a generous layer of homemade Caesar dressing on both sides, then layer in the crispy chicken cutlets. Top with the prepared romaine and some additional grated Parmesan cheese for a delicious touch. Assemble right before serving to ensure everything remains fresh, making your Crispy Chicken Caesar Sandwich truly delightful.
Make Ahead Options
Preparing your Crispy Chicken Caesar Sandwich ahead of time is a fantastic way to save time on busy days! You can make the Caesar dressing and bread the chicken cutlets up to 24 hours in advance. Simply store the dressing in an airtight container in the fridge and keep the breaded chicken covered with plastic wrap to maintain its crispness. For the chicken, it’s best to fry it fresh just before serving, but if needed, you can cook it and refrigerate for up to 3 days. To finish, simply reheat the chicken in the oven to restore its crunch, then assemble your sandwiches with the prepped romaine and dressing. This method ensures your meal remains just as delicious while fitting perfectly into your schedule!
Crispy Chicken Caesar Sandwich Variations
Feel free to get creative with this delightful sandwich and make it your own with these fun variations!
-
Protein Swap: Substitute the chicken with turkey or tofu for an exciting twist. Tofu not only provides a wonderful texture but also absorbs flavors beautifully!
-
Gluten-Free Goodness: Use gluten-free panko and flour to cater to dietary needs. This swap ensures everyone can enjoy a crispy coating without the gluten!
-
Different Bread Types: Experiment with ciabatta or sourdough for a unique flavor profile. Each type of bread adds its own character, enhancing the overall experience.
-
Veggie-Packed Delight: Add in some roasted red peppers or sliced avocado for extra freshness. These ingredients complement the creamy dressing and add wonderful texture.
-
Herb Infusion: Mix fresh herbs like basil or cilantro into the romaine for a delightful flavor boost. It’s a simple way to elevate the sandwich with vibrant notes.
-
Creamy Alternatives: Swap out the full-fat mayonnaise for avocado or a homemade cashew cream for a lighter, plant-based dressing. You’ll still enjoy that creaminess but with a different flair!
-
Spicy Kick: Add sriracha or a pinch of cayenne pepper to the Caesar dressing for a delightful heat. This adds a spicy edge that might just become your new favorite variation!
-
Crunch Time: Boost the texture by topping the sandwich with crushed tortilla chips or cabbage slaw. This creates a delightful crunch that pairs perfectly with the tender chicken.
Let your imagination run wild with these variations! If you’re curious about another delicious creation, check out my Garlic Parmesan Chicken for more mouthwatering inspiration.
What to Serve with Crunchy Chicken Caesar Sandwich
The delightful crunch of your Chicken Caesar Sandwich deserves equally appetizing companions to create a full meal experience.
-
Crispy French Fries: These golden fries add a touch of indulgence and a satisfying crunch, perfectly balancing the sandwich’s flavors.
-
Garlic Parmesan Potato Wedges: Flavorful and hearty, these wedges provide a delicious savory contrast to the creamy Caesar dressing in the sandwich.
-
Caesar Salad: Keep the theme consistent! A light Caesar salad enhances the meal with its crisp texture and tangy dressing, making it a refreshing side.
-
Coleslaw: The creamy, crunchy slaw adds a tangy bite that complements the sandwich beautifully, making every bite exciting.
-
Grilled Corn on the Cob: Sweet and smoky corn adds a delightful seasonal touch, bringing bright flavors to your plate while offering a satisfying crunch.
-
Iced Lemonade: Refreshing and zesty, this drink cuts through the richness of the sandwich, providing a perfect palate-cleansing companion.
-
Sparkling Water with Mint: A light, effervescent drink garnished with fresh mint brings a refreshing twist that balances the meal’s robust flavors.
-
Chocolate Chip Cookies: End your meal on a sweet note! Warm, gooey cookies offer a familiar comfort that makes for an irresistible finish.
Storage Tips for Crispy Chicken Caesar Sandwich
Fridge: Store any leftover assembled sandwich in an airtight container in the refrigerator for up to 1 day. The chicken may lose its crunch, so reheating it before assembly is recommended.
Freezer: It’s best to freeze the chicken cutlets separately after frying. Place them in a single layer on a baking sheet until solid, then transfer to a freezer bag for up to 3 months. Reheat before assembling your sandwich.
Reheating: For the best texture, reheat the frozen chicken cutlets in the oven at 180°C (350°F) until heated through and crispy, approximately 10-15 minutes. Avoid microwave reheating to maintain that crispy goodness!
Dressing Storage: Store any extra homemade Caesar dressing in the fridge for up to 1 week in a sealed container. It’s perfect for salads or additional sandwiches!
Expert Tips for the Crispy Chicken Caesar Sandwich
-
Even Thickness: Ensure chicken cutlets are evenly pounded for consistent cooking. This prevents some parts from being undercooked while others overcook.
-
Oil Temperature: Maintain the oil temperature between 175-180°C (350-360°F) to avoid burning the coating or undercooking the chicken during frying.
-
Avoid Sogginess: Assemble your Crispy Chicken Caesar Sandwich just before serving. Toasting the baguette can help form a moisture barrier against the dressing.
-
Batch Frying: If frying multiple cutlets, do not overcrowd the pan. This ensures each piece gets the heat it needs for that perfect crisp.
-
Timing on Assembly: Serve immediately after assembling to enjoy that crunchy texture and fresh flavors at their best.

Crispy Chicken Caesar Sandwich Recipe FAQs
What type of chicken is best for this Crispy Chicken Caesar Sandwich?
Absolutely! I recommend using chicken cutlets for the best texture and taste. They are easy to pound to an even thickness, ensuring that they cook uniformly. You can also use chicken thighs if you prefer a juicier option. Just remember to check for even thickness to avoid any undercooking!
How should I store leftover Crispy Chicken Caesar Sandwich?
For optimal enjoyment, store any leftover assembled sandwiches in an airtight container in the fridge for up to 1 day. However, as the chicken may lose its crunch, I suggest reheating the chicken before assembling the sandwich again to restore some of its original quality.
Can I freeze the chicken cutlets for later use in the sandwich?
Yes, you can! After frying, place the chicken cutlets in a single layer on a baking sheet until they are solid. Then, transfer them to a freezer bag where they can be stored for up to 3 months. When you’re ready to enjoy them, reheat in an oven at 180°C (350°F) for about 10-15 minutes for the best crispy texture!
What should I do if my chicken cutlets are not getting crispy enough?
Very! If you find your chicken cutlets aren’t as crispy as you’d like, check the oil temperature during frying. It should be between 175-180°C (350-360°F). If the temperature is too low, the chicken will absorb more oil and become soggy rather than crunchy. Fry them in smaller batches to keep the oil temperature consistent.
Is there a gluten-free option for this Crispy Chicken Caesar Sandwich?
Certainly! To make this delicious sandwich gluten-free, substitute all-purpose flour with a gluten-free flour blend and choose gluten-free panko crumbs. It’s a fantastic way to enjoy the same crunchy goodness without the gluten!
How long can I keep the homemade Caesar dressing?
The fresh homemade Caesar dressing can be stored in a sealed container in the refrigerator for up to 1 week. This dressing not only elevates your sandwiches but also makes a delightful addition to salads!

Crunchy Crispy Chicken Caesar Sandwich You’ll Crave Daily
Ingredients
Equipment
Method
- In a mixing bowl, combine full-fat mayonnaise, Greek yogurt, Dijon mustard, Worcestershire sauce, fresh lemon juice, grated Parmesan, minced garlic, black pepper, and a pinch of salt. Whisk until smooth and creamy.
- Chop the romaine hearts into bite-sized pieces and place in a large bowl. Drizzle with reserved Caesar dressing, tossing gently.
- Pound the chicken cutlets until evenly thick. Season with salt and black pepper.
- Create a breading station with bowls of seasoned flour, beaten eggs, and panko-breadcrumb mixture.
- Heat vegetable oil in a frying pan over medium heat until it reaches 175-180°C (350-360°F).
- Dredge each chicken cutlet in the flour, dip in beaten eggs, and coat with panko-breadcrumb mixture.
- Fry the coated chicken cutlets until golden brown and crispy, about 4-5 minutes per side.
- Slice the baguettes, spread Caesar dressing on both sides, layer with crispy chicken cutlets, and top with prepared romaine and grated Parmesan cheese.
Leave a Reply