
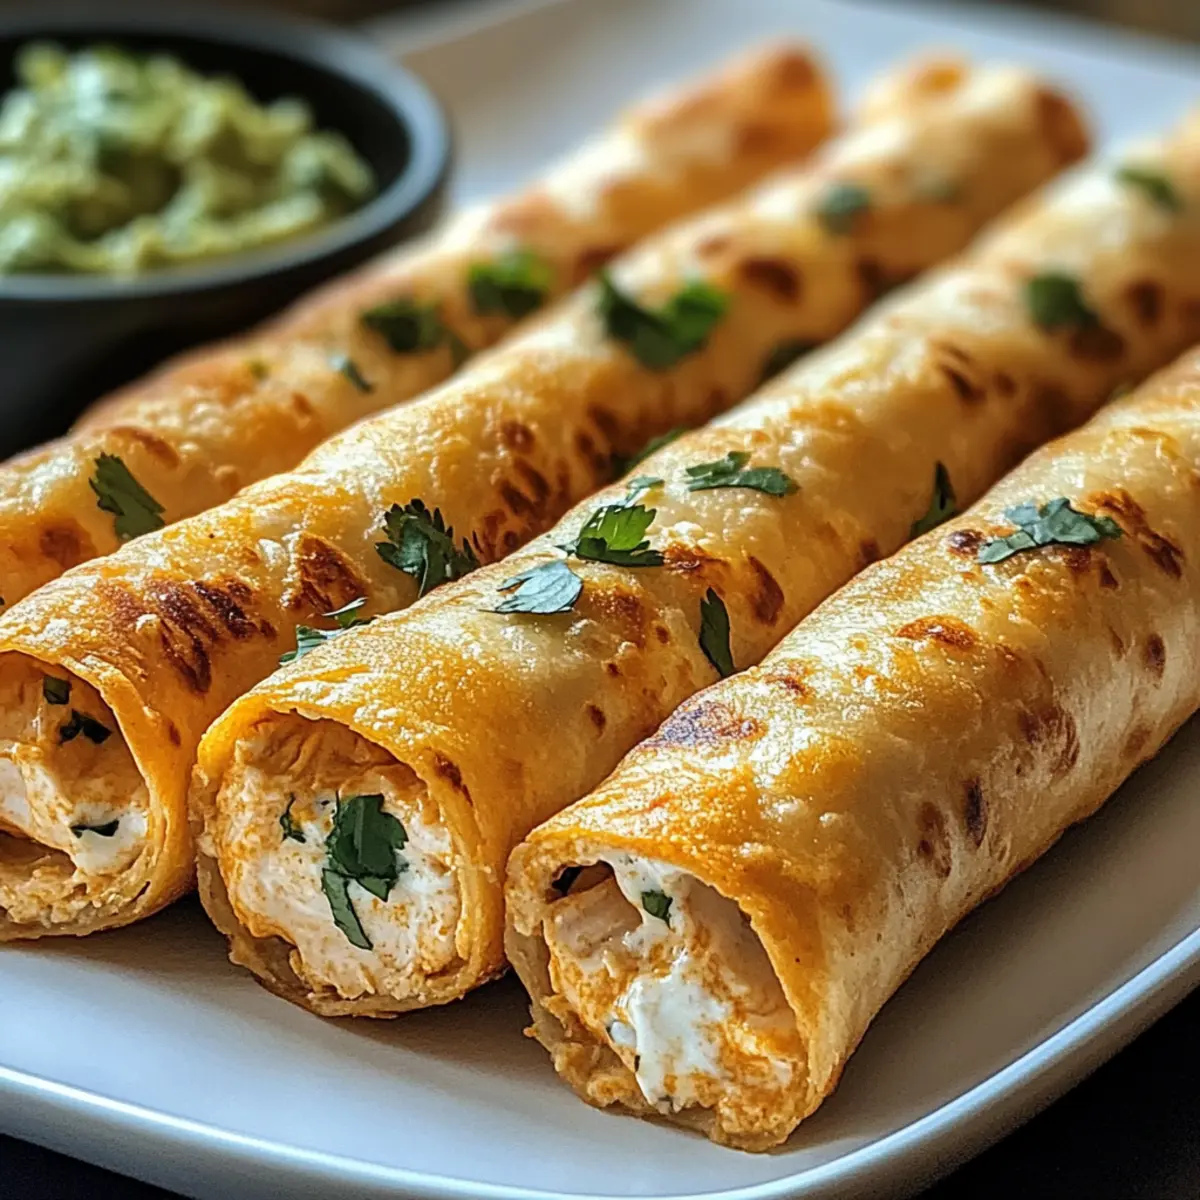
“Crispy Chicken Taquitos have a way of turning any ordinary evening into a festive occasion. The moment I pull them from the oven, golden and perfectly crispy, I can almost hear the cheers from my family—these little rolled delights never fail to impress! What I adore about this recipe is not just its incredible flavor but also its versatility. You can whip up these baked taquitos in no time, making them an ideal go-to for busy weeknights or weekend gatherings. Plus, with customizable fillings, you can cater to everyone’s taste preferences, ensuring every bite is deliciously satisfying—it’s comfort food at its finest! Ready to take your taquito game to the next level? Let’s dive into this fun, Mexican-inspired dish that’s sure to become a beloved staple in your home.”
Why are Crispy Chicken Taquitos a Must-Try?
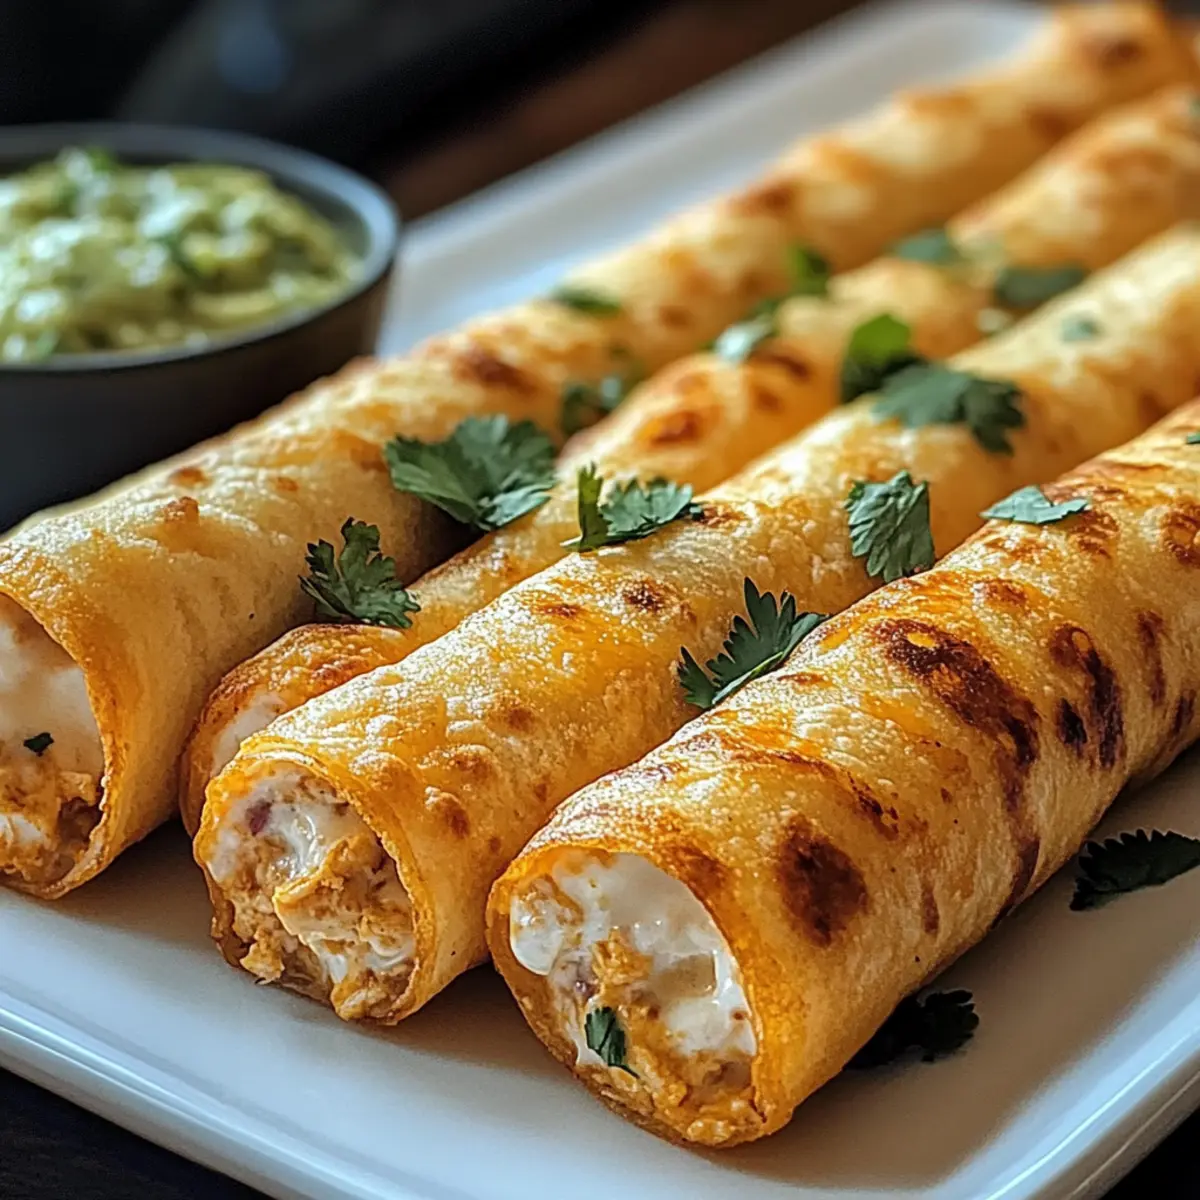
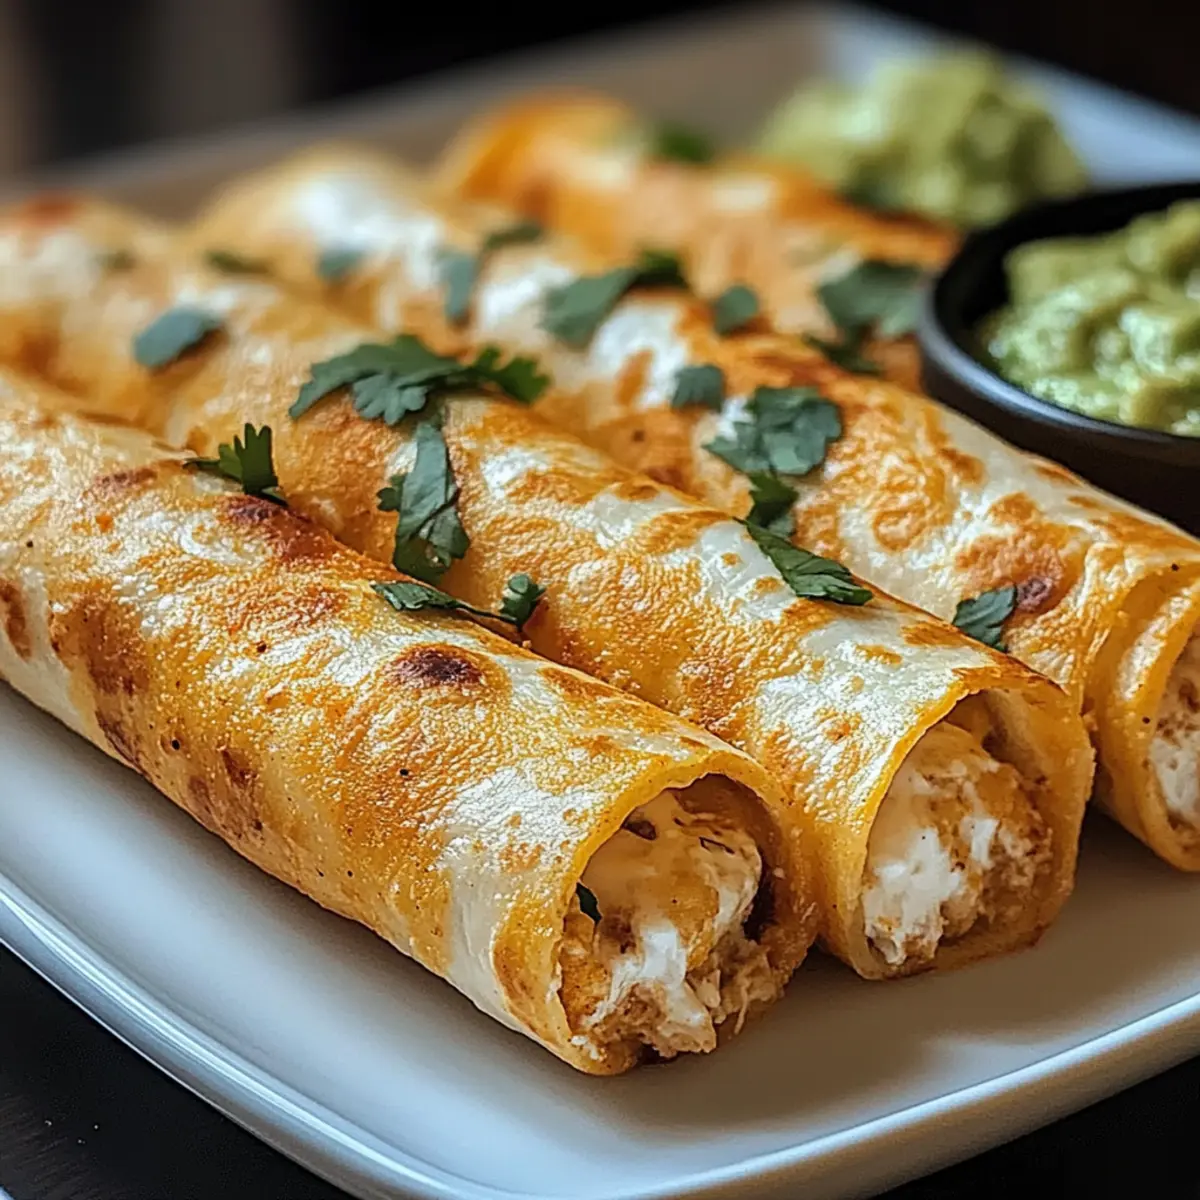
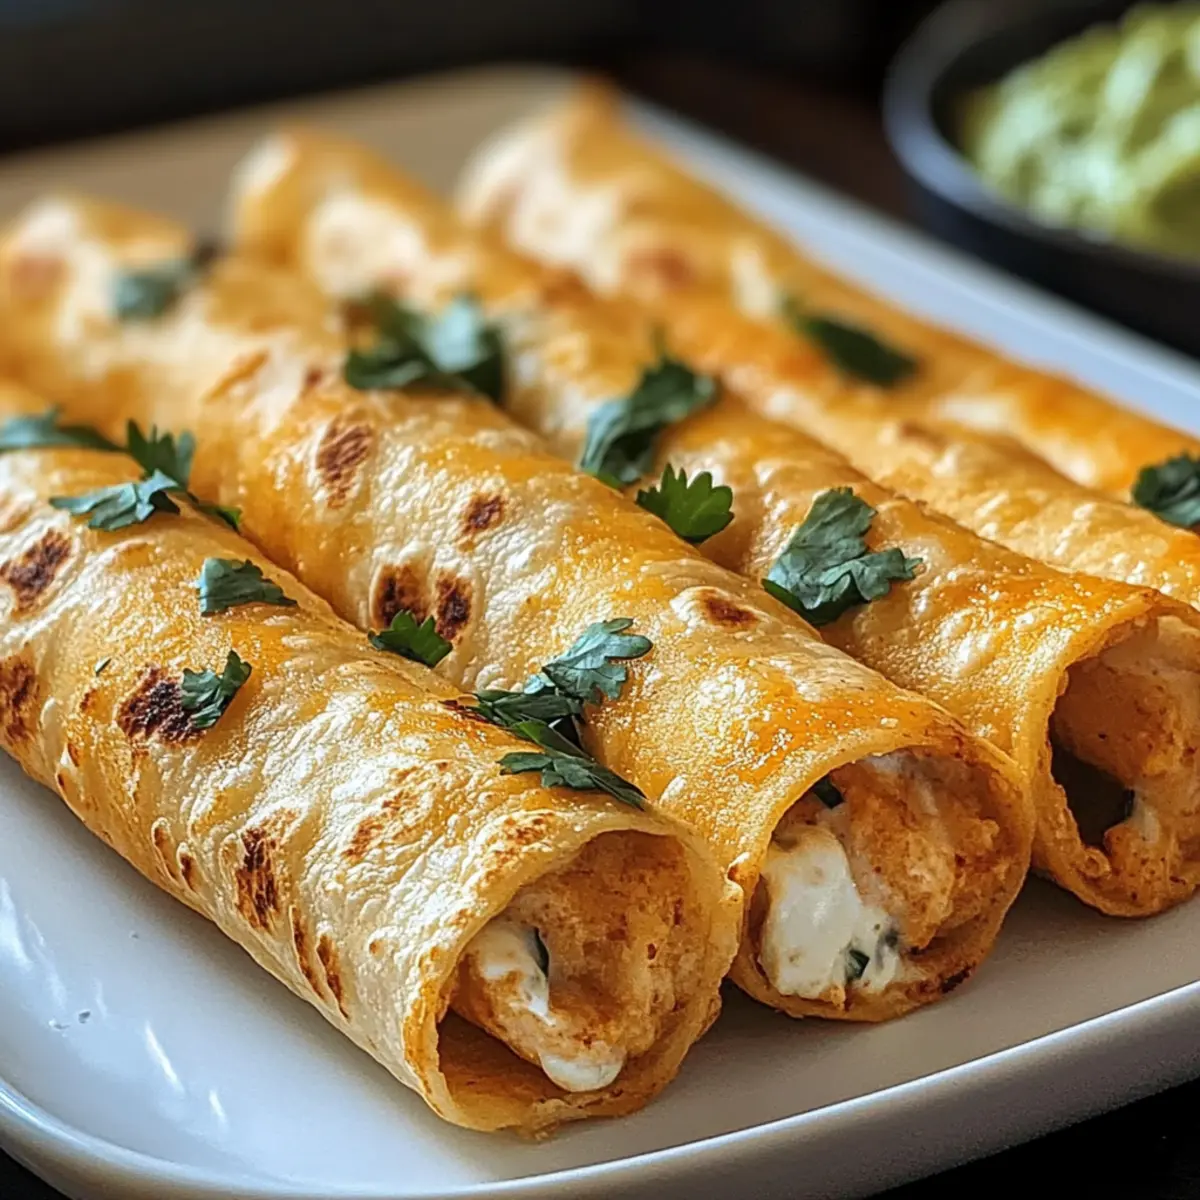
Crispy, Golden Delight: These taquitos are baked to perfection, offering a satisfying crunch without the fuss of frying.
Customizable Flavors: Fill them with your choice of cheese, proteins, or even veggies to suit your tastes. They are perfect for any palate!
Quick Preparation: In just 30 minutes or less, you can have a delicious meal ready, making it ideal for busy nights.
Family Approved: Whether enjoyed as a snack, appetizer, or main course, they’re sure to get rave reviews from everyone at the table. For more weeknight favorites, check out my Garlic Parmesan Chicken or Street Corn Chicken.
Make Ahead Option: Assemble these tasty rolls in advance and bake them when you’re ready to eat— it’s a fantastic way to streamline mealtime!
Crispy Chicken Taquitos Ingredients
For the Filling
• Cooked Shredded Chicken – Provides the primary protein; rotisserie chicken is a superb shortcut!
• Cream Cheese – Adds creaminess and richness; ricotta can be used for a lighter option.
• Shredded Cheddar or Mexican Blend Cheese – Contributes flavor and nuttiness; try pepper jack for a spicy kick!
• Salsa – Infuses the filling with moisture and flavor; select your favorite heat level.
• Garlic Powder – Enhances the overall flavor profile delightfully.
• Chili Powder – Adds warmth and depth to your crispy chicken taquitos.
• Cumin – Provides an earthy, aromatic note that complements the dish.
• Salt and Black Pepper – Essential for seasoning; adjust to taste.
For the Tortillas
• Flour or Corn Tortillas – The base for the taquitos; corn tortillas offer a gluten-free option.
• Cooking Spray or Oil – Used for brushing to achieve that perfect crispness.
Enjoy whipping up these delightful Crispy Chicken Taquitos with your loved ones!
Step‑by‑Step Instructions for Crispy Chicken Taquitos
Step 1: Preheat the Oven
Begin by preheating your oven to 425°F (220°C). While the oven heats up, prepare a baking sheet by lining it with parchment paper or a light drizzle of oil. This ensures your Crispy Chicken Taquitos will bake evenly and not stick, allowing for a perfectly crispy exterior.
Step 2: Mix the Filling
In a large mixing bowl, combine the cooked shredded chicken, cream cheese, shredded cheese, salsa, garlic powder, chili powder, cumin, salt, and pepper. Stir until everything is nicely blended and well combined, creating a flavorful filling that will shine inside your taquitos. This step should take about 3-5 minutes.
Step 3: Prepare the Tortillas
To make rolling easier, warm your flour or corn tortillas in the microwave. Place them in a damp paper towel and heat for about 20 seconds. This will soften the tortillas, making them pliable and preventing any cracking as you fill them later.
Step 4: Fill and Roll
Take a softened tortilla and spoon 2-3 tablespoons of the filling mixture onto one edge. Carefully roll the tortilla tightly around the filling, tucking in the sides as you go to create a secure roll. Repeat this process for each tortilla, ensuring they are tightly packed for optimal crispiness.
Step 5: Arrange on Baking Sheet
Once all your Crispy Chicken Taquitos are rolled, place them seam-side down on the prepared baking sheet. Make sure to leave a little space between each taquito so they can crisp up evenly while baking. This spacing helps achieve that delightful crunch you’re looking for.
Step 6: Prep for Baking
Brush or spray the tops of your rolled taquitos lightly with oil. This step is key for achieving a golden and crispy finish as they bake. You can use cooking spray or a pastry brush for even coverage, ensuring each taquito is ready to shine in the oven.
Step 7: Bake the Taquitos
Place the baking sheet in your preheated oven and bake for 15-20 minutes. Keep an eye on them towards the end—your Crispy Chicken Taquitos are ready when they turn golden brown and crisp. For an extra crunch, you can switch to broil for the last minute of cooking.
Step 8: Serve and Enjoy
Once baked to perfection, remove the taquitos from the oven and let them cool for a minute. Serve them warm with your favorite toppings, such as sour cream, guacamole, or salsa. These crispy delights are perfect for snacking, sharing, or enjoying as part of a delicious meal.
Tips for the Best Crispy Chicken Taquitos
- Warm Tortillas: Always heat your tortillas before rolling; this helps prevent cracking and ensures a smooth, easy roll to keep your Crispy Chicken Taquitos intact.
- Don’t Overfill: Use just enough filling when rolling—2-3 tablespoons is perfect. Overfilling can cause the tortillas to burst during baking.
- Oil for Crunch: Lightly brush or spray the tops with oil before baking to achieve that golden brown crispiness everyone loves on Crispy Chicken Taquitos.
- Watch Baking Time: Keep an eye on the taquitos while they bake. Different ovens can vary—remove them when they’re golden, not burnt!
- Make-Ahead Magic: Assemble your taquitos and keep them in the fridge for up to 24 hours. You can bake them fresh when you’re ready for a delicious meal!
What to Serve with Crispy Chicken Taquitos
Crispy Chicken Taquitos are a vibrant way to elevate your meal experience, offering endless possibilities for delightful pairings.
- Guacamole: Creamy avocado dip adds freshness and richness, perfectly balancing the crispy texture of the taquitos.
- Sour Cream: A classic companion, its cool, tangy flavor enhances every bite, making it a go-to topping.
- Mexican Street Corn Salad: Packed with sweet corn, lime, and cotija cheese, this salad offers a refreshing crunch that complements the taquitos beautifully.
- Pico de Gallo: This fresh salsa of tomatoes, onions, and peppers brings a burst of flavor and color to your plate, enhancing the dish’s overall appeal.
- Cilantro-Lime Rice: The zesty flavor of cilantro and lime in this fluffy rice dish creates a lightness that contrasts nicely with the crispy fried taquitos.
- Spicy Pickled Jalapeños: For those who enjoy heat, these add an extra kick, balancing out the creamy filling with their sharp, tangy flavor.
- Chips and Salsa: A crunchy side that doubles as an appetizer, chips served with a zesty salsa make for a fun snack alongside your taquitos.
- Beer Margaritas: A refreshing twist on traditional drinks, this combo perfectly pairs with Mexican foods, adding a fun, festive flair.
- Flan: For dessert, this smooth and creamy caramel custard offers a sweet end to your savory meal, making it a perfect contrast.
Crispy Chicken Taquitos Variations
Feel free to get creative with these Crispy Chicken Taquitos—they’re a blank canvas for your culinary imagination!
-
Spicy Twist: Add diced jalapeños to the filling for an extra kick that will thrill heat lovers. The subtle spice mingles beautifully with the creamy cheese.
-
Vegetarian Option: Substitute shredded chicken with black beans and corn for a delicious meatless version that still packs a flavorful punch. Pair it with fresh avocado for added creaminess.
-
Cheese Medley: Use a blend of cheeses like Monterey Jack, mozzarella, or pepper jack to create an irresistible cheesy filling. The melty goodness takes these taquitos to the next level!
-
Herb Infusion: Mix in some fresh herbs like cilantro or parsley to elevate the flavor profile with a burst of freshness. The herbs add a delightful contrast to the rich filling.
-
Crunchy Veggie: Stir in finely chopped bell peppers or spinach for texture and nutrition. The veggies add a lovely crunch and pop of color in every bite.
-
BBQ Flair: Substitute the salsa with a smoky BBQ sauce for a twist that’s both sweet and savory. A drizzle of ranch dressing takes it over the top!
-
Gluten-Free Crunch: Stick with corn tortillas for a gluten-free option, allowing everyone to enjoy this delicious treat. They become just as crispy, plus they offer a unique flavor.
-
Mini Version: Make bite-sized taquitos for parties or snacks. They’re perfect for dipping into salsa or guacamole, making them the ultimate crowd-pleaser.
With these delicious variations in mind, your taquito game will never be the same! Enjoy experimenting, and for another delightful chicken recipe, try my Mushroom Chicken Soup or Chicken Caesar Wraps.
How to Store and Freeze Crispy Chicken Taquitos
Fridge: Store leftover crispy chicken taquitos in an airtight container for up to 3-4 days. This keeps them fresh while maintaining their flavor.
Freezer: For longer storage, freeze taquitos before baking by placing them in a single layer on a baking sheet until solid, then transfer to a freezer-safe bag. They can last up to 3 months.
Reheating: To enjoy them later, bake the frozen taquitos directly from the freezer at 425°F (220°C) for 20-25 minutes until heated through and crispy.
Make-Ahead Option: Assemble the crispy chicken taquitos a day ahead, then store in the fridge before baking for a quick, homemade meal when you need it!
Make Ahead Options
Crispy Chicken Taquitos are perfect for meal prep enthusiasts looking to save time on busy weeknights! You can assemble these tasty rolls up to 24 hours in advance and refrigerate them until you’re ready to bake. To prepare, mix the filling and roll the taquitos as directed, then place them seam-side down on your baking sheet. Cover with plastic wrap to keep them fresh and prevent them from drying out. When you’re ready to serve, simply remove the cover and bake as instructed, adding an extra minute under the broiler if you want that irresistible crunch. This way, you’ll enjoy delicious, homemade taquitos with minimal effort when it’s time to eat!
Crispy Chicken Taquitos Recipe FAQs
How do I choose the best chicken for my taquitos?
Absolutely! The quality of your chicken is essential. I recommend using cooked shredded chicken from a rotisserie for convenience and flavor. If you’re using canned chicken, be sure to drain it well and mix gently to maintain the right texture.
What’s the best way to store leftover taquitos?
Leftover crispy chicken taquitos can be stored in an airtight container in the refrigerator for up to 3-4 days. Just make sure they’re completely cool before sealing them in the container to prevent sogginess.
Can I freeze my crispy chicken taquitos, and how?
Yes, you can freeze your taquitos! Before baking, place them in a single layer on a baking sheet until they are solid. Then, transfer them to a freezer-safe bag. They can last up to 3 months in the freezer. When you’re ready to enjoy, bake them straight from the freezer at 425°F (220°C) for 20-25 minutes until they’re heated through and crispy.
What should I do if my taquitos crack when rolling?
Very! If your tortillas crack, it often means they haven’t been warmed enough. Microwaving them for 20 seconds—wrapped in a damp paper towel—makes them pliable. This step is crucial to prevent any tears while rolling and ensures a snug, secure fold.
Can I make these taquitos vegetarian?
Absolutely! You can swap the shredded chicken for black beans or cooked vegetables like bell peppers or corn. This makes for a delicious vegetarian option while still keeping the flavors vibrant and satisfying.
Are there any allergy considerations I should be aware of?
Yes, if you’re preparing these crispy chicken taquitos for guests, keep in mind that they may contain allergens like dairy (cream cheese and cheese) and gluten (flour tortillas). For gluten-free options, ensure you use corn tortillas, and consider using dairy-free cheese alternatives if lactose intolerance is a concern.
Crispy Chicken Taquitos for a Flavor-Packed Weeknight Treat
Ingredients
Equipment
Method
- Preheat your oven to 425°F (220°C) and prepare a baking sheet lined with parchment paper or a light drizzle of oil.
- In a large mixing bowl, combine the cooked shredded chicken, cream cheese, shredded cheese, salsa, garlic powder, chili powder, cumin, salt, and pepper. Stir until well combined.
- Warm flour or corn tortillas in the microwave by placing them in a damp paper towel for about 20 seconds to soften.
- Spoon 2-3 tablespoons of filling onto one edge of a tortilla, then roll tightly, tucking in the sides as you go.
- Place rolled taquitos seam-side down on the baking sheet, leaving space between each for even crisping.
- Lightly brush or spray the tops of the taquitos with oil for a golden finish.
- Bake in preheated oven for 15-20 minutes until golden brown and crispy, optionally broiling for the last minute for extra crunch.
- Remove from oven, let cool for a minute, and serve warm with toppings like sour cream, guacamole, or salsa.
Leave a Reply