
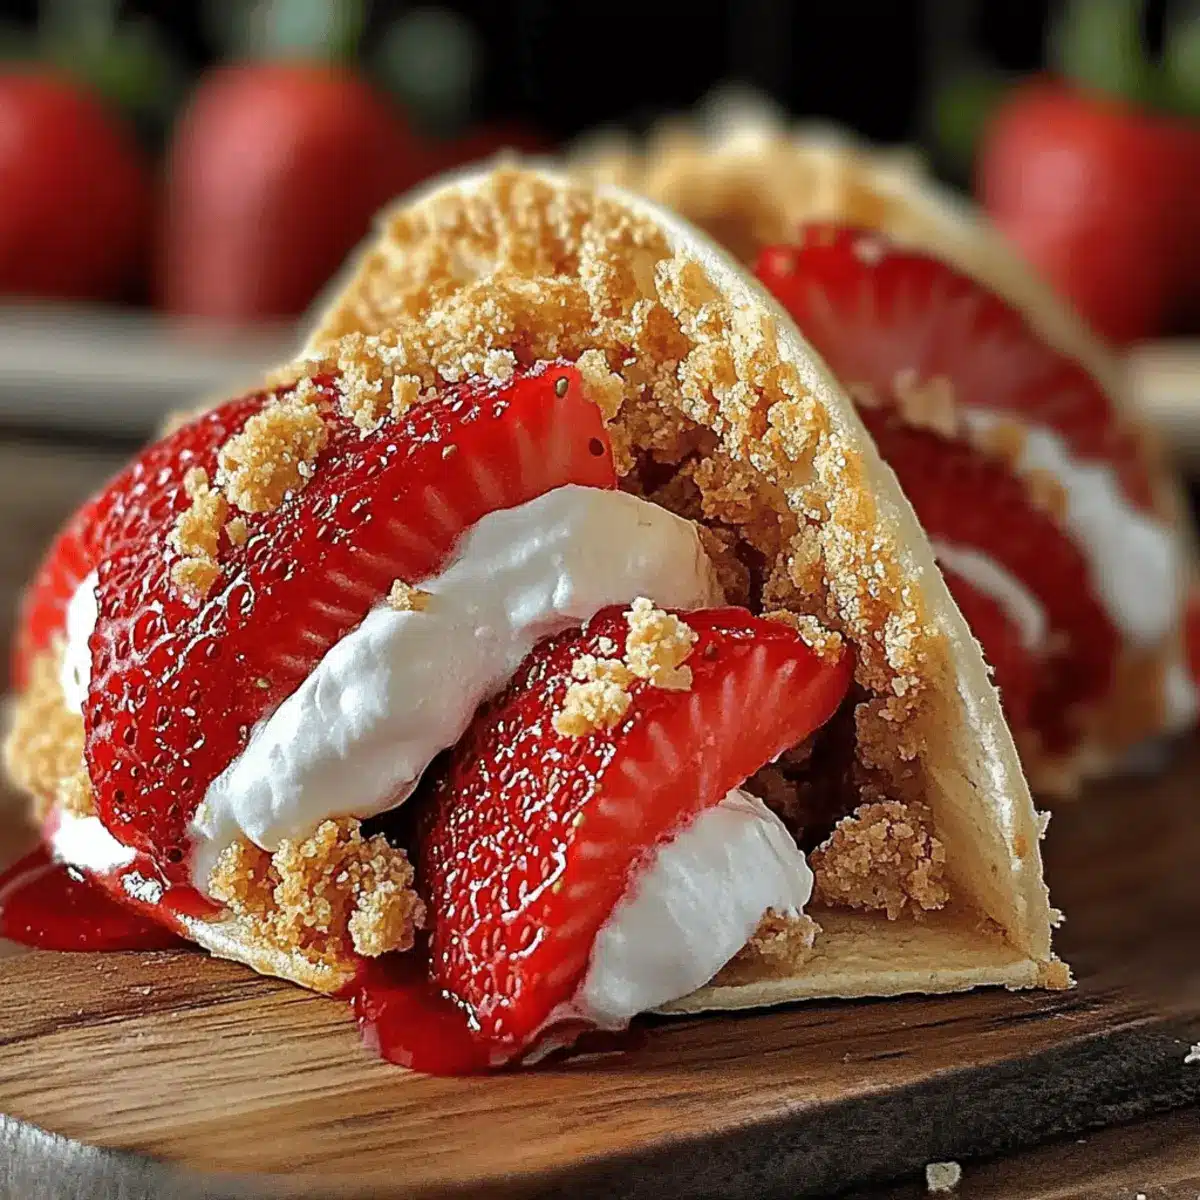
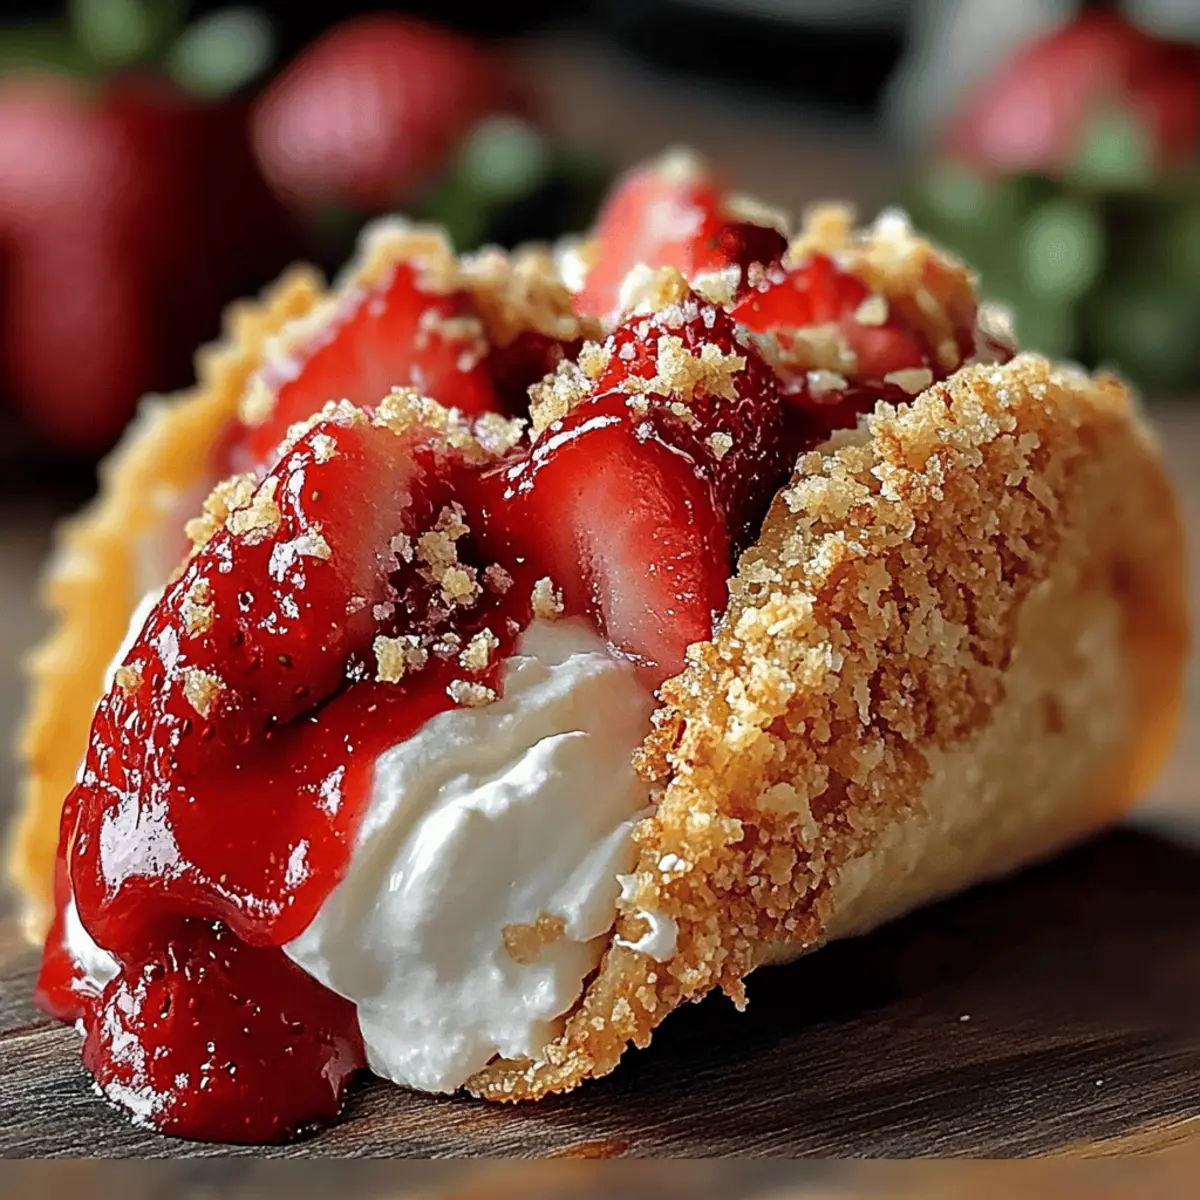
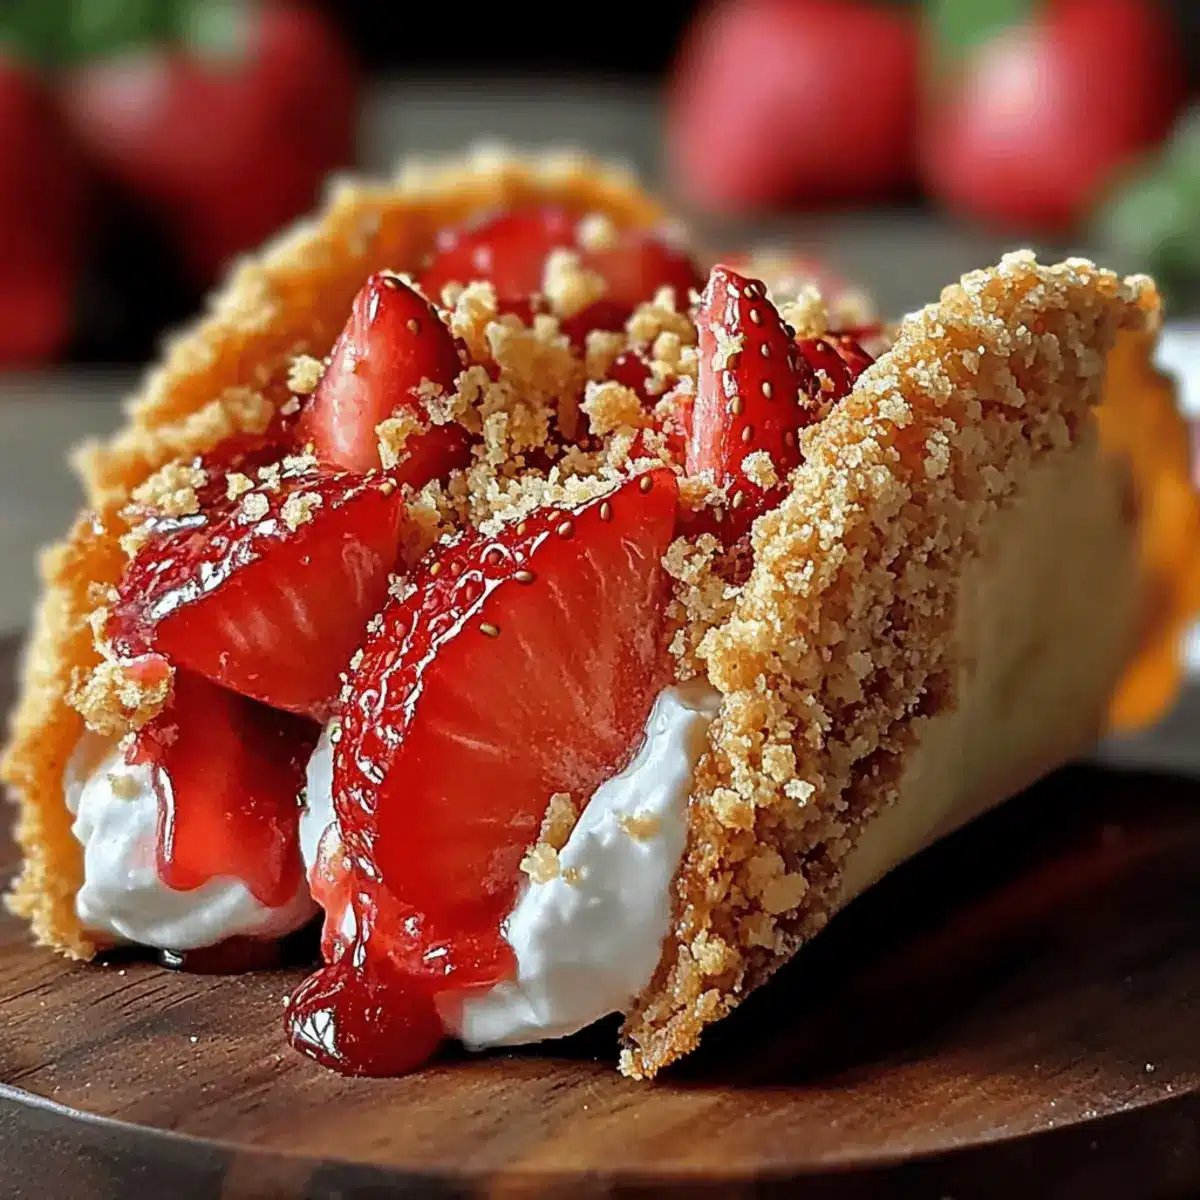
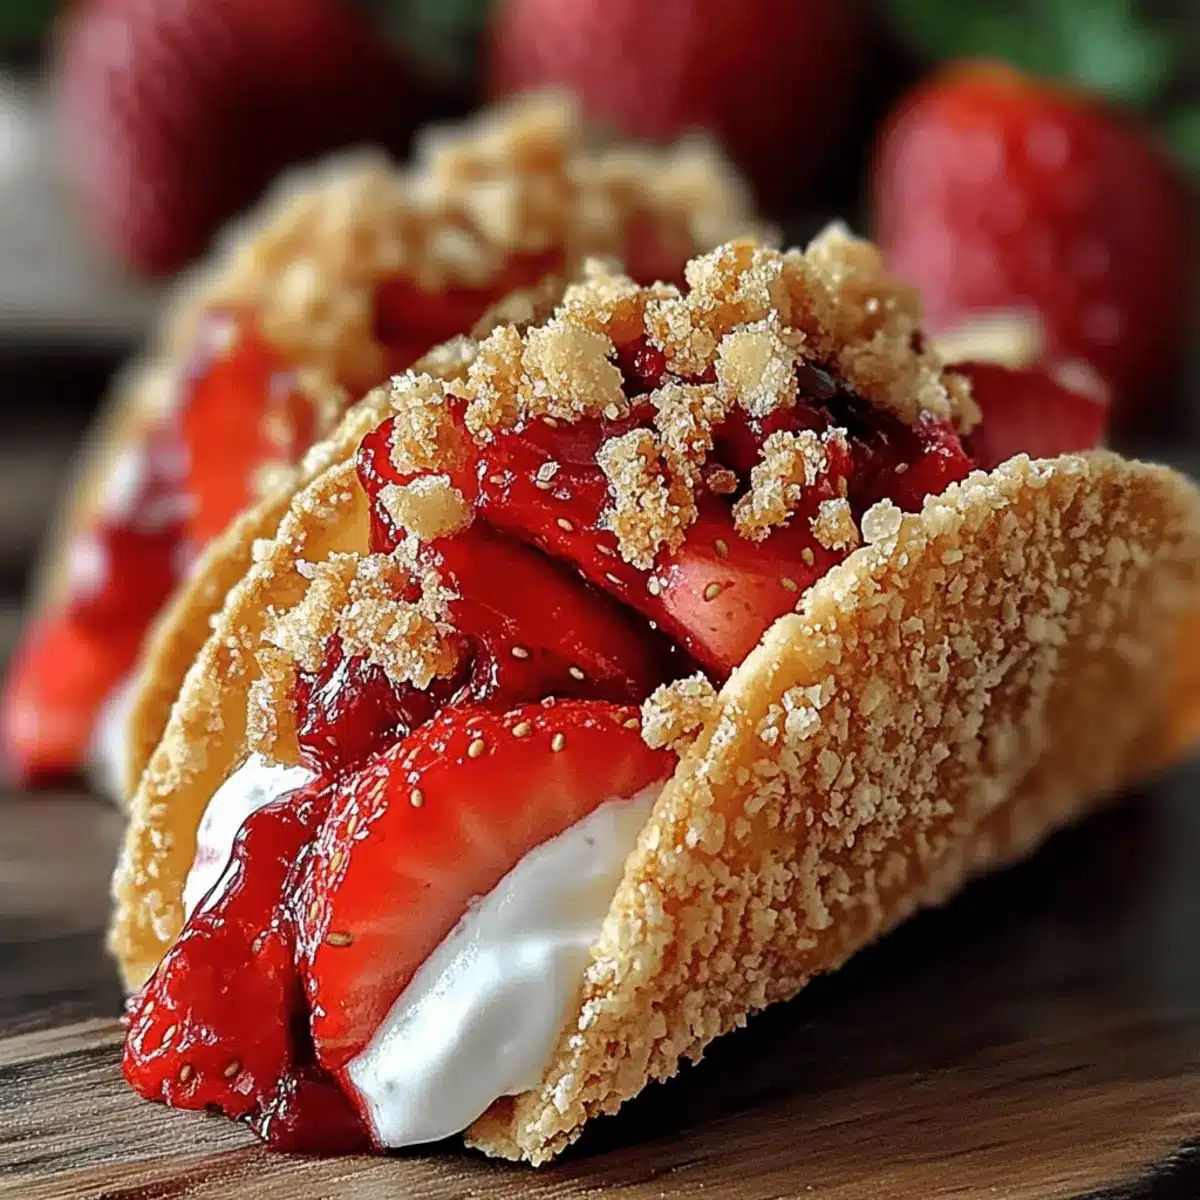
You won’t believe how easy it is to make a dessert that has everyone clamoring for more! These Strawberry Crunch Cheesecake Tacos bring together creamy cheesecake, a delightful graham cracker crust, and luscious fresh strawberries, creating a handheld treat that’s perfect for any gathering or just when you crave something sweet. Not only do these tacos offer a fun twist on traditional dessert, but they also let you impress your friends without spending hours in the kitchen. Whip them up in no time and elevate your dessert game to new heights. Ready to dive into this delicious adventure? Let’s get started!
Why Are Strawberry Crunch Cheesecake Tacos Amazing?
Unique Twist: These tacos redefine dessert by merging beloved flavors into a fun, portable treat.
Creamy & Crunchy: The blend of smooth cheesecake and a crunchy graham cracker shell delivers a texture sensation that will leave you craving more.
Fresh & Delicious: Bursting with juicy strawberries, each bite is a refreshing experience that captures the essence of summer.
Quick & Easy: Put together in just a few steps, this recipe is perfect for any home cook looking to impress without the fuss.
Crowd-Pleasing Appeal: Ideal for gatherings, parties, or everyday indulgences, these tacos are sure to be a hit! And if you’re looking for more delightful dessert ideas, check out our simple cheesecake variations.
Strawberry Crunch Cheesecake Tacos Ingredients
For the Cheesecake Filling
- Cream Cheese – Delivers the creamy base for luscious cheesecake; opt for low-fat to lighten it up.
- Granulated Sugar – Sweetens the filling to balance the creaminess; substitute with a favorite sweetener for fewer calories.
- Vanilla Extract – Adds depth to the flavor; use pure vanilla for the best taste, but artificial works in a pinch.
- Heavy Cream – Creates a rich and smooth texture; whipping cream can offer a light alternative.
- Fresh Strawberries – Brings juicy freshness to each bite; feel free to swap with other fruits like raspberries or blueberries.
For the Taco Shells
- Graham Cracker Crumbs – Forms the delicious crust that embodies classic cheesecake flavor; gluten-free options are available for dietary needs.
- Unsalted Butter – Binds the crumbs for solid taco shells and enriches flavor; coconut oil serves as a dairy-free alternative.
For Topping
- Chopped Toasted Pecans – Adds delightful crunch and flavor; try almonds or walnuts if you prefer another nut.
- Additional Strawberries for Garnish – Enhances visual appeal and freshness; always a welcomed touch for presentation.
Step‑by‑Step Instructions for Strawberry Crunch Cheesecake Tacos
Step 1: Prepare the Cheesecake Filling
Begin by beating 8 ounces of softened cream cheese in a mixing bowl until it’s silky smooth, about 2 minutes. Gradually mix in ⅓ cup of granulated sugar and 1 teaspoon of vanilla extract, blending until creamy and well combined. This will create a luscious base for your Strawberry Crunch Cheesecake Tacos.
Step 2: Incorporate the Heavy Cream and Strawberries
Next, fold in 1 cup of heavy cream into the mixture, using a spatula for a gentle touch to maintain its airy texture. After the cream is fully incorporated, add in 1 cup of diced fresh strawberries. This will infuse your filling with fruity freshness and color, bringing your cheesecake tacos to life.
Step 3: Make the Taco Shells
In a separate bowl, combine 1 ½ cups of graham cracker crumbs with 4 tablespoons of melted unsalted butter, mixing until you achieve a crumbly texture. Preheat your oven to 350°F (175°C), and then press this mixture firmly into taco-shaped molds or mini muffin tins to form the shells. Make sure they are packed tightly to hold their shape once baked.
Step 4: Bake the Taco Shells
Place the molds in the preheated oven and bake for about 8-10 minutes, or until the edges are golden brown. Keep an eye on them to ensure they don’t burn. Once done, remove the taco shells from the oven and let them cool completely before transferring them to a wire rack. This cooling step is crucial for achieving a crunchy texture.
Step 5: Assemble Your Tacos
Once the taco shells have cooled, carefully spoon or pipe the cheesecake filling into each shell, being generous but careful not to overfill. The creamy cheesecake should fill the base, leaving just enough space for a beautiful garnish. This is where the magic of your Strawberry Crunch Cheesecake Tacos truly begins!
Step 6: Garnish for Presentation
Optional but encouraged, sprinkle chopped toasted pecans over the filled tacos for added crunch and flavor. You can also top with additional slices of fresh strawberries for a vibrant finish that will catch everyone’s eye. This step not only enhances the taste but also elevates the overall presentation of your dessert.
Step 7: Chill and Serve
Place the assembled Strawberry Crunch Cheesecake Tacos in the refrigerator for at least 1 hour to allow the filling to set and the flavors to meld beautifully. Serving these delicious tacos chilled will enhance the experience, making them a refreshing sweet treat that everyone will adore.
Storage Tips for Strawberry Crunch Cheesecake Tacos
Fridge: Keep assembled Strawberry Crunch Cheesecake Tacos in an airtight container for up to 3 days to maintain their freshness and delicious texture.
Make-Ahead: Prepare the cheesecake filling and taco shells ahead of time; combine them just before serving to ensure the shells stay crunchy.
Freezing: These tacos are best enjoyed fresh, but if you need to freeze them, do so without the filling for up to 2 months. Thaw shells, then fill with cheesecake before serving.
Reheating: If you’ve made the shells and need to warm them, place them in a 350°F (175°C) oven for about 5 minutes to restore their crispiness before assembling your Strawberry Crunch Cheesecake Tacos.
Expert Tips for Strawberry Crunch Cheesecake Tacos
-
Soften Cream Cheese: Ensure your cream cheese is at room temperature for a lump-free and creamy filling. Cold cream cheese can lead to a bumpy texture.
-
Pack Taco Shells Firmly: Press the graham cracker mixture tightly into the molds; this prevents crumbling once baked and allows for sturdy shells that hold the cheesecake filling.
-
Use Fresh Strawberries: Opt for fresh strawberries for the best flavor and texture. Thawing frozen strawberries can lead to excess moisture, so make sure to drain and pat them dry first.
-
Chill Before Serving: Allow the assembled Strawberry Crunch Cheesecake Tacos to chill for at least 1 hour. This helps the flavors meld and ensures the filling is refreshingly cool.
-
Garnish Creatively: Don’t shy away from garnishing! Add chocolate drizzle or a dollop of whipped cream on top for an extra touch that will wow your guests.
Strawberry Crunch Cheesecake Tacos Variations
Feel free to get creative with these delightful Strawberry Crunch Cheesecake Tacos and make them your own!
-
Berry Bliss: Swap strawberries for a mix of raspberries and blueberries for a colorful, berry-filled delight. This combination not only looks stunning but also packs a punch of different flavors!
-
Nut-Free: Omit the pecans and replace them with additional graham cracker crumbs for a nut-free version that still has that wonderful crunch. Go ahead and experiment with textures, ensuring everyone at the table can enjoy!
-
Chocolate Drizzle: Top the tacos with a rich chocolate sauce for an indulgent twist that enhances both flavor and presentation. Chocolate and cheesecake are a classic pairing, perfect for those special occasions or chocolate lovers.
-
Vegan Version: Use plant-based cream cheese and coconut whipped cream for a vegan take on this dessert. The flavors and textures will still shine through, making it a delightful option for everyone.
-
Coconut Flavor: Mix shredded coconut into the graham cracker crust or sprinkle it on top of the tacos for a tropical flair. This adds a lovely chewiness and enhances the overall experience.
-
Lemon Zest: Add a tantalizing hint of lemon zest to the cheesecake filling for a refreshing citrus twist. It brightens the flavors, making the dessert even more tantalizing against the creamy base.
-
Spicy Touch: For those who like a kick, incorporate a pinch of chili powder or cayenne pepper into the graham cracker mixture. This unexpected twist gives an exciting warmth that contrasts beautifully with the sweetness!
-
Layered Dessert: Transform this recipe into a parfait by layering the cheesecake filling and toppings in a dessert glass. It’s an elegant way to serve guests and showcases the vibrant colors beautifully.
With these enticing variations, your Strawberry Crunch Cheesecake Tacos can cater to all sorts of preferences and cravings, making them a must-try for any gathering! For more ideas, check out our quick dessert recipes for inspiration.
Make Ahead Options
These Strawberry Crunch Cheesecake Tacos are a lifesaver for busy home cooks looking to save time! You can prepare the cheesecake filling and taco shells up to 3 days in advance. Simply follow the initial steps, then store the filling in an airtight container in the refrigerator to maintain its creamy texture. For the taco shells, once they’ve cooled, keep them in a separate container to prevent sogginess. When it’s time to serve, just fill each shell with the cheesecake filling, and garnish with toasted pecans and strawberries. This way, you’ll enjoy a delightful dessert that’s just as delicious without the last-minute fuss!
What to Serve with Strawberry Crunch Cheesecake Tacos
Enhance your dessert experience with delightful pairings that elevate your Strawberry Crunch Cheesecake Tacos to a whole new level.
- Fresh Fruit Salad: A vibrant mix of seasonal fruits brings freshness and lightness, perfectly balancing the creamy cheesecake tacos.
- Whipped Cream: A dollop of airy whipped cream adds a luscious touch, making each bite even more indulgent. Whether flavored or classic, it’s a must-have!
- Chocolate Drizzle: Drizzle melted chocolate over the tacos for a rich contrast that satisfies the sweet tooth and turns up the dessert’s appeal.
- Vanilla Ice Cream: Creamy vanilla ice cream complements the cheesecake, creating a classic pairing that takes dessert to dreamy heights.
- Mint Tea: A soothing mint tea offers a refreshing palate cleanser, enhancing the flavors of the strawberries and cream without overwhelming your senses.
- Sparkling Water: Crisp and effervescent, sparkling water cleanses the palate between bites, adding a refreshing finish to your dessert experience.
- Pecan Pie Bites: Bite-sized pecan pie desserts echo the nutty crunch from the tacos, creating a harmonious connection that sweet tooth lovers will adore.
- Lemon Sorbet: A zesty lemon sorbet provides a tart contrast, brightening flavors and offering a refreshing interlude amidst the sweetness of the cheesecake tacos.
- Espresso: A bold shot of espresso serves as an invigorating companion, bringing out the sweetness of the cheesecake while providing a delightful caffeine kick.
Strawberry Crunch Cheesecake Tacos Recipe FAQs
What type of strawberries should I use for the filling?
Absolutely, fresh strawberries are the best choice! Look for berries that are vibrant, plump, and free of dark spots. Overripe strawberries can result in a mushy texture, so aim for firm and juicy berries for optimal flavor in your cheesecake filling.
How should I store Strawberry Crunch Cheesecake Tacos?
You can keep your assembled Strawberry Crunch Cheesecake Tacos in an airtight container in the refrigerator for up to 3 days. Make sure to stack them carefully to prevent the shells from crushing. This will help maintain their freshness and delightful texture.
Can I freeze these cheesecake tacos?
Yes, while they are best eaten fresh, you can freeze the taco shells without the filling for up to 2 months. To freeze, place the shells in a single layer in a freezer-safe bag or container. When you’re ready to enjoy them, thaw the shells in the refrigerator overnight, then fill them with the cheesecake mixture just before serving.
What should I do if my graham cracker shells crumble when removing them from the molds?
If your graham cracker shells are crumbling, it might be that the mixture wasn’t packed tightly enough in the molds. Press the graham cracker mixture firmly into the molds before baking, and allow them to cool completely before attempting to remove them. If they still crumble, you can always pout the remaining mixture in a baking dish for a cheesecake that’s just as delicious without the taco shape!
Are there any allergy considerations for this recipe?
Definitely! Common allergens in this recipe include dairy from the cream cheese and heavy cream and gluten from the graham cracker crumbs. For a gluten-free version, you can use gluten-free graham cracker crumbs. If you are substituting for dairy-free options, consider using cashew or almond cream cheese and coconut cream for the filling. Always check labels to ensure safety based on your dietary requirements.
Can I make these tacos ahead of time?
Yes, you can prepare the cheesecake filling and taco shells in advance. I often make the filling and shells a day ahead; just assemble the tacos right before serving to keep the shells nice and crunchy. This way, you can impress your guests without the last-minute rush!
Enjoy making your Strawberry Crunch Cheesecake Tacos and feel free to reach out with any other questions!
Strawberry Crunch Cheesecake Tacos That Wow Your Tastebuds
Ingredients
Equipment
Method
- Prepare the Cheesecake Filling: Beat 8 ounces of softened cream cheese in a mixing bowl until silky smooth, about 2 minutes. Gradually mix in ⅓ cup of granulated sugar and 1 teaspoon of vanilla extract until creamy.
- Incorporate the Heavy Cream and Strawberries: Fold in 1 cup of heavy cream, then add in 1 cup of diced fresh strawberries.
- Make the Taco Shells: Combine 1 ½ cups of graham cracker crumbs with 4 tablespoons of melted unsalted butter. Press into taco-shaped molds and preheat oven to 350°F.
- Bake the Taco Shells: Bake for about 8-10 minutes until edges are golden brown. Let cool completely.
- Assemble Your Tacos: Spoon or pipe the cheesecake filling into cooled taco shells.
- Garnish for Presentation: Sprinkle chopped toasted pecans and topping with additional strawberries.
- Chill and Serve: Place tacos in the refrigerator for at least 1 hour before serving.
Leave a Reply