
As the fireworks light up the sky this 4th of July, I can’t help but think about the sweet treat that will steal the show—4th of July cake pops! These festive bites are not just a feast for the eyes with their vibrant red, white, and blue colors; they’re also incredibly easy to make. Whether you’re hosting a barbecue or attending a family get-together, these delightful desserts are guaranteed to bring smiles to faces of all ages. Plus, they offer a fun twist on traditional cake, making them the perfect kid-friendly treat to involve little chefs in your kitchen. With endless flavor variations and a beautiful presentation, who’s ready to dive into a batch of these easy and delicious cake pops?

Why Make 4th of July Cake Pops?
Simplicity at Its Best: This recipe is straightforward, allowing even novice bakers to create impressive treats without any fuss.
Festive and Fun: Drenched in vibrant colors and topped with playful sprinkles, these cake pops make any gathering instantly more celebratory.
Versatile Flavors: Feel free to experiment! Swap in your favorite cake mix like red velvet or chocolate for unique twists that delight every palate.
Kid-Friendly Delight: Kids will love their mini cake pops! Involving them in the baking process adds an extra layer of joy, as these treats are perfect for little hands.
Perfect for Sharing: Whether it’s a barbecue or a picnic, these cake pops are portable and easy to share, making them a hit at any summer gathering.
Looking for more delightful desserts? Try these fun and festive Mini Cheesecake Sweet or Strawberry Crunch Cheesecake ideas to accompany your celebrations!
4th of July Cake Pops Ingredients
For the Cake Base
• Cake Mix – Provides the foundational flavor; feel free to substitute with red velvet or chocolate for added flair.
• Cream Cheese Frosting – Offers a luscious, sweet contrast; buttercream can be used if you prefer.
For the Coating
• White Chocolate Wafers – Perfect for a smooth and creamy coating; consider colorful candy melts for a vibrant touch.
• Coconut Oil – Ensures your chocolate has a beautiful shine; it’s optional if you want to keep things simple.
For Decoration
• Sprinkles – Adds a festive touch; use red, white, and blue sprinkles to enhance the holiday spirit.
Step‑by‑Step Instructions for 4th of July Cake Pops
Step 1: Bake the Cake
Start by preheating your oven to 350°F (175°C) while you prepare the cake mix as per the package instructions. Pour the batter into a greased 9×13 inch cake pan and bake for 25-30 minutes or until a toothpick inserted in the center comes out clean. Once baked, allow the cake to cool completely in the pan, which will take about 30-40 minutes.
Step 2: Crumble the Cake
After the cake has cooled, transfer it to a large mixing bowl. Using your hands or a fork, crumble the cake until it resembles fine crumbs, making sure there are no large lumps left. This step is crucial for creating the perfect texture for your 4th of July cake pops, so take your time to ensure an even crumble.
Step 3: Combine with Frosting
Add your cream cheese frosting to the crumbled cake mixture, starting with a few spoonfuls. Mix thoroughly with your hands or a spatula until the mixture is well combined and has a dough-like consistency that holds together when pinched. If it feels too dry, add more frosting gradually until you achieve the right texture.
Step 4: Form Cake Balls
Using a tablespoon, scoop out the mixture and roll it into balls, about 1 inch in diameter. Place each ball onto a lined baking sheet, ensuring they are spaced out evenly. This step creates the signature shape of your 4th of July cake pops, and you should be able to form about 20-25 balls, depending on the size.
Step 5: Freeze
Transfer the baking sheet to the freezer for about 30 minutes, allowing the cake balls to firm up. This chilling process is essential, as it ensures your cake pops maintain their shape when dipped in chocolate. You’ll know they are ready when they feel solid to the touch.
Step 6: Melt Chocolate
While the cake balls chill, melt the white chocolate wafers in a microwave-safe bowl. Heat them in 30-second intervals, stirring in between, until fully melted and smooth. If desired, stir in a tablespoon of coconut oil to achieve a glossy finish. This step ensures your chocolate coating is effortlessly smooth for your 4th of July cake pops.
Step 7: Prepare for Dipping
Remove the cake balls from the freezer and insert a lollipop stick into the center of each one, pushing it in about halfway. This step creates a handle for your cake pops and provides stability while dipping. Make sure to work quickly, as the warmth from your hands can start to soften the cake balls.
Step 8: Dip and Decorate
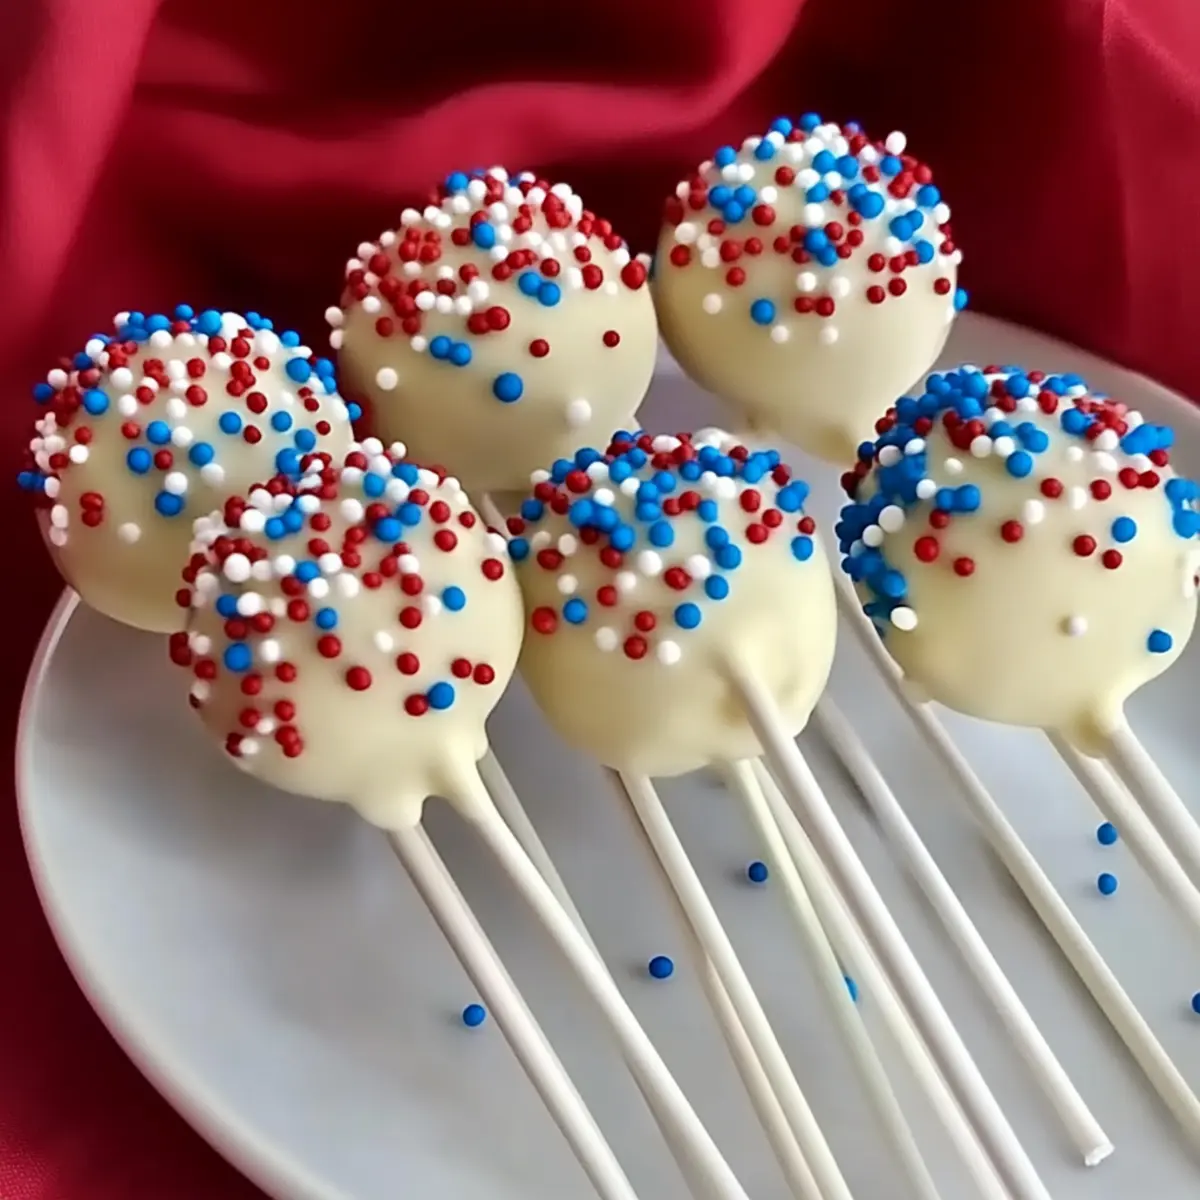
Dip each cake pop into the melted chocolate, swirling to coat evenly while gently tapping the stick against the bowl’s edge to remove excess chocolate. Before the coating sets, sprinkle festive red, white, and blue sprinkles over the top for that patriotic charm. This step transforms your cake pops into a visual delight for the 4th of July.
Step 9: Let Set
Insert the decorated cake pops upright into a cup lined with cling wrap or floral foam to hold them in place. Allow them to sit at room temperature for about 30 minutes, or until the chocolate has completely set. This final step ensures your festive cake pops are ready for the big reveal!
Step 10: Serve & Enjoy
Once the cake pops are fully set, arrange them on a fun festive platter or within decorative jars for an eye-catching presentation. With their vibrant colors and irresistible taste, your 4th of July cake pops will be the highlight of the celebration, ready to bring joy to your party guests!

What to Serve with 4th of July Cake Pops?
Imagine a colorful array of dishes that complement the cheerful vibes of joyous summer gatherings.
-
Grilled Hamburgers: Nothing says summer like juicy hamburgers. The smoky flavors pair perfectly with the sweet cake pops, balancing savory and sweet.
-
Corn on the Cob: This iconic side dish, with its sweet and creamy butter, resonates beautifully with the festive flavors of your cake pops. It adds a lovely crunch and freshness to the meal.
-
Fruit Salad: A vibrant mix of seasonal fruits brings a refreshing sweetness that complements the rich cake pops. Plus, it offers a healthy, colorful contrast that looks stunning on the table!
-
Potato Salad: Creamy and tangy, potato salad is a classic barbecue dish. Its rich flavors enhance the sweetness of the cake pops, providing a satisfying, well-rounded meal.
-
Lemonade or Iced Tea: Quench your thirst with lemonade or iced tea, their bright flavors and refreshing qualities balance out the sweetness of the cake pops.
-
Chocolate Dipped Strawberries: Elevate dessert time with these indulgent treats. They share a similar aesthetic, adding a decadent but fruity twist to your dessert table.
Gather your loved ones around and create delightful memories this 4th of July, where every bite and sip takes your celebration to new heights!
4th of July Cake Pops Variations
Get ready to customize your cake pops and elevate the festive fun to new heights!
-
Chocolate Cake: Swap vanilla cake for a rich chocolate mix, offering a decadent twist that chocolate lovers will adore. The blend of flavors creates a delightful burst with each bite!
-
Red Velvet Delight: Use red velvet cake mix for a stunningly colorful, velvety treat that adds a touch of elegance to your dessert spread. The cream cheese frosting pairs beautifully with it, creating a match made in dessert heaven.
-
Dairy-Free Option: Substitute the cream cheese frosting with a dairy-free alternative, and use vegan chocolate melts for a tasty treat that everyone can enjoy. This is perfect for those with dietary restrictions!
-
Nutty Crunch: Mix in finely chopped nuts like almonds or pecans to the cake batter for a delightful crunch that adds texture. Each pop will have a surprise inside, enhancing the eating experience.
-
Fruit Infusion: Add pureed strawberries or raspberries to your cake mix for a fruity twist. The bright flavor pairs wonderfully with the white chocolate coating, making each pop refreshingly unique.
-
Heat Boost: Incorporate a hint of cayenne or chili powder into the cake mixture for a spicy kick that balances the sweetness. This unexpected twist will excite adventurous taste buds!
-
Festive Coatings: Instead of traditional white chocolate, use colored candy melts, matching the themes of other holidays. Imagine vibrant green for St. Patrick’s Day or spooky orange and black for Halloween!
-
Fun Shapes: Instead of traditional balls, use cookie cutters to form star or heart-shaped cake pops for a creative presentation. Change it up for each celebration, making each pop memorable!
Ready to impress with your unique cake pops? For more delicious dessert ideas, consider these delightful Strawberry Crunch Cheesecake or Pancake Poppers Bites that will surely complement your festive spread!
Expert Tips for 4th of July Cake Pops
Keep It Chilled: Ensure cake balls are well chilled before dipping to prevent them from falling apart during the process.
Melt Smart: Melt the chocolate in short intervals to avoid burning; keeping a close eye on it will yield a perfect coating for your cake pops.
Frosting Balance: If your mixture feels too dry after adding frosting, don’t hesitate to add more until you achieve the ideal dough-like consistency for your 4th of July cake pops.
Stick It Right: Insert lollipop sticks halfway into the cake balls quickly to ensure they stay intact and firm during decoration.
Decorate Right Away: Sprinkle your decorations while the chocolate coating is still wet to ensure sprinkles adhere properly for that festive touch.
How to Store and Freeze 4th of July Cake Pops
Room Temperature: Store your cake pops in an airtight container at room temperature for up to 3 days to keep them fresh and delicious.
Fridge: For longer freshness, you can refrigerate the cake pops in an airtight container for up to 1 week. Allow them to come to room temperature before serving for the best texture.
Freezer: If you want to make a larger batch ahead of time, freeze the cake pops individually on a baking sheet for 1-2 hours, then transfer them to a freezer-safe container. They can be frozen for up to 3 months.
Reheating: When you’re ready to enjoy your frozen 4th of July cake pops, thaw them in the fridge overnight, and let them sit at room temperature for about 20 minutes before serving to regain that delightful texture.
Make Ahead Options
These 4th of July cake pops are perfect for meal prep enthusiasts looking to save time without sacrificing flavor! You can prepare the cake balls up to 24 hours in advance by following the first five steps, then refrigerate them in an airtight container. Additionally, you can melt the chocolate and store it separately in the fridge for up to 3 days. When you’re ready to impress your guests, simply reheat the chocolate gently until smooth and then dip the chilled cake balls, decorating them with sprinkles just before serving. This way, you’ll enjoy freshly dipped cake pops that are just as delightful, making your holiday celebrations a breeze!
4th of July Cake Pops Recipe FAQs
What type of cake mix should I use for my cake pops?
You can use any cake mix you enjoy! A classic vanilla is perfect for a festive touch, but feel free to experiment with chocolate or red velvet for a unique flavor twist. The key is to ensure the mix complements your choice of frosting.
How do I store my 4th of July cake pops?
Store your cake pops in an airtight container; they can sit at room temperature for up to 3 days or in the refrigerator for up to 1 week. If you’re making them in advance, refrigerate them for longer freshness. Just make sure to let them come to room temperature before serving for the best taste!
Can I freeze cake pops, and if so, how?
Absolutely! To freeze your cake pops, first place them individually on a baking sheet lined with parchment paper and freeze them for about 1-2 hours until solid. Then, transfer them to a freezer-safe container. They can be stored in the freezer for up to 3 months. When ready to enjoy, thaw them overnight in the fridge before serving.
What should I do if my cake balls are falling apart?
If your cake balls feel too crumbly, it might be due to insufficient frosting. Try adding more cream cheese frosting gradually until your mixture achieves a dough-like consistency that holds together well when pinched. Be sure to chill them adequately before dipping to maintain their shape!
Are these cake pops safe for children with allergies?
Check the labels of the cake mix, frosting, and chocolate wafers you are using, as they may contain allergens such as dairy, nuts, or gluten. Consider using gluten-free cake mix or vegan frosting options if needed. Always ensure you follow safety guidelines to avoid cross-contamination.
How can I make my 4th of July cake pops more festive?
Get creative with your decorations! Use colored candy melts instead of white chocolate for a fun twist and a range of colored sprinkles in red, white, and blue. You can also drizzle contrasting chocolate over the finished pops for a visually appealing touch that enhances their festive charm.

Festive 4th of July Cake Pops for an Unforgettable Celebration
Ingredients
Equipment
Method
- Preheat your oven to 350°F (175°C) and prepare the cake mix as per the package instructions. Pour the batter into a greased 9x13 inch cake pan and bake for 25-30 minutes until a toothpick comes out clean. Cool the cake for about 30-40 minutes.
- Crumble the cooled cake into fine crumbs in a large mixing bowl, ensuring no large lumps remain for the perfect texture.
- Add cream cheese frosting to the crumbled cake mixture, mixing thoroughly until it achieves a dough-like consistency. Add more frosting if needed.
- Scoop tablespoon-sized portions of the mixture and roll them into balls, placing each onto a lined baking sheet. Aim for about 20-25 balls.
- Freeze the cake balls for about 30 minutes until solid to maintain their shape when dipped in chocolate.
- Melt the white chocolate wafers in a microwave-safe bowl in 30-second intervals, stirring until smooth. Optionally stir in coconut oil for gloss.
- Insert lollipop sticks halfway into the chilled cake balls, working quickly to avoid softening.
- Dip each cake pop into the melted chocolate, ensuring even coverage, then sprinkle with festive sprinkles while the chocolate is still wet.
- Insert the finished cake pops upright into a cup lined with cling wrap or floral foam and let them set at room temperature for about 30 minutes.
- Arrange the set cake pops on a festive platter and enjoy!
Leave a Reply