
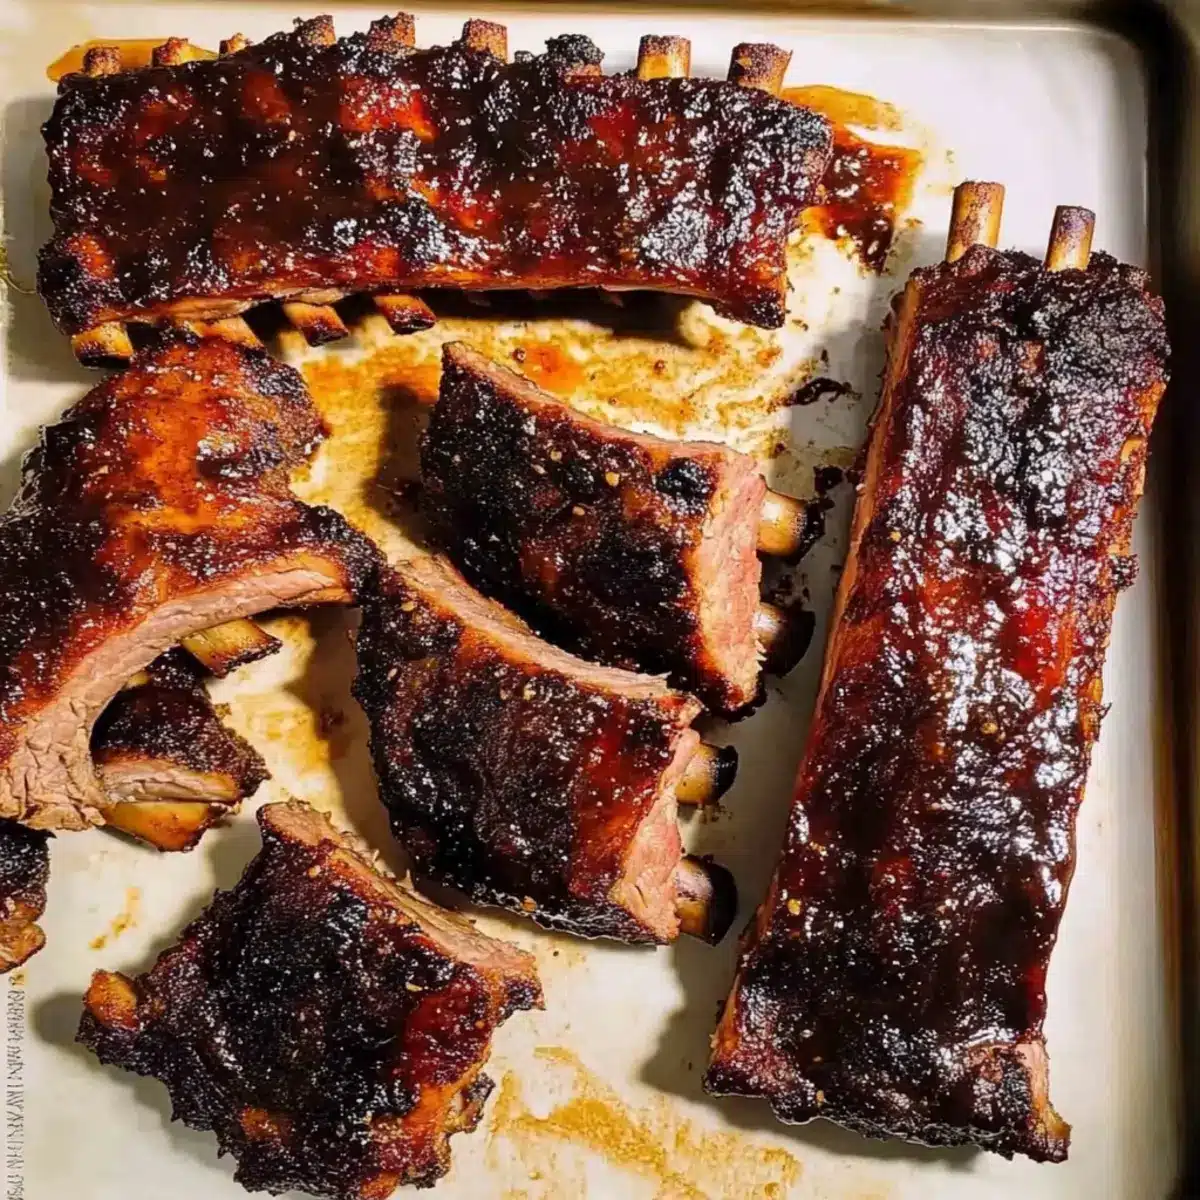
As I glanced over at the simmering pot of BBQ sauce, a wave of nostalgia washed over me. Those summer afternoons spent grilling ribs with friends seemed to come flooding back. But today, I’m inviting you to skip the grill and dive into the delectable world of oven-baked Fall-Off-the-Bone Dry Rub Ribs. These succulent ribs are everything you crave — tender, juicy, and infused with a robust homemade dry rub that you’ll want to use on everything. Perfect for gatherings or a cozy family dinner, this recipe transforms the boring takeout routine into a mouthwatering feast that anyone can achieve in the comfort of their own kitchen. Plus, they’re an absolute crowd-pleaser and can be prepped in no time, letting you focus on what really matters: good company and great conversation. Are you ready to impress your taste buds and your guests? Let’s dig in and unleash a rib experience you won’t forget!
Why are these ribs so irresistible?
Unforgettable Flavor: The unique blend of spices in this dry rub creates a mouthwatering taste that brings your BBQ game to the next level.
Perfect Tenderness: Achieving fall-off-the-bone texture is effortless with this oven-baking method, ensuring every bite is juicy and satisfying.
No Grill Required: Enjoy all the benefits of barbecue without needing an outdoor grill — perfect for year-round BBQ lovers!
Quick Prep Time: With just a few easy steps, you can whip up these delicious ribs in no time, allowing you to spend more moments enjoying with your family or friends.
Crowd-Pleasing Dish: These ribs are sure to impress anyone at your table, making them the star of your next gathering or family dinner. Serve them with your favorite sides or alongside extra BBQ sauce for endless enjoyment!
Fall-Off-The-Bone Dry Rub Ribs Ingredients
For the Ribs
• Baby Back Ribs – The star of the dish, these ribs provide the main protein; remember to remove the membrane for ultimate tenderness.
For the Rub
• Yellow Mustard – Acts as a binder for the dry rub and helps tenderize the meat; Dijon mustard works as a great substitute.
• Dark Brown Sugar – Adds irresistible sweetness and caramelization; make sure it’s not clumpy for even distribution.
• Smoked Paprika – Infuses a deep smoky flavor; if you’re out, regular paprika will do just fine.
• Chili Powder – Elevates the flavor profile with a spicy kick; no direct substitutes recommended.
• Granulated Garlic – Offers a robust garlic flavor; you can swap it with garlic powder, using half the amount.
• Granulated Onion – Delivers a sweet onion taste; crushed dried onion can be used if needed.
• Ground Black Pepper – Introduces a mild heat and depth of flavor.
• White Pepper – Provides a different flavor profile; this ingredient can be omitted if you prefer.
• Cayenne Pepper – Adds an extra kick; leave it out for a milder flavor.
• Smoked Sea Salt – Enhances the smoky attributes of the ribs; regular kosher salt can be substituted.
• Kosher Salt – A necessary seasoning for balancing the rub’s flavors.
These Fall-Off-the-Bone Dry Rub Ribs promise to be a hit, delivering both taste and tenderness that’s hard to beat!
Step‑by‑Step Instructions for Fall-Off-the-Bone Dry Rub Ribs
Step 1: Prep Ribs
Begin by removing the membrane from the back of each rack of baby back ribs. This essential step ensures maximum tenderness. Using a paper towel, grip the membrane and gently pull it away from the meat. Set the ribs aside, and take a moment to admire their beautiful curves as you prepare for the next steps.
Step 2: Apply Mustard
Brush a thin layer of yellow mustard over each rack of ribs, ensuring even coverage. The mustard acts as a glue, helping the dry rub stick to the meat while adding an extra layer of flavor. This tacky base will create a delightful crust as the ribs bake. Set the coated ribs aside and prepare your dry rub mixture.
Step 3: Prepare Dry Rub
In a mixing bowl, combine your dry ingredients: dark brown sugar, smoked paprika, chili powder, granulated garlic, granulated onion, ground black pepper, white pepper, cayenne pepper, smoked sea salt, and kosher salt. Stir well to ensure an even blend, then apply the rub generously to both sides of each rib rack, massaging it into the meat for maximum flavor absorption.
Step 4: Wrap Ribs
Grab your aluminum foil and lay out two large sheets. Place each coated rack of ribs on the foil, and wrap them tightly, ensuring there are no leaks where juices can escape during cooking. This wrapping creates a steam chamber that enhances tenderness while baking. Prepped and tucked away, your ribs are now ready for the oven.
Step 5: Bake
Preheat your oven to 275°F (135°C). Place the wrapped ribs on a baking sheet to catch any drips and transfer them into the oven. Bake for 2.5 hours, allowing the low and slow heat to break down the connective tissues, resulting in those succulent fall-off-the-bone dry rub ribs. The aroma wafting from your kitchen will be utterly irresistible!
Step 6: Check Temperature
After 2.5 hours, it’s time to check the ribs. Carefully unwrap one rack and insert a meat thermometer into the thickest part of the meat; it should read between 190°F and 200°F (88°C to 93°C) for that perfect tenderness. If they haven’t reached this temperature, rewrap and return them to the oven for an additional 15-30 minutes, checking periodically.
Step 7: Grill or Broil
For a deliciously charred finish on your fall-off-the-bone dry rub ribs, preheat your grill to medium heat, or turn on the broiler in your oven. Once ready, carefully remove the ribs from the foil and brush with your favorite BBQ sauce. Grill or broil the ribs for 5-10 minutes, turning occasionally until the sauce caramelizes and forms a lovely crispy layer.
Expert Tips for Fall-Off-the-Bone Dry Rub Ribs
-
Membrane Removal: Always remove the membrane from the ribs for the best texture and tenderness; it can toughen the meat if left on.
-
Foil Wrapping: Wrap the ribs tightly in aluminum foil to retain moisture during baking — leaks can dry out your dish.
-
Temperature Check: Use a meat thermometer to ensure the internal temperature reaches 190°F-200°F for the ideal fall-off-the-bone texture; this prevents overcooking.
-
Topping Finish: For that perfect char, brush on BBQ sauce just before grilling or broiling, ensuring the sauce caramelizes without burning.
-
Resting Period: Let your ribs rest for 10-15 minutes after cooking to allow juices to redistribute, enhancing flavor and tenderness.
What to Serve with Fall-Off-The-Bone Dry Rub Ribs
Take your meal to the next level with delightful accompaniments that perfectly balance the savory flavors of these tender ribs.
-
Creamy Coleslaw: A crunchy, refreshing side that contrasts the rich, smoky flavor of the ribs, adding a delightful tang to every bite.
-
Sweet Cornbread: Its soft texture and slight sweetness pair beautifully with the savory ribs, making each forkful a comforting combination.
-
Garlic Mashed Potatoes: Creamy and buttery, their richness complements the bold flavors of the dry rub while providing a hearty feel to the meal.
-
Grilled Vegetables: Add a splash of color and nutrition! Their smoky, charred flavors harmonize wonderfully with the BBQ essence of the ribs.
-
BBQ Baked Beans: Earthy and slightly sweet, these beans are a classic BBQ side that enhances the overall meal while soaking up the rib juices.
-
Thick BBQ Sauce: Always a crowd-pleaser, serve extra BBQ sauce on the side for dipping or drizzling over the ribs for those who like it saucy!
Now, gather your favorite sides and let the delicious ribs take center stage for a truly memorable meal.
Fall-Off-the-Bone Dry Rub Ribs Customization
Feel free to unleash your creativity and personalize these ribs to match your family’s tastes and dietary needs!
-
Rib Type: Substitute baby back ribs with St. Louis ribs for a meatier option. St. Louis ribs have a slightly more robust flavor and can handle being cooked longer without drying out.
-
Mustard Swap: Use Dijon mustard instead of yellow mustard for a tangier flavor. Alternatively, for a no-mustard option, brush with a bit of olive oil to aid in adhering the rub.
-
Spice It Up: Add a pinch of smoked cayenne pepper for extra heat. You can also experiment with different spices, like cumin or coriander, to create a unique flavor profile that excites your palate.
-
Sweetness Level: Adjust the amount of dark brown sugar based on your sweetness preference. For a deeper caramelization, add a bit more sugar, or try brown coconut sugar for a healthier alternative.
-
Herb Infusion: Blend in dried herbs like thyme or oregano to the dry rub for an earthy touch. These herbs offer a lovely aromatic quality while complementing the smoky spices.
-
Baking Method: Try using a slow cooker for an even more hands-off approach. Just season the ribs, place them in the slow cooker, and let them cook on low for 8 hours for a melt-in-your-mouth experience.
-
BBQ Sauce Variations: Top with your favorite BBQ sauce or try a tangy apple cider vinegar-based sauce for a zesty twist. This works beautifully for those who enjoy a bit of zing with their ribs.
-
Reheat Innovation: If you have leftovers, try reheating them in a pan with a splash of liquid (like beer or broth) covered with a lid to steam and rehydrate the ribs, keeping them tender and flavorful.
I hope these ideas inspire you to make this recipe even more special. Enjoy the process and let your culinary creativity shine!
Make Ahead Options
These Fall-Off-the-Bone Dry Rub Ribs are a fantastic option for meal prep, saving you time on busy weeknights! You can prepare the dry rub and apply it to the ribs up to 24 hours ahead; just wrap them tightly in foil and refrigerate to maintain flavor and moisture. If you’re looking to take it a step further, you can wrap the seasoned ribs and freeze them for up to 3 months. When ready to cook, simply thaw them overnight in the fridge and proceed with baking as instructed. This thoughtful prep ensures that your ribs are just as delicious, so you can spend more time enjoying those precious moments with family and friends!
How to Store and Freeze Fall-Off-the-Bone Dry Rub Ribs
Fridge: Store leftover ribs in an airtight container for up to 3 days. Ensure they’re properly cooled before sealing to maintain freshness and flavor.
Freezer: For longer storage, freeze ribs in individual portions wrapped tightly in plastic wrap and aluminum foil. They can last up to 3 months without losing quality.
Reheating: To reheat, thaw the ribs in the fridge overnight and then warm them in a 300°F (150°C) oven for about 20-30 minutes until heated through. Brush with BBQ sauce before serving for added moisture and flavor.
Make-Ahead Tips: These ribs can be prepared in advance and frozen, saving you time when you’re ready for a delicious meal!
Fall-Off-The-Bone Dry Rub Ribs Recipe FAQs
What type of baby back ribs should I use for the recipe?
Absolutely! Look for ribs that have a good amount of meat and a nice layer of fat, which helps keep them juicy as they bake. The ideal ribs should have a slight sheen and not be overly dry or discolored.
How should I store leftover Fall-Off-the-Bone Dry Rub Ribs?
After enjoying your meal, store leftover ribs in an airtight container in the fridge for up to 3 days. Make sure they’re properly cooled to lock in freshness.
Can I freeze the ribs, and what’s the best method?
Yes, you can freeze these delicious ribs! For best quality, wrap them tightly in plastic wrap, followed by aluminum foil, to prevent freezer burn. These ribs will last up to 3 months in the freezer. When you’re ready to enjoy them, thaw in the fridge overnight before reheating.
What should I do if my ribs are tough after baking?
Very often, toughness comes from not cooking the ribs long enough or not removing the membrane. If your ribs are tough, rewrap and return them to the oven at 275°F (135°C) for an additional 30 minutes or until they reach that magical temperature of 190°F-200°F. Don’t rush; patience pays off!
Are there any dietary considerations I should be aware of?
If you’re cooking for someone with food allergies, be mindful of the spices used in the dry rub. Most ingredients, like cayenne pepper and smoked paprika, are generally safe, but always double-check for allergies, especially with spice blends. Additionally, for pets, avoid giving them ribs due to the risk of small bones.
Can I prepare the ribs ahead of time?
The more the merrier, I say! You can prep the ribs by coating them with the dry rub a day in advance and storing them wrapped in the fridge. This not only saves time but also allows the flavors to deepen, resulting in even tastier Fall-Off-the-Bone Dry Rub Ribs!
Savory Fall-Off-the-Bone Dry Rub Ribs That Will Impress
Ingredients
Equipment
Method
- Begin by removing the membrane from the back of each rack of baby back ribs. Set the ribs aside.
- Brush a thin layer of yellow mustard over each rack of ribs.
- In a mixing bowl, combine your dry ingredients: dark brown sugar, smoked paprika, chili powder, granulated garlic, granulated onion, ground black pepper, white pepper, cayenne pepper, smoked sea salt, and kosher salt. Apply the rub generously to both sides of each rib rack.
- Wrap each coated rack of ribs tightly in aluminum foil to ensure there are no leaks.
- Preheat your oven to 275°F (135°C). Place the wrapped ribs on a baking sheet and bake for 2.5 hours.
- Check the ribs' internal temperature; it should read between 190°F and 200°F.
- For a charred finish, preheat your grill or broiler and brush the ribs with BBQ sauce. Grill or broil for 5-10 minutes until the sauce caramelizes.
Leave a Reply