
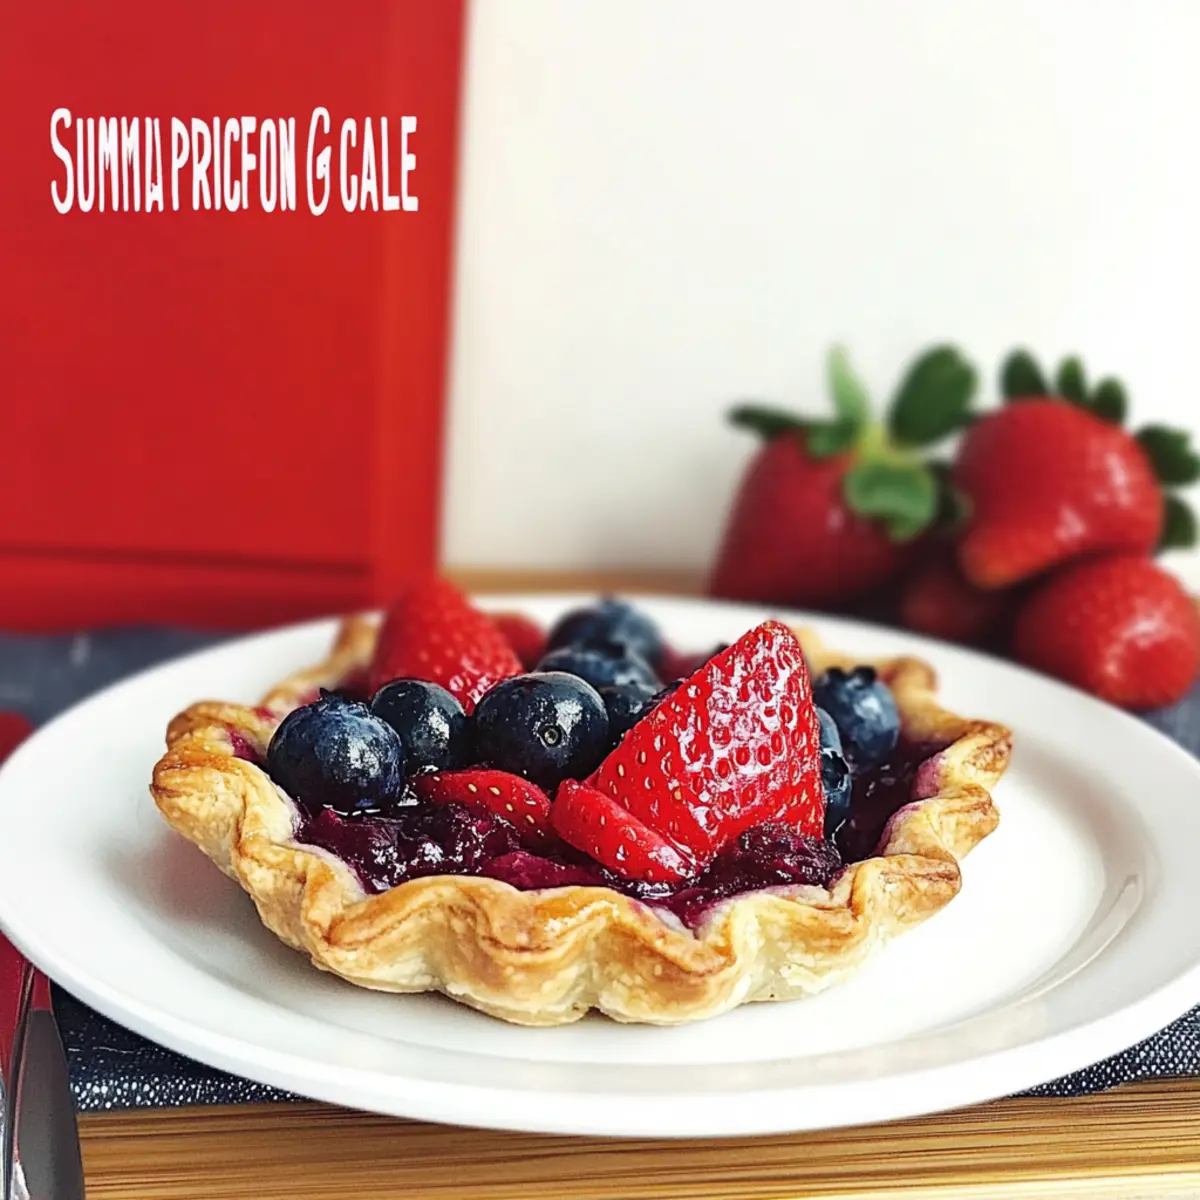
As the sun shines brightly and the flowers bloom, there’s a certain magic that calls for fresh desserts to celebrate summer’s bounty. Enter these delightful Mini Summer Berry Galettes—an easy dessert that brings together juicy strawberries and blueberries nestled in a flaky pie crust. The beauty of these galettes lies in their simplicity; they are not only a visual treat but also family-friendly, making them the perfect addition to any gathering. Plus, with a little help from store-bought dough, you’ll spend less time in the kitchen and more enjoying the sweet moments with loved ones. Curious how to whip these up for your next summer soirée? Let’s dive in!

Why not try these delightful galettes?
Simplicity is Key: These Mini Summer Berry Galettes require minimal steps, making them perfect for both novice bakers and seasoned chefs alike.
Fresh Ingredients Shine: The vibrant strawberries and blueberries bring a burst of summer flavor that can be enhanced with a sprinkle of cinnamon or lemon zest.
Versatile and Customizable: Feel free to mix in your favorite fruits or add herbs for a unique twist, like basil or mint.
Quick Prep Time: Using store-bought pie crust streamlines the process, allowing you to enjoy these delicious treats in no time.
Crowd-Pleasing Delight: Perfect for summer gatherings, these galettes are not just tasty but a visual feast, sure to impress guests! Pair them with a dollop of whipped cream or even a slice of Lemon Blueberry Yogurt for an irresistible dessert spread.
Mini Summer Berry Galettes Ingredients
For the Berry Filling
- Strawberries – Fresh cut fruit for sweetness. Substitution Note: You may use raspberries or blackberries.
- Blueberries – Juicy berries that add depth. Substitution Note: Any similar berry can replace blueberries.
- Sugar – Provides sweetness and enhances fruit flavor. Note: Adjust based on fruit tartness.
- Cornstarch – Thickens the berry filling. Note: Can use all-purpose flour as a substitute.
- Cinnamon – Adds warm spice to the filling. Note: Optional, adjust to taste.
- Lemon Zest – Brightens flavors and provides acidity. Note: Use lime zest for a different profile.
For the Pie Crust
- Pie Crust – Forms the base; store-bought for ease. Note: Homemade crust can enhance flavor.
- Egg Wash (optional) – Creates a golden glaze. Note: Milk or water can be used instead.
For the Finishing Touch
- Sugar for Sprinkling – Optional sweet topping for crust finish.
Step‑by‑Step Instructions for Mini Summer Berry Galettes
Step 1: Preheat Your Oven
Begin by preheating your oven to 400°F (200°C). While it warms up, line a baking sheet with parchment paper, ensuring it is ready for your Mini Summer Berry Galettes. This step provides a non-stick surface, so you can easily remove your delicious galettes once they’re baked to golden perfection.
Step 2: Prepare the Berry Filling
In a mixing bowl, combine chopped strawberries and blueberries with sugar, cornstarch, cinnamon, and lemon zest. Gently toss the ingredients until all the berries are evenly coated, about 2 to 3 minutes. This mixture will create a juicy filling that bursts with flavor, so take a moment to appreciate the vibrant colors!
Step 3: Roll Out the Pie Crust
Next, roll out your pie crust on a lightly floured surface until it’s about 1/8 inch thick. Using the rim of an upside-down bowl, cut out circles, ideally about 5-6 inches in diameter. This will give you the perfect shape for your Mini Summer Berry Galettes, ensuring easy handling and a delightful rustic look when baked.
Step 4: Set the Crust on the Baking Sheet
Place each pie crust round onto the prepared baking sheet with enough space in between. Ensure that the crusts lay flat and aren’t touching, creating room for them to puff up beautifully in the oven. The sides will form a lovely edge that cradles the berry filling when you assemble the galettes.
Step 5: Add the Berry Filling
Spoon about ¼ cup of the berry filling into the center of each crust circle, leaving a 1-inch border around the edges. The mixture should be heaped but not overflowing. This allows the filling to bubble slightly as it cooks, creating that delightful burst of juice that everyone loves in a galette.
Step 6: Fold the Edges Over
Gently fold the edges of the crust over the fruit filling, overlapping the dough as you go to create a rustic appearance. Pinch the seams to secure them, ensuring the galette doesn’t fall apart while baking. This also enhances the visual appeal, showing off those beautifully juicy berries.
Step 7: Brush and Sprinkle Topping
If desired, brush the tops of the galettes with an egg wash for a golden finish, or simply use milk or water. Finish by sprinkling a light dusting of sugar over the crusts to add a sweet crunch. This step not only enhances the flavor but also gives your Mini Summer Berry Galettes a lovely glazed sheen.
Step 8: Bake to Golden Perfection
Bake your galettes in the preheated oven for 20-25 minutes or until the crust is golden brown and the berry filling is bubbly. Keep an eye on them, looking for that perfect golden color on the edges. The aroma wafting through your kitchen will surely build excitement for these sweet treats!
Step 9: Cool and Serve
Once baked, remove the Mini Summer Berry Galettes from the oven and let them cool on the baking sheet for about 10 minutes. This allows the juices to settle. Serve warm or at room temperature, pairing them with whipped cream or a scoop of vanilla ice cream for the ultimate summer dessert experience.

Make Ahead Options
These Mini Summer Berry Galettes are a fantastic treat to prepare ahead of time, perfect for streamlining your busy weeknights or summer gatherings! You can assemble the galettes and refrigerate them for up to 24 hours before baking, keeping the crust nice and flaky. Simply cover them with plastic wrap to maintain quality and prevent drying. Alternatively, feel free to prepare the filling and store it in an airtight container in the fridge for up to 3 days. When you’re ready to serve, just roll out the crust, fill, fold, and bake as directed for delightful, homemade desserts that taste just as fresh and delicious!
Expert Tips for Mini Summer Berry Galettes
-
Choose Ripe Fruit: Use fresh, ripe strawberries and blueberries for a naturally sweet filling. Overly tart fruit may need extra sugar.
-
Avoid Excess Liquid: Ensure your berry mixture isn’t too watery; excess juices can make the crust soggy. Adjust sugar and cornstarch as needed.
-
Chill Your Dough: Keep the pie crust chilled before rolling to maintain its flakiness. This prevents spreading and helps achieve a crispy texture.
-
Customize Flavor: Experiment with different flavor profiles by adding herbs like basil or mint to the filling for a fresh twist on your mini summer berry galettes.
-
Proper Pinching: Pinch the edges of the crust firmly to prevent them from unfolding during baking, keeping those scrumptious berries tucked in!
-
Serve Warm: For the best experience, serve the galettes warm and topped with ice cream or whipped cream to enhance their deliciousness.
Storage Tips for Mini Summer Berry Galettes
- Room Temperature: Keep any uneaten galettes at room temperature for up to 2 days in an airtight container to maintain their delightful texture.
- Fridge: If you want to extend their freshness, refrigerate for up to a week. Just know that the crust may soften slightly.
- Freezer: For longer storage, freeze unbaked galettes for up to 3 months. Bake directly from the freezer, adding a few extra minutes to the cooking time.
- Reheating: To enjoy leftover galettes, reheat them in the oven at 350°F (175°C) for about 10 minutes until warmed through and the crust is crispy again.
Mini Summer Berry Galettes Variations
Feel free to explore these delightful twists on our Mini Summer Berry Galettes, elevating your dessert experience with exciting flavors and textures!
-
Fruit Swap: Replace the strawberries and blueberries with peaches or cherries for a refreshing take. The sweetness of peaches will create a lovely contrast with the flaky crust.
-
Herb Infusion: Incorporate fresh basil or mint leaves into the berry filling for a unique, aromatic twist. This can transform your galette into an unexpected delight that will surprise your guests.
-
Nuts and Crunch: Add some crushed almonds or walnuts to the filling for added texture. The crunch complements the softness of the berries beautifully, creating a harmonious mouthfeel.
-
Spice it Up: Enhance the filling with a pinch of nutmeg or cardamom for a warm, spiced profile. These flavors will evoke cozy feelings reminiscent of comforting baked goods.
-
Almond Cream Base: Spread a layer of almond cream on the pie crust before adding the berries. This adds richness, offering a decadent surprise with each bite similar to a traditional pastry.
-
Gluten-Free Option: Use a gluten-free pie crust substitute to make these galettes suitable for gluten-sensitive guests. Explore options like almond or oat crusts for a delicious alternative.
-
Sweet and Savory: Try adding a touch of crumbled goat cheese or feta alongside the berries for a sweet-savory combination that takes your galette to a whole new level.
-
Citrus Burst: Mix in some orange or lime zest with your berry filling for an extra zing. The citrus flavor elevates the dish, making it a perfect treat for summer gatherings.
Each of these variations offers a personal touch, inviting you to customize this easy dessert to suit your preferences. Don’t forget to check out our delightful recipes like Mini Pumpkin Pies or Christmas Cranberry Spinach for further baking inspiration!
What to Serve with Mini Summer Berry Galettes
As you savor these delightful summer desserts, think of how to elevate your meal experience with perfect pairings that resonate with flavor and texture.
-
Whipped Cream: A dollop of light, fluffy whipped cream adds a creamy contrast to the fruity filling, enhancing each bite.
-
Vanilla Ice Cream: The classic scoop of creamy vanilla brings richness, cooling the sweet berry flavors and creating a lovely temperature contrast.
-
Lemon Sorbet: For a refreshing twist, lemon sorbet will cleanse your palate and complement the sweetness of the galettes beautifully.
-
Fresh Mint Leaves: Adding a sprinkle of fresh mint elevates the presentation while introducing a refreshing herbal note that pairs wonderfully with berries.
-
Sparkling Water: Serve with bubbly sparkling water infused with citrus slices for a light, palate-cleansing beverage that enhances the dessert experience.
-
Berry Compote: A drizzle of homemade berry compote takes the berry flavor to the next level, enriching your galettes with additional depth.
-
Salad with Balsamic Vinaigrette: Offer a light green salad with a tangy vinaigrette for a refreshing balance against the sweetness of the galettes.
-
Chocolate Drizzle: A delicate drizzle of dark chocolate adds a rich, decadent layer that harmonizes beautifully with the tartness of the berries.
Mini Summer Berry Galettes Recipe FAQs
What type of berries should I use?
Absolutely! Fresh, ripe strawberries and blueberries are ideal for a delicious filling. You can easily mix in raspberries or blackberries for a bit of variety. Just remember that while different berries may slightly alter the sweetness, they will bring their own unique flavor to the galettes.
How should I store leftover galettes?
For sure! You can store any uneaten Mini Summer Berry Galettes in an airtight container at room temperature for up to 2 days. If you want them to stay fresh longer, refrigerate them for up to a week. Just a heads up: the crust may soften slightly in the fridge, but they’ll still be lovely when served!
Can I freeze these galettes before baking?
Very much! It’s a fantastic idea to freeze unbaked Mini Summer Berry Galettes for up to 3 months. To do this, assemble them as directed but don’t bake. Instead, place them on a baking sheet lined with parchment and freeze until solid. Once frozen, transfer them to a freezer-safe bag. When you’re ready to bake, simply pop them straight from the freezer into a preheated oven—add a few extra minutes to the baking time.
What if my galette crust is soggy?
Oh, no worries! If you find the crust is soggy, it could be due to excess moisture in the fruit filling. To prevent this, make sure your berry mixture isn’t too watery by adjusting the sugar and cornstarch amounts as needed. Bake your galettes until the filling is bubbly and the crust is beautifully golden. Plus, chilling the crust before you roll it out can help maintain its flakiness!
Are Mini Summer Berry Galettes suitable for various dietary needs?
Indeed! These galettes can cater to many dietary considerations. For a gluten-free option, simply utilize a gluten-free pie crust. If you’re feeding someone with egg allergies, you can skip the egg wash; instead, brush with milk or water for a lovely finish. Always double-check for allergies based on the specific ingredients used, especially with the berries and any added sugars.
How long can I keep unbaked galettes in the freezer?
Absolutely, unbaked Mini Summer Berry Galettes can be stored in the freezer for up to 3 months! Just assemble them, freeze on a baking sheet until solid, and then transfer to a freezer-safe container. When it’s time to bake, they can go directly into a hot oven with just a few extra minutes of cook time. This makes it so handy for impromptu dessert gatherings!

Mini Summer Berry Galettes Perfect for Your Sunny Gatherings
Ingredients
Equipment
Method
- Preheat your oven to 400°F (200°C) and line a baking sheet with parchment paper.
- In a mixing bowl, combine chopped strawberries, blueberries, sugar, cornstarch, cinnamon, and lemon zest. Toss until evenly coated.
- Roll out the pie crust on a floured surface until 1/8 inch thick. Cut out circles about 5-6 inches in diameter.
- Place each pie crust round onto the baking sheet, ensuring enough space in between.
- Spoon about ¼ cup of the berry filling into the center of each crust circle, leaving a 1-inch border.
- Gently fold the edges of the crust over the filling, overlapping the dough to create a rustic appearance.
- Brush the tops with an egg wash or milk/water, then sprinkle sugar over the crusts.
- Bake for 20-25 minutes or until the crust is golden brown and the filling is bubbly.
- Cool on the baking sheet for about 10 minutes before serving.
Leave a Reply