
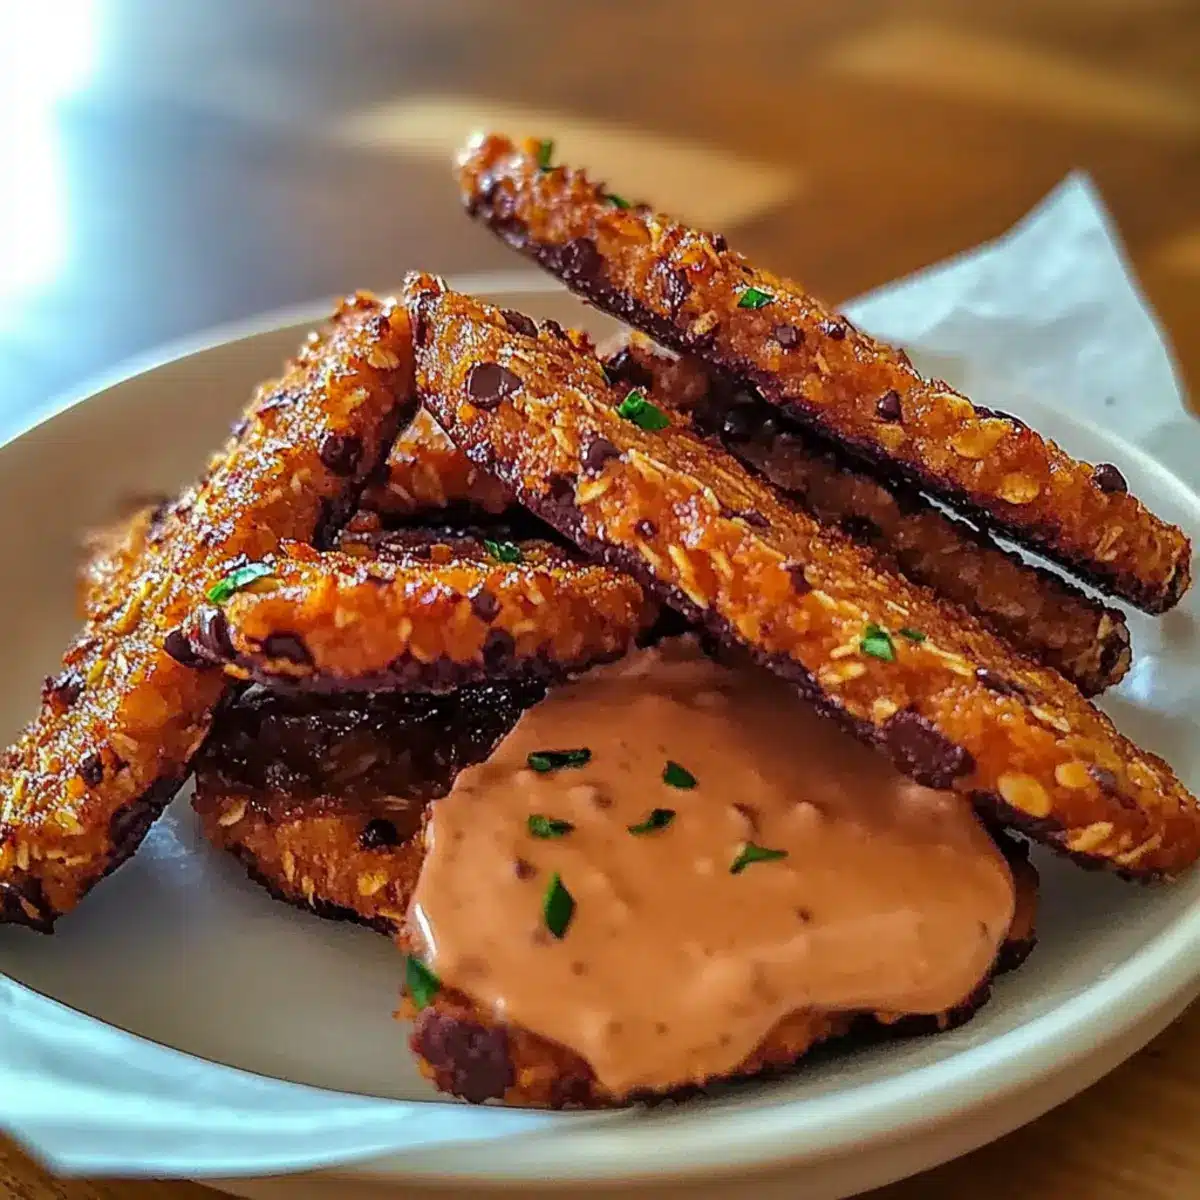
As I took a bite of my latest creation, the crunch of these delightful no-bake cookies ignited a spark of joy. The 4-Ingredient No-Bake Crispy Chocolate Oat Cookies are not just easy to whip up, but they also cater to both my chocolate cravings and my desire for healthier snacks. These gluten-free treats are perfect for those who want a quick, guilt-free indulgence without sacrificing taste. The combination of crispy oats and rich chocolate makes them a satisfying choice for any time of day—ideal for a mid-afternoon pick-me-up or a sweet treat after dinner. Curious about how you can make these delicious little bites yourself? Let’s dive into the recipe!
Why Are These Cookies So Irresistible?
Simplicity at Its Finest: These 4-ingredient cookies are incredibly straightforward, perfect for both novice bakers and seasoned chefs.
Quick Preparation: No baking required! In just 30 minutes, you can have delicious treats ready to enjoy.
Guilt-Free Indulgence: Made with wholesome ingredients, they’re a healthier option for satisfying your sweet tooth without the guilt.
Versatile Treats: Feel free to swap in your favorite nut butter or add in coconut flakes for a unique twist.
Crowd-Pleasing Snack: Whether it’s an afternoon snack or a party treat, everyone will love these crunchy chocolate bites—perfect alongside a cup of tea or with a side of Cinnamon Roll Cookies for extra indulgence!
Crispy Chocolate Oat Cookie Ingredients
For the Cookie Base
• Oats – Provide structure and a satisfying crunch; opt for gluten-free oats if you need to accommodate dietary restrictions.
• Nut Butter (e.g., peanut or almond) – Adds creaminess and binds ingredients together; sunflower seed butter is perfect for those avoiding nuts.
• Honey or Maple Syrup – A natural sweetener that enhances flavor and moisture; try maple syrup for a vegan-friendly option.
• Dark Chocolate Chips – Delivers rich chocolate flavor and a delightful texture contrast; use dairy-free chocolate for a non-dairy version.
Optional Mix-Ins
• Coconut Flakes – Substitute for an extra layer of texture and sweetness.
• Dried Fruits (e.g., cranberries or raisins) – Add for a chewy sweetness that complements the chocolate.
• Flavor Extracts (e.g., vanilla or almond) – Experiment for a unique twist and added depth of flavor.
If you’re ready to create something delectable, gather these ingredients, and let’s get to baking your Crispy Chocolate Oat Cookies!
Step‑by‑Step Instructions for 4-Ingredient No-Bake Crispy Chocolate Oat Cookies
Step 1: Combine Ingredients
In a large mixing bowl, add 2 cups of oats, 1 cup of nut butter, 1/3 cup of honey or maple syrup, and 1 cup of dark chocolate chips. Using a sturdy spatula or a wooden spoon, mix the ingredients until they are uniformly blended, creating a sticky and cohesive dough. Ensure no dry oats remain visible, as this will help your cookies hold together when formed.
Step 2: Form Cookies
With clean hands or a cookie scoop, take about 2 tablespoons of the mixture and roll it into a ball. Gently flatten each ball into a disc shape directly on a parchment-lined baking tray. Aim for around 1/2 inch thickness, and make sure each cookie is similar in size for even setting. The cookies should look inviting and ready to chill once formed.
Step 3: Chill
Transfer the tray of formed cookies to the refrigerator and allow them to chill for at least 30 minutes. This step is essential, as it helps the cookies firm up and maintain their shape. Keep an eye out during chilling; they should become noticeably firmer and a bit glossy due to the melting chocolate setting up with the nut butter.
Step 4: Serve or Store
After the chilling time is up, take the cookies out of the refrigerator. They should be firm to the touch but still chewy in the center. Enjoy them immediately, or store any leftovers in an airtight container in the refrigerator. These 4-Ingredient No-Bake Crispy Chocolate Oat Cookies will stay fresh for up to a week, perfect for a snack or a sweet treat whenever you desire!
Storage Tips for 4-Ingredient No-Bake Crispy Chocolate Oat Cookies
Room Temperature: Keep your cookies at room temperature for up to 2 days, but be wary of humidity which can affect their texture.
Fridge: Store the cookies in an airtight container in the fridge for up to 1 week; this helps maintain their crunchiness and prevents them from getting too soft.
Freezer: For longer storage, freeze the cookies in a single layer. Once solid, transfer to an airtight container or freezer bag, where they can last for up to 3 months.
Reheating: If you prefer to enjoy them a bit warm, let them sit at room temperature for 10 minutes, or slightly microwave for 5-10 seconds, keeping in mind that the crispy chocolate oat cookies are best eaten fresh!
Variations & Substitutions for Crispy Chocolate Oat Cookies
Feel free to explore these delightful options that can elevate your cookie experience to another level!
- Nut-Free: Use sunflower seed butter instead of nut butter for a safe alternative that’s perfectly creamy.
- Vegan-Friendly: Swap honey for maple syrup to make these cookies entirely plant-based and just as delicious.
- Coconut Delight: Add 1/2 cup of shredded coconut for a tropical twist that adds both flavor and texture.
- Fruity Boost: Mix in dried cranberries or raisins for a sweet burst that complements the rich chocolate beautifully.
- Flavor Enhancer: Add a splash of vanilla or almond extract to the mixture for an extra depth of flavor.
- Crunchy Goodness: Toss in some chopped nuts, like walnuts or pecans, to introduce a delightful crunch with every bite.
- Spicy Kick: Stir in a pinch of cinnamon or cayenne pepper for a surprising hint of heat that plays off the sweetness.
Feeling adventurous? By tweaking these recipes, you can also create a delicious side by pairing your cookies with a glass of milk or a cup of tea as a wonderful complement. Plus, if you’re looking for a crispy texture on the side, check out Sweet Potato Fries for an irresistible treat!
Expert Tips for Crispy Chocolate Oat Cookies
-
Consistency Matters: Ensure the mixture is sticky enough to hold together. If too dry, add more nut butter; if too wet, mix in extra oats.
-
Timing Is Key: Chill your cookies for at least 30 minutes to enhance their firmness. Longer chilling means better texture.
-
Mix Ingredients Thoroughly: Make sure the nut butter and sweetener are evenly mixed with the oats for a delightful treat. Uneven mixtures result in inconsistent textures.
-
Perfect Size: Form evenly sized cookies to ensure uniform chilling and texture. This helps each cookie achieve that perfect crunch and chewiness.
-
Savor Variation: Don’t hesitate to experiment! Substitute flavor extracts or mix in nuts, coconut, or dried fruits to create your own spin on these no-bake cookies.
Make Ahead Options
These 4-Ingredient No-Bake Crispy Chocolate Oat Cookies are perfect for busy home cooks looking to save time! You can prepare the cookie mixture and shape them into disks up to 24 hours in advance. Simply place the formed cookies on a parchment-lined tray and refrigerate. This step not only helps them firm up but also enhances their flavor as the ingredients meld together. When you’re ready to enjoy, take them out of the fridge and let them sit for a few minutes before serving. With these make-ahead options, you’ll have delightful treats ready for any snack craving—just as delicious as when freshly made!
What to Serve with 4-Ingredient No-Bake Crispy Chocolate Oat Cookies
Elevate your cookie experience with delightful pairings that will tantalize your taste buds and complete your meal.
- Rich Almond Milk: A creamy glass of almond milk enhances the chocolate flavors while providing a refreshing contrast to the chewy cookies.
- Fresh Berries: Juicy strawberries or raspberries add a burst of freshness and a hint of acidity, balancing out the richness of the cookies.
- Coconut Yogurt: This tropical, creamy treat complements the oats wonderfully, offering a delightful contrast in texture and flavor.
- Herbal Tea: A refreshing cup of chamomile or mint tea invites calm moments, perfectly rounding out your sweet snack break.
- Dried Fruit Medley: A mix of apricots, figs, and cranberries creates a chewy texture that echoes the cookie’s oat base, sweetening every bite.
- Dark Chocolate Drizzle: A drizzle of melted dark chocolate over the cookies amps up the indulgence factor, creating a fun presentation.
- Crunchy Nut Clusters: Serve alongside some peanut or almond clusters for an exciting mix of textures that play off the cookie’s crispiness.
- Vanilla Ice Cream: Elevate your dessert game with a scoop of vanilla ice cream that melts into the warm, chewy center for a decadent treat.
- Cinnamon-Spiced Coffee: A warm cup of coffee with a hint of cinnamon perfectly complements the chocolate and oat flavors, creating a cozy experience.

4-Ingredient No-Bake Crispy Chocolate Oat Cookies Recipe FAQs
What type of oats should I use for these cookies?
Absolutely! I recommend using rolled oats for their structure and crunch. If you need to accommodate dietary restrictions, go for gluten-free oats to ensure everyone can enjoy your delicious treats.
How should I store my cookies to keep them fresh?
For optimal freshness, store your cookies in an airtight container in the fridge for up to 1 week. This helps maintain their delightful crunch and prevents them from becoming too soft due to humidity.
Can I freeze these cookies for later?
Yes, you can! To freeze, place the cookies in a single layer on a baking tray, freeze until solid, then transfer to an airtight container or freezer bag. They’ll keep well for up to 3 months. Just remember to let them thaw a bit before enjoying!
What can I do if my cookie mixture is too dry?
Very! If you find your mixture isn’t holding together, simply add a bit more nut butter—about 1 tablespoon at a time—until it reaches a sticky consistency. Conversely, if it’s too wet, stir in a few more oats until it’s just right!
Are these cookies suitable for kids with nut allergies?
Yes! For a nut-free option, you can easily substitute the nut butter with sunflower seed butter. This makes your cookies safe for those with nut allergies while still providing the delicious flavor and texture.
How long should I chill the cookies, and can I chill them longer?
The cookies should chill for at least 30 minutes to set properly. However, if you have the time, chilling them longer will enhance their firmness and improve the texture. Just keep an eye on them as they should become noticeably firmer after chilling.
Crispy Baked Sweet Potato Fries You Can't Resist
Ingredients
Equipment
Method
- In a large mixing bowl, combine oats, nut butter, honey or maple syrup, and dark chocolate chips. Mix until uniformly blended.
- Take about 2 tablespoons of the mixture and roll it into a ball. Flatten each ball into a disc shape on a parchment-lined baking tray.
- Transfer the tray to the refrigerator and chill for at least 30 minutes.
- After chilling, enjoy immediately or store in an airtight container in the refrigerator.
Leave a Reply