
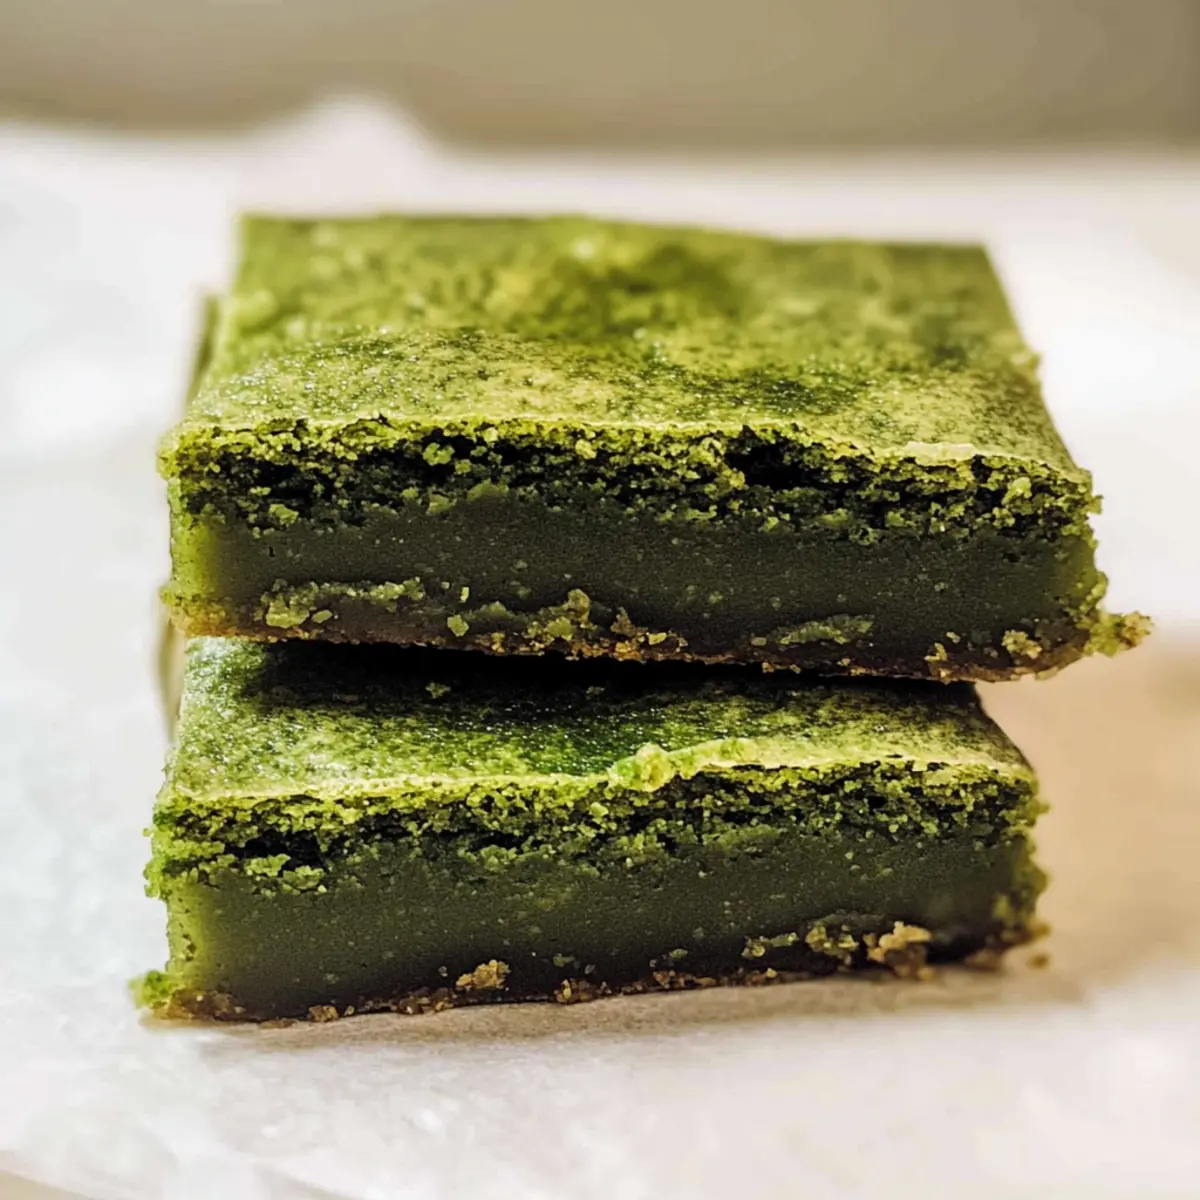
As I stood in my kitchen, savoring the rich aroma of matcha swirling through the air, I knew I was onto something special. These Easy Matcha Brownie Mochis, or Brochi, merge the traditional Japanese mochi with the deep, earthy essence of green tea, resulting in a dessert that’s both nostalgic and exciting. What I love most about this recipe is its simple preparation; you can whip up these delightful treats in under an hour, making them perfect for last-minute cravings or an afternoon snack. Plus, they’re gluten-free, so everyone can enjoy a chewy, subtly sweet experience with a satisfying crispy edge. Have you ever tasted a dessert that feels like a warm hug? Get ready, because these matcha brownies are about to become your new favorite indulgence!
Why Try Matcha Brownie Mochi?
Simplicity at its Finest: With only a handful of ingredients and straightforward steps, these Matcha Brownie Mochis are perfect for both novice bakers and seasoned chefs.
Unique Flavor Fusion: The earthy matcha melds beautifully with the chewy mochi texture, offering a delightful twist on traditional brownies.
Crowd-Pleasing Treat: Whether for a cozy family gathering or a lively afternoon tea, these mochi brownies are sure to impress guests.
Gluten-Free Goodness: Made with glutinous rice flour, this recipe ensures everyone can enjoy a chewy dessert without the gluten.
Versatile Variations: Feel free to play with flavors! Substitute matcha for cocoa powder or experiment with black sesame for a nutty flair.
Pair these creations with a Hojicha Latte to elevate your dessert experience!
Matcha Brownie Mochi Ingredients
For the Brownies
• Mochiko (glutinous rice flour) – Essential for that signature chewy texture of Matcha Brownie Mochi; avoid regular rice flour.
• Baking powder – This leavening agent helps create a light lift in the brownies.
• Sea salt – A little pinch enhances the overall flavor profile.
• Matcha powder – Provides that vibrant green hue and deep earthy taste; always opt for high-quality ceremonial grade for optimal flavor.
• Large egg – Binds everything together while adding moisture; can be swapped with a flax egg for a vegan option.
• Granulated sugar – Sweetens the batch; adjust to taste for your preferred sweetness level.
• Vegetable oil – Adds moisture to the mix; can be omitted if using full-fat coconut milk.
• Full-fat coconut milk (or whole milk) – Contributes to the moistness and richness; substitute with carton coconut milk but include a bit of oil for moisture retention.
Note: Gather these ingredients to create your very own Matcha Brownie Mochi for a lovely, chewy experience!
Step‑by‑Step Instructions for Matcha Brownie Mochi
Step 1: Preheat the Oven
Begin by preheating your oven to 350°F (177°C). While the oven warms up, take an 8″x8″ baking pan and line it with parchment paper, allowing some overhang for easy removal later. This sets the stage for your Matcha Brownie Mochi to bake evenly and come out perfectly without sticking.
Step 2: Combine Dry Ingredients
In a large mixing bowl, whisk together Mochiko (glutinous rice flour), baking powder, and sea salt. Sift in the matcha powder, which adds both color and flavor. Make sure all dry ingredients are well combined for a uniform mixture. This foundational step ensures you achieve the delightful chewy texture that defines Matcha Brownie Mochi.
Step 3: Mix Wet Ingredients
In a separate bowl, whisk together the large egg, granulated sugar, vegetable oil, and full-fat coconut milk until the mixture is smooth and well-blended. Combine them thoroughly to create a rich base that adds moisture to your brownies. This harmonious blend will be the perfect complement to your dry ingredients in the next step.
Step 4: Combine Wet and Dry Mixtures
Pour the wet mixture into the bowl of dry ingredients, stirring gently until just incorporated. Be careful not to overmix, as this can affect the texture of your Matcha Brownie Mochi. The batter should be thick yet smooth, reflecting the wonderful fusion of flavors you’re about to bake.
Step 5: Spread the Batter
Transfer the batter into your prepared baking pan, spreading it evenly with a spatula. This ensures each corner of your Matcha Brownie Mochi is cooked uniformly. Take a moment to admire the vibrant green color of the batter before placing it in the oven to bake.
Step 6: Bake the Mochi
Place the baking pan in the center of the preheated oven and bake for 35-40 minutes. You’ll know they’re done when a toothpick inserted in the center comes out clean or with a few moist crumbs. The edges should look slightly crisp, providing a beautiful contrast to the chewy interior of your Matcha Brownie Mochi.
Step 7: Cool and Slice
Once baked, remove the pan from the oven and allow it to cool for about 10-15 minutes. Use the parchment overhang to lift the brownies out of the pan. Let them cool completely on a wire rack before slicing them into squares. This cooling step ensures the perfect texture, as the Matcha Brownie Mochi will hold together beautifully when cut.
Make Ahead Options
These Easy Matcha Brownie Mochis are perfect for busy weeknights or gatherings, allowing you to prep in advance for a delicious dessert that’s just as delightful! You can mix the dry ingredients (Mochiko, baking powder, salt, and matcha powder) and store them in an airtight container for up to 3 days. The wet ingredients can also be whisked together and kept in the refrigerator for up to 24 hours; just be sure to bring them back to room temperature before combining. When you’re ready to bake, simply mix the wet and dry components, pour the batter into the prepared pan, and bake as directed. This way, you can enjoy a warm, chewy treat with minimal effort, bringing joy to your day!
Storage Tips for Matcha Brownie Mochi
-
Room Temperature: Store cut pieces in an airtight container at room temperature for up to 2 days to keep the chewy texture intact.
-
Avoid Refrigeration: Do not refrigerate the Matcha Brownie Mochi, as this can alter the texture and make it less enjoyable.
-
Freezer: Freezing is not recommended, as it may change the desired chewy consistency of the mochi brownies.
-
Reheating: If needed, gently warm individual pieces in the microwave for 5-10 seconds to restore some softness, but avoid overheating.
Expert Tips for Matcha Brownie Mochi
-
Quality Matcha Matters: Use high-quality ceremonial grade matcha for the best flavor and color; lower grades may lead to a bitter taste.
-
Don’t Overmix: When combining wet and dry ingredients, mix just until incorporated to maintain that signature chewy texture — overmixing can make them tough.
-
Check the Bake: Keep an eye on your brownies during the last few minutes of baking; they should have a slightly crisp edge but remain moist inside.
-
Cool Completely: Allow the Matcha Brownie Mochi to cool completely before slicing for cleaner squares and the right chewy consistency.
-
Avoid Refrigeration: Store at room temperature to keep the texture delightful; refrigerating can make them dry and less enjoyable.
What to Serve with Matcha Brownie Mochi?
Create a delightful experience by exploring the perfect pairings for your Matcha Brownie Mochi, enhancing every bite with flavor and warmth.
-
Hojicha Latte: This roasted green tea latte offers a nutty, caramel flavor that contrasts beautifully with the sweetness of the matcha, creating a warm and cozy experience.
-
Coconut Ice Cream: The creamy, cool texture of coconut ice cream complements the chewy mochi, adding a refreshing element to your dessert. It’s like a tropical dream combined with matcha bliss.
-
Fresh Berries: Raspberries or strawberries bring a burst of tartness that balances the sweetness of the brochi, creating a refreshing flavor contrast. Their bright colors also add a beautiful pop to your dessert plate.
-
Matcha Tea: Serve with a warm cup of traditional matcha for an authentic experience. The earthy drink intensifies the matcha flavor of the brownies, making for a harmonious pairing.
-
Japanese Mochi Ice Cream: Layer the flavors by enjoying your Matcha Brownie Mochi with a piece of mochi ice cream; the unique texture and additional flavor boost complement each other splendidly.
-
Almond Milk: For a lighter drink option, consider pairing your treat with chilled almond milk. Its subtle nuttiness enhances the rich flavors while providing a satisfying contrast to the brochi’s chewiness.
-
Chocolate Sauce: A drizzle of warm chocolate sauce adds a decadent flair, creating a delightful contrast of flavors. The richness of the chocolate beautifully accents the green tea notes, making each bite irresistible.
Matcha Brownie Mochi Variations
Feel free to put your own spin on these delightful Mochis and explore new flavors!
-
Chocolate Twist: Replace matcha with cocoa powder for a rich, chocolatey brownie mochi. It’s a perfect treat for chocolate lovers!
-
Roasted Flavor: Use hojicha tea powder for a warm, roasted aroma that adds depth to your mochi. This unique twist beautifully complements the chewy texture.
-
Nutty Depth: Ground black sesame can be substituted for matcha to create a nutty variant. Its earthy flavor offers a delightful new experience.
-
Exotic Delight: Try adding ube purple yam for a colorful and sweet version. This twist not only enhances visual appeal but also infuses an indulgent flavor.
-
Fruity Option: Incorporate finely chopped fresh strawberries or raspberries into the batter for a fruity kick. The tartness perfectly balances the sweetness!
-
Spice it Up: Add a pinch of cinnamon or cardamom for an aromatic twist that elevates the flavor profile of the brownies.
-
Nutty Crunch: Fold in chopped nuts like walnuts or almonds for added texture and flavor. They give a delightful crunch that contrasts with the chewy mochi.
-
Coconut Flavor Boost: For a tropical touch, mix in shredded coconut with the batter. It enhances the moisture and flavor, creating a deliciously chewy dessert!
Pair these customized delights with a lovely Hojicha Latte for an afternoon treat that warms your heart!

Matcha Brownie Mochi Recipe FAQs
How do I choose the right matcha powder?
Absolutely! When selecting matcha powder, opt for high-quality ceremonial grade matcha. This type not only provides a vibrant green color but also a rich, earthy flavor. Look for matcha with a fine texture and a bright green hue; dull or yellowish matcha often means it’s of lower quality and may impart a bitter taste to your brownies.
What is the best way to store Matcha Brownie Mochi?
For best results, keep your cut Matcha Brownie Mochis in an airtight container at room temperature for up to 2 days. Storing them this way helps maintain their delightful chewy texture. It’s best to avoid refrigerating them, as it can alter their consistency and make them less enjoyable.
Can I freeze Matcha Brownie Mochi?
Freezing is not recommended for Matcha Brownie Mochis. The unique chewy texture may be compromised when thawed. However, if you must freeze them, wrap each square in plastic wrap and place them in a freezer-safe bag, ensuring they are used within a month to minimize any textural changes.
What should I do if my mochi seems too dry or tough?
If you find your Matcha Brownie Mochis turning out dry, it’s often due to overmixing the batter or baking too long. Ensure you mix the ingredients just until combined to keep them moist, and check for doneness a few minutes before the baking time ends. Additionally, ensure you’re using full-fat coconut milk or another moisture-rich ingredient for the best texture.
Can I substitute any ingredients to accommodate allergies?
Very! For a vegan option, substitute the large egg with a flax egg (1 tablespoon of ground flaxseed mixed with 3 tablespoons of water, allowed to sit for 5-10 minutes until it becomes gelatinous). Also, ensure your coconut milk is free from additives that may contain allergens. When selecting matcha, double-check that it’s processed in a gluten-free facility if gluten sensitivity is a concern.
Matcha Brownie Mochi Recipe: Chewy Bliss in Every Bite
Ingredients
Equipment
Method
- Preheat your oven to 350°F (177°C) and line an 8"x8" baking pan with parchment paper.
- In a large bowl, whisk together Mochiko, baking powder, and sea salt. Sift in the matcha powder.
- In a separate bowl, whisk together the egg, sugar, vegetable oil, and coconut milk until smooth.
- Pour the wet mixture into the dry ingredients and stir gently until just combined.
- Transfer the batter to the baking pan and spread it evenly.
- Bake for 35-40 minutes until a toothpick inserted comes out clean.
- Cool for 10-15 minutes in the pan, then remove and slice once cooled completely.
Leave a Reply