
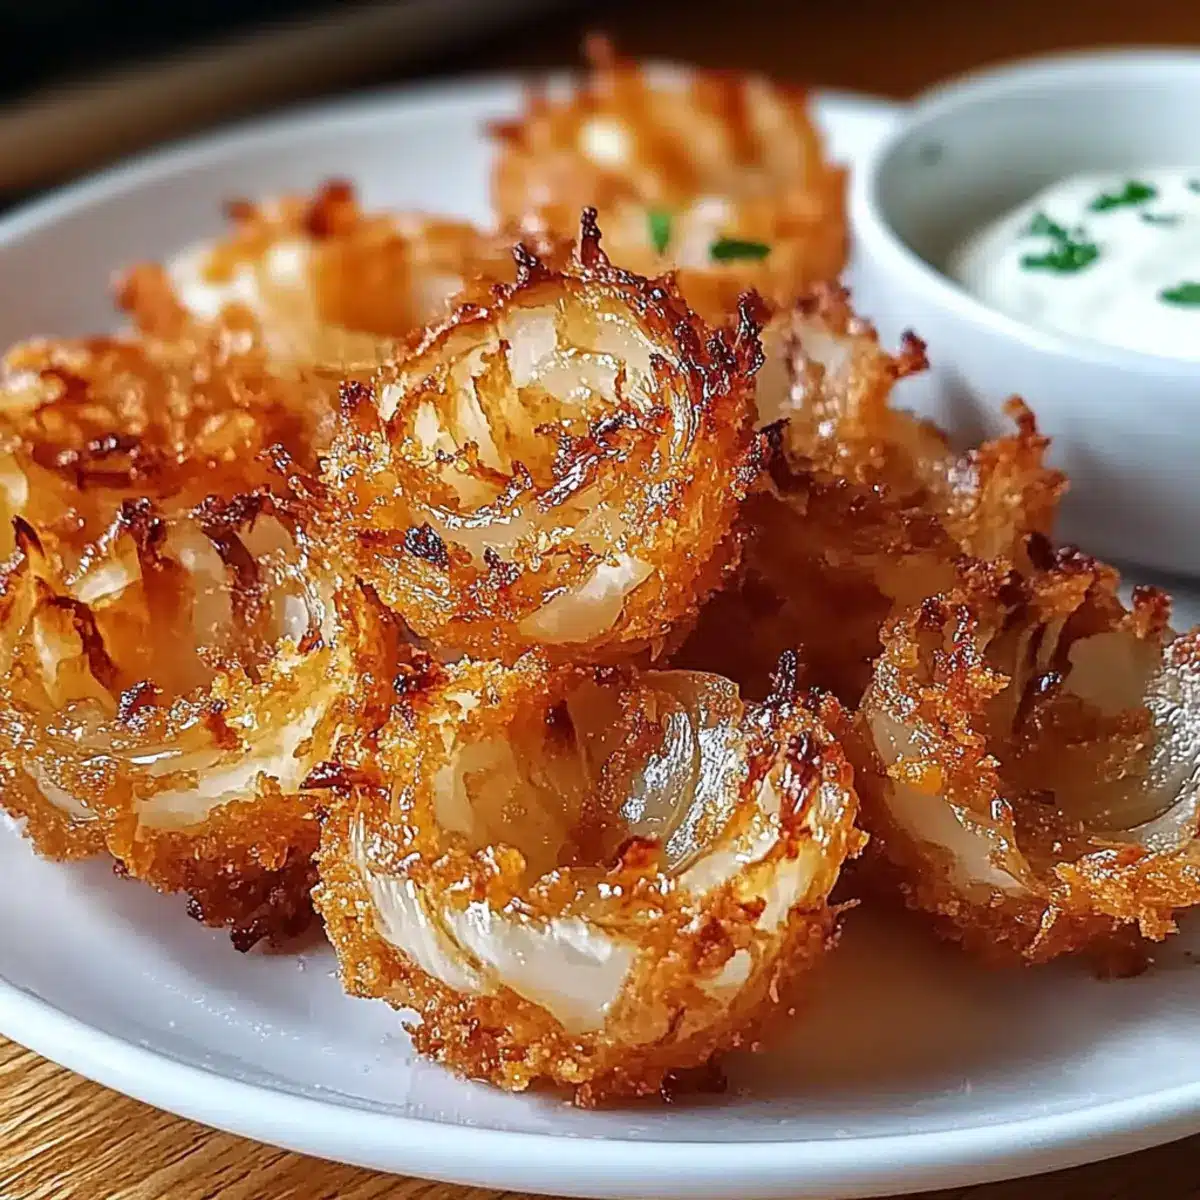
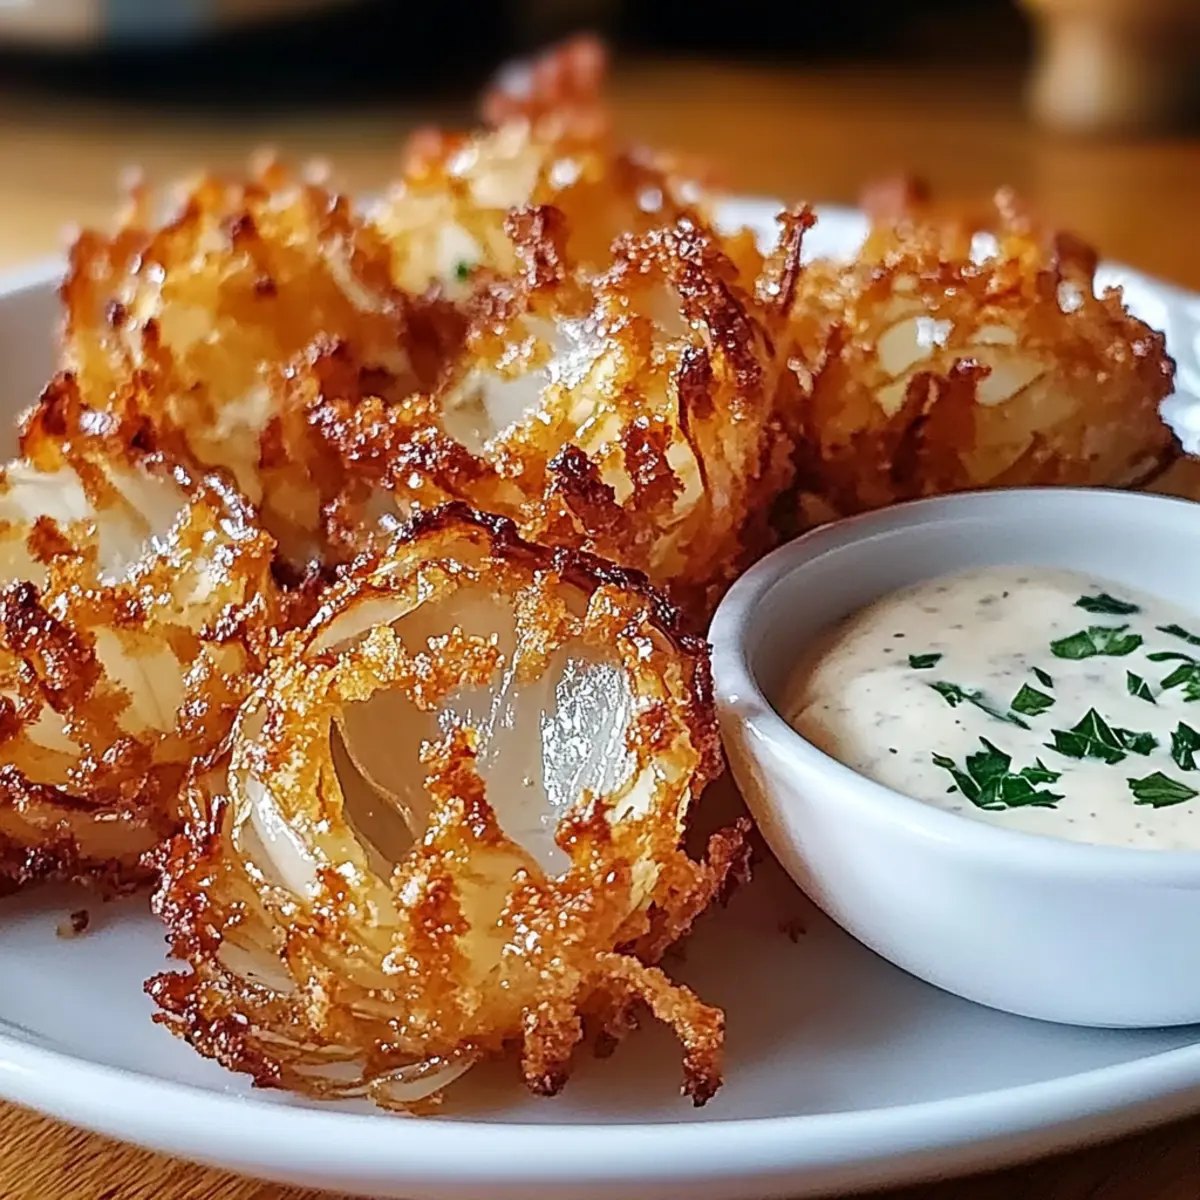
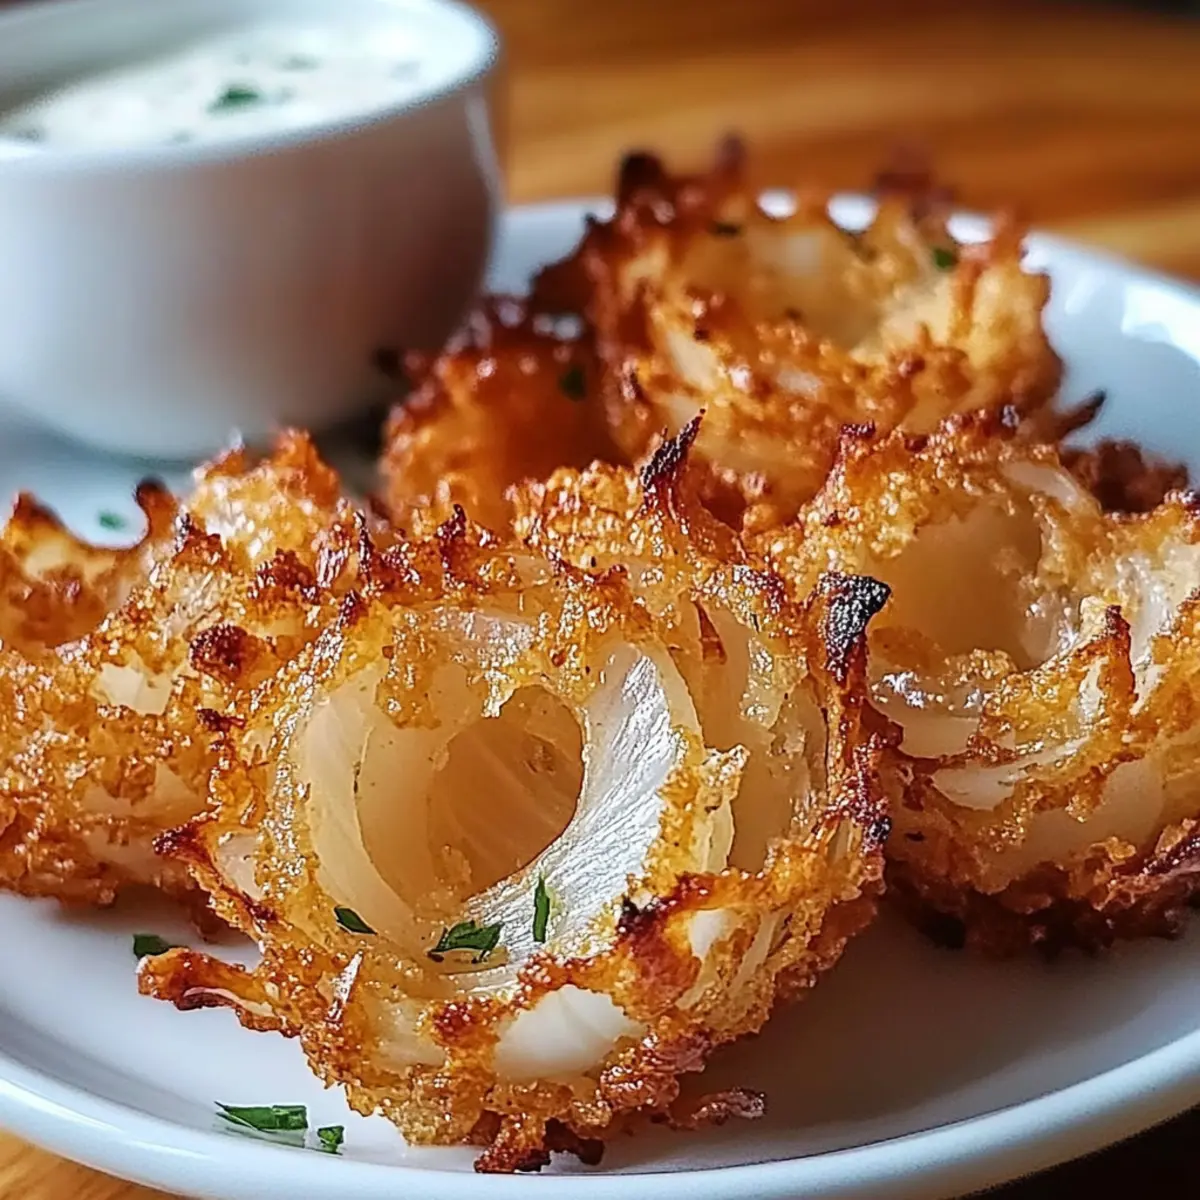
The aroma of sizzling onions wafts through the air, instantly transporting me to lively gatherings filled with laughter and good food. Today, I’m excited to share my recipe for Bite-Sized Blooming Onions—a delightful twist on the classic appetizer that’s sure to be the star of any party or cozy night in. With their light, crispy coating and tender, sweet onion layers, these little beauties promise a fun, shareable treat that’s both simple to make and impressive enough to wow your guests. Plus, the customizable spices let you tailor them to any palate, while a creamy zesty dipping sauce elevates the entire experience. Curious to learn how to create these crispy bites of joy in your own kitchen? Let’s dive in!
Why Make Bite-Sized Blooming Onions?
Crispy exterior: These bite-sized delights boast a perfectly crispy coating that contrasts beautifully with the tender onion inside.
Customizable flavors: Feel free to mix and match spices to cater to your taste buds! From smoky paprika to zesty cayenne, the choices are endless.
Effortless entertaining: Ideal for gatherings, these appetizers will impress without requiring extensive culinary skills. Just whip up a batch, and your guests will be raving!
Dip it your way: Pair them with your favorite dipping sauce, whether it’s a classic ranch or a tangy homemade mixture. You can even explore other options like the flavor-packed Roasted Green Beans as a side.
Make ahead: Prep them in advance for a quick fry just before serving, ensuring a warm, crispy treat every time.
Kid-friendly fun: Not only are these bites delicious, but they’re also a hit with the kids—perfect for getting everyone involved in the kitchen!
Bite-Sized Blooming Onion Ingredients
For the Onion Coating
• Onions – Use sweet onions for a milder flavor or yellow onions for a sharper taste.
• Buttermilk – This tenderizes the onions and enhances flavor absorption; substitute with milk mixed with a bit of vinegar if necessary.
• All-Purpose Flour – Provides the first coating that adheres well; gluten-free flour can be used for a gluten-free version.
• Paprika – Adds smokiness and color; smoked paprika can be substituted for an even deeper flavor.
• Garlic Powder – Infuses a lovely depth of flavor; fresh minced garlic can also be used but adjust to taste.
• Onion Powder – Enhances onion flavor; can be omitted for lighter seasoning.
• Cayenne Pepper – Gives a spicy kick; adjust to taste or omit for milder bites.
• Salt – Essential for seasoning; adjust according to personal preference.
• Panko Breadcrumbs – Creates a delightful crunchy texture; regular breadcrumbs work but may be less crispy.
For Frying
• Vegetable Oil – Necessary for frying; any high smoke point oil, such as canola or peanut oil, can be substituted.
For the Dipping Sauce
• Mayonnaise – The creamy base for the dipping sauce, which can be customized.
• Ketchup – Adds a sweet and tangy flavor, balancing the richness of the mayo.
• Worcestershire Sauce – Introduces depth and a hint of umami to the mix.
• Horseradish (optional) – For those who enjoy a bit of heat!
• Smoked Paprika – To enhance the flavor profile of the sauce.
• Garlic Powder – To tie the sauce back to the crispy bites.
These Bite-Sized Blooming Onion ingredients are perfect for creating a crunchy, flavorful appetizer that will be sure to impress at your next gathering!
Step‑by‑Step Instructions for Bite-Sized Blooming Onions
Step 1: Prepare Onions
Begin by peeling large sweet or yellow onions, then slice them into bite-sized wedges while keeping the layers intact. Aim for at least eight wedges per onion to ensure that they bloom beautifully. Set the cut onions aside and admire their natural shape, which will form the delightful base for your Bite-Sized Blooming Onions.
Step 2: Soak Onions
In a large bowl, submerge the onion wedges in buttermilk, ensuring they are fully covered. Allow them to soak for about 10 minutes, enabling the onions to become tender and absorb the rich flavor. As they soak, you’ll notice the buttermilk slightly thickening, indicating that it’s working its magic on the onions!
Step 3: Prepare Coating
While your onions soak, prepare the coating. In one shallow dish, combine all-purpose flour with paprika, garlic powder, onion powder, cayenne pepper, and salt. In a separate dish, place the panko breadcrumbs for a crispy finish. This efficient setup will streamline the coating process and make it fun to see your Bite-Sized Blooming Onions come together!
Step 4: Coat Onions
Once the onions have soaked, remove them from the buttermilk, letting the excess drip off. First, dredge each wedge in the flour mixture, ensuring it’s fully coated. Next, dip the wedge back in the buttermilk, and finally, roll it in panko breadcrumbs, pressing gently to secure the coating. Repeat with all the onion wedges until they are completely coated and ready to fry.
Step 5: Heat Oil
In a large skillet, pour in vegetable oil to a depth of about 1 inch and heat it over medium-high heat. Use a thermometer to monitor the temperature, ensuring it reaches 350°F (175°C). You’ll know it’s ready when a small piece of bread sizzles upon contact. This precise temperature is key to achieving crispy, golden Bite-Sized Blooming Onions.
Step 6: Fry Onions
Carefully place a few coated onion wedges into the hot oil, avoiding overcrowding the skillet. Fry them in small batches for about 2-3 minutes, or until they turn a beautiful golden brown. As you observe their transformation, feel free to flip them gently for even cooking, ensuring that all sides develop that delightful crunch.
Step 7: Drain Oil
Once your onion wedges are perfectly golden, remove them from the skillet using a slotted spoon and transfer them to a plate lined with paper towels. This crucial step allows excess oil to drain off—leaving you with perfectly crispy Bite-Sized Blooming Onions. Repeat the frying process with the remaining wedges until all are cooked to perfection.
Step 8: Make Dipping Sauce
While the onions cool slightly, mix up your creamy dipping sauce. In a bowl, combine mayonnaise, ketchup, Worcestershire sauce, optional horseradish, smoked paprika, and garlic powder. Whisk until smooth, allowing the flavors to meld beautifully. This zesty sauce will perfectly complement the flavors of your freshly fried Bite-Sized Blooming Onions.
Step 9: Serve
To present your Bite-Sized Blooming Onions, arrange them artfully on a platter. Serve them hot alongside the dipping sauce, inviting your guests to indulge in these delectable crispy treats. Their warm, fragrant aroma and appealing crunch will surely make them the highlight of your gathering, bringing smiles to everyone’s faces!
What to Serve with Crispy Bite-Sized Blooming Onions?
Enhance your gathering with mouthwatering accompaniments that beautifully complement these crunchy, flavorful bites.
- Creamy Mashed Potatoes: The velvety texture of creamy mashed potatoes balances the crunch of the onions, creating a comforting taste experience.
- Spicy Buffalo Cauliflower Bites: Their kick of heat pairs perfectly with the crispy onions, making for a delightful contrast that keeps the flavor profiles exciting.
- Zesty Coleslaw: A refreshing slaw adds a crunchy and tangy element, lightening the meal while complementing the richness of the blooming onions.
- Garlic Breadsticks: These warm, buttery indulgences provide a satisfying chew and aroma, great for dipping into your sauce alongside the crispy bites.
- Sweet Corn Fritters: The sweet, juicy flavor of corn fritters pairs wonderfully with the savory onion flavor, creating a delightful harmony on your plate.
- Classic Ranch Dressing: This creamy dip is a staple pairing with any fried appetizer, creating a satisfying contrast to the crunchy texture of the blooming onions.
- Chilled White Wine: A crisp, chilled glass of Sauvignon Blanc elevates the dining experience, cutting through the richness while enhancing the flavors of your meal.
- Chocolate Lava Cake: End your meal on a sweet note with a warm, gooey chocolate cake that balances the savory bites while providing an indulgent finish.
- Roasted Seasonal Vegetables: Their charred, earthy flavors bring balance to the plate and add a touch of freshness that contrasts beautifully with the crispy onions.
Bite-Sized Blooming Onion Variations
Feel the freedom to elevate your Bite-Sized Blooming Onions with these exciting twists that enhance flavors and cater to diverse preferences!
-
Gluten-Free: Substitute all-purpose flour and breadcrumbs with gluten-free alternatives to make this delicious appetizer suitable for everyone.
-
Spicy Kick: Add more cayenne pepper or a dash of hot sauce to the coating for an extra layer of heat. Your taste buds will revel in the thrill!
-
Herb-Infused: Toss in dried herbs like Italian seasoning or fresh thyme to the coating mixture. This adds an aromatic depth that pairs beautifully with the sweetness of the onions.
-
Cheesy Delight: Mix grated Parmesan or cheddar cheese into the panko for a scrumptious cheesy crust. The rich flavor complements the crispy texture perfectly.
-
Sweet & Savory: Drizzle honey or maple syrup over the finished onions to create a delightful contrast between the sweetness and the savory crunch. It’s a fun twist that your guests will love!
-
Dipping Sauce Variation: Experiment with different dips like tangy yogurt sauce or spicy chipotle mayo for a zesty twist. A creamy garlic dip is also a delightful alternative!
-
Baked Option: For a healthier take, try baking the coated onions instead. Arrange them on a baking sheet and spray lightly with cooking oil before baking at 400°F (200°C) until golden.
-
Piquant Flavors: Add a bit of ground cumin or chili powder to the coating for a southwestern flair. This simple adjustment can make your appetizer stand out from the traditional offerings.
With these variations, your Bite-Sized Blooming Onions can become a unique centerpiece that delights everyone at your table. Don’t forget to serve them alongside tasty snacks like Roasted Green Beans for a colorful and delicious spread!
Expert Tips for Bite-Sized Blooming Onions
-
Keep It Crispy: Avoid overcrowding the skillet while frying to ensure each onion achieves that perfect, crunchy texture without getting soggy.
-
Flavor Boost: For a zesty touch, add lemon juice to the dipping sauce; it brightens up the flavors and complements the crispy bite of the blooming onions.
-
Assembly Line Technique: Set up an efficient station with your soaking, coating, and frying processes to make it easy and fun to prepare multiple batches of these tasty bites.
-
Storage Savvy: To make ahead, prep the onion wedges and their coatings separately. Fry them fresh right before serving for that ultimate crispiness.
-
Kid-Friendly Cooking: Involve the little ones by letting them help with coating the onions. They’ll love getting their hands a little messy while crafting these delightful snacks!
Storage Tips for Bite-Sized Blooming Onions
-
Room Temperature: It’s best to enjoy these crispy bites immediately after frying, but if you have leftovers, they can sit at room temperature for up to 2 hours before they need to be refrigerated.
-
Fridge: Store any uneaten Bite-Sized Blooming Onions in an airtight container in the fridge for up to 3 days. To reheat, place them in the oven for about 10 minutes until crispy.
-
Freezer: For longer storage, freeze the coated, uncooked onion wedges on a baking sheet until solid, then transfer to a freezer bag. They’ll keep well for up to 2 months. Fry them straight from frozen when you’re ready to enjoy!
-
Reheating: To restore that beautiful crunch, reheat leftovers in the oven at 375°F (190°C) for 10-15 minutes. Avoid microwaving, as it can make them soggy.
Make Ahead Options
Preparing Bite-Sized Blooming Onions in advance is a game-changer for busy weeknights or entertaining! You can slice the onions and soak them in buttermilk up to 24 hours ahead, ensuring they retain their flavor and tender texture. Keep the flour mixture and panko breading separated until you’re ready to fry to maintain that coveted crispiness. For the best results, after coating the onions, fry them just before serving to achieve a golden brown finish. By following these simple steps, you can enjoy deliciously crispy treats with minimal last-minute effort, impressing your guests just as easily as if they were freshly made!
Bite-Sized Blooming Onions Recipe FAQs
What type of onions are best for Bite-Sized Blooming Onions?
Using sweet onions will give you a milder flavor, while yellow onions provide a sharper taste that adds depth. Either choice works beautifully, so feel free to pick based on your preference!
How should I store leftover Bite-Sized Blooming Onions?
Store any uneaten Bite-Sized Blooming Onions in an airtight container in the fridge for up to 3 days. When ready to enjoy them again, just place them in the oven at 375°F (190°C) for about 10 minutes for that crispy texture you crave.
Can I freeze Bite-Sized Blooming Onions?
Yes! To freeze, lay the coated, uncooked onion wedges on a baking sheet and place them in the freezer until solid. Transfer the frozen wedges to a freezer bag, where they can store for up to 2 months. Fry them directly from frozen for quick and delicious snacks!
What do I do if my coating isn’t sticking to the onions?
If the coating isn’t adhering as well as you’d like, ensure that your onion wedges are fully submerged in buttermilk for the soaking step. This helps bind the flour and panko to the onions. You can also retry the dredging process—first flour, then buttermilk, followed by panko, pressing firmly to secure the coating.
Can I customize the spices in the coating?
Absolutely! You can mix and match spices to your liking. Whether you want a smokier touch with smoked paprika or a bit of heat with extra cayenne, feel free to adjust the spice levels to cater to your taste buds. It’s all about making your Bite-Sized Blooming Onions perfect for you!

Crispy Bite-Sized Blooming Onions: Irresistible Appetizer Delight
Ingredients
Equipment
Method
- Peel the onions and slice them into wedges, keeping layers intact. Set aside.
- Submerge onion wedges in buttermilk for 10 minutes.
- Combine flour, paprika, garlic powder, onion powder, cayenne, and salt in a dish. Place panko in another dish.
- Dredge wedges in flour mix, dip in buttermilk, then coat in panko. Repeat with all wedges.
- Heat vegetable oil in a skillet to 350°F (175°C).
- Fry onion wedges in batches for 2-3 minutes until golden brown.
- Remove fried onion wedges and drain on paper towels.
- Mix mayonnaise, ketchup, Worcestershire, horseradish, smoked paprika, and garlic powder to create dipping sauce.
- Serve onion wedges hot with dipping sauce on the side.
Leave a Reply