
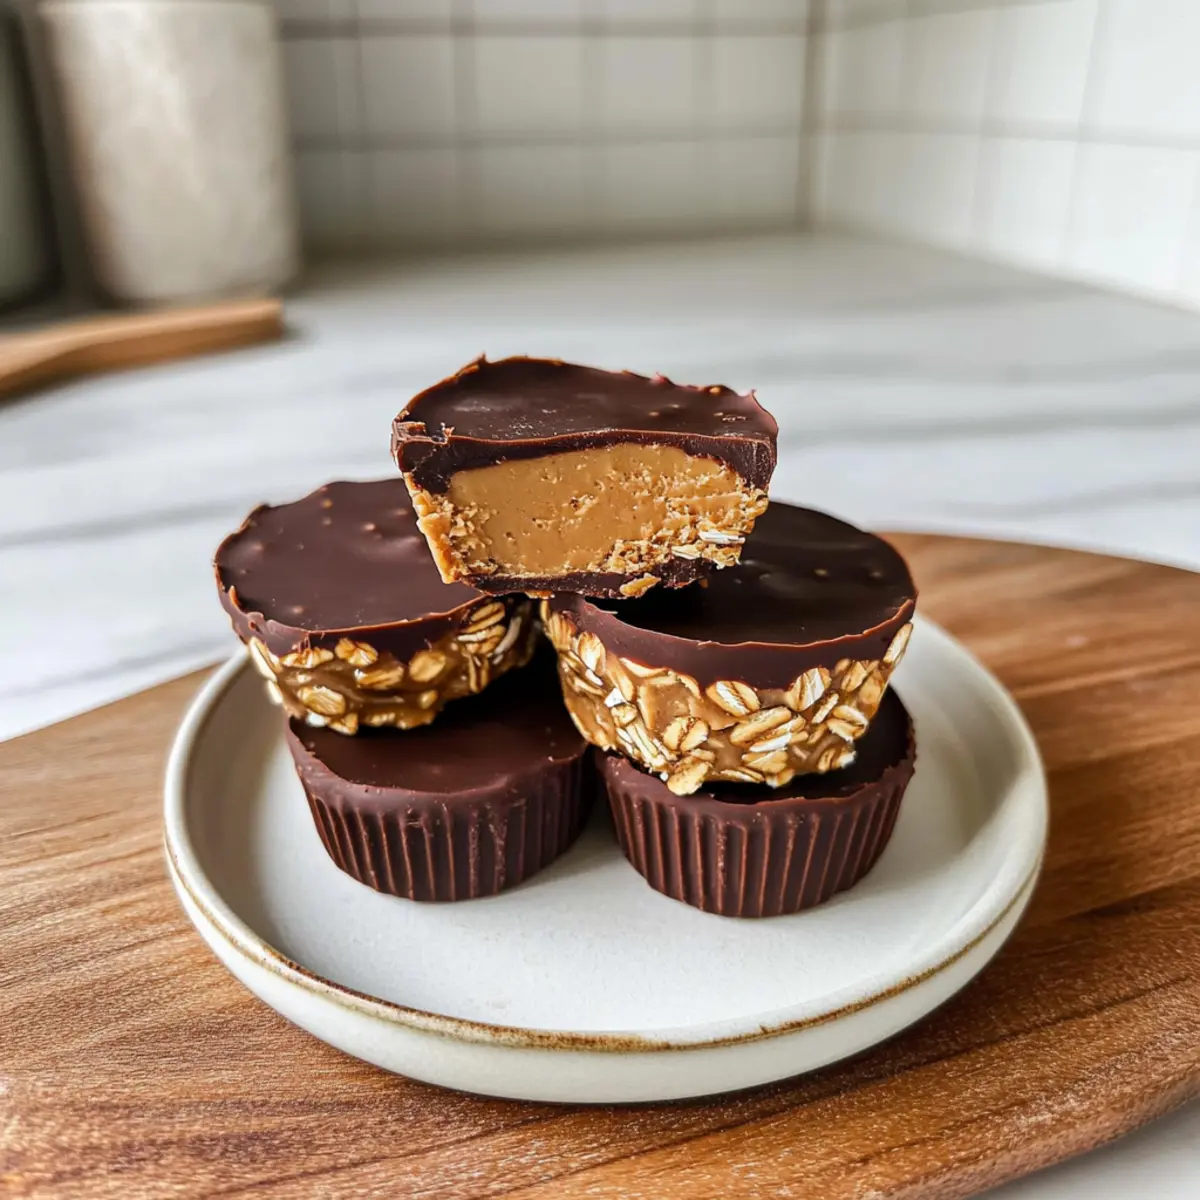
As I rummaged through my pantry, the familiar jarring of jars came alive with possibilities, but nothing caught my eye quite like the creamy peanut butter begging to be transformed. This led me to the simple joy of making No-Bake Peanut Butter Oat Cups, a delightful treat that’s not only a lifesaver in the heat of summer but also a game-changer for health-conscious sweet tooths. In just under 20 minutes, you can whip up these easy, gluten-free, and vegan cups with minimal fuss—perfect for a quick snack or dessert that doesn’t compromise on flavor. With just four simple ingredients, you can enjoy a creamy and chewy concoction that will have everyone reaching for seconds. Are you ready to discover the magic of peanut butter in a new light? Let’s dive in!
Why are Peanut Butter Oat Cups a must-try?
Uncomplicated preparation: You only need four simple ingredients to whip up these cups in under 20 minutes.
Endless variations: Customize with different nut butters, sweeteners, or additions like dried fruit or seeds to suit your taste preferences.
Guilt-free indulgence: Enjoy a delicious treat that’s not only vegan and gluten-free but also satisfies your sweet tooth without compromising your health goals.
Freezer-friendly: Make them ahead and store in the freezer for an instant snack option whenever cravings strike.
Crowd-pleaser: Perfect for both kids and adults, these Peanut Butter Oat Cups are bound to impress and become a family favorite—ideal for those hot summer days when you want something cool and satisfying!
Peanut Butter Oat Cups Ingredients
For the Base
- Peanut Butter – Adds creaminess and flavor; for nut-free versions, swap with sunflower seed butter.
- Old Fashioned Rolled Oats – Provides structure; quick oats can be substituted, but avoid instant oats for the best texture.
- Maple Syrup – Sweetens the mixture beautifully; can be replaced with honey or agave syrup if desired.
For Topping
- Chocolate Chips – Use for a delightful topping; ensure they’re dairy-free for a vegan-friendly option or choose your preferred chocolate variety.
Optional Additions
- Protein Powder – Optional for a protein boost; blend with peanut butter for a more filling treat or leave out for simplicity.
Step‑by‑Step Instructions for Peanut Butter Oat Cups
Step 1: Combine Peanut Butter and Maple Syrup
In a mixing bowl, scoop out the creamy peanut butter and drizzle your maple syrup on top. Use a sturdy spatula or a whisk to blend these ingredients together until they form a smooth, cohesive mixture. This should take about 2-3 minutes, and you’ll know it’s ready when it reaches a lovely, uniform consistency without any lumps.
Step 2: Incorporate the Rolled Oats
Once your peanut butter and maple syrup are well combined, add the old-fashioned rolled oats to the bowl. Stir gently but thoroughly, ensuring every oat is coated with the peanut butter mixture. This step should take another 2-3 minutes, and the mixture will begin to clump together, looking deliciously sticky and inviting.
Step 3: Shape the Oat Mixture
Prepare your silicone molds by placing them on a flat surface, making them ready for filling. Spoon the mixture evenly into the molds, using your fingers or a small spatula to press it down firmly. Aim for each cup to be about three-quarters full, ensuring they hold their shape. Flatten the tops for a smooth finish, and this should take around 5 minutes.
Step 4: Add the Peanut Butter Layer
If you desire a richer flavor, take a small dollop of peanut butter and place it on top of each oat cup. Alternatively, mix in a little protein powder with your peanut butter beforehand for an extra boost. This step will add about 3-4 minutes, and you should see a satisfying layer of peanut butter topping these enticing Peanut Butter Oat Cups.
Step 5: Freeze the Cups
After topped, carefully transfer the molds to the freezer and allow the cups to set for about 20 minutes. During this time, they will firm up nicely and become easier to remove. You’ll know they’re ready when they feel solid to the touch and hold their shape perfectly.
Step 6: Melt the Chocolate
While the oat cups are freezing, take a microwave-safe bowl and add your chocolate chips along with a splash of oil to enhance the melting process. Microwave in 30-second intervals, stirring in between until completely smooth, which should take about 1-2 minutes. You’ll want a silky texture with no lumps for that perfect glossy drizzle over your Peanut Butter Oat Cups.
Step 7: Drizzle Chocolate on Top
Once your cups are firmly set, remove them from the freezer and pop them out of the molds. Use a spoon to drizzle the melted chocolate generously over each cup. Get creative with the amounts; make it a heavy drizzle or light, depending on your preference. Return the cups to the freezer for another 20 minutes until the chocolate sets hard.
Step 8: Serve and Enjoy
After the final freezing period, take out your Peanut Butter Oat Cups and, if desired, sprinkle a hint of flaky sea salt on top for an added flavor punch. Now, they’re ready to be savored! Feel free to serve them straight from the freezer for a firmer treat or allow them to thaw slightly in the fridge for a softer texture—perfect for sharing or indulging anytime!
Expert Tips for Peanut Butter Oat Cups
-
Silicone Molds: Using silicone molds allows for easy removal of the cups without mess. Metal molds can sometimes stick, making it tricky to get the cups out intact.
-
Consistency Matters: Ensure your peanut butter is at the right consistency; runny peanut butter may lead to longer freezing times and less structured cups.
-
Visual Appeal: Get creative with toppings! Drizzle different types of chocolate or add attractive garnishes like sea salt or coconut flakes for an eye-catching presentation.
-
Freezing Time: Adjust freezing time according to your texture preference; longer freezing makes for firmer cups while shorter times yield a softer treat.
-
Custom Flavor Enhancements: Feel free to mix in nuts, dried fruits, or different sweeteners to keep your Peanut Butter Oat Cups exciting and tailored to your taste!
Peanut Butter Oat Cups Variations
Feel free to get creative and customize these delightful treats to suit your taste and dietary needs!
-
Nut-Free: Swap peanut butter for sunflower seed butter to make this a nut-free delight for those with allergies. It retains that creamy texture you’ll love!
-
Sweetener Alternatives: If you prefer a different sweetness, replace maple syrup with honey or agave syrup for a unique flavor twist. Experiment with coconut sugar for something a bit more rustic!
-
Protein Boost: Mix some protein powder into the peanut butter before dolloping it onto the cups for a nutritious kick, making them a perfect post-workout snack. It’s an awesome way to keep you fueled throughout the day.
-
Chocolate Lovers: Substitute dark chocolate with white chocolate or even a swirl of Nutella for a different dessert experience. The sweetness will delight anyone with a serious sweet tooth!
-
Fruity Twist: Toss in some dried cranberries, chopped dates, or mini chocolate chips into the oat mixture for an extra burst of flavor and texture. This addition can bring memories of fruity summer days right to your kitchen.
-
Texture Variation: For a crunchier bite, mix in chopped nuts or seeds to the oat base. This variety offers a delightful contrast to the creaminess of the peanut butter.
-
Flaky Salt Topping: A light sprinkle of flaky sea salt over the chocolate drizzle enhances the flavor profile, elevating each cup to an unforgettable treat.
For more delightful peanut butter inspirations, check out these Peanut Butter Oatmeal treats or give a try to a Peanut Butter Yogurt bowl for a refreshing breakfast!
How to Store and Freeze Peanut Butter Oat Cups
Fridge: Store in an airtight container for up to 1 week for a softer texture that’s great for snacking.
Freezer: Keep in the freezer for up to 1 month. Make sure to layer between parchment paper to avoid sticking. Thaw slightly before enjoying!
Reheating: No need to reheat; these cups are best enjoyed chilled or slightly thawed, letting the delicious flavors shine.
Serving Tips: For a delightful experience, serve directly from the freezer for a firmer treat, perfect for those warm summer days!
Make Ahead Options
These Peanut Butter Oat Cups are a fantastic choice for meal prep, saving you time on busy days! You can prepare the oat mixture and portion it into molds up to 24 hours in advance; simply store them covered in the refrigerator. When you’re ready to enjoy these tasty treats, add the peanut butter layer and freeze for 20 minutes. After that, feel free to melt the chocolate and drizzle it over the cups, then return them to the freezer for another 20 minutes to set. If stored properly in an airtight container, these oat cups will remain wonderfully delicious for up to a month in the freezer, making them an ideal make-ahead snack option for any occasion.
What to Serve with No-Bake Peanut Butter Oat Cups
These delightful treats can elevate your dessert game and complement a variety of satisfying accompaniments.
-
Fresh Berry Medley: Juicy berries like strawberries and blueberries add a refreshing contrast, balancing the rich creaminess of the oat cups. The sweetness of the fruit boosts flavor while keeping things light.
-
Coconut Yogurt: A dollop of creamy coconut yogurt offers a luscious texture while enhancing the vegan theme. Its subtle tang pairs beautifully with the nutty flavor, creating a satisfying mouthfeel.
-
Chilled Almond Milk: Serve with a glass of chilled almond milk for a delightful dairy-free drink option. The nutty undertones of the milk harmonize with the oat cups, making it a perfect snack pairing.
-
Sliced Bananas: Adding sliced bananas brings a tropical element to your dessert experience. Their natural sweetness and creamy texture complement the richness of peanut butter, making every bite blissful.
-
Dark Chocolate Dipped Fruit: For an indulgent twist, pair with dark chocolate-dipped apples or strawberries. The crunchy texture of the fruit offers a refreshing bite that balances the richness of your No-Bake Peanut Butter Oat Cups.
-
Nutty Granola: A sprinkle of nutty granola can add a delightful crunch while remaining in harmony with the oat base of the cups. This combination offers an appealing contrast of textures that enhances the enjoyment of both treats.
-
Coffee or Iced Coffee: Enjoy your cups alongside a warm cup of coffee or a refreshing iced coffee. The deep flavors in coffee enhance the chocolate and peanut butter, creating a cozy atmosphere perfect for a sweet treat break.
-
Chia Seed Pudding: Top off the experience with a small serving of chia seed pudding. The creamy, nutrient-rich dessert complements the oat cups while providing a healthy dose of fiber to keep your day balanced.
Peanut Butter Oat Cups Recipe FAQs
How do I choose the right peanut butter for my Peanut Butter Oat Cups?
Absolutely! The best peanut butter is one that’s creamy and smooth, as it helps to bind the ingredients together nicely. Look for natural peanut butters that contain just peanuts and salt for the cleanest flavor. If you’re all about nut allergies, feel free to swap it out for sunflower seed butter, which works beautifully in this recipe!
How should I store leftover Peanut Butter Oat Cups?
Very good question! You can keep your delicious Peanut Butter Oat Cups in an airtight container in the fridge for up to 1 week. This will give you a softer treat that’s perfect for snacking! If you prefer a firmer texture, place them in the freezer where they can last for up to 1 month. Just remember to layer them between parchment paper to prevent sticking, and thaw slightly before enjoying!
Can I freeze Peanut Butter Oat Cups? If so, how?
Absolutely! Freezing these snacks is super simple. Just place the cups in a single layer in an airtight container, separated with parchment paper if you’re stacking them. They can stay frozen for up to 1 month. To enjoy, remove a cup and let it sit at room temperature for about 5-10 minutes, or pop it in the fridge for a quicker thaw. This way, you’ll have a fantastic treat ready whenever cravings hit!
What do I do if my mixture is too runny?
No worries! If your Peanut Butter Oat Cup mixture seems too runny, it might be because of the peanut butter’s consistency. To fix this, just add a little more rolled oats to help absorb the excess moisture. Start with 1 tablespoon at a time until it reaches a thicker, moldable consistency. Mix it thoroughly, and you’ll be back on track in no time!
Are Peanut Butter Oat Cups suitable for vegan diets?
Very much so! These Peanut Butter Oat Cups are entirely vegan since they utilize maple syrup for sweetness and dark chocolate that is dairy-free for topping. Always double-check your chocolate chips to ensure they don’t contain any milk products, and you’re good to go for a deliciously guilt-free treat that everyone can enjoy!
Can dogs eat Peanut Butter Oat Cups?
This is such a thoughtful question! Dogs can enjoy peanut butter in moderation as long as it doesn’t contain xylitol, which is toxic to them. However, I recommend keeping these cups a human-only treat since the chocolate can be harmful to dogs. If you want to share the love with your furry friend, you could make a special dog-friendly version without chocolate, using just oats and peanut butter mixed with dog-safe ingredients!
Delicious Peanut Butter Oat Cups Made Easy in Minutes
Ingredients
Equipment
Method
- Combine Peanut Butter and Maple Syrup by blending them together until smooth.
- Incorporate the Rolled Oats gently into the mixture until well combined.
- Shape the Oat Mixture into molds, pressing it down firmly.
- Add a dollop of Peanut Butter on top for extra flavor.
- Freeze the cups for 20 minutes until solid.
- Melt the Chocolate Chips in a microwave-safe bowl until smooth.
- Drizzle the melted chocolate over the cups, then return to the freezer for another 20 minutes.
- Serve and enjoy your Peanut Butter Oat Cups, optionally sprinkling flaky sea salt on top.
Leave a Reply