
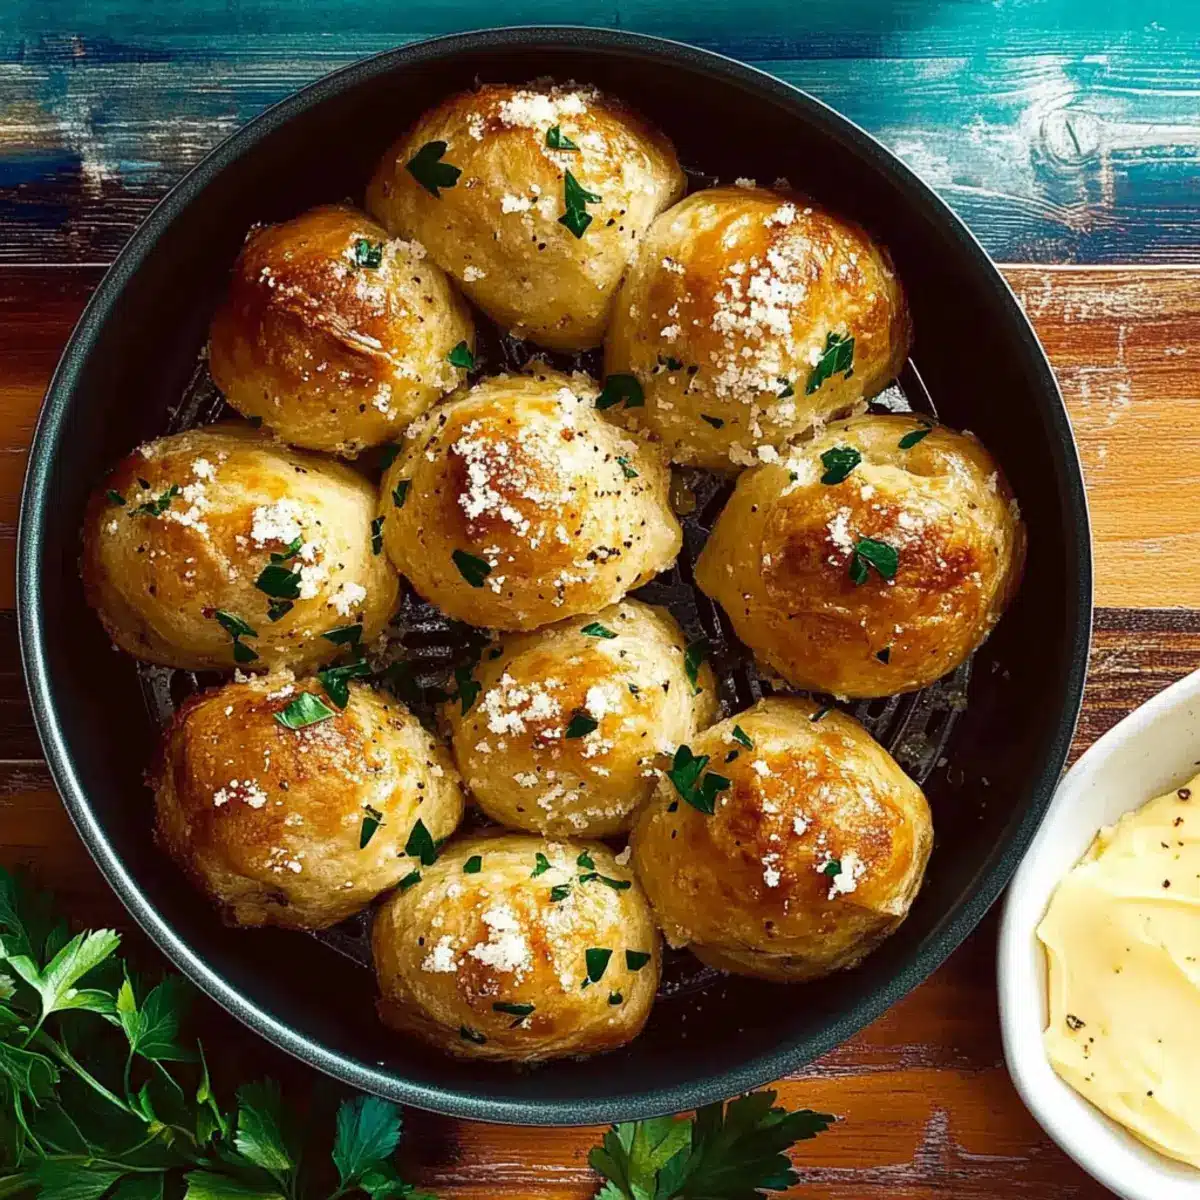
As I pulled out my trusty air fryer, the kitchen filled with the irresistible scent of garlic, and I knew a tasty triumph was on the horizon. This Easy Air Fryer Garlic Bread with Pizza Dough is not just quick and simple; it’s a perfect side dish to elevate your favorite meals or a delightful snack for game night. With a crusty exterior that gives way to a fluffy center, each bite is like a warm hug for your taste buds. Plus, you’ll love how it pairs beautifully with pasta or soups, making this savory appetizer a versatile addition to your culinary repertoire. Curious to make your own? Let’s dive into this delicious recipe that’s bound to become a favorite!

Why is this garlic bread irresistible?
Simplicity: This Air Fryer Garlic Bread is incredibly easy to whip up, requiring just a handful of ingredients and minimal prep time.
Golden Crispy Delight: The air fryer gives the bread a perfectly crispy exterior while keeping the inside soft and fluffy—a texture that’s simply unbeatable.
Flavor Explosion: With fresh garlic, fragrant herbs, and melty parmesan, each bite is packed with rich, savory goodness that complements any meal.
Versatile Treat: Whether served as a side to your favorite pasta dishes or enjoyed on game night with marinara sauce for dipping, it never disappoints. And if you love vibrant flavors, consider pairing it with Garlic Parmesan Chicken for a satisfying meal!
Quick Cooking: The air fryer allows this dish to come together in a flash, saving you valuable time without sacrificing flavor.
Crowd Favorite: Whether cooking for family or entertaining friends, this garlic bread is guaranteed to impress and disappear quickly—everyone will be reaching for more!
Air Fryer Garlic Bread Ingredients
For the Dough
• Pizza Dough – This forms the base; you can use store-bought for convenience or make your own.
For the Flavor Mixture
• Unsalted Butter – Provides richness; using unsalted allows for better control over the overall saltiness of the garlic bread.
• Garlic – Fresh minced garlic is essential for that aromatic pasty kick.
• Parsley – Offers a touch of freshness and color; can easily be swapped with basil or any other herb you prefer.
• Lemon Zest – Brightens the flavors beautifully; if you’re out, you can skip it!
• Grated Parmesan – Adds an umami punch; feel free to substitute with any hard cheese like pecorino if needed.
Optional Toppings
• Extra Herbs – A sprinkle of fresh herbs on top adds freshness; try more parsley or a pinch of thyme for added flavor.
• Sea Salt – A dash on top before serving enhances the savory complexity of your Air Fryer Garlic Bread.
Now that you’re equipped with all the necessary ingredients, you’re one step closer to creating a delightful dish of Air Fryer Garlic Bread that’s not only simple to make but incredibly delicious!
Step‑by‑Step Instructions for Easy Air Fryer Garlic Bread with Pizza Dough
Step 1: Preheat Air Fryer
Begin by preheating your air fryer to 400°F (204°C) for 5–10 minutes. This initial heat will ensure your Air Fryer Garlic Bread gets that perfect golden crust. While it heats, you can prepare your garlic butter mixture, making it easier when you’re ready to bake.
Step 2: Melt Butter
In a heat-proof bowl, place your unsalted butter and microwave it in 15-second intervals until it’s halfway melted. Stir the butter occasionally until it’s fully melted and creamy. This step is crucial for evenly distributing flavor in the garlic bread later on.
Step 3: Combine Ingredients
Add fresh minced garlic, chopped parsley, lemon zest, and grated Parmesan cheese into the melted butter. Mix thoroughly until well combined. This flavorful concoction will be slathered over the dough, infusing each bite of your Air Fryer Garlic Bread with savory goodness.
Step 4: Prepare Dough Balls
Cut your pizza dough into 12 equal pieces and shape each piece into a ball. This helps the dough cook uniformly in the air fryer. Make sure they are roughly the same size for even baking, ensuring every ball turns out perfectly fluffy and delicious.
Step 5: Butter the Pan
Brush the bottom of a 7 or 8-inch air fryer pan with half of the garlic butter mixture. Next, take each dough ball and coat it in the remaining garlic butter mixture, carefully leaving the tops unbasted to prevent burning while allowing the flavors to seep in as they bake.
Step 6: Bake Initially
Place the buttered dough balls in the preheated air fryer and bake at 400°F (204°C) for 5 minutes. This high heat will help form that initial crispy exterior. Avoid opening the air fryer during this time to maintain the temperature required for perfect rising.
Step 7: Adjust Temperature for Baking
After 5 minutes, lower the air fryer temperature to 325°F (163°C) without opening the fryer. Continue baking for an additional 5 minutes. This step is essential for achieving a tender inside while maintaining a crisp exterior for your Air Fryer Garlic Bread.
Step 8: Finish Baking
After the second baking phase, carefully apply the remaining garlic butter mixture on top of the dough balls. Close the air fryer and bake for another 5 minutes or until the tops are golden brown and crispy, inviting you to enjoy that delightful aroma.
Step 9: Cool and Serve
Once your Air Fryer Garlic Bread is done, allow it to cool in the air fryer for about 5–10 minutes. This resting period lets the flavors settle, and you’ll find your garlic bread is easier to handle. Serve warm, optionally topped with extra herbs or a sprinkle of sea salt for that finishing touch.

How to Store and Freeze Air Fryer Garlic Bread
Room Temperature: Store leftover garlic bread in an airtight container at room temperature for up to 2 days to maintain its crusty texture.
Fridge: If you need to keep it longer, refrigerate in an airtight container for up to 5 days, although it may lose some crispness.
Freezer: For longer storage, freeze garlic bread wrapped in plastic wrap and then in foil for up to 2 months. Thaw before reheating.
Reheating: To restore crispiness, reheat in the air fryer for 2-3 minutes at 350°F (175°C) before serving. Enjoy your Air Fryer Garlic Bread fresh from the oven!
Expert Tips for Air Fryer Garlic Bread
-
Even Butter Distribution: Ensure the butter is thoroughly mixed with garlic and herbs to prevent any burning while baking your Air Fryer Garlic Bread.
-
Protect the Tops: Avoid brushing the tops of the dough balls with butter initially to keep the herbs from burning and to ensure even browning.
-
Thaw Frozen Dough: If using frozen pizza dough, remember to let it thaw completely before working with it to achieve the best texture in your garlic bread.
-
Batch Cooking: If making multiple batches, allow the air fryer to rest briefly between cookies to maintain optimal temperature for crispy results.
-
Customization Options: Don’t hesitate to explore flavor variations! Adding red pepper flakes or different herbs can elevate your Air Fryer Garlic Bread experience.
Make Ahead Options
These Air Fryer Garlic Bread delights are perfect for busy weeknights! You can prepare the butter mixture (with garlic, parsley, lemon zest, and parmesan) up to 3 days in advance by storing it in an airtight container in the refrigerator. Additionally, you can cut the pizza dough into balls and keep them in the fridge for up to 24 hours prior to baking. When ready to serve, simply take the dough balls and butter mixture out, coat the dough balls in the mixture, and follow the baking instructions as directed. This way, you’ll enjoy the same deliciously crispy and cheesy garlic bread without the last-minute rush!
Air Fryer Garlic Bread Variations
Feel free to experiment with these fun variations that let your taste buds dance while you enjoy this delicious garlic bread!
-
Sourdough Switch: Swap pizza dough for sourdough for a tangy, flavorful twist that pairs beautifully with savory dishes.
-
Spicy Kick: Add a sprinkle of red pepper flakes to your garlic butter mixture for an enticing heat that awakens your senses. The combination of spicy and savory elevates the classic flavors.
-
Herb Infusion: Mix in dried oregano or thyme to the garlic butter for an aromatic herb twist. This not only enhances flavor but adds an inviting fragrance as it cooks.
-
Cheesy Goodness: Add shredded mozzarella or a blend of Italian cheeses into the center of each dough ball for an extra cheesy surprise. Picture a melty, gooey center that makes each bite even more satisfying!
-
Honey Glaze: Drizzle a touch of honey on top before serving for a unique sweet-and-savory twist that perfectly complements that garlicky goodness. The contrast will leave your guests asking for seconds!
-
Roasted Garlic: Swap fresh minced garlic for roasted garlic for a sweeter, more mellow flavor. Roasting gives it a creamy texture, creating a deeper, richer taste profile.
-
Gluten-Free Option: Use gluten-free pizza dough to accommodate dietary needs without sacrificing flavor. It can be just as delightful when prepared correctly!
Need some delicious sides to accompany your Air Fryer Garlic Bread? How about serving it with Garlic Parmesan Chicken or pairing it with some Rosemary Garlic Mashed potatoes? The possibilities are endless!
What to Serve with Easy Air Fryer Garlic Bread
The delightful aroma wafting from your kitchen as the garlic bread bakes sets the stage for a beautiful meal.
- Classic Marinara Sauce: Perfect for dipping, this savory sauce complements the garlic bread’s crispy edges and enhances its flavor.
- Spaghetti Aglio e Olio: The garlicky simplicity of this pasta dish pairs beautifully, creating a rich, aromatic experience at each bite.
- Crispy Caesar Salad: The crunchy textures of fresh romaine lettuce and croutons mixed with creamy dressing balance the warmth of the garlic bread.
- Creamy Tomato Soup: This pairing offers a comforting mix of flavors and textures, making every dunk of garlic bread a delightful experience.
- Roasted Vegetables: A medley of roasted veggies adds a fresh, earthy contrast that brightens your meal and balances the richness of the garlic bread.
- Chilled White Wine: A crisp, refreshing white wine cuts through the richness, making it an ideal companion for the savory garlic bread.
- Homemade Pesto: A drizzle of fresh pesto adds a burst of flavor that elevates your garlic bread, creating a vibrant contrast with its buttery notes.
- Olive Oil and Balsamic Vinegar: A small dipping bowl of this mix introduces a tangy twist that highlights the buttery, cheesy elements of your garlic bread.
- Chocolate Lava Cake: For dessert, this indulgent chocolate treat offers a rich finale, balancing the savory garlic bread with a sweet moment.
Air Fryer Garlic Bread Recipe FAQs
How do I choose the best pizza dough for garlic bread?
Absolutely! The best pizza dough is one that’s fresh and hasn’t been expired. You can use store-bought dough for convenience or opt for homemade dough if you’re feeling adventurous. If using frozen dough, make sure to thaw it completely at room temperature for about 1 hour before working with it, as this will help achieve the desired texture.
How long can I store leftover garlic bread?
Very! Leftover Air Fryer Garlic Bread can be stored in an airtight container at room temperature for up to 2 days. After that, they may begin to lose their delicious crunch. If you prefer to keep them longer, refrigerate for up to 5 days. Just be mindful that refrigeration might cause some loss of texture.
Can I freeze Air Fryer Garlic Bread? If so, how?
Yes, you can! To freeze your Air Fryer Garlic Bread, wrap it tightly in plastic wrap and then in aluminum foil to prevent freezer burns. It can be stored in the freezer for up to 2 months. When you’re ready to enjoy it again, simply thaw it overnight in the refrigerator and reheat in the air fryer at 350°F (175°C) for 2-3 minutes to regain that crispy goodness.
What should I do if my garlic bread doesn’t turn out crispy?
If your garlic bread is coming out less crispy than expected, there are a couple of troubleshooting steps you can take. First, ensure that you have preheated the air fryer sufficiently before baking. Also, avoid overcrowding the air fryer basket; give each dough ball enough space for air to circulate. If everything is right, make sure to coat the dough lightly in butter without saturating it, which can lead to a soggy result.
Are there any dietary considerations I need to take into account?
Absolutely! If there are allergies in your home, let’s make sure to be cautious. This recipe contains gluten due to the pizza dough, and dairy from the butter and cheese; so it’s not suitable for anyone with gluten or lactose intolerance. For a dairy-free option, you can substitute the butter with a plant-based alternative and omit the cheese. If you’re cooking for pets, homemade garlic bread should be avoided as garlic can be harmful to dogs and cats. Always check with your veterinarian if unsure!

Irresistible Air Fryer Garlic Bread with a Cheesy Twist
Ingredients
Equipment
Method
- Preheat your air fryer to 400°F (204°C) for 5–10 minutes.
- Melt the unsalted butter in a heat-proof bowl.
- Combine melted butter, garlic, parsley, lemon zest, and parmesan in the bowl.
- Cut the pizza dough into 12 equal pieces and shape each into a ball.
- Brush the air fryer pan with half the garlic butter mixture and coat the dough balls with the remaining mixture.
- Bake the dough balls in the air fryer at 400°F (204°C) for 5 minutes.
- Lower the temperature to 325°F (163°C) without opening the fryer, and bake for an additional 5 minutes.
- Apply the remaining garlic butter mixture on top of the dough balls and bake for another 5 minutes, or until golden.
- Allow cooling for 5-10 minutes before serving.
Leave a Reply