
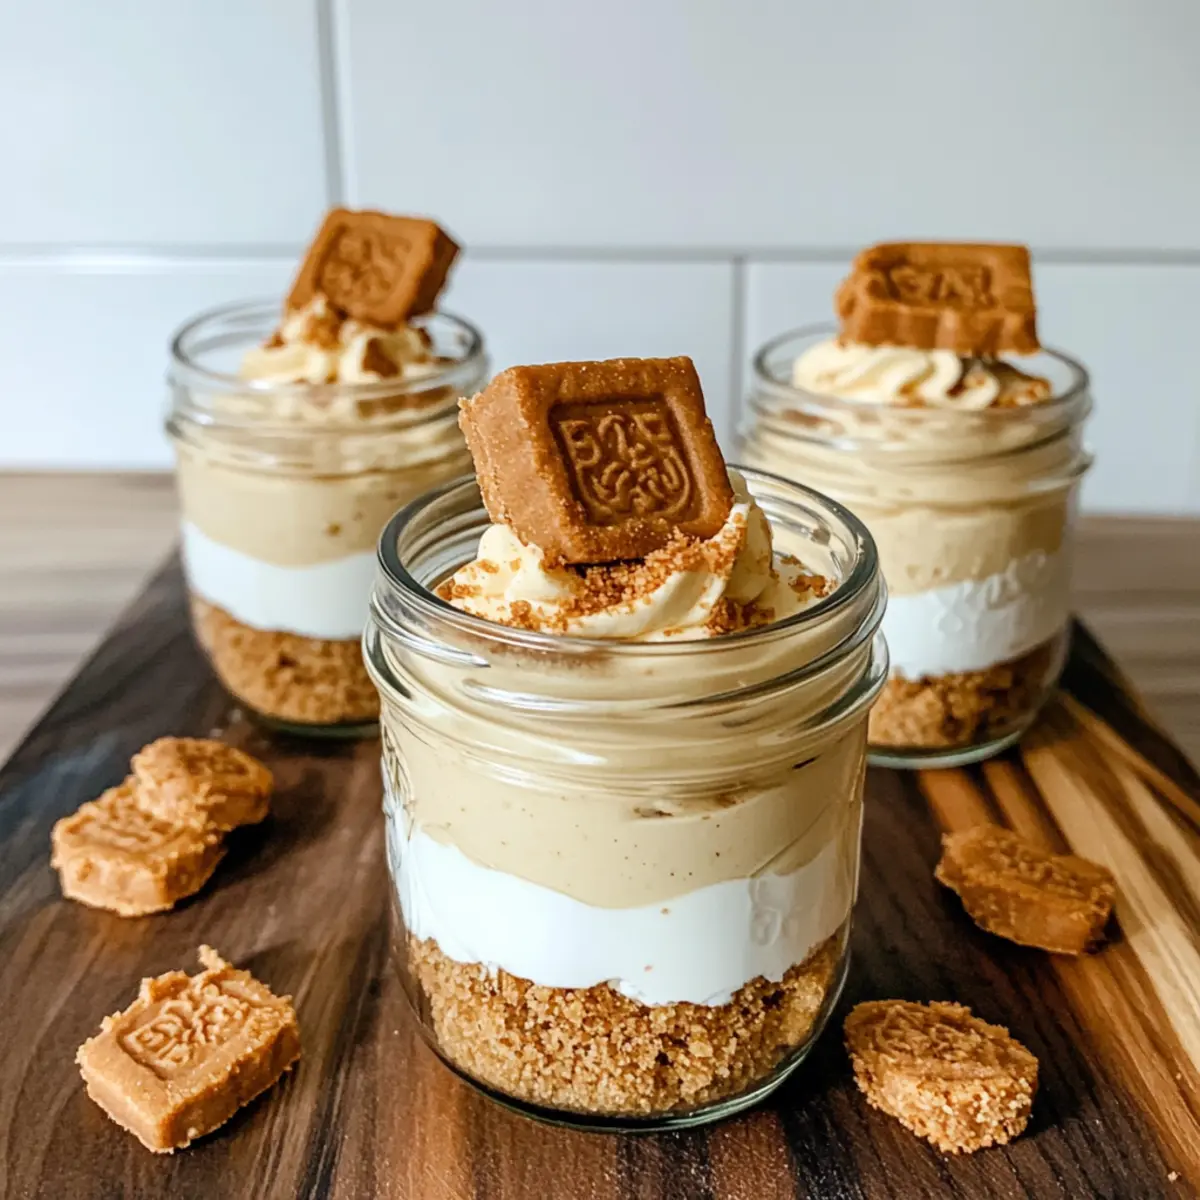
In a world where time often feels too scarce, finding a quick yet delightful dessert can feel like chasing a mirage. Enter my No Bake Biscoff Cheesecake Cups with Cottage Cheese, a luscious treat that magically combines speed with flavor. These dreamy cups come together in less than 30 minutes, making them the perfect solution for stressful days when you crave something sweet but don’t want to put in the effort traditional baking demands. What’s even better? They boast a protein-packed filling thanks to cottage cheese, all while satisfying your sweet tooth with the warm spice of Biscoff cookie butter. Whether served at a gathering or enjoyed solo with a cozy blanket, these cheesecake cups are sure to impress. Ready to discover how to whip up this indulgent dessert? Let’s dive in!

Why Are These Cheesecake Cups So Special?
Quick and Easy: With no baking required, these cheesecake cups come together in just 30 minutes, making them perfect for busy weeknights or impromptu gatherings.
Protein Power: Packed with cottage cheese and Greek yogurt, they offer a delightful, creamy filling that’s healthier than traditional options without sacrificing flavor.
Versatile Flavor: Customize these treats to your liking with toppings like fresh berries or a drizzle of caramel for a different twist each time. Just like our delicious Strawberry Cheesecake Truffle, you can mix things up!
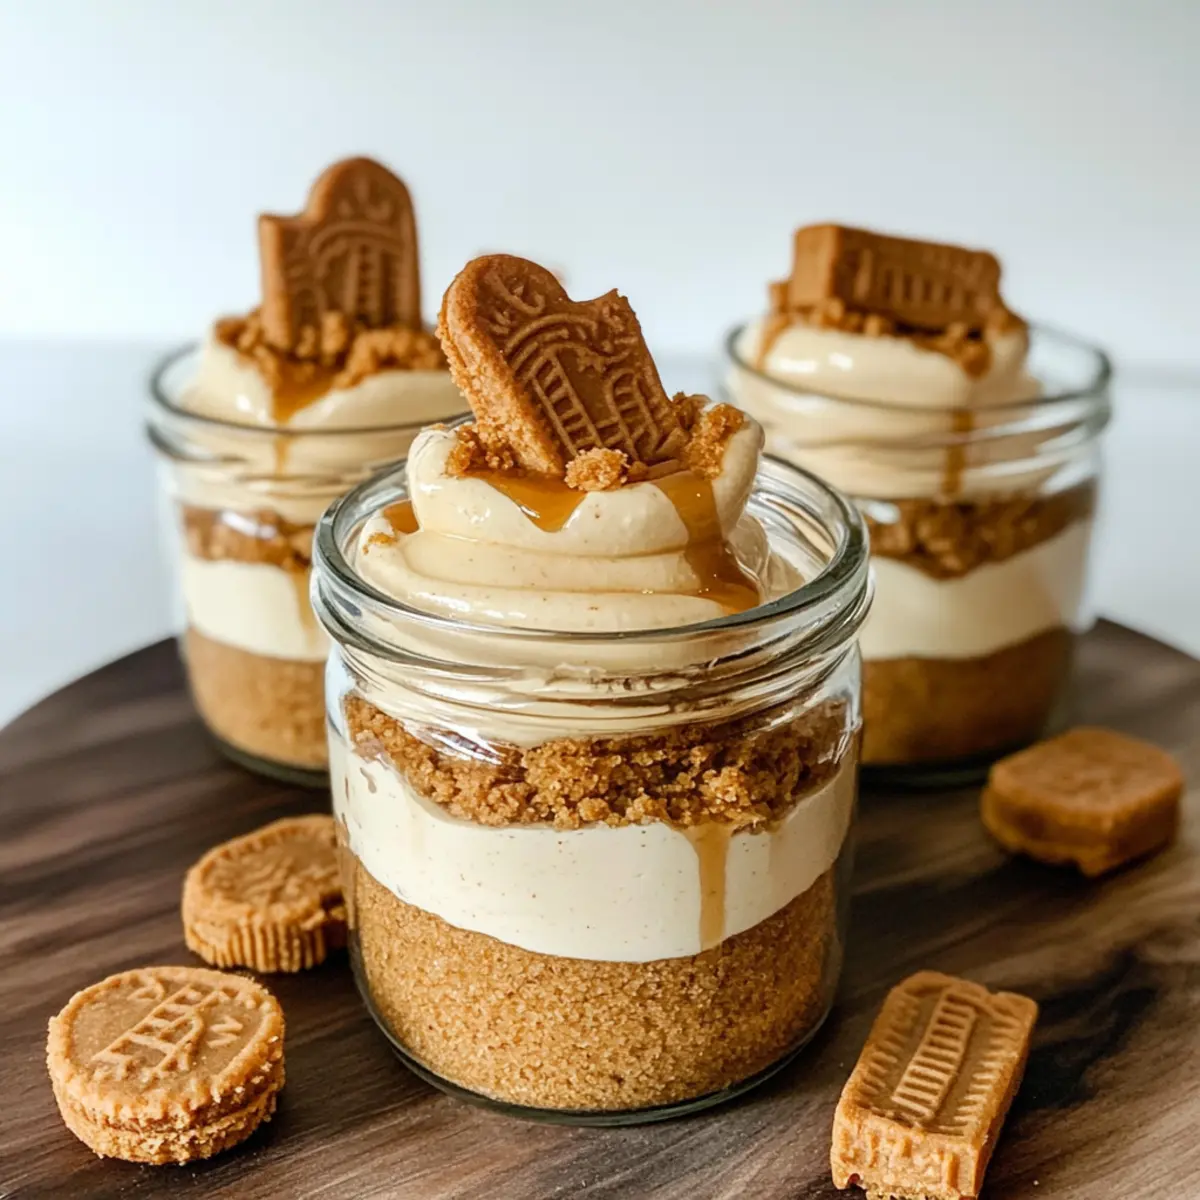
Irresistible Texture: Enjoy the contrast between the silky filling and the crunchy Biscoff cookie base—every bite is an indulgent delight.
Crowd-Pleaser: These cups not only look stunning but also taste divine, making them a guaranteed hit at any gathering! Treat yourself or impress guests easily with these dreamy desserts.
Biscoff Cheesecake Cups Ingredients
For the Filling
• Cottage Cheese – Provides a creamy base for the cheesecake; choose low-fat for a lighter option.
• Plain Greek Yogurt – Adds tang and creaminess; you can swap it with any thick, unsweetened yogurt.
• Maple Syrup – A natural sweetener for the filling; can easily be replaced with honey or agave if desired.
• Biscoff Butter – The star that brings in that rich, spiced flavor; consider other cookie butters as alternatives.
• Vanilla Bean Paste – Enhances flavor with warm notes; if unavailable, pure vanilla extract works well.
For the Crust
• Biscoff Cookies – Crushed to create a textural base; gingersnaps or graham crackers are great substitutes.
• Melted Biscoff Butter – For drizzling on top, providing a decadent finish and extra flavor.
Optional Toppings
• Whipped Cream – Add a fluffy layer on top for extra indulgence and visual appeal.
• Fresh Berries – Sprinkle on top for a burst of freshness and color.
• Chopped Nuts – For a nutty crunch, perfect for adding texture.
Explore the delightful world of Biscoff Cheesecake Cups, coming together seamlessly to create a dessert that’s sure to captivate your palate!
Step‑by‑Step Instructions for No Bake Biscoff Cheesecake Cups
Step 1: Crush the Cookies
Start by placing your Biscoff cookies in a zip-top bag or blender. Crush them into fine crumbs, ensuring no large pieces remain. This should take about 2-3 minutes. Once crushed, set the cookie crumbs aside to use later for the base of your Biscoff Cheesecake Cups.
Step 2: Prepare the Filling
In a food processor, combine the cottage cheese, plain Greek yogurt, maple syrup, Biscoff butter, and vanilla bean paste. Blend these ingredients together for about 15–20 seconds until you achieve a smooth and creamy texture. Be careful not to over-blend, as this could make the filling too runny for your delicious cheesecake cups.
Step 3: Layer the Crust
Take your serving jars and evenly divide the crushed Biscoff cookie crumbs among them, using about 2 tablespoons per jar. Press the crumbs gently to form a compact base. This will create a nice crunch that pairs beautifully with the creamy filling of the No Bake Biscoff Cheesecake Cups.
Step 4: Add the Filling
Spoon or pipe the creamy filling over the cookie crust in each jar. Fill them generously, leaving a little space at the top for the final touch. The filling should appear silky and smooth, showcasing that rich Biscoff flavor we’ve combined in step 2.
Step 5: Drizzle with Biscoff Butter
Microwave about 2 tablespoons of Biscoff butter for 20-30 seconds until it’s melted but not boiling. Use a spoon to drizzle this warm, gooey goodness over the top of each cheesecake cup. This step adds an extra layer of flavor and a gorgeous presentation.
Step 6: Chill Before Serving
Cover the jars with lids or plastic wrap and chill in the fridge for at least 30 minutes, allowing the flavors of your No Bake Biscoff Cheesecake Cups to meld beautifully. You’ll notice the filling becoming firmer and more cohesive, perfect for digging in later!
Step 7: Final Touches
Before serving, feel free to add your choice of toppings, such as whipped cream, fresh berries, or chopped nuts for extra texture. These additions will elevate your presentation and enhance the taste of the Biscoff Cheesecake Cups, making them even more irresistible!
What to Serve with No Bake Biscoff Cheesecake Cups
Create a delightful spread that perfectly complements your cheesecake cups while tantalizing your taste buds.
-
Creamy Mashed Potatoes: Their velvety texture and buttery richness provide a hearty counterbalance to the light and airy cheesecake.
-
Fresh Fruit Salad: Chilled, colorful fruits add a refreshing bite, enhancing the sweetness while cutting through the richness of the dessert.
-
Mint Chocolate Chip Ice Cream: This classic pairing contrasts beautifully with the warm spices of the cheesecake, creating a deliciously exciting flavor profile. The coolness of the ice cream elevates the overall experience.
-
Almond Biscotti: Crunchy and slightly sweet, these biscuits make for an elegant crunchy partner; perfect for dipping into the cheesecake if desired.
-
Sparkling Water with Lime: Refreshing and palate-cleansing, this drink adds a zesty finish, balancing out the sweetness before diving back into the decadent cheesecake cups.
-
Chocolate Dipped Strawberries: These romantic treats enhance the dessert experience, offering a burst of freshness that pairs wonderfully with Biscoff flavors. Each bite of sweet, luscious strawberry complements the creamy cheesecake, resulting in dessert harmony.
-
Chilled White Wine: A crisp Sauvignon Blanc can elevate the flavors and bring a touch of sophistication to your dessert spread, making it perfect for gatherings or a quiet evening at home.
-
Coconut Whipped Cream: Light and airy coconut cream is a delightful twist that plays well with the Biscoff Cheesecake Cups and adds an exotic flair. It’s luscious, creamy notes create a refreshing contrast to the dessert’s texture.
Expert Tips for Biscoff Cheesecake Cups
-
Don’t Over-Blend: Ensure not to over-process the filling; doing so can lead to a runny consistency that won’t hold up in the cups.
-
Piping Perfection: Use a piping bag to add the filling for neat layering; it makes assembly easier and looks great in clear jars!
-
Chill Time Matters: After assembling, refrigerate for at least 30 minutes. This chilling period helps the flavors meld and the filling set perfectly.
-
Tweak Sweetness: Depending on the type of Greek yogurt and Biscoff butter used, you may want to taste the filling before layering it. Adjust the sweetness to your liking.
-
Layer Wisely: To prevent sogginess, add the toppings like whipped cream or fresh berries just before serving to maintain their freshness and texture.
-
Explore Variations: Feel free to mix it up by trying out different toppings or even swapping in other cookie butters for unique Biscoff Cheesecake Cups flavors.
Storage Tips for Biscoff Cheesecake Cups
Fridge: Store your Biscoff Cheesecake Cups in airtight containers in the fridge for up to 4 days. This ensures they remain fresh and perfectly chilled.
Before Serving: Wait to add any toppings, like whipped cream or fresh berries, until just before serving to maintain their texture and flavor.
Freezer: For longer storage, freeze the cheesecake cups without toppings in airtight containers for up to 2 months. Thaw in the fridge overnight before serving.
Reheating: These cups are best enjoyed chilled, so no need for reheating—simply remove from the fridge and dig in!
Biscoff Cheesecake Cups Variations
Inviting a bit of creativity can elevate your Biscoff Cheesecake Cups to new heights of deliciousness!
-
Coconut Caramel: Add coconut cream to the filling and top with warm caramel sauce and toasted shredded coconut for a tropical twist. The rich coconut flavor complements the spiced Biscoff beautifully!
-
Berry Biscoff: Top your cheesecake cups with fresh berries or a dollop of berry jam to introduce a refreshing contrast. The bright flavors of berries balance the sweetness, making each bite a delightful surprise.
-
Nutty Crunch: Incorporate chopped nuts, like hazelnuts or almonds, over the top for added texture and a robust flavor. The crunch will create a satisfying element to your sumptuous dessert.
-
Espresso Cookie Butter: Mix in a bit of instant espresso powder into the filling for a coffee-flavored treat. This twist adds depth, perfect for coffee lovers who crave something sweet after dinner.
-
Chocolate Drizzle: Drizzle some melted chocolate on top for a decadent finish. A layer of rich chocolate adds an indulgent layer that pairs perfectly with the smoothness of the cheesecake.
-
Zesty Lemon: Incorporate a splash of lemon zest into the filling for a tangy pop of flavor. This refreshing addition brightens the overall taste, making it a perfectly balanced dessert.
-
Pumpkin Spice: Add pumpkin puree and a sprinkle of pumpkin spice to the filling for a seasonal flair. These flavors meld beautifully with Biscoff, ideal for autumn gatherings!
Consider making a batch of these changes alongside the classic version. Just as with the delightful Strawberry Crunch Cheesecake, you can create a variety of options to please everyone’s palate!
Make Ahead Options
These No Bake Biscoff Cheesecake Cups are fantastic for meal prep, making your busy weeknights a breeze! You can prepare the filling up to 24 hours in advance by blending the cottage cheese, Greek yogurt, maple syrup, Biscoff butter, and vanilla bean paste, and store it in the fridge in an airtight container. The crushed Biscoff cookie base can also be made ahead of time—just keep it in a zip-top bag until you’re ready to assemble. When you’re ready to serve, layer the crust and filling in your jars, drizzle with melted Biscoff butter, and refrigerate for at least 30 minutes to set. This way, you’ll have delicious, creamy Biscoff Cheesecake Cups ready to impress at a moment’s notice!

Biscoff Cheesecake Cups Recipe FAQs
What type of cottage cheese should I use?
You can opt for either regular or low-fat cottage cheese based on your preference. Regular will give a creamier texture, while low-fat offers a lighter alternative without compromising on taste. I often recommend using smooth cottage cheese for the most delightful filling.
How should I store leftover cheesecake cups?
Store your Biscoff Cheesecake Cups in airtight containers in the fridge for up to 4 days. It’s crucial to keep them covered to maintain freshness. I suggest waiting to add any toppings until you’re ready to serve to keep that delightful crunch and creaminess intact!
Can I freeze Biscoff Cheesecake Cups? How?
Absolutely! To freeze your cheesecake cups, make sure they are without any toppings. Use airtight containers and they’ll keep well in the freezer for up to 2 months. When you’re ready to enjoy them, simply transfer the cups to the fridge overnight to thaw. This way, they’ll retain their creamy texture.
What if my filling turns out runny?
If your filling becomes runny, it’s likely due to over-blending or using too much liquid in the ingredients. To salvage it, try chilling the mixture for a bit to thicken it. Another great option is to add a small amount of powdered sugar or even a spoonful of cornstarch to help firm it up. Always blend just until smooth for best results!
Are these cheesecake cups safe for people with dairy allergies?
Unfortunately, these Biscoff Cheesecake Cups contain dairy due to the cottage cheese and Greek yogurt. For those with dairy allergies, you might explore dairy-free alternatives like cashew cheese or coconut yogurt. However, be aware that the flavor and texture may vary slightly from the original recipe.
Can I use different cookie butters aside from Biscoff?
Definitely! While Biscoff gives these cheesecake cups their signature flavor, you can experiment with other cookie butters such as speculoos or even hazelnut spread for a unique twist. Just keep an eye on the sweetness level—you might need to adjust the maple syrup based on your choice!
Creamy Biscoff Cheesecake Cups You Can Make in Minutes
Ingredients
Equipment
Method
- Crush the Biscoff cookies in a zip-top bag or blender until fine crumbs remain.
- Combine cottage cheese, Greek yogurt, maple syrup, Biscoff butter, and vanilla in a food processor and blend until creamy.
- Divide crushed cookie crumbs into jars and press gently to form a base.
- Spread the creamy filling over the crust in each jar, leaving a bit of space at the top.
- Microwave Biscoff butter for 20-30 seconds and drizzle over each cheesecake cup.
- Chill in the fridge for at least 30 minutes before serving.
- Add optional toppings just before serving for a fresh presentation.
Leave a Reply