
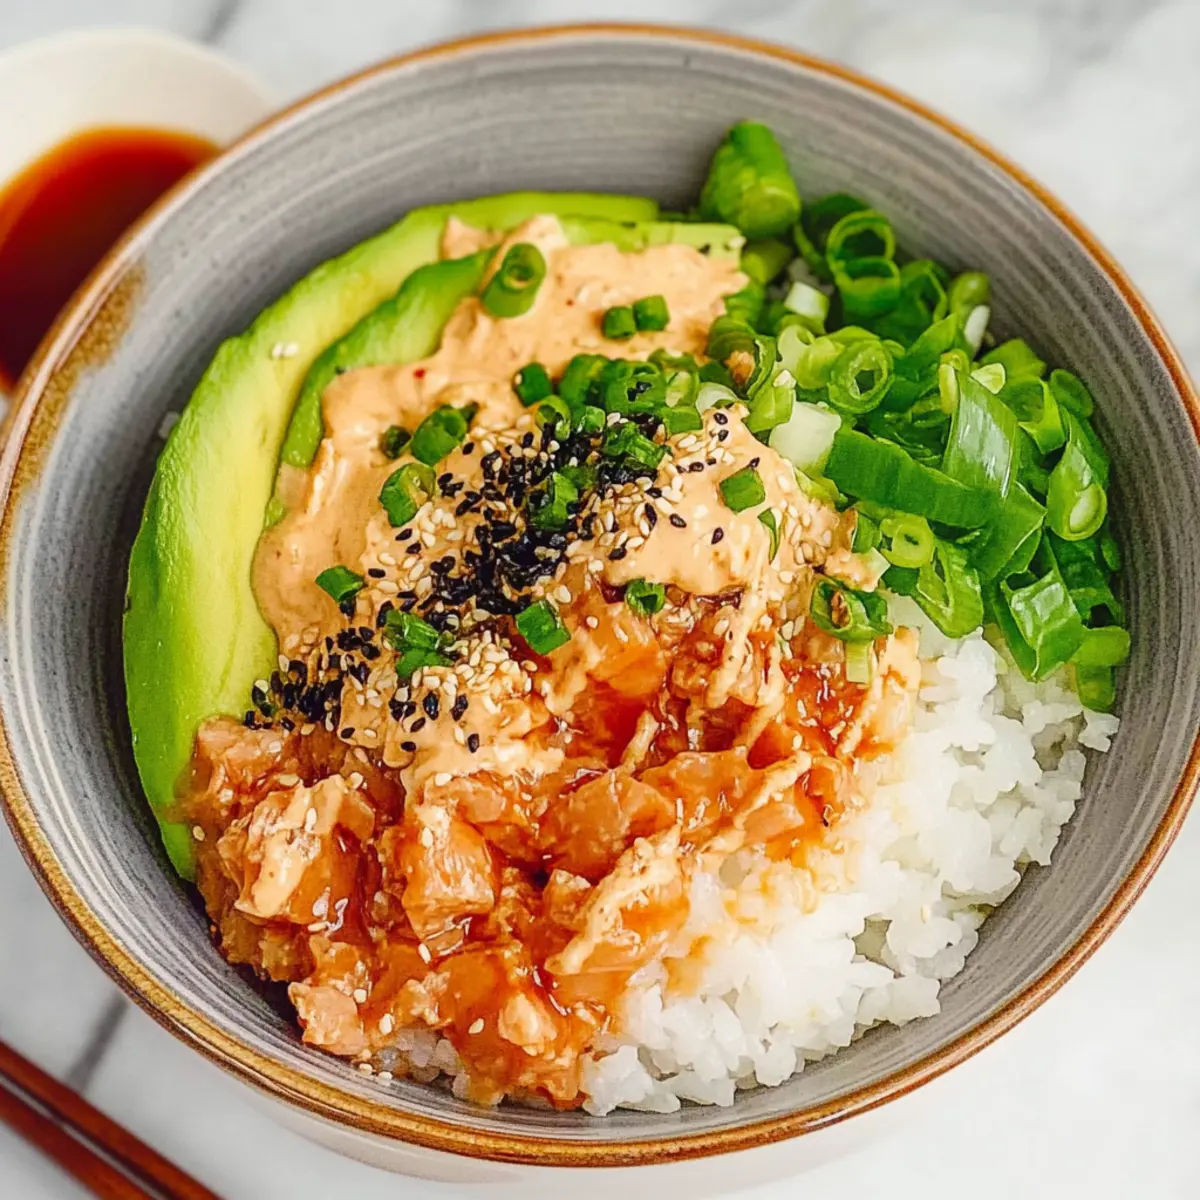
As I scoured my fridge for a quick, satisfying dinner, a can of tuna caught my eye, sparking an idea that would take my taste buds on a delightful journey. Enter the Spicy Canned Tuna Sushi Bowl, where the vibrant flavors of sushi come together in a customizable, protein-rich dish that can be whipped up in under 20 minutes. This recipe not only makes me feel like a culinary artist, but it also banishes those fast-food cravings while keeping my health in check. The best part? You can dress this bowl to your liking, with toppings that range from creamy avocado to a zingy bang bang sauce. Curious about how to create your own delicious masterpiece? Let’s dive in!
Why choose a Canned Tuna Sushi Bowl?
Quick and Easy: With only 20 minutes needed from start to finish, this recipe is perfect for those busy weeknights when time is short but hunger is high.
Protein-Packed: Each bowl serves up about 21g of protein, making it a nutritious option that fuels your body without sacrificing flavor.
Customizable Options: Feel free to swap canned tuna for other proteins like canned salmon or shredded chicken, which adds flexibility to your meal prep.
Flavor Explosion: The vibrant combination of creamy avocado, spicy bang bang sauce, and savory furikake creates a delightful flavor profile that will satisfy even the pickiest eaters.
Crispy Texture: Achieving that perfectly crispy rice adds an exciting crunch that elevates the dish from ordinary to extraordinary.
Whether you’re whipping up a solo dinner or impressing guests, this Canned Tuna Sushi Bowl is a winning choice that rivals any takeout! Looking for more quick meals? Check out our Street Corn Bowl for another easy dinner option.
Canned Tuna Sushi Bowl Ingredients
For the Sushi Rice
• Cooked Sushi Rice – The foundation of this dish; season with rice vinegar, sesame oil, and sugar for authentic flavor.
For the Toppings
• Canned Tuna (drained) – The primary protein source; opt for tuna packed in oil for richer taste.
• Bang Bang Sauce – This spicy addition boosts flavor; you can use store-bought spicy mayo for convenience.
• Large Avocado (sliced or diced) – Adds creaminess and healthy fats; make sure it’s ripe for the best quality.
• Scallions (chopped) – Freshness enhancer; can be substituted with chives if needed.
• Sriracha Sauce – Delivers extra heat; feel free to replace it with your favorite hot sauce.
• Furikake – Brings umami goodness to the bowl; can also switch to nori (seaweed) if out of stock.
For Cooking
• Olive Oil – Used for pan-frying the rice to achieve delightful crispness; a neutral oil can work as a great alternative.
• Salt and Black Pepper – Essential creatures for flavor balance; adjust to taste.
Embrace the opportunity to create your custom Canned Tuna Sushi Bowl, stacked high with your favorite toppings!
Step‑by‑Step Instructions for Canned Tuna Sushi Bowl
Step 1: Cook the Sushi Rice
Begin by preparing your sushi rice according to package instructions. Once cooked, transfer the hot rice to a bowl, and while it’s still warm, gently mix in rice vinegar, sesame oil, and sugar for flavor. The rice should be slightly sticky and glossy, perfect for forming the base of your Canned Tuna Sushi Bowl.
Step 2: Mix the Canned Tuna and Toppings
In a separate bowl, combine the drained canned tuna with the bang bang sauce, stirring until well coated. Set this mixture aside while you prepare other components. Slice the avocado and chop the scallions; these fresh ingredients will elevate the flavor profile of your sushi bowl and provide contrasting textures.
Step 3: Pan-Fry the Rice for Crispiness
If you’re aiming for that delightful crispy texture, heat a skillet over medium-high heat and add a drizzle of olive oil. Once hot, add the prepared sushi rice, flattening it with a spatula. Cook for about 3-5 minutes until the bottom is golden brown, then gently flip to crisp the other side for another minute. The rice should have a nice crunch to contrast the creamy toppings.
Step 4: Assemble Your Canned Tuna Sushi Bowl
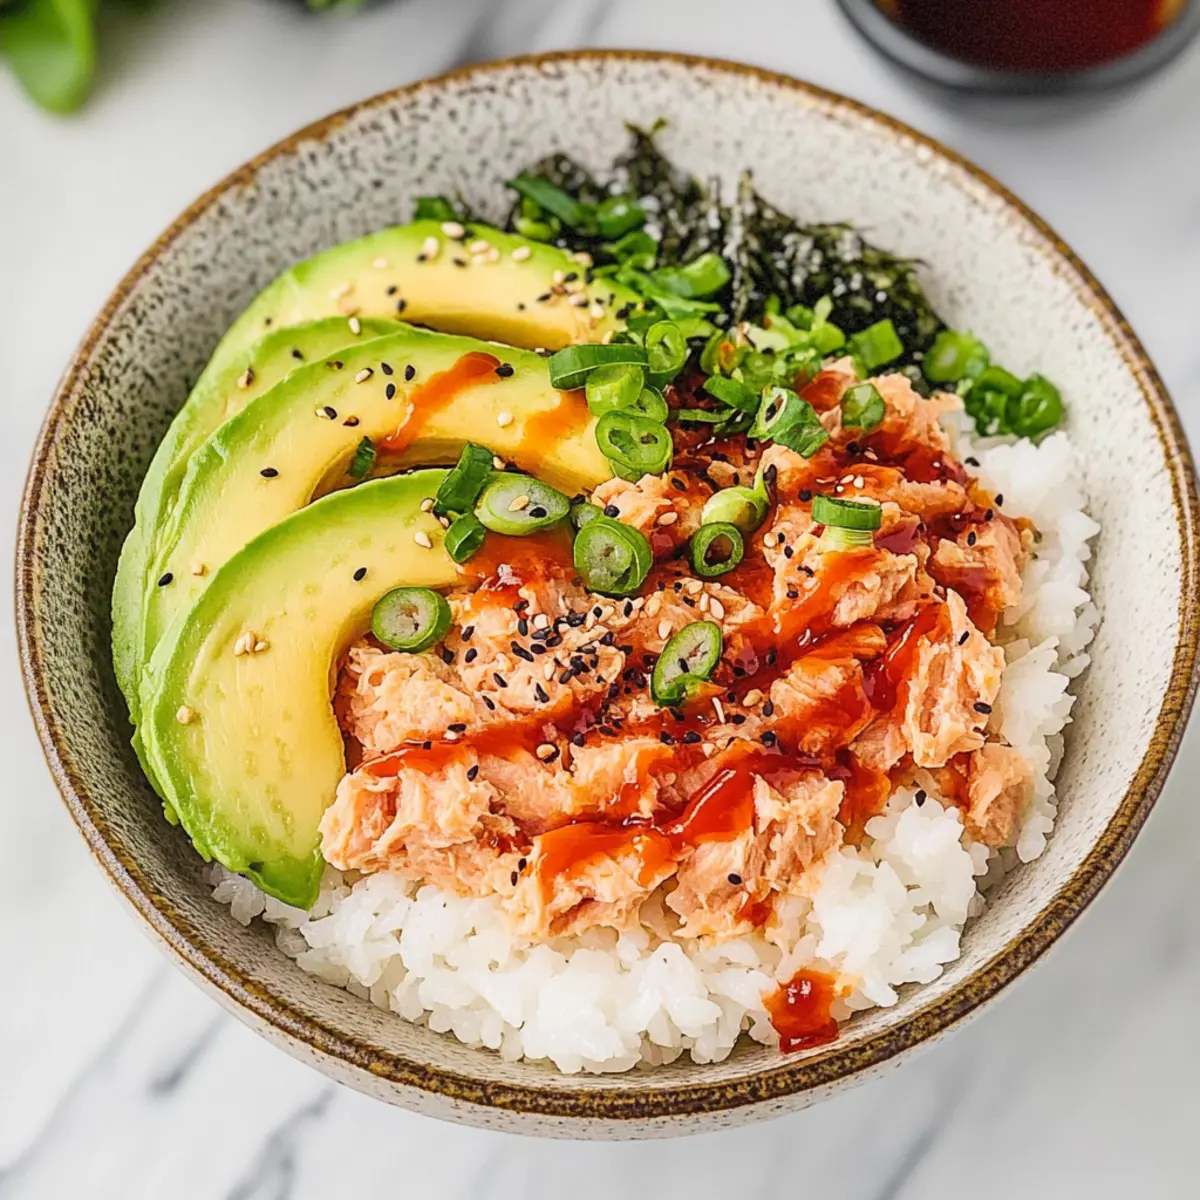
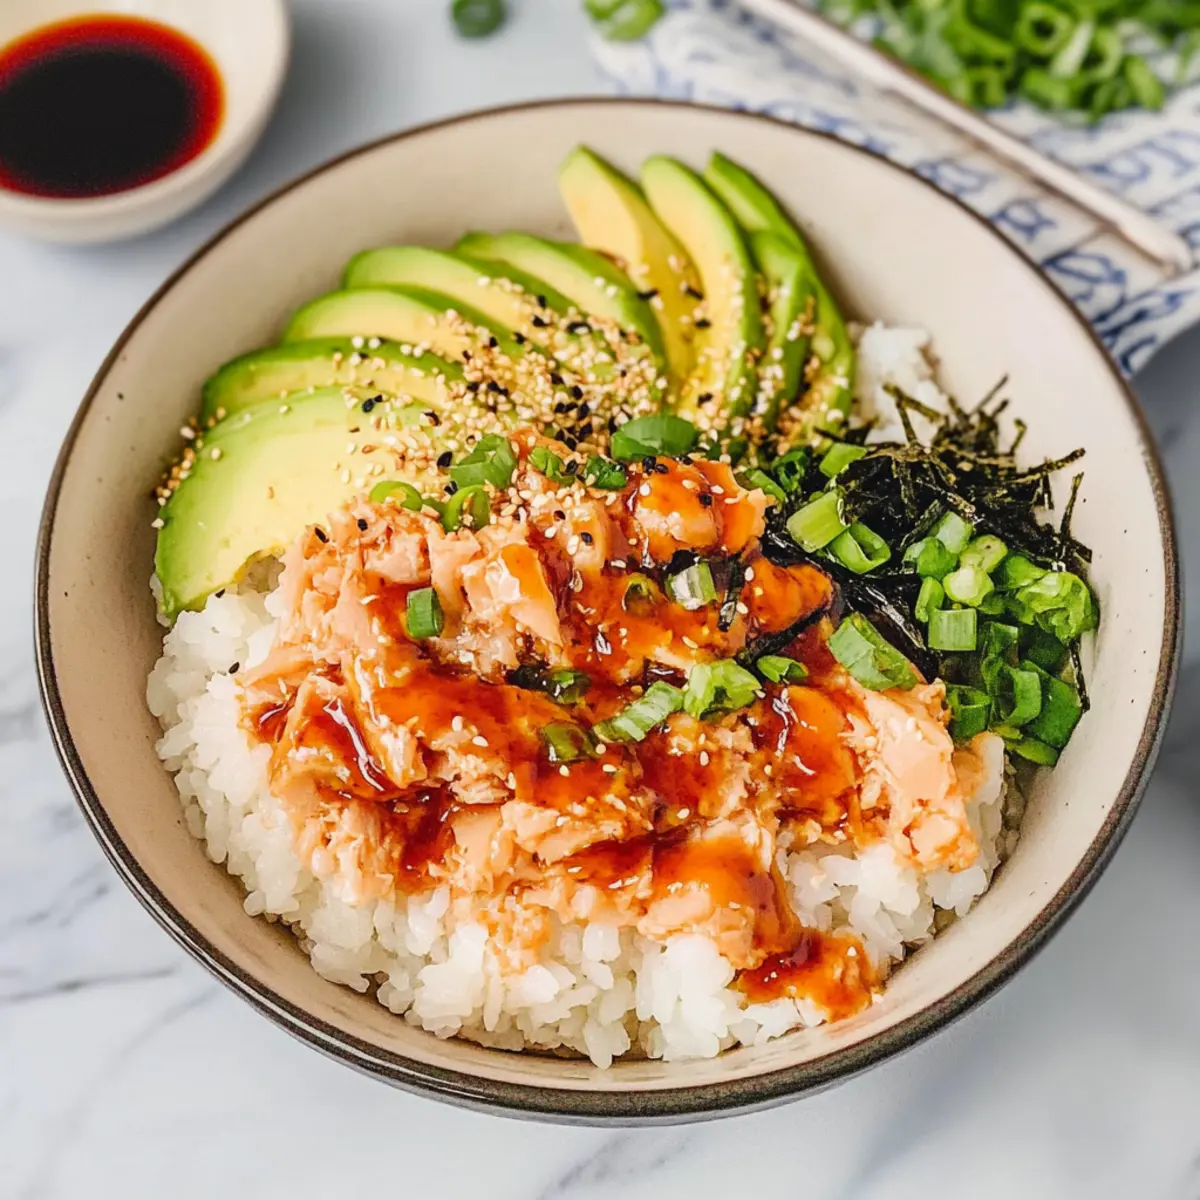
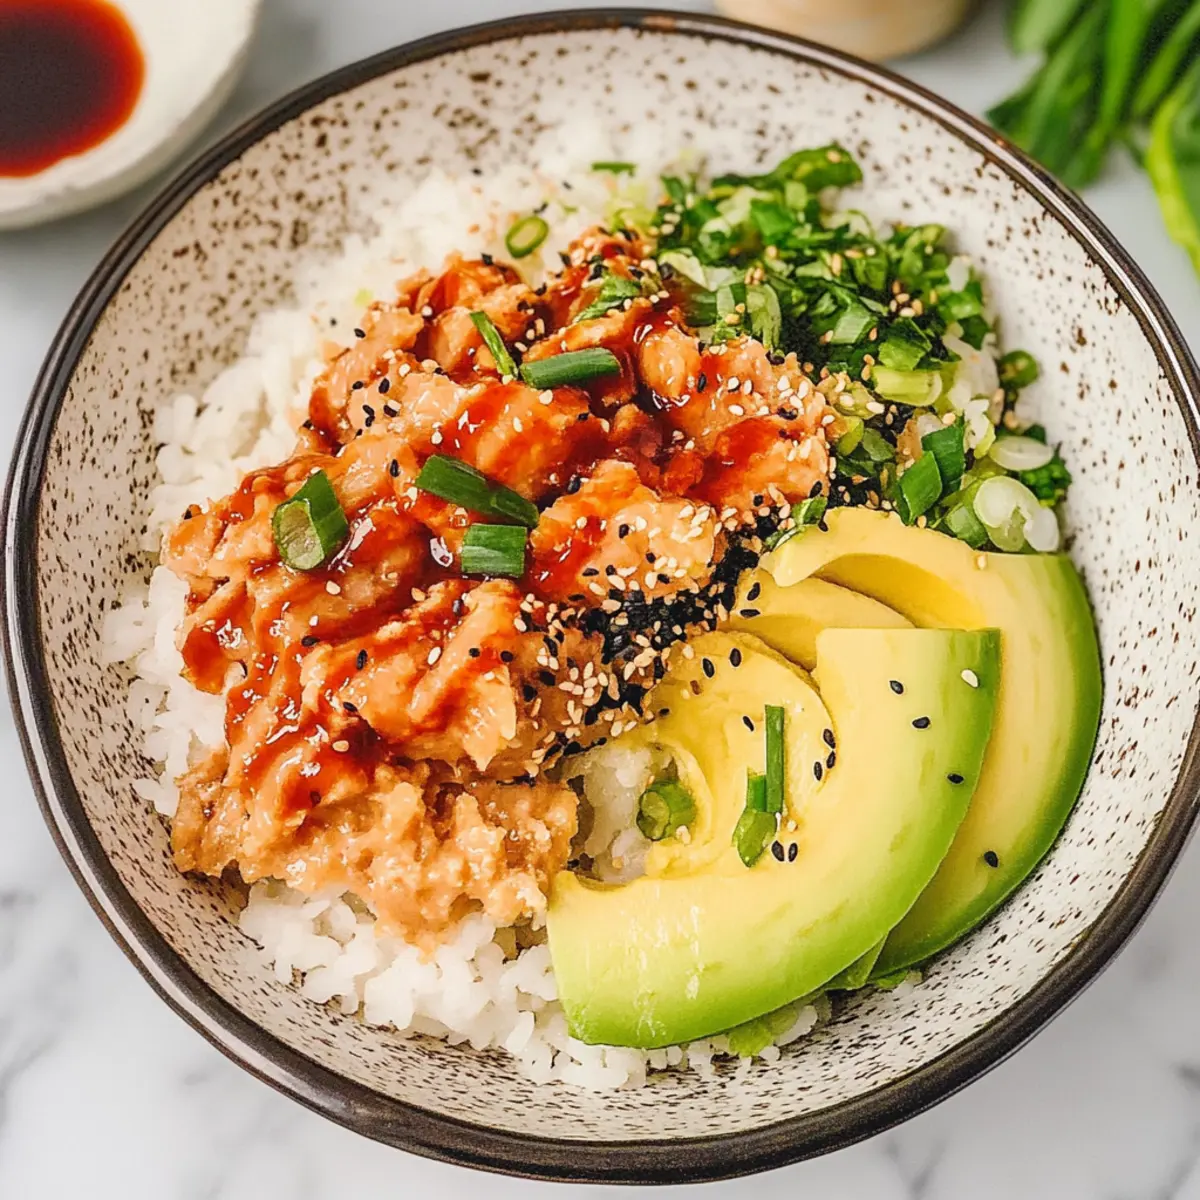
In a serving bowl, create a generous layer of the crispy sushi rice as the base. Top it with the spicy tuna mixture, followed by the diced avocado and chopped scallions. For an extra burst of flavor, sprinkle furikake over everything and drizzle sriracha sauce or additional bang bang sauce on top as desired. Enjoy your vibrant and flavorful Canned Tuna Sushi Bowl!
Expert Tips for Canned Tuna Sushi Bowl
• Rice Texture Matters: Ensure the sushi rice is slightly sticky and crispy at the bottom for the best experience. Don’t stir too much when frying!
• Quality Tuna: Opt for canned tuna packed in oil rather than water for richer flavor. Drain it well to avoid excess liquid in your bowl.
• Customizable Toppings: Personalize your Canned Tuna Sushi Bowl with favorite toppings like shredded carrots or pickled ginger for extra crunch and flavor.
• Sriracha Substitutions: If you’re not a fan of heat, replace sriracha with a mild sauce or simply skip it for a gentler option.
• Make-Ahead Components: You can prepare sushi rice and toppings in advance; just keep them in separate airtight containers for easy assembly later.
• Freshness Counts: Use ripe avocados and fresh scallions for the best flavor. A little attention to these details elevates the entire dish!
What to Serve with Canned Tuna Sushi Bowl?
The bright, fresh flavors of this dish call for accompaniments that will enhance your meal while creating a well-rounded dining experience.
-
Miso Soup: A warm, comforting bowl that adds umami depth, perfectly complementing the sushi bowl’s flavors.
-
Seaweed Salad: Light and refreshing, this salad brings an ocean-like crispness that balances the richness of the avocado.
-
Edamame: These tender, lightly salted soybeans offer a satisfying crunch and boost your protein intake seamlessly.
-
Pickled Ginger: A classic sushi side, its sharpness cuts through richness and refreshes your palate with every bite.
-
Cucumber Salad: Crisp cucumbers tossed in a tangy dressing provide a refreshing contrast to the hearty sushi bowl.
-
Sushi Rolls: For sushi lovers, pairing with classic rolls—like California or spicy tuna—creates a fun, shareable feast.
-
Green Tea: This calming beverage enhances the meal’s flavors while offering antioxidants, adding a healthy touch.
-
Mocha Sorbet: A sweet finish, this light dessert will cleanse your palate and keep your meal feeling light and refreshing.
Canned Tuna Sushi Bowl Variations
Feel free to mix and match toppings and ingredients to create your perfect Canned Tuna Sushi Bowl experience!
-
Protein Swap: Use canned salmon or shredded chicken in place of tuna for a twist. Each protein offers unique flavors and textures that can enhance your bowl.
-
Flavor Enhancer: Add pickled ginger or shredded carrots for a zesty crunch. These toppings not only bring bright flavors but also add a beautiful color contrast to your dish.
-
Healthy Grains: Substitute brown rice or quinoa for sushi rice to boost fiber content. These whole-grain options are nutritious and give your bowl an entirely new character.
-
Heat Level: For more heat, use a hot sauce blend instead of sriracha or incorporate sliced jalapeños for a spicy kick. Adjusting your heat level can change the entire dynamic of the bowl.
-
Creamy Twist: Swap out regular avocado for spicy guacamole for an extra flavor punch. Guacamole offers that wonderful creaminess we love while adding a hint of spice.
-
Crunch Factor: Include crushed sesame seeds or toasted nori strips to enhance texture. They lend a delicious crunch that’ll keep your taste buds dancing.
-
Saucy Ideas: Mix in teriyaki sauce or a yogurt-based dressing for a different flavor profile. A touch of sweetness from teriyaki can beautifully complement the savory elements.
-
Luxury Bowls: Treat your taste buds by adding soft-boiled eggs or edamame for a more luxurious feel. These ingredients turn your sushi bowl into a filling meal while keeping it super satisfying.
Embrace your creativity and have fun crafting a Canned Tuna Sushi Bowl that’s uniquely yours! For more meal inspiration, don’t miss out on our tasty Apple Oatmeal Bowl or the delightful Butter Yogurt Bowl.
Make Ahead Options
These Canned Tuna Sushi Bowls are fantastic for meal prep enthusiasts! You can prepare the sushi rice and toppings up to 3 days in advance, making weeknight dinners a breeze. For optimal freshness, refrigerate the rice in an airtight container, and store the bang bang tuna mixture, avocado slices, and scallions separately to prevent browning and sogginess. When you’re ready to enjoy your Canned Tuna Sushi Bowl, simply reheat the rice in the microwave or on the stovetop for a minute before assembling. Top with the pre-mixed tuna, fresh avocado, and garnishes, and you’ll have a delicious meal ready in no time – just as tasty as if it were made fresh!
How to Store and Freeze Canned Tuna Sushi Bowl
Fridge: Store leftovers in an airtight container for up to 2 days. Keep rice and toppings in separate containers to maintain freshness and texture.
Freezer: While it’s best served fresh, you can freeze the sushi rice for up to 1 month. Thaw in the refrigerator overnight before reheating.
Reheating: To reheat rice, add a splash of water and microwave for 30 seconds. Stir and heat for additional 15-second intervals until warmed through.
Make-Ahead Tips: Prepare components in advance, and store them separately in the fridge. Assemble your Canned Tuna Sushi Bowl when ready to eat for the best quality.
Canned Tuna Sushi Bowl Recipe FAQs
What type of canned tuna should I use for the best flavor?
Opt for canned tuna packed in oil, as it enhances the overall taste and richness of your sushi bowl. If you prefer a lighter option, tuna in water can also work but may not deliver the same depth of flavor.
How do I store leftovers of the Canned Tuna Sushi Bowl?
Store any leftovers in airtight containers for up to 2 days in the fridge. It’s best to keep the rice and toppings in separate containers to maintain freshness, as the rice may become soggy if mixed.
Can I freeze the components of the Canned Tuna Sushi Bowl?
Yes! While it’s better enjoyed fresh, you can freeze the sushi rice for up to 1 month. To do this, portion the cooled rice into airtight freezer bags or containers. When you’re ready to enjoy, simply thaw in the refrigerator overnight, then reheat on the stove or microwave.
What should I do if the sushi rice turns out too sticky?
If your sushi rice is overly sticky, ensure you use the right water-to-rice ratio and avoid overcooking it. If it sticks after cooking, try rinsing it with cold water, which may help separate the grains. To prevent stickiness in the future, allow the rice to cool slightly after cooking before mixing in the seasonings.
Can I customize the toppings for my sushi bowl?
Absolutely! The Canned Tuna Sushi Bowl is very customizable. Feel free to experiment with toppings like shredded carrots, cucumber slices, or pickled ginger for a variety of flavors and textures. Just be mindful of portion sizes to keep a balanced meal!
Is this dish suitable for those with allergies?
If you have a fish allergy, you can substitute canned tuna with canned chicken or chickpeas for a protein boost. Additionally, check the ingredients of your bang bang sauce to ensure it fits your dietary needs, especially for any potential allergens like eggs or gluten.
Canned Tuna Sushi Bowl: Quick, Tasty Comfort in a Bowl
Ingredients
Equipment
Method
- Cook the sushi rice according to package instructions. Transfer hot rice to a bowl and mix in rice vinegar, sesame oil, and sugar while warm.
- In a separate bowl, combine the drained canned tuna with the bang bang sauce until well coated.
- Heat a skillet over medium-high heat and add olive oil. Add the sushi rice, flatten, and cook for 3-5 minutes until golden brown. Flip and crisp the other side for another minute.
- In a serving bowl, create a layer of crispy sushi rice, top with the spicy tuna mixture, diced avocado, and chopped scallions. Sprinkle furikake and drizzle sriracha or additional bang bang sauce on top.
Leave a Reply