
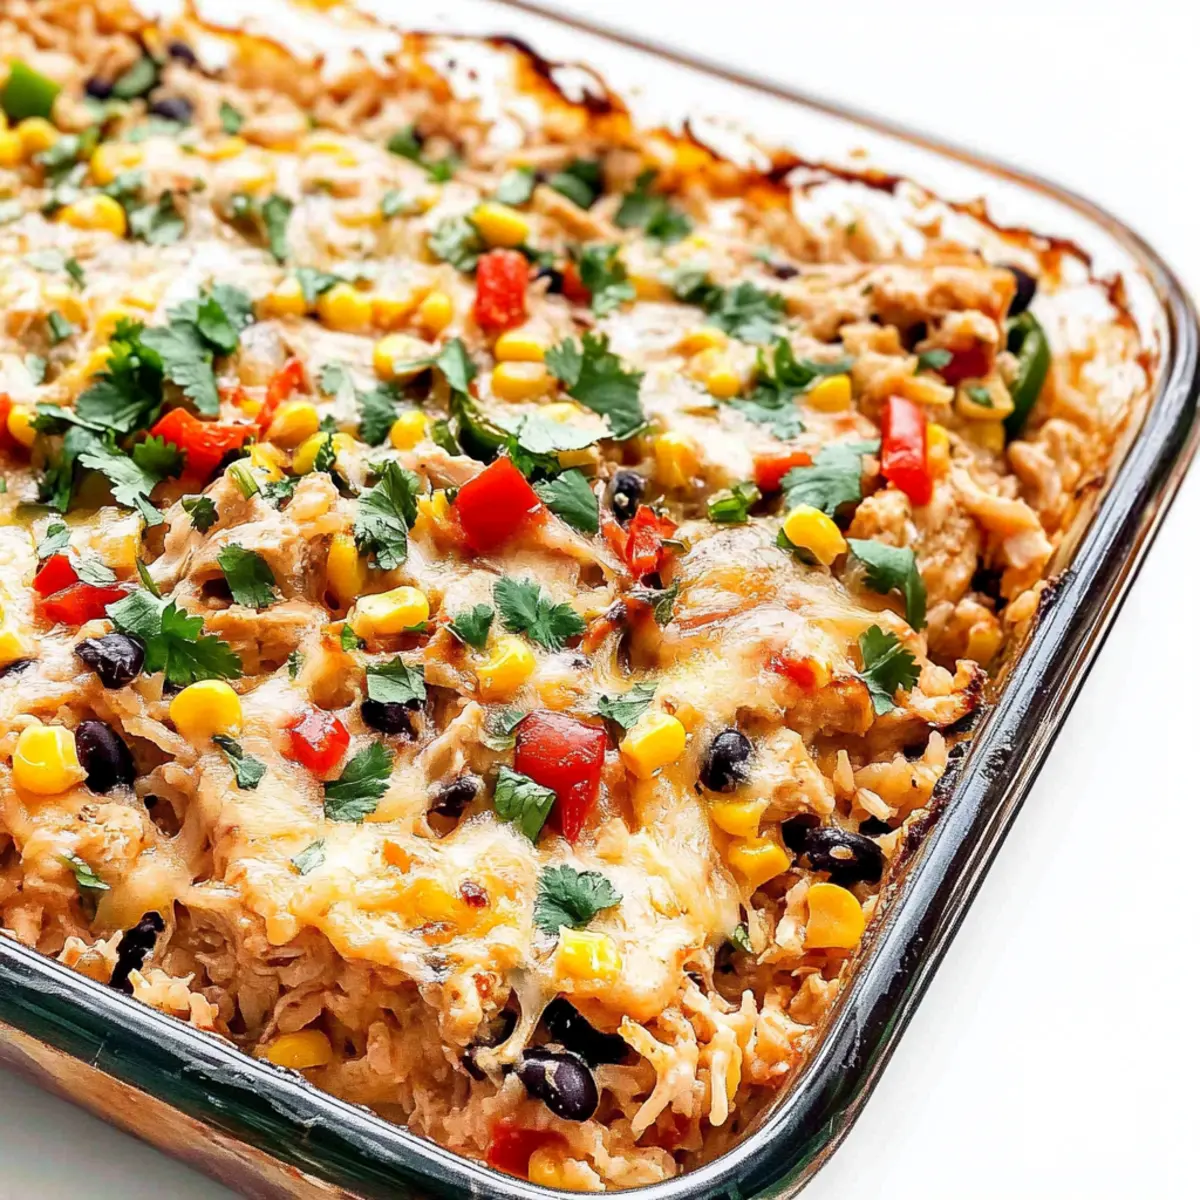
As I pulled the casserole from the oven, a warm wave of Mexican spices filled the kitchen, instantly elevating my mood. This Easy Gluten-Free Chicken Burrito Casserole has become my go-to dish for busy weeknights, combining tender chicken, zesty vegetables, and creamy cheese into a hearty, one-pan meal that the whole family adores. It’s not just simple to prepare; it’s a crowd-pleaser that bridges comfort food with vibrant flavors, proving that home-cooked meals don’t have to be complicated. Plus, you can easily customize it to fit dietary needs or personal preferences, making it versatile for everyone at the table. Are you ready to dive into this delightful blend of flavors?
Why is this casserole a must-try?
Hearty Comfort: This Chicken Burrito Casserole delivers a fulfilling meal that wraps the comfort of home cooking into every delicious bite.
Easily Customizable: Whether you prefer spicy or mild, you can tailor this dish with your choice of vegetables and seasonings, making it perfect for picky eaters.
Time-Saving Delight: With its straightforward prep and one-pan method, you can effortlessly whip this up within an hour, leaving you more time to enjoy with family.
Family Favorite: Its creamy, cheesy goodness has everyone coming back for seconds, making it a staple for your dinner rotation.
Healthy Twist: Using gluten-free ingredients, this casserole ensures that everyone can partake in the deliciousness without dietary worries. Pair it with a crisp salad or cilantro lime slaw for a refreshing side!
Chicken Burrito Casserole Ingredients
For the Casserole
- Onion – Adds sweetness and depth to the flavor; shallots can be a great substitute.
- Red Bell Pepper – Offers a sweet crunch; any color bell pepper works well.
- Parboiled Long-Grain Brown Rice – Provides structure and heartiness; white rice can also be used, but adjust cooking time.
- Fajita Seasoning – Infuses robust flavors; use homemade or store-bought, or substitute with taco seasoning when needed.
- Cayenne Pepper – Enhances heat (optional); omit for a milder dish.
- Frozen Corn Kernels – Adds sweetness and texture; fresh corn is a fantastic alternative.
- Low Sodium Black Beans – Provides protein and fiber; ensure they are drained and rinsed before use.
- Shredded Chicken – Main protein source; rotisserie chicken significantly reduces prep time.
- Reduced Sodium Chicken Broth – Contributes moisture and flavor; vegetable broth can be used for a vegetarian option.
- Mild Green Chiles – Introduces subtle heat; omit for less spice or use spicier chiles for an extra kick.
- Olive Oil – Aids in combining ingredients; can be omitted if enough moisture is provided by other components.
- Tomato Paste – Adds richness and umami; fresh tomatoes can also work, though texture may vary.
- Shredded Monterey Jack Cheese – Offers creaminess and flavor; Cheddar cheese is a delightful alternative.
For Serving
- Fresh Cilantro – Brightens up the dish; adds freshness and aroma.
- Sliced Green Onions – Provide a mild onion flavor; a perfect pop of color on top.
- Salsa – Adds zing and a burst of flavor; your favorite brand or homemade works great.
- Avocado – Creamy and rich; perfect for balancing out the flavors of the casserole.
This Chicken Burrito Casserole brings the flavors of Mexican cuisine to your table with ease!
Step‑by‑Step Instructions for Chicken Burrito Casserole
Step 1: Preheat the Oven
Begin by preheating your oven to 400°F (200°C). This ensures a perfectly cooked Chicken Burrito Casserole from the first minute it enters the oven. While waiting, you can gather all your ingredients and equipment such as a large mixing bowl and a baking dish to make the next steps seamless.
Step 2: Prepare the Vegetable Base
In a spacious baking dish, combine the diced onion, chopped red bell pepper, uncooked parboiled long-grain brown rice, and fajita seasoning. Mix all the ingredients thoroughly until everything is well-coated with the seasoning. This vibrant mixture will provide the flavor foundation for your casserole, blending the sweet taste of onion and bell pepper beautifully.
Step 3: Mix the Liquids
In a separate bowl, whisk together the reduced sodium chicken broth, mild green chiles, tomato paste, and olive oil until smooth and well-blended. This savory liquid mix will bring moisture and depth of flavor to your Chicken Burrito Casserole, enhancing the overall texture and taste when baked. Take a moment to make sure it’s well combined before moving on.
Step 4: Combine Ingredients
Pour the broth mixture over the rice and vegetable mixture in the baking dish, stirring gently to create an even distribution of the wet and dry elements. This step ensures that every grain of rice and vegetable is well-coated, allowing for even cooking and flavor infusion throughout the casserole.
Step 5: Add Proteins and Veggies
Now, add in the shredded chicken, drained and rinsed black beans, and frozen corn kernels, mixing until all ingredients are evenly distributed. The shredded chicken will provide that satisfying protein bounce, while the black beans and corn enhance the heartiness of your Chicken Burrito Casserole, making it perfectly filling for family meals.
Step 6: Bake the Casserole
Cover your baking dish tightly with aluminum foil and place it in the preheated oven. Bake for 65–70 minutes, or until all the liquid is absorbed and the rice is cooked through. You’ll know it’s ready when you see the edges bubbling and the casserole appears set rather than soupy, a sure sign of a well-baked dish.
Step 7: Add the Cheese
After baking, carefully remove the foil and sprinkle the shredded Monterey Jack cheese evenly over the top of the casserole. Return the dish to the oven for an additional 5–10 minutes, allowing the cheese to melt and turn slightly golden brown. This delicious layer adds a creamy texture to your Chicken Burrito Casserole that everyone will love!
Step 8: Cool and Serve
Once the cheese is melted and bubbling, take the casserole out of the oven and let it cool for about 5–10 minutes. Serve warm, garnished with fresh cilantro, sliced green onions, salsa, and avocado if desired. This resting time allows the flavors to meld and makes serving easier, ensuring a hearty Chicken Burrito Casserole that delights!
Expert Tips for Chicken Burrito Casserole
-
Check Liquid Levels: Ensure the casserole has enough moisture before removing it from the oven; excess liquid could make the dish soupy if not adjusted properly.
-
Homemade Seasoning: Consider making your own fajita seasoning for a personalized flavor boost. It’s simple and lets you control the spice level!
-
Shredded Chicken Shortcut: Using pre-cooked shredded chicken can save you a lot of time, making this Chicken Burrito Casserole even easier to put together.
-
Even Baking: Remember to cover your baking dish with aluminum foil in the initial baking phase to ensure that it cooks evenly without drying out.
-
Flavorful Additions: Feel free to experiment with adding different vegetables, like zucchini or extra bell peppers, to make the casserole even heartier and nutritious.
How to Store and Freeze Chicken Burrito Casserole
-
Fridge: Store leftovers in an airtight container for up to 4 days to maintain freshness and flavor. This Chicken Burrito Casserole tastes great even after a few days!
-
Freezer: For longer storage, freeze cooked portions in freezer-safe containers for 1-3 months. Ensure they are tightly sealed to prevent freezer burn.
-
Reheating: Thaw overnight in the fridge before reheating. Warm it in the oven at 350°F (175°C) until heated through, or use the microwave in short intervals.
-
Leftover Usage: Consider transforming leftover casserole into burrito wraps or stuffing into peppers for a fun twist on meals throughout the week!
What to Serve with Easy Gluten-Free Chicken Burrito Casserole
The warmth of this casserole beckons for delightful accompaniments that will elevate your family dinner experience.
-
Crispy Salad: A mixed greens salad topped with a zesty vinaigrette adds a refreshing crunch, balancing the richness of the casserole.
-
Cilantro Lime Slaw: This vibrant slaw brings a tangy, citrus twist that complements the flavorful layers of the Chicken Burrito Casserole while offering a satisfying crunch.
-
Guacamole: Creamy, rich guacamole invites your family to indulge further, with its smooth texture enhancing each bite and keeping the flavors vibrant.
-
Salsa Verde: A bright and zesty salsa will liven up each plate, bringing in fresh flavors that contrast beautifully with the heartiness of the casserole.
-
Avocado Slices: Soft avocado slices offer a rich creaminess, making every bite of the Chicken Burrito Casserole a touch more luxurious.
-
Tortilla Chips: Crispy tortilla chips serve as the perfect vessel for scooping up bitefuls of casserole, adding a delightful crunch to your meal.
-
Mexican Rice: Flavorful, seasoned Mexican rice rounds out your table, providing additional heartiness that complements the casserole seamlessly.
-
Chilled Beverages: Pair with chilled horchata or a refreshing limeade to quench your thirst—these beverages harmonize wonderfully with the Mexican-inspired flavors!
Make Ahead Options
These Easy Gluten-Free Chicken Burrito Casseroles are perfect for meal prep enthusiasts! You can fully assemble the casserole up to 24 hours in advance and refrigerate it until you are ready to bake. Simply follow the initial steps, layering the ingredients in your baking dish. To maintain quality, cover the casserole tightly with plastic wrap before refrigerating, which helps keep the flavors fresh. When you’re ready to enjoy, remove the wrap and bake as directed, adding a few extra minutes if baking from cold. This allows for a stress-free weeknight dinner that’s just as delicious as a freshly made meal!
Chicken Burrito Casserole Variations
Feel free to get creative with this Chicken Burrito Casserole and customize it to suit your taste!
-
Vegetarian: Swap the shredded chicken for roasted vegetables or additional black beans for a hearty plant-based version. Trust me, it’s just as satisfying without the meat!
-
Dairy-Free: Use a dairy-free cheese alternative or simply omit the cheese altogether. This allows the vibrant flavors of the dish to shine through without the creaminess.
-
Spicy Kick: Add diced jalapeños or swap in spicy green chiles for those who crave heat. A little extra spice can elevate the entire casserole!
-
Quinoa Upgrade: Replace rice with cooked quinoa for a protein-packed, gluten-free alternative. Quinoa brings a delightful nuttiness and an extra boost of nutrition.
-
Fajita Flavor Boost: Toss in more fajita seasoning or add a squeeze of lime juice right before serving to really bring out that zest! It adds a refreshing brightness that pairs wonderfully with the casserole.
-
Tortilla Layer: Instead of mixing all ingredients, create layers by adding corn tortillas between the mixture for a fun twist. It’s like a cozy burrito bake!
-
Curry Infusion: Why not experiment? Add a tablespoon of curry powder for a unique fusion flavor that keeps everyone guessing about the secret ingredient!
For more fabulous chicken dishes, check out my easy recipes for Garlic Parmesan Chicken or Creamy Mushroom Chicken. These variations will surely keep your dinners exciting!
Chicken Burrito Casserole Recipe FAQs
How do I select ripe vegetables for the casserole?
When choosing vegetables like bell peppers and onions, look for vibrant colors without any dark spots or bruises. A firm feel indicates freshness. For onions, ensure they are dry and free from soft spots. As for bell peppers, any hue will do, but avoid those with wrinkled skin, which can indicate age.
How should I store leftover Chicken Burrito Casserole?
Absolutely! Store any leftovers in an airtight container in the refrigerator for up to 4 days. To ensure the best taste and texture, allow the casserole to cool down before sealing. When you’re ready to enjoy it again, simply reheat until warmed through.
Can I freeze Chicken Burrito Casserole, and how do I do it?
Yes, you can! To freeze, let the casserole cool completely, then portion it into freezer-safe containers. Make sure to leave some space for expansion as it freezes. It can be kept for up to 1-3 months. When you’re ready to eat, thaw overnight in the fridge. Reheat in the oven at 350°F (175°C) until hot throughout—about 20-30 minutes.
What if my casserole turns out too soupy?
If your Chicken Burrito Casserole is too soupy, don’t worry! You can try baking it uncovered for an extra 10-15 minutes to help evaporate some of the liquid. Stirring gently during baking can also encourage even cooking. Next time, check the liquid levels before removing it from the oven to avoid this issue.
Are there any dietary considerations I should know about?
Certainly! This casserole is gluten-free when using gluten-free products. If you have allergies, ensure that your fajita seasoning and other ingredients are free of allergens. For pets, remember that some ingredients like onions can be toxic, so ensure any leftovers are kept out of reach.
Can I customize the Chicken Burrito Casserole for a vegetarian option?
Absolutely! Substitute the shredded chicken with more beans for added protein, or include extra vegetables like zucchini and bell peppers. You can also use vegetable broth in place of chicken broth for a fully vegetarian dish. This way, everyone can enjoy a delightful meal suited to their dietary preferences!
Hearty Chicken Burrito Casserole for Cozy Family Nights
Ingredients
Equipment
Method
- Preheat your oven to 400°F (200°C). Gather all your ingredients and equipment.
- In a large baking dish, combine diced onion, chopped red bell pepper, uncooked parboiled long-grain brown rice, and fajita seasoning. Mix well.
- In a separate bowl, whisk together reduced sodium chicken broth, mild green chiles, tomato paste, and olive oil until smooth.
- Pour the broth mixture over the rice and vegetable mixture in the baking dish, stirring gently.
- Add the shredded chicken, drained and rinsed black beans, and frozen corn kernels, mixing until evenly distributed.
- Cover the baking dish tightly with aluminum foil and bake for 65–70 minutes.
- Remove the foil and sprinkle shredded Monterey Jack cheese evenly over the casserole. Return to the oven for 5–10 minutes.
- Once the cheese is melted and bubbling, let the casserole cool for 5–10 minutes before serving.
Leave a Reply