
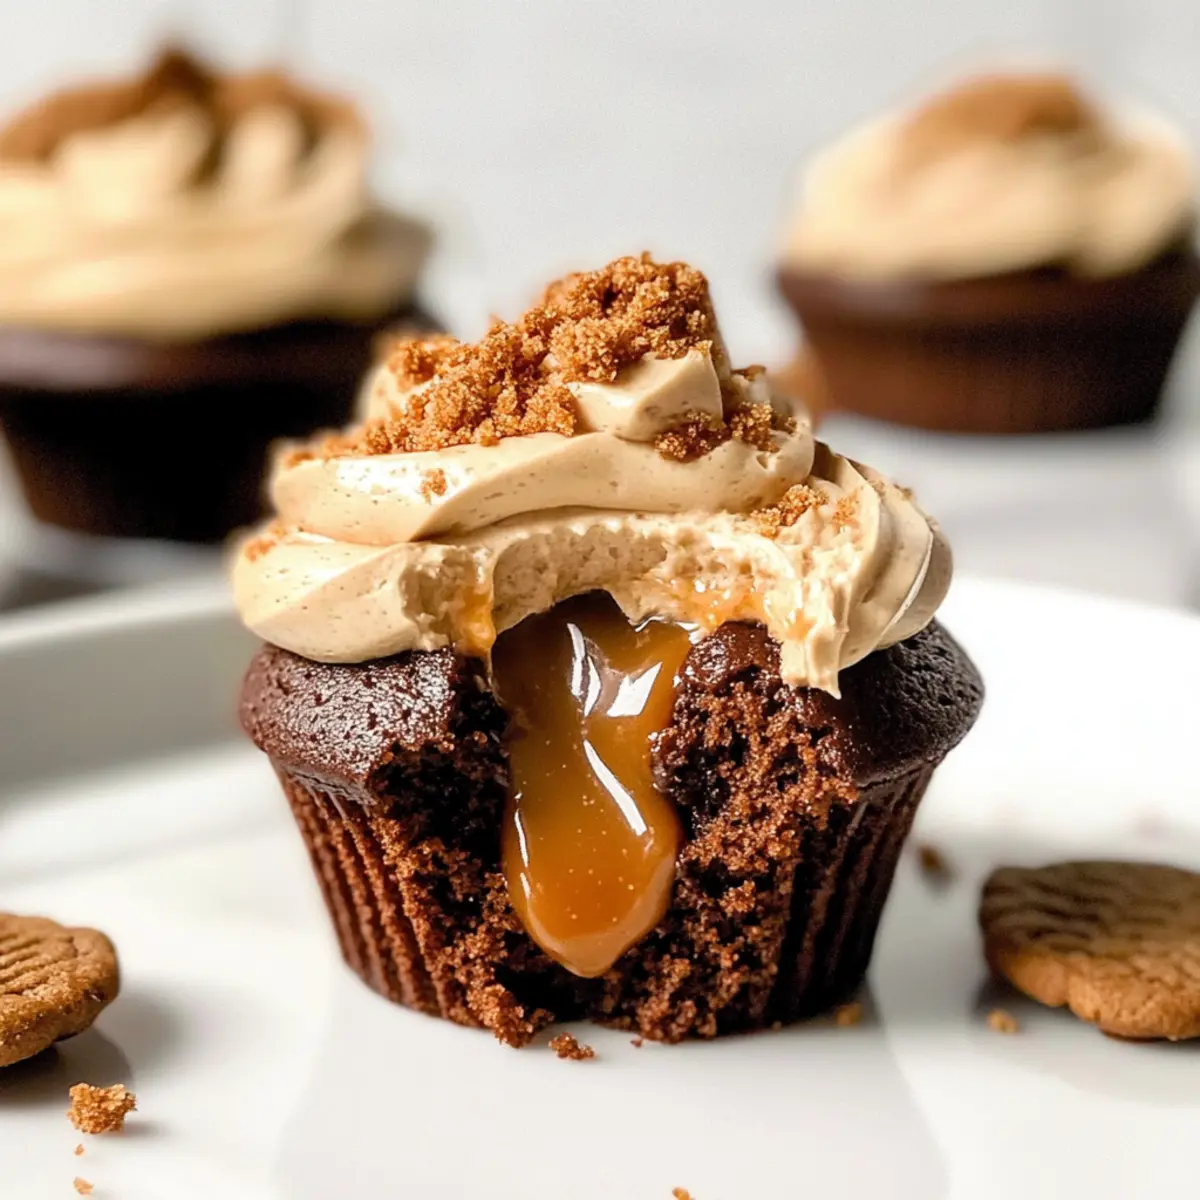
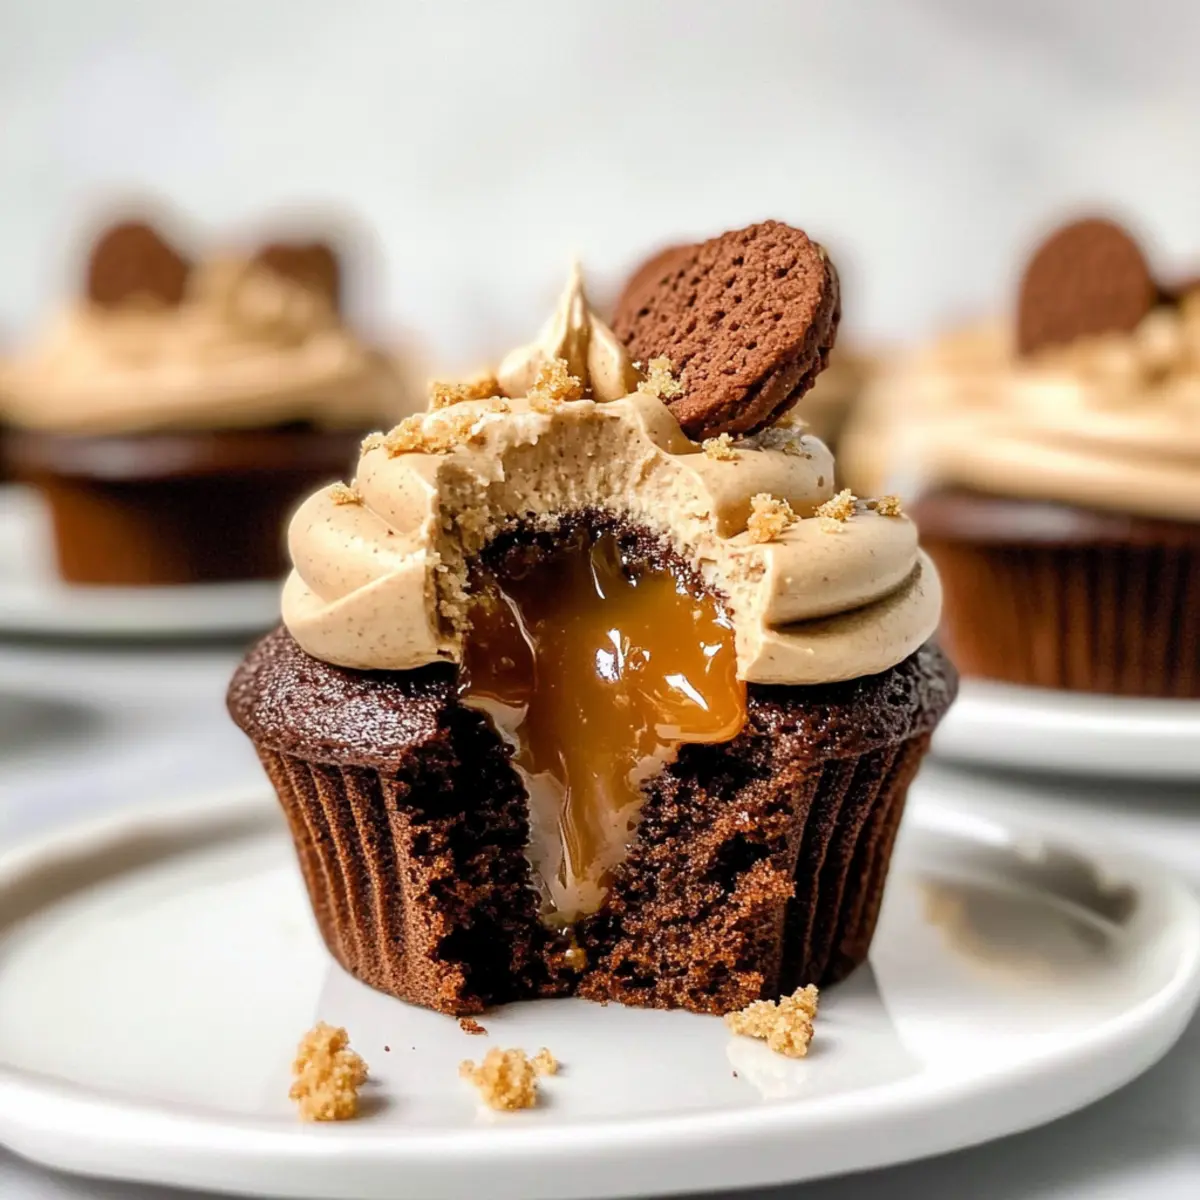
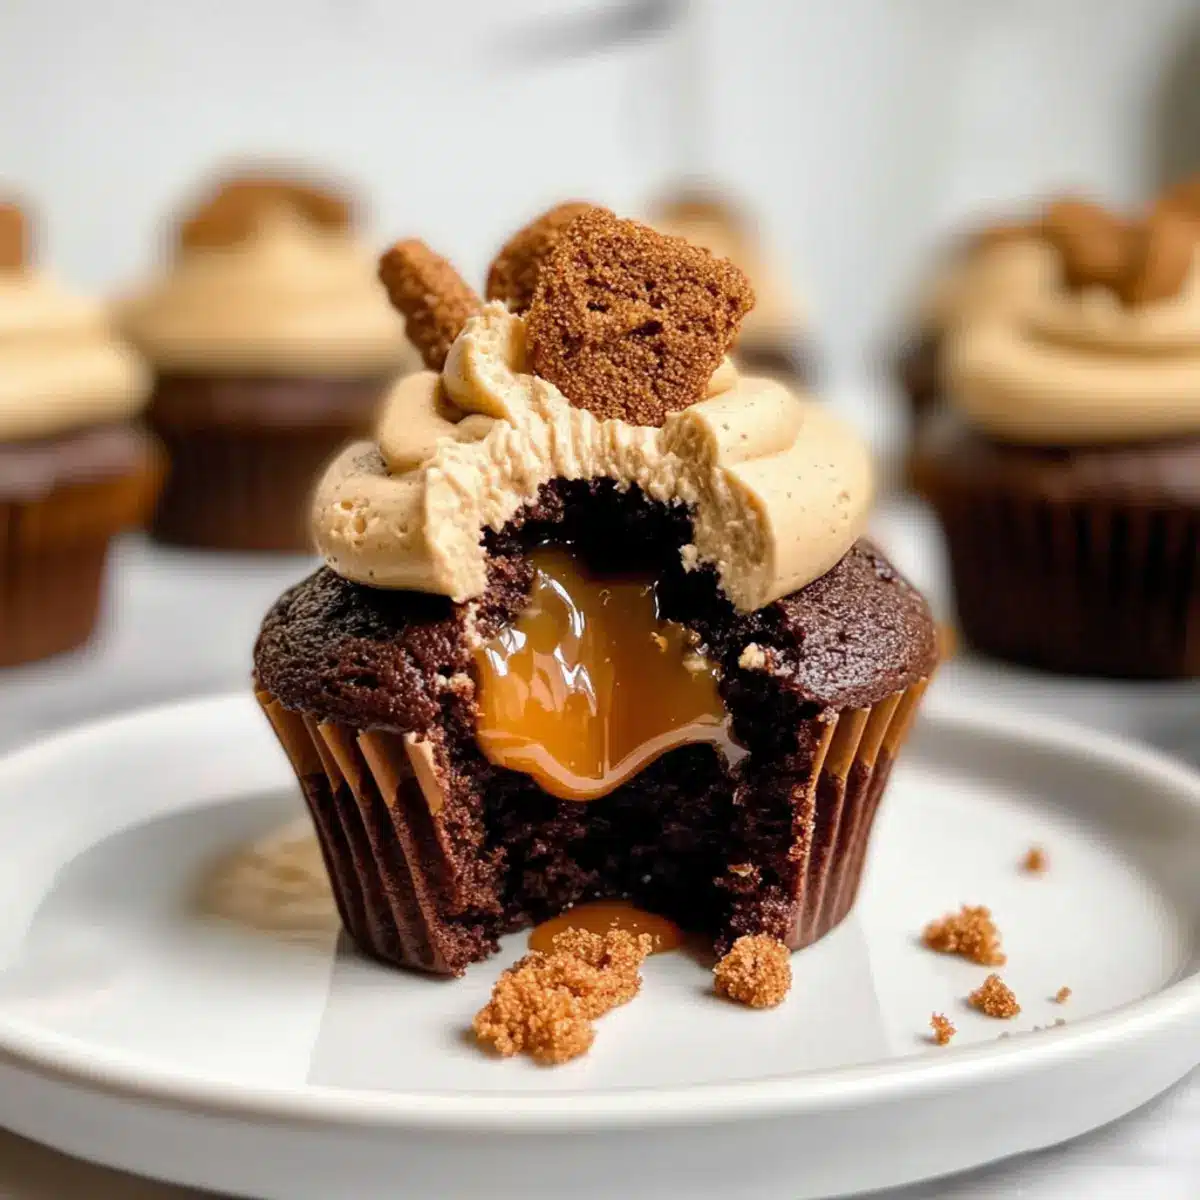
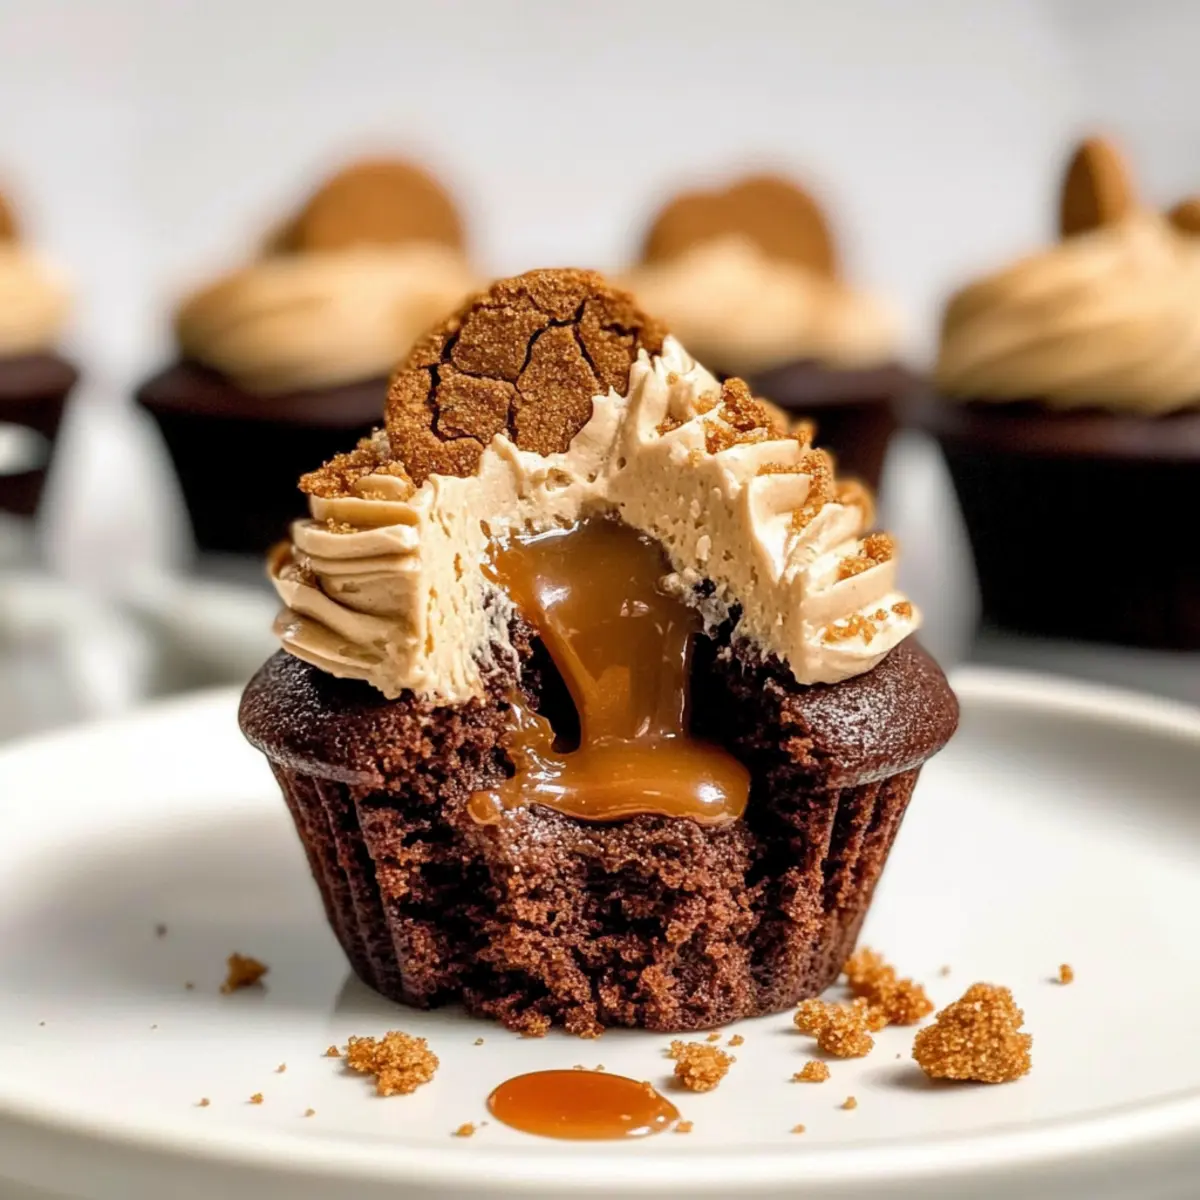
You know that moment when you take a bite of something so delicious it feels like a warm hug? That’s exactly what you’ll experience with these Chocolate Biscoff Cupcakes. Each cupcake is a delightful balance of moist chocolate cake paired with the velvety richness of Biscoff caramel filling, making them the ultimate indulgence for any dessert lover. The beauty of this recipe lies not just in its taste, but also in its swift preparation—perfect for those of us always on the go! Plus, they’re a guaranteed crowd-pleaser, ensuring your next gathering is filled with smiles and happy bellies. So, are you ready to whip up a batch of these irresistible treats? Let’s dive in!
Why You’ll Crave These Cupcakes?
Indulgence in Every Bite: Each cupcake is filled with luscious Biscoff caramel, creating a delightful explosion of flavors.
Quick and Easy: The straightforward preparation means you can enjoy these decadent treats in no time!
Crowd Favorite: Whether it’s a party or a cozy night in, these cupcakes are sure to impress everyone.
Versatile Swaps: Feeling adventurous? Try swapping Biscoff for Nutella or adding nuts for extra crunch!
Moist and Fluffy: Your taste buds will revel in the perfect texture that keeps each cupcake light yet satisfying.
Perfect Pairing: Serve with a scoop of vanilla ice cream or a dollop of whipped cream for the ultimate dessert experience!
Chocolate Biscoff Cupcake Ingredients
Unlock the magic of these decadent cupcakes!
For the Batter
• All-purpose flour – Provides structure and texture to the cupcake; substitute with gluten-free flour for a lighter option.
• Cocoa powder – Adds rich chocolate flavor; using Dutch-processed cocoa elevates the depth of taste.
• Baking powder & Baking soda – These leavening agents create a light and fluffy cupcake that melts in your mouth.
• Salt – Enhances sweetness and balances flavors beautifully.
• Sugar – Sweetens the cupcake perfectly; consider brown sugar for a rich depth of flavor.
• Eggs – Binds ingredients and adds moisture; ensure they’re at room temperature for the best results.
• Milk – Contributes to moisture; opt for almond milk to make this recipe dairy-free.
• Vegetable oil – Keeps cupcakes moist; feel free to replace it with melted coconut oil or melted butter for a different twist.
• Vanilla extract – Essential for baking; it adds a wonderful depth of flavor that complements the chocolate.
• Biscoff spread – Used for filling to provide that unique caramel flavor; other caramel spreads can substitute if needed.
For Topping
• Whipped cream – A dollop on top creates an extra indulgent treat.
• Chocolate ganache – Drizzling it enhances the chocolate experience for true chocoholics!
Get ready to fall in love with these Chocolate Biscoff Cupcakes—the perfect balance of indulgence and simplicity!
Step‑by‑Step Instructions for Chocolate Biscoff Cupcakes
Step 1: Preheat the Oven
Begin by preheating your oven to 350°F (175°C). While it’s heating up, take a moment to line a muffin tin with cupcake liners. This will prepare your pan for these delightful Chocolate Biscoff Cupcakes, ensuring they come out easily after baking.
Step 2: Combine Dry Ingredients
In a large mixing bowl, whisk together the all-purpose flour, cocoa powder, baking powder, baking soda, and salt. Make sure these dry ingredients are well combined to help your Chocolate Biscoff Cupcakes rise beautifully. Look for a uniform mixture with no lumps, which is essential for a light and fluffy texture.
Step 3: Mix Wet Ingredients
In a separate bowl, mix the sugar, eggs, milk, vegetable oil, and vanilla extract until fully combined. This step adds moisture and flavor to the cupcakes. The mixture should appear smooth and glossy, perfectly ready to unite with the dry ingredients for a rich chocolate base.
Step 4: Combine Wet and Dry
Gradually add the dry mixture to the wet mixture, stirring gently until just combined. Be careful not to overmix as this can lead to dense cupcakes. Aim for a thick batter with small lumps still visible, ensuring your Chocolate Biscoff Cupcakes remain moist and fluffy.
Step 5: Fill the Cupcake Liners
Spoon the cupcake batter into the lined muffin tin, filling each liner about halfway. This allows room for the cupcakes to rise and creates the perfect base for your filling. The rich chocolate color should be visible, hinting at the deliciousness to come.
Step 6: Add Biscoff Filling
Take a teaspoon of Biscoff spread and carefully place it into the center of each filled liner. This will be the sweet surprise inside your Chocolate Biscoff Cupcakes. Make sure to keep the filling centered so that it remains deliciously gooey when baked.
Step 7: Top with Batter
Using the remaining batter, top off each cupcake liner until they’re about two-thirds full. This will ensure that the cupcakes grow beautifully while baking, creating that delightful dome shape. You should still be able to see the Biscoff filling peeking through.
Step 8: Bake to Perfection
Bake your cupcakes in the preheated oven for 18-20 minutes. Keep an eye on them, and check for doneness by inserting a toothpick into the center. When it comes out clean, your Chocolate Biscoff Cupcakes are ready to be removed from the oven.
Step 9: Cool and Enjoy
Allow the cupcakes to cool in the pan for 5 minutes. Then, gently transfer them to a wire rack to cool completely. This cooling process is important, as it helps the cupcakes maintain their perfect texture and ensures the Biscoff filling has time to set.
What to Serve with Chocolate Biscoff Cupcakes?
When your Chocolate Biscoff Cupcakes are ready to delight, consider these scrumptious pairings to elevate your dessert experience.
-
Dollop of Whipped Cream: A light, fluffy addition that enhances the cupcakes’ moisture, creating a dreamy mouthfeel.
The sweetness of whipped cream complements the chocolate beautifully, allowing the flavors to dance harmoniously. -
Vanilla Ice Cream: Serve a scoop of creamy vanilla next to your cupcakes for a classic pairing that cools and contrasts.
The rich chocolate and warm Biscoff filling pair wonderfully with the cold creaminess of ice cream, making each bite divine. -
Espresso Coffee: A robust cup of espresso balances the sweetness of your cupcakes, enhancing their flavors.
The bitter notes of coffee harmonize perfectly with the decadent chocolate and caramel, making every bite an experience. -
Fresh Berries: Adding a side of mixed berries introduces a refreshing element with a hint of acidity.
Their natural juiciness cuts through the richness, providing a well-rounded taste sensation with every mouthful. -
Chocolate Ganache: Drizzle warm chocolate ganache over your cupcakes for an added layer of decadence.
The silky chocolate adds depth to the cupcake, creating an indulgent combination that will have you reaching for more. -
Caramel Sauce: An extra drizzle of warm caramel sauce brings out the Biscoff filling’s flavor profile beautifully.
The caramel enhances the already sweet experience, creating an irresistible treat that’s hard to resist! -
Herbal Tea: A soothing cup of herbal tea can calm the palate between bites, enhancing the overall dessert experience.
The fragrant notes of chamomile or peppermint create a cozy atmosphere, perfect for enjoying your cupcakes with friends.
Chocolate Biscoff Cupcakes Variations
Feel free to sprinkle your creativity into these cupcakes—your taste buds will thank you!
- Gluten-Free: Substitute all-purpose flour with a 1:1 gluten-free blend for a delightful treat that everyone can enjoy.
- Nutty Surprise: Add chopped walnuts or hazelnuts to the batter for a crunchy twist that pairs perfectly with the creamy filling.
- Chocolate Hazelnut: Swap Biscoff spread with Nutella for a luxurious chocolate-hazelnut flavor that will leave you dreaming of dessert.
- Vegan Option: Use flax eggs and almond milk as substitutes for eggs and regular milk to create a moist and scrumptious vegan version.
- Caramel Drizzle: Drizzle warm caramel sauce over your cupcakes just before serving for an extra layer of sweet decadence.
- Spicy Kick: Add a pinch of cayenne pepper to the batter for a surprising kick that beautifully complements the sweetness!
- Frosting Variations: Top with a rich chocolate ganache or a fluffy cream cheese frosting instead of traditional buttercream for a unique finish.
- Flavor Infusion: Try infusing the milk with brewed coffee or espresso for an intense flavor boost that elevates your chocolate experience.
Feeling inspired? If chocolate is calling your name, you might also want to check out Cream Cheese Chocolate Chip Cookies or whip up a batch of Whipped Hot Chocolate to cozy up with these delightful treats!
Make Ahead Options
These Chocolate Biscoff Cupcakes are perfect for meal prep enthusiasts looking to save time on busy days! You can prepare the cupcake batter up to 24 hours in advance by mixing the dry ingredients together and separately combining the wet ingredients. Keep the two mixtures refrigerated until you’re ready to bake. Additionally, you can fill the cupcake liners and add the Biscoff spread, then cover and refrigerate for up to 3 days before baking. Just remember, to maintain their delightful moisture, ensure they’re stored in an airtight container. When you’re ready to enjoy, simply preheat the oven, bake, and you’ll have warm, decadent Chocolate Biscoff Cupcakes that taste just as delightful as if they were freshly made!
Expert Tips for Chocolate Biscoff Cupcakes
- Room Temperature Ingredients: Ensure all ingredients are at room temperature before mixing to promote better emulsification and a light texture for your cupcakes.
- Avoid Overmixing: Gently combine wet and dry ingredients until just combined. Overmixing can lead to dense Chocolate Biscoff Cupcakes, which no one wants!
- Level Filling: When adding Biscoff spread, make sure it’s centered and not too much or too little. This ensures the filling is gooey and remains a delightful surprise.
- Use Cookie Scoop: For even-sized cupcakes, use a cookie scoop to distribute the batter. This helps with uniform baking and presentation!
- Check for Doneness: Use a toothpick to test for doneness around the 18-minute mark; if it comes out clean, they’re ready. Overbaking can dry them out!
How to Store and Freeze Chocolate Biscoff Cupcakes
Room Temperature: Store unfrosted cupcakes in an airtight container at room temperature for up to 3 days. They’ll stay moist and delicious, perfect for quick grab-and-go treats.
Fridge: If you need to keep them longer, refrigerate frosted Chocolate Biscoff Cupcakes in an airtight container for up to 5 days. Bring them back to room temperature before serving for the best flavor.
Freezer: Freeze unfrosted cupcakes by wrapping them individually in plastic wrap and placing them in a freezer-safe bag for up to 3 months. Thaw in the fridge overnight before enjoying!
Reheating: If you want a warm cupcake, pop it in the microwave for about 10-15 seconds. Enjoy that gooey Biscoff filling—it’s a treat you won’t want to miss!
Chocolate Biscoff Cupcakes Recipe FAQs
What type of flour should I use for Chocolate Biscoff Cupcakes?
For the best structure and texture, all-purpose flour is recommended. However, if you are looking for a gluten-free option, you can easily substitute it with a gluten-free all-purpose flour blend, ensuring you still get that fluffy texture.
How should I store leftover cupcakes?
Store your unfrosted Chocolate Biscoff Cupcakes in an airtight container at room temperature for up to 3 days. If frosted, you can keep them in the fridge for up to 5 days. Just remember, bringing them back to room temperature enhances their flavor before serving!
Can I freeze Chocolate Biscoff Cupcakes?
Absolutely! To freeze, wrap each unfrosted cupcake tightly in plastic wrap and place them in a freezer-safe zip-top bag. They can be kept in the freezer for up to 3 months. When you’re ready to enjoy, simply thaw them in the fridge overnight.
What if my cupcakes come out dense?
If your Chocolate Biscoff Cupcakes turn out dense, it’s likely due to overmixing the batter. Make sure to mix until just combined. Additionally, ensure that your ingredients, especially eggs and milk, are at room temperature for better aeration.
Are these cupcakes suitable for people with allergies?
These cupcakes contain common allergens such as eggs, dairy, and gluten. For a dairy-free version, substitute regular milk with almond milk, and for a gluten-free option, use a suitable flour blend. Always check specific ingredient labels for allergy information to ensure safety.
Can I use a different filling instead of Biscoff spread?
The more the merrier! You can definitely swap Biscoff spread with other caramel spreads, or even try Nutella for a chocolate-hazelnut twist. Just keep in mind that it will alter the flavor profile slightly, but it’ll still be delicious!
Irresistible Chocolate Biscoff Cupcakes with Caramel Filling
Ingredients
Equipment
Method
- Preheat your oven to 350°F (175°C) and line a muffin tin with cupcake liners.
- In a large bowl, whisk together flour, cocoa powder, baking powder, baking soda, and salt until no lumps remain.
- Mix sugar, eggs, milk, vegetable oil, and vanilla in a separate bowl until smooth and glossy.
- Gradually add dry ingredients to wet ingredients, stirring gently until just combined.
- Spoon batter into lined muffin tin, filling each liner halfway.
- Add a teaspoon of Biscoff spread into the center of each filled liner.
- Top each cupcake liner with remaining batter until about two-thirds full.
- Bake for 18-20 minutes, checking for doneness with a toothpick.
- Allow cupcakes to cool in pan for 5 minutes before transferring to a wire rack.
Leave a Reply