
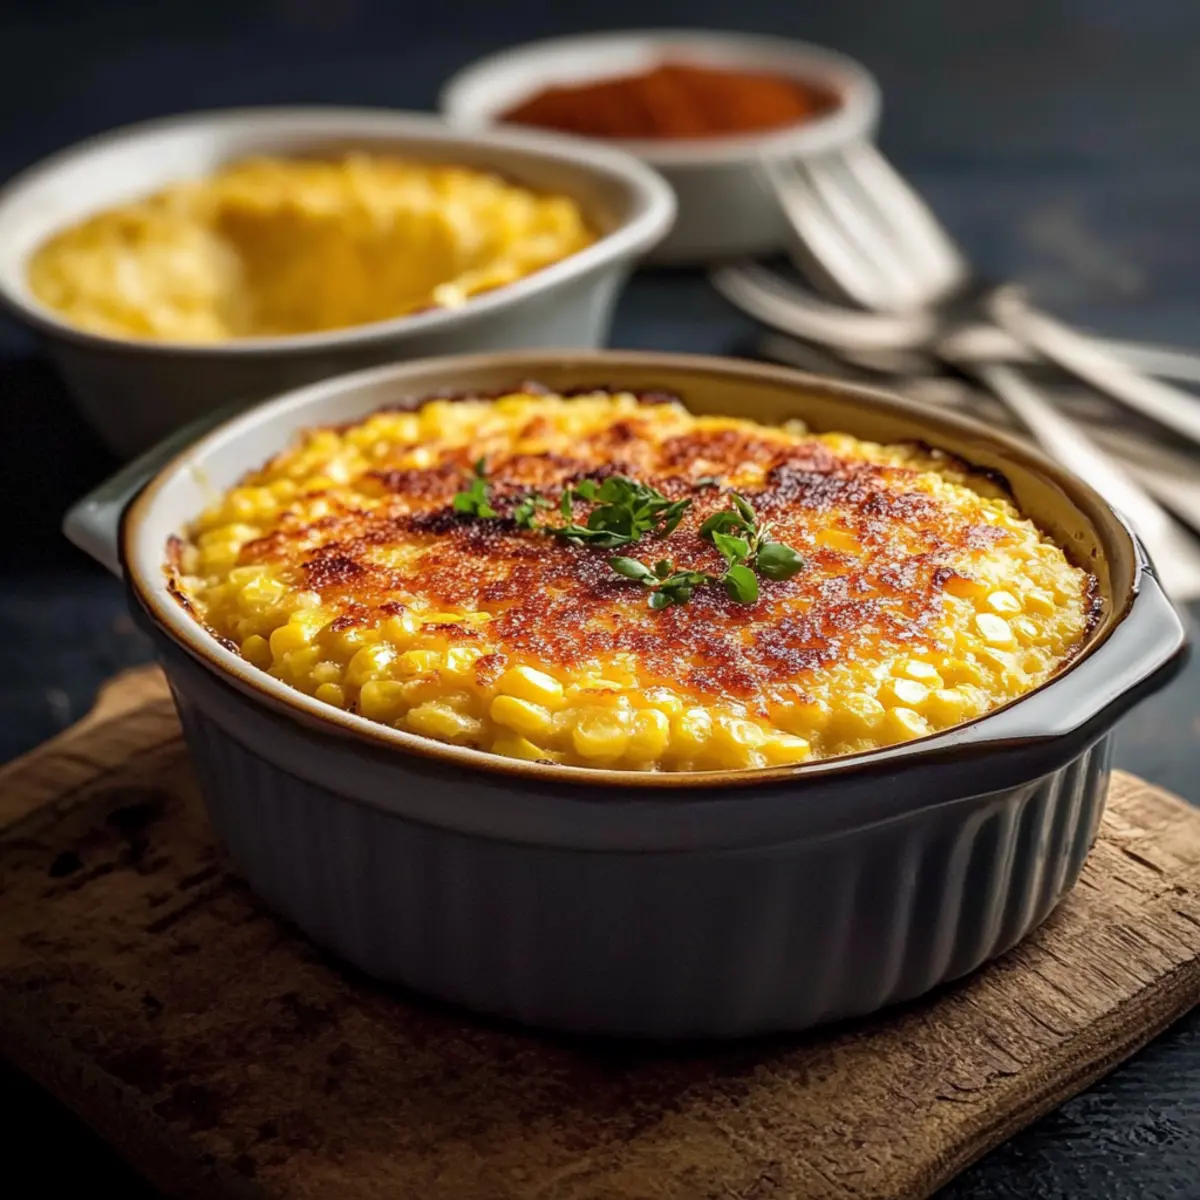
As I prepared a simple meal one evening, the warm aroma of corn wafted through my kitchen, sparking a craving for something indulgent yet comforting. Enter Ruth’s Chris Corn Pudding, a creamy side dish that effortlessly elevates your dining experience. This Corn Pudding Recipe combines whole-kernel corn and creamed corn into a luscious, custard-like treat that’s perfect for special gatherings or a cozy family dinner. Not only is it easy to whip up, but its rich texture leaves everyone asking for seconds. With just a handful of ingredients, this recipe transforms humble corn into an elegant delight that sings alongside your favorite main courses. Ready to bring a touch of steakhouse charm to your table? Let’s dive into this deliciously creamy adventure!
Why is This Corn Pudding Recipe Special?
Creamy Deliciousness: This Corn Pudding Recipe is the ultimate comfort food, merging sweet corn with a rich custard-like texture that will warm your heart.
Simplicity Wins: Using just a few pantry staples, you can create an impressive side dish without fuss, making it the ideal choice for busy weeknights or special celebrations.
Crowd-Pleasing Flavor: Whether you’re serving it alongside grilled meats or enjoying it at a holiday feast, everyone will rave about its delightful balance of sweet and savory flavors.
Versatile Ingredient Swaps: Feel free to get creative! Add diced bell peppers for color or a hint of spice with jalapeños, transforming this dish to suit your taste.
Perfectly Make-Ahead: Prepare it a day in advance and simply reheat, allowing you to savor more time with family and friends. For more tasty side dish ideas, check out my Creamy Street Corn Pasta or Winter Salad recipes!
Corn Pudding Recipe Ingredients
• Here’s everything you need to create this creamy delight!
For the Pudding Base
- Whole Kernel Corn – Provides sweet corn flavor and texture; using drained canned corn makes it super convenient.
- Creamed Corn – This is essential for the pudding’s creamy base, helping to achieve that luscious custard-like consistency.
- Corn Muffin Mix – Adds structure and a hint of sweetness; if you want to get fancy, homemade cornbread mix works beautifully too.
- Sour Cream – Introduces creaminess and a slight tang; Greek yogurt can offer a lighter alternative that still tastes great.
For the Flavor Boosters
- Butter (Melted) – Enhances the dish’s richness and moisture; don’t skimp on this one!
- Large Eggs – Acts as a binding agent, ensuring the pudding has that fluffy texture everyone loves—be sure to beat them until fluffy before adding.
- Sugar – Balances the savory notes in the pudding; feel free to adjust based on your sweetness preference.
- Salt – A key ingredient to enhance the overall flavor; it’s best not to omit this essential component.
Dive into this Corn Pudding Recipe and experience the warm comfort of a dish that your family and friends will adore!
Step‑by‑Step Instructions for Corn Pudding Recipe
Step 1: Preheat the Oven
Begin by preheating your oven to 350°F (175°C). While the oven heats up, take a moment to generously grease a 9×13-inch baking dish with melted butter. This ensures the Corn Pudding will easily release after baking, resulting in that perfect custard-like texture you’re after.
Step 2: Combine Corn Ingredients
In a large mixing bowl, combine the drained whole kernel corn and creamed corn. Stir these together until evenly blended, creating a creamy base that carries the sweetness of the corn. You will want a smooth and cohesive mixture, so set it aside while you prepare the other ingredients.
Step 3: Mix in the Corn Muffin Mix
Next, add the corn muffin mix directly into the corn mixture, using a spatula to fold it in gently. This step adds structure and a hint of sweetness to your Corn Pudding. Be careful not to overmix; you want to have a well-combined batter while maintaining some texture.
Step 4: Beat the Eggs
In a separate bowl, crack the large eggs and beat them until they become light and fluffy, which should take about 2 minutes. This fluffy egg mixture is key for achieving the lightness in your Corn Pudding. Once ready, set the eggs aside until you’re ready to incorporate them with the other ingredients.
Step 5: Combine Creamy Ingredients
In a medium bowl, blend together the sour cream and melted butter until they are fully combined. Then, mix in the sugar and salt, creating a creamy and flavorful addition to the pudding. This combination introduces richness and tanginess, enhancing the overall flavor of your Corn Pudding.
Step 6: Fold All Ingredients Together
Now, bring all the mixtures together—fold the beaten eggs and the creamy mixture into the corn and muffin mix gently. Use a spatula to ensure everything is just combined, avoiding overmixing to keep your pudding light and fluffy. This is where the magic truly begins: a delightful union of sweet textures.
Step 7: Pour and Spread the Batter
Carefully pour the batter into the prepared baking dish, making sure to spread it out evenly. This ensures that the Corn Pudding cooks uniformly, developing that golden crust on top. You want to see a smooth surface ready for baking, inviting you to dig in once it’s finished.
Step 8: Bake to Perfection
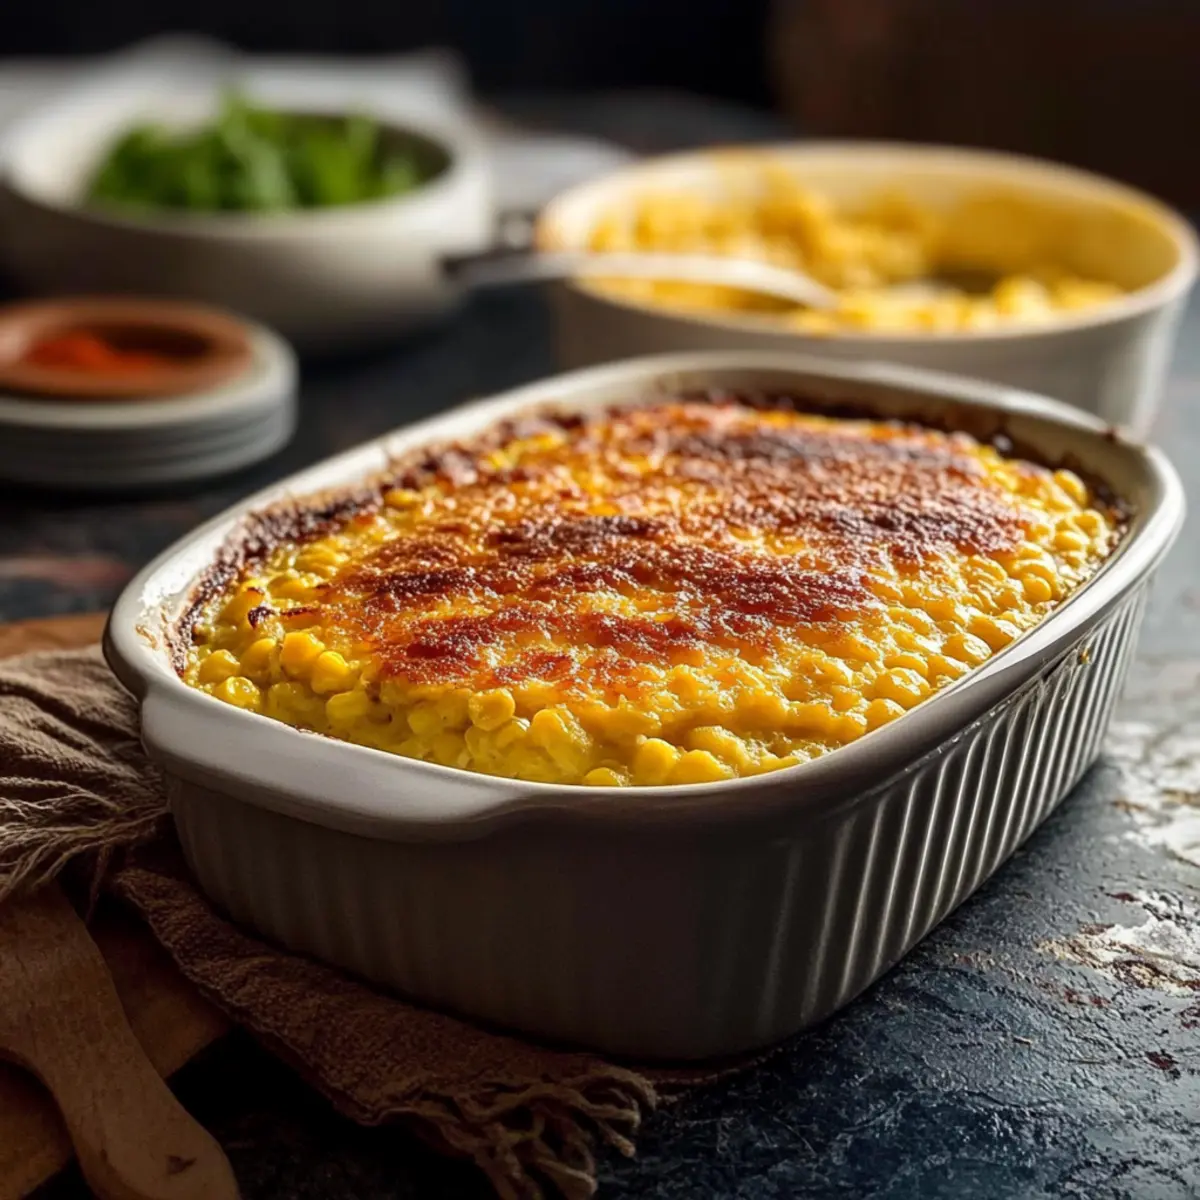
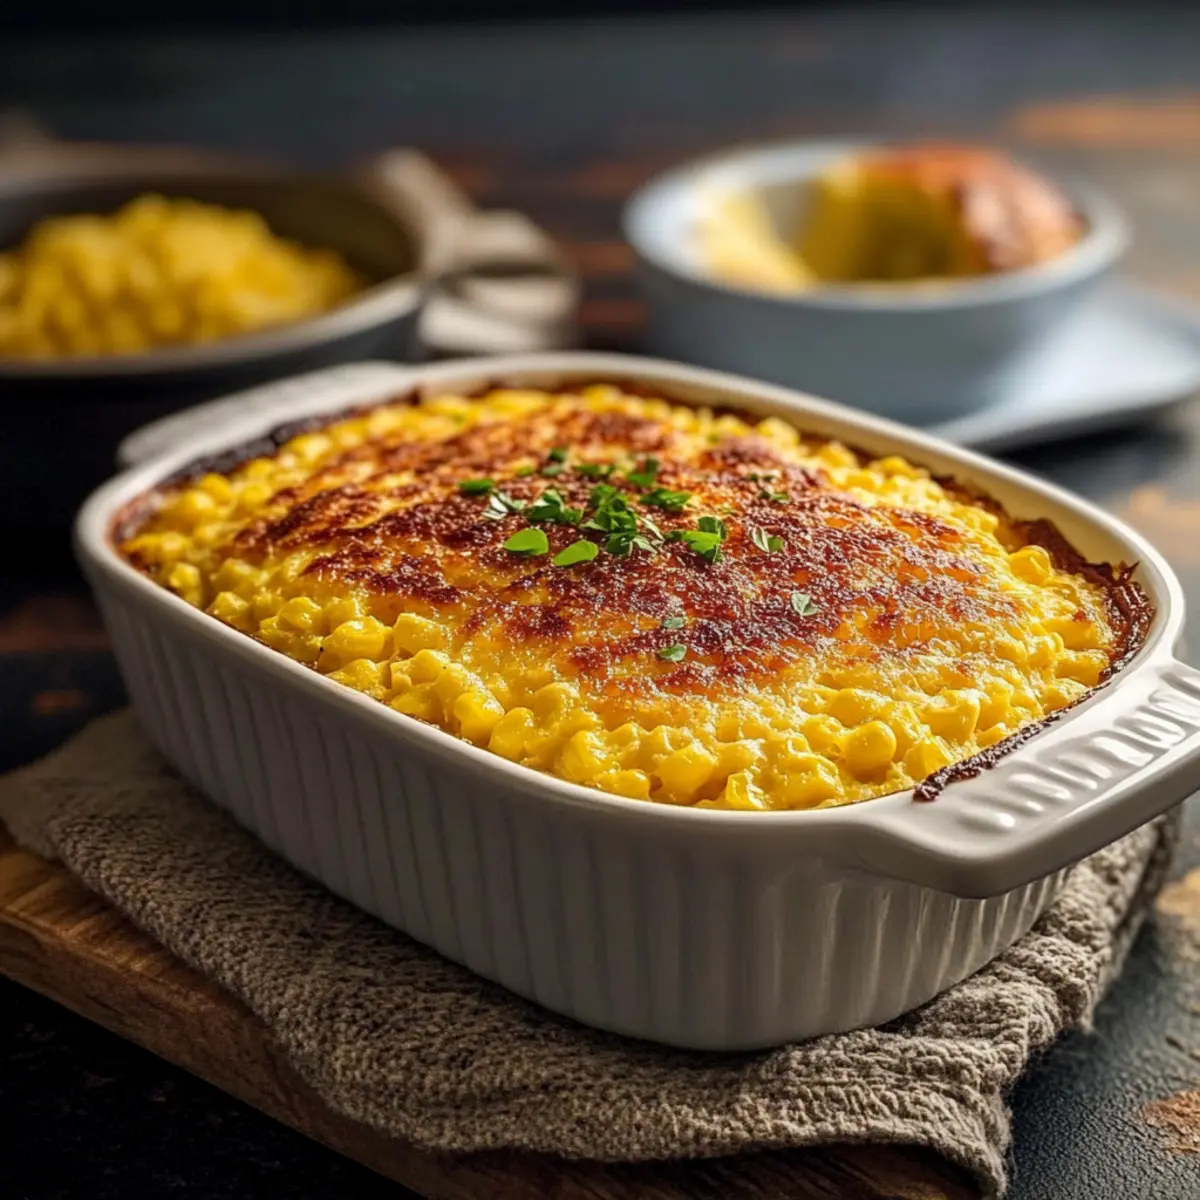
Slide the baking dish into your preheated oven, and let it bake for 45-50 minutes. You’re looking for that golden-brown top and the edges pulling slightly away from the dish. To check for doneness, insert a toothpick into the center; if it comes out clean, your Corn Pudding is ready to delight!
Step 9: Cool and Serve
After removing the Corn Pudding from the oven, allow it to cool for about 10 minutes before serving. This crucial step helps the pudding set, making it easier to cut into squares. Its velvety texture, combined with a warm, inviting scent, is ready to enhance your meal or celebration!
Expert Tips for Corn Pudding Recipe
Drain Corn Well: Ensure you drain the canned whole kernel corn thoroughly to prevent excess liquid, which can make the pudding soggy.
Gentle Mixing: Always fold the ingredients gently to maintain a light, airy texture. Overmixing can lead to a denser corn pudding, which isn’t as delightful.
Oven Accuracy: Use an oven thermometer to confirm that your oven is at the correct temperature. This ensures the pudding bakes evenly and achieves that perfect golden brown crust.
Cooling Time: Allow the corn pudding to cool for about 10 minutes before serving. This helps it set and makes it easier to cut into clean squares while enhancing its creamy texture.
Storage Tips: If you have leftovers, store them in an airtight container in the refrigerator for up to 3 days. Reheat gently in the oven for the best flavor.
What to Serve with Ruth’s Chris Corn Pudding?
Picture a cozy dinner where rich flavors dance on your palate and delightful side dishes steal the show.
- Grilled Steak: Pair this creamy delight with juicy grilled steak for a classic steakhouse experience that will impress your guests.
- Roasted Chicken: The savory notes of a herb-marinated roasted chicken complement the sweetness of corn pudding, creating a beautifully balanced meal.
- Fried Chicken: The crispy texture of fried chicken alongside the velvety corn pudding offers a comforting contrast, perfect for family gatherings.
- Green Beans Almondine: The fresh crunch of green beans tossed with toasted almonds provides a nutritious and vibrant touch to your plate.
- Garlic Mashed Potatoes: Creamy mashed potatoes infused with garlic make for a rich pairing, layering comfort and delicious flavors with the pudding.
- Cornbread: Enhance the Southern charm by serving cornbread, a delightful addition that echoes the sweet corn flavors of your dish.
For drinks, consider a chilled glass of Prosecco to add a festive sparkle, or a refreshing iced tea infused with lemon for a touch of sweetness. This meal could be completed with a light dessert like a fruit cobbler to round off the evening perfectly!
Corn Pudding Recipe Variations
Feel free to unleash your creativity and customize this corn pudding to make it your own delight!
-
Vegetable Boost: Mix in diced bell peppers or zucchini for a pop of color and added nutrition. This not only enhances the dish visually but also adds layers of flavor.
-
Spicy Kick: Incorporate diced jalapeños or a pinch of cayenne pepper for a zesty twist. The heat can perfectly complement the sweetness of the corn, making every bite exciting!
-
Cheesy Goodness: Stir in shredded cheese, such as sharp cheddar or Monterey Jack, for a creamy richness that will make the pudding even more indulgent. This melty addition brings comfort to another level!
-
Herb Infusion: Add fresh herbs like chives or parsley to introduce a fragrant element. Herbs can elevate the flavor profile, making each serving taste even more exquisite.
-
Sweet Variation: For a sweeter version, toss in some golden raisins or dried cranberries. These little gems can add a delightful burst of flavor, making it perfect for brunch gatherings.
-
Gluten-Free: Swap the corn muffin mix with a gluten-free cornbread mix or homemade mixture. Everyone will enjoy a gluten-free version that doesn’t compromise on taste!
-
Creamy Substitute: Use cream cheese instead of sour cream for an ultra-creamy base. This twist will yield a richer texture that is simply divine!
For more comforting side dish ideas that pair well with your favorite mains, check out my Creamy Street Corn Pasta or my delightful Winter Salad. Enjoy your culinary adventures!
How to Store and Freeze Corn Pudding
Fridge: Keep leftovers in an airtight container for up to 3 days. Before serving, gently reheat in the oven to maintain that creamy texture.
Freezer: Corn pudding can be frozen for up to 2 months. Slice into portions, wrap in plastic wrap, and store in a freezer-safe container. Thaw in the fridge before reheating.
Reheating: For the best results, reheat individual portions in a warm oven until heated through. This will help restore its original creamy consistency, ensuring every bite is delightful!
Make Ahead Options
These delightful Corn Pudding Recipes are perfect for busy home cooks looking to save time! You can prepare the entire mixture up to 24 hours in advance. Simply combine all the ingredients as directed and pour the batter into your greased baking dish. Cover it tightly with plastic wrap and refrigerate. To maintain the creamy texture, prevent excess air from getting in. When you’re ready to serve, simply remove it from the fridge, let it sit at room temperature for about 30 minutes to ensure even baking, and then pop it into your preheated oven. Bake as instructed, and you’ll have a fresh, comforting dish ready to impress!
Corn Pudding Recipe FAQs
What type of corn should I use for the corn pudding?
Absolutely! You can use drained canned whole kernel corn for convenience, as it provides a delightful sweet corn flavor and texture. If you’re feeling adventurous, fresh corn or frozen corn can be great alternatives, although you may need to adjust cooking times slightly.
How should I store leftover corn pudding?
Very good question! Store any leftover corn pudding in an airtight container in the refrigerator for up to 3 days. Make sure to let it cool completely before sealing to maintain its creamy texture. When you’re ready to enjoy it again, simply reheat in the oven until warmed through.
Can I freeze corn pudding?
Yes, you can freeze corn pudding for up to 2 months! I often recommend slicing it into portions before wrapping each slice in plastic wrap. Place the wrapped portions in a freezer-safe container to prevent freezer burn. Simply thaw in the fridge overnight before reheating in the oven to restore its creamy goodness!
What if my corn pudding is too dense?
If your corn pudding turns out dense, it might be due to overmixing the ingredients. For next time, mix just until combined and avoid vigorous stirring. Remember, a gentle fold can keep it light and fluffy. If it’s already baked, you can try adding a dollop of sour cream or Greek yogurt when reheating to reintroduce some creaminess.
Is this corn pudding recipe suitable for those with dietary restrictions?
Definitely! This Corn Pudding Recipe can easily be adapted for various dietary needs. For a lighter option, consider substituting Greek yogurt for sour cream. If gluten is an issue, using a gluten-free corn muffin mix can make this dish suitable for those with dietary restrictions. Always check labels for allergens and make sure to communicate any allergies when serving to friends or family!

Corn Pudding Recipe: Creamy Comfort Food for Every Occasion
Ingredients
Equipment
Method
- Preheat your oven to 350°F (175°C) and grease a 9×13-inch baking dish with melted butter.
- In a large mixing bowl, combine the drained whole kernel corn and creamed corn.
- Add the corn muffin mix into the corn mixture, folding gently.
- In a separate bowl, beat the large eggs until light and fluffy.
- Blend together the sour cream and melted butter, then mix in the sugar and salt.
- Fold the beaten eggs and creamy mixture into the corn and muffin mix gently.
- Pour the batter into the prepared baking dish, spreading it out evenly.
- Bake for 45-50 minutes until golden brown and edges pull away from the dish.
- Allow to cool for about 10 minutes before serving.
Leave a Reply