
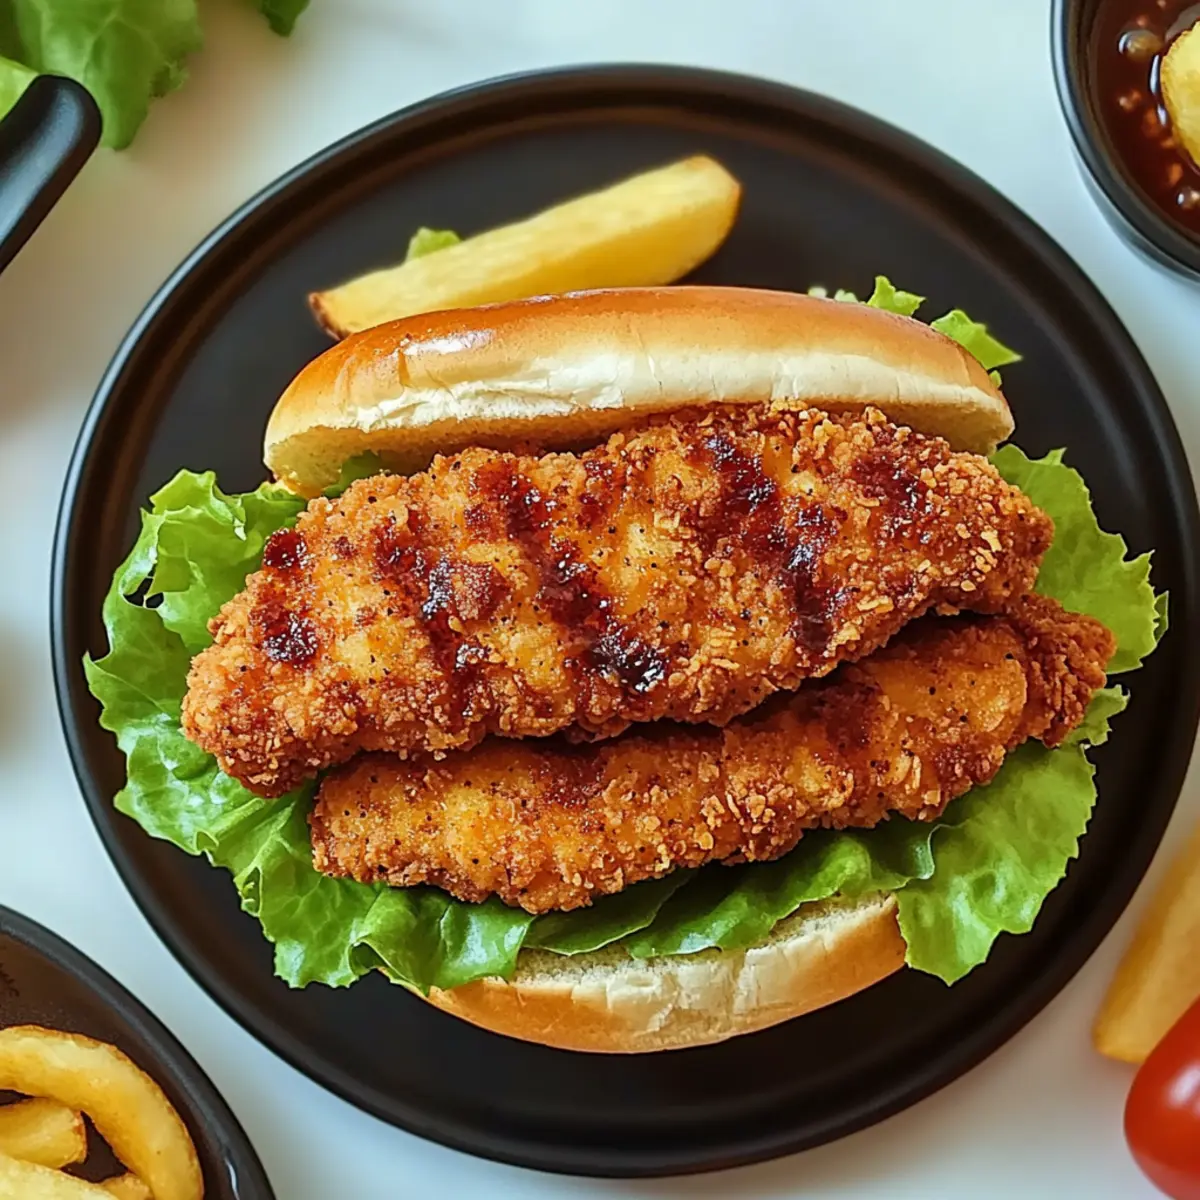
As I took my first bite of this Crispy Lemon Pepper Chicken Sandwich, the crunch echoed like a satisfying applause in my kitchen. There’s something magical about the zesty kick of lemon pepper that makes every juicy piece of chicken shine. It’s a recipe that celebrates comfort and flexibility, letting you customize toppings that suit your craving, whether you’re in the mood for a simple lettuce and tomato topping or dreaming of creamy avocado slices. With its quick prep time, this delightful sandwich elevates homemade cooking to gourmet-level enjoyment, perfect for those nights when you want to leave fast food behind. Ready to experience this crispy creation that’s both delicious and rewarding? Let’s dive in!
Why Is This Chicken Sandwich a Must-Try?
Crispy Texture: Experience the delightful crunch of perfectly fried chicken that creates a satisfying bite, leaving fast food in the dust.
Zesty Flavor: The bright kick of lemon pepper enchants your taste buds, making every sandwich unforgettable.
Customizable Goodness: Whether topped with fresh veggies like tomato and lettuce or creamy avocado, you can make this sandwich your own.
Quick Preparation: Ready in under 30 minutes, you won’t be spending hours in the kitchen.
Crowd-Pleasing Option: Perfect for family dinners or gatherings, this dish will impress both friends and family.
Looking for more delicious chicken ideas? Don’t miss out on our Garlic Parmesan Chicken or the flavorful Street Corn Chicken to keep your meals exciting!
Crispy Lemon Pepper Chicken Ingredients
For the Chicken
- Chicken Breasts – The star ingredient; boneless, skinless chicken thighs can be used for even more juiciness.
- Buttermilk – Tenderizes the chicken; if unavailable, mix milk with lemon juice or vinegar for a quick substitute.
- Salt and Pepper – Essential for enhancing flavor; don’t hesitate to adjust according to your taste preferences.
For the Coating
- All-Purpose Flour – Forms the first crispy layer; mix with seasonings for a burst of flavor before frying.
- Garlic Powder & Onion Powder – Yield depth of flavor; feel free to swap for fresh garlic or onion for a more vibrant taste.
- Paprika – Adds warmth and color; try smoked paprika to infuse a different aromatic profile.
- Cayenne Pepper – Gives a spicy kick; adjust its amount depending on how mild or hot you prefer your chicken.
- Egg – Binds the coating to the chicken; substitute with a flax egg for a vegan option if desired.
- Breadcrumbs – This is what makes the chicken extra crispy; try panko breadcrumbs for an even crunchier finish!
For Assembly
- Hamburger Buns – Choose a soft variety to complement the crunchy chicken; whole wheat buns can be a healthier option.
- Mayonnaise – Creamy element that brings everything together; Greek yogurt can be used as a lighter alternative.
- Dijon Mustard – Adds a zingy flavor; consider spicy aioli for a flavor twist.
- Lemon Juice & Zest – The secret to refreshing citrus brightness; fresh squeeze is optimal for that vibrant zing.
- Shredded Lettuce & Tomato Slices – Fresh toppings that add texture and moisture; avocado slices are a wonderful upgrade for added creaminess.
- Chopped Fresh Parsley – A beautiful garnish that pops in flavor; optional for those who prefer minimal greens.
Step‑by‑Step Instructions for Crispy Lemon Pepper Chicken Sandwich
Step 1: Prepare the Chicken
Begin by slicing the chicken breasts horizontally to create thinner filets, ensuring even cooking. Place them in a bowl with buttermilk, allowing them to marinate for at least 15 minutes. This step is crucial for achieving that tender, juicy texture which complements the crispy lemon pepper coating perfectly.
Step 2: Mix the Coating
In a shallow bowl, whisk together the all-purpose flour, salt, pepper, garlic powder, onion powder, paprika, and cayenne pepper. This flavorful combination will provide a deliciously seasoned first layer for your Crispy Lemon Pepper Chicken. Ensure the mixture is well combined for an even taste throughout the coating process.
Step 3: Prepare the Egg Wash
In a separate bowl, whisk together one egg and a splash of water to create a smooth egg wash. This will help the breadcrumbs adhere to the chicken. Creating this binding layer is essential for achieving the ultimate crunchy texture, so make sure it’s mixed well and ready for the next steps.
Step 4: Coat the Chicken
Take each marinated chicken piece and dredge it in the seasoned flour mixture, shaking off any excess. Then, dip the chicken into the egg wash, allowing it to coat thoroughly. Finally, coat each piece generously with breadcrumbs, pressing lightly to ensure they stick well. This triple-layered method will enhance the crispiness of your Crispy Lemon Pepper Chicken.
Step 5: Heat the Oil
In a large skillet, heat about an inch of vegetable oil over medium-high heat until it shimmers, indicating it’s hot enough for frying. To test if the oil is ready, drop a small piece of bread into the oil; if it bubbles and sizzles, you’re set to fry. Ensure that the oil reaches approximately 350°F (175°C) for that perfect golden crisp.
Step 6: Fry the Chicken
Carefully add the coated chicken pieces to the hot oil, ensuring not to overcrowd the pan. Fry each piece for about 4-5 minutes on each side, or until they turn a beautiful golden brown and register 165°F (73.9°C) internally. This step is essential for achieving that cohesive crispy layer that you desire in your Crispy Lemon Pepper Chicken.
Step 7: Drain the Chicken
Once cooked, transfer the fried chicken onto a plate lined with paper towels to absorb excess oil. This resting step is vital as it keeps your Crispy Lemon Pepper Chicken from becoming soggy while retaining that desired crunch. Allow them to rest for a few minutes before assembling your sandwich.
Step 8: Toast the Buns
While your chicken is draining, toast the hamburger buns in the same skillet or under the broiler until they are golden and slightly crispy. This little step adds an extra layer of texture and warmth to your sandwich, enhancing the overall experience of the Crispy Lemon Pepper Chicken Sandwich.
Step 9: Make the Sauce
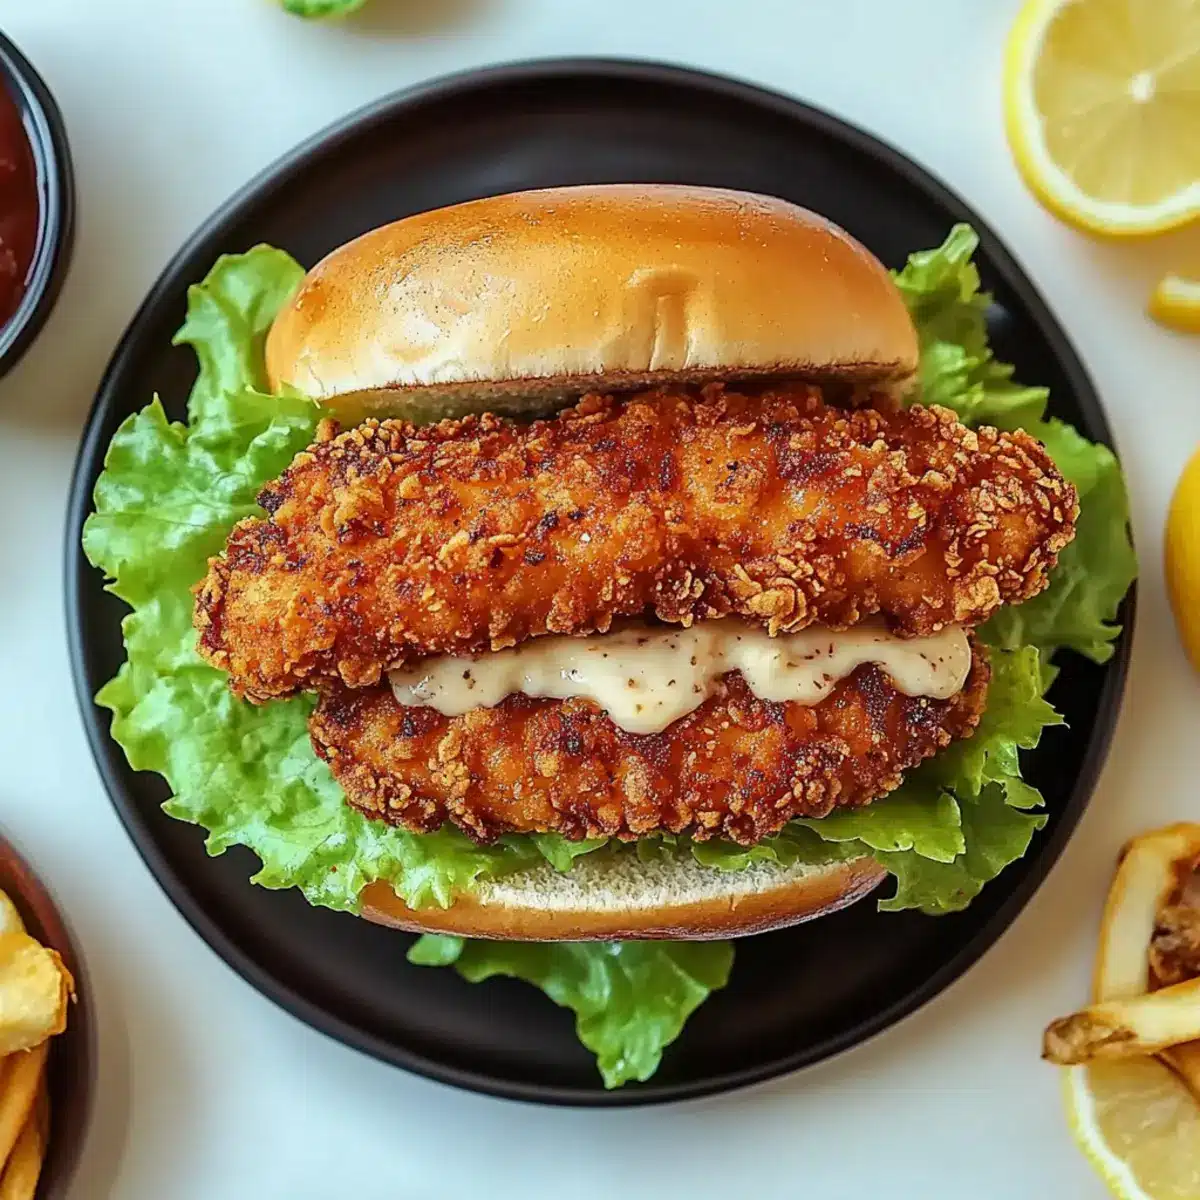
In a small bowl, mix together the mayonnaise, Dijon mustard, fresh lemon juice, and lemon zest to create a zesty sauce. This refreshing condiment perfectly complements the crispy chicken and adds a delightful tang, enhancing the robust flavors of your Crispy Lemon Pepper Chicken Sandwich.
Step 10: Assemble the Sandwich
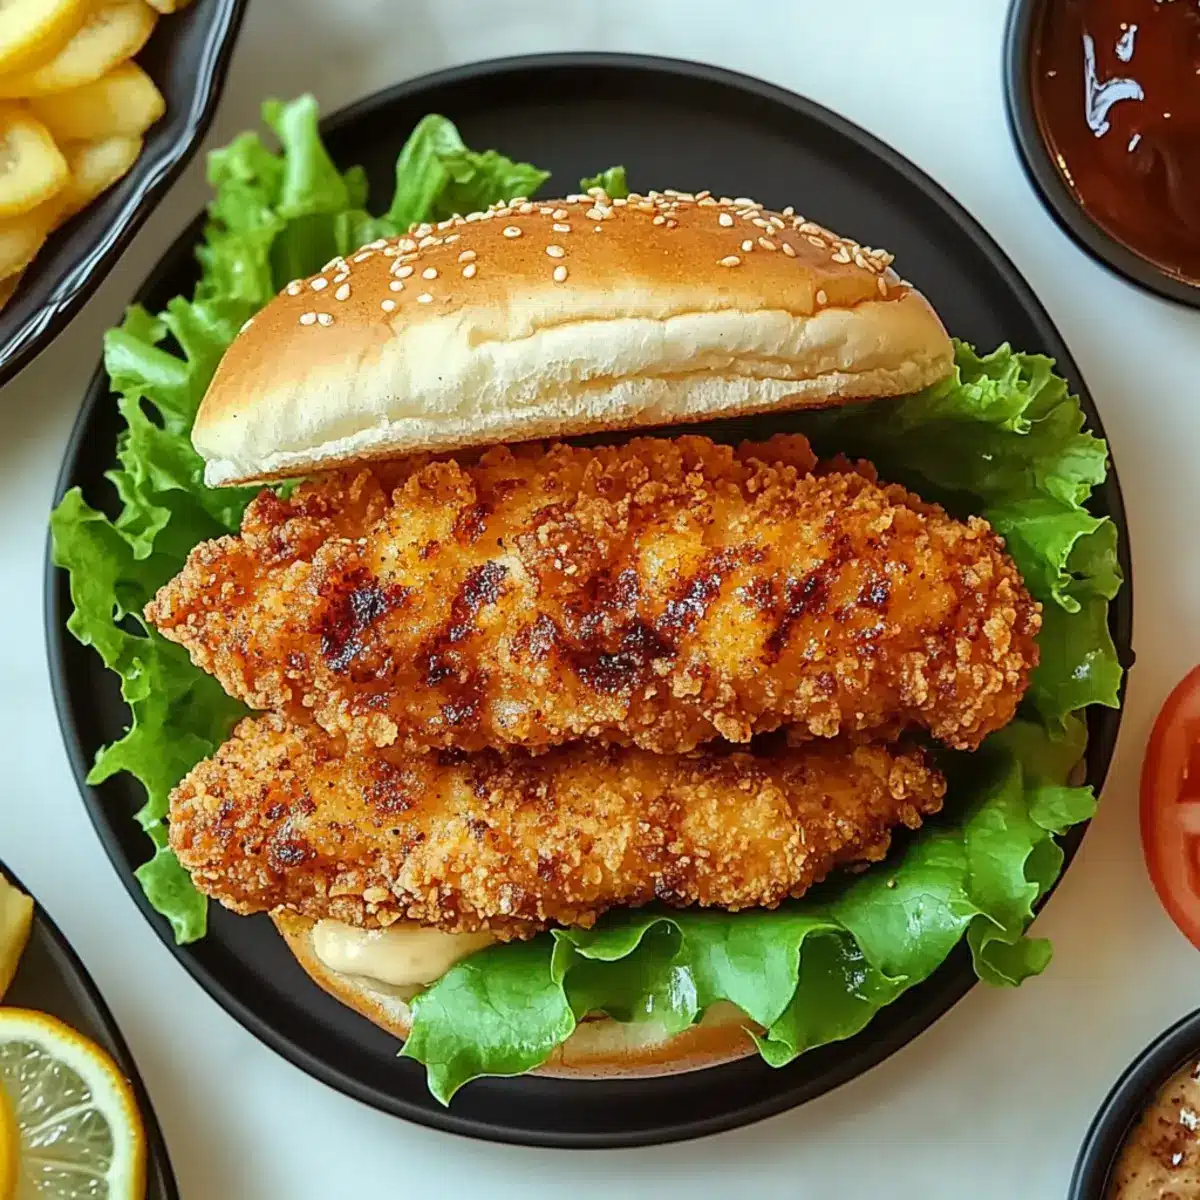
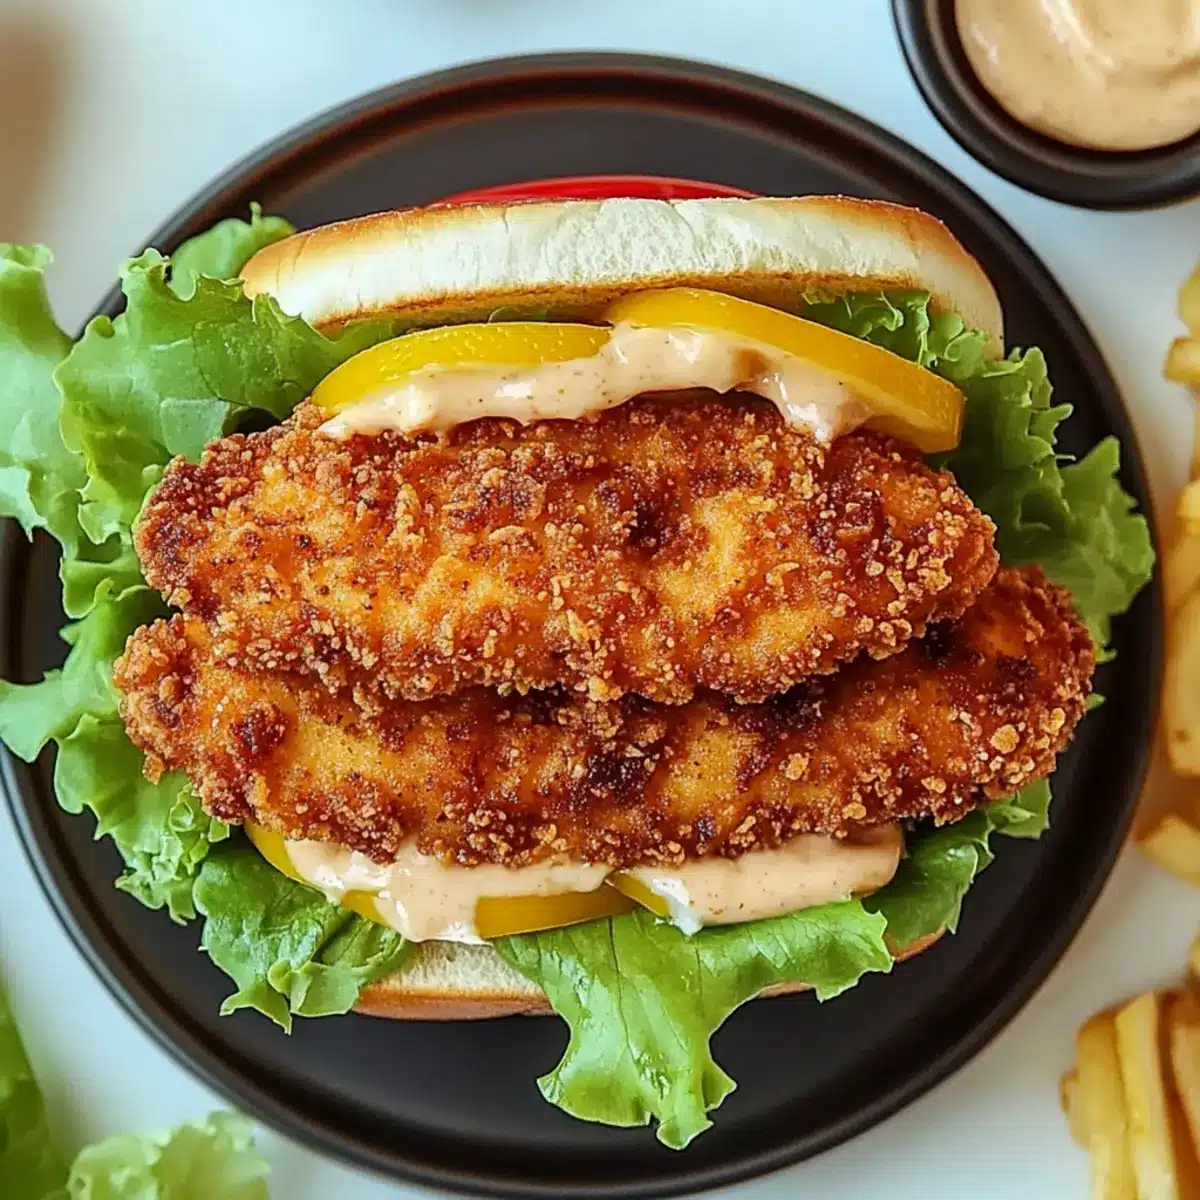
Spread the zesty sauce on the bottom bun, then layer the crispy chicken atop it. Add shredded lettuce, tomato slices, and a sprinkle of fresh parsley for a pop of color. This is where you can let your creativity shine by adding any desired toppings, making your Crispy Lemon Pepper Chicken Sandwich uniquely yours.
Step 11: Serve and Enjoy
Carefully place the top of the hamburger bun on the assembled sandwich and serve immediately while the chicken is still warm and crispy. The combination of flavors and textures in your homemade Crispy Lemon Pepper Chicken Sandwich promises a satisfying meal that brings gourmet comfort right to your table.
Make Ahead Options
These Crispy Lemon Pepper Chicken Sandwiches are perfect for busy weeknights and meal prep enthusiasts! You can marinate the chicken breasts in buttermilk for up to 24 hours in advance, allowing the flavors to infuse and ensure maximum tenderness. Additionally, prep the seasoning flour and store it in an airtight container for easy access. If you plan to assemble the sandwiches later, fry the chicken and allow it to cool completely before refrigerating for up to 3 days; this helps maintain that coveted crispy texture. When it’s time to serve, simply reheat the chicken in the oven to retain its crunch, toast your buns, and layer with sauce and toppings. This way, your homemade Crispy Lemon Pepper Chicken Sandwiches will be just as delicious, saving you time and effort!
How to Store and Freeze Crispy Lemon Pepper Chicken
Fridge: Store leftover crispy lemon pepper chicken in an airtight container in the fridge for up to 2 days to maintain its flavor and texture.
Freezer: If you want to freeze it, wrap the cooked chicken tightly in plastic wrap or foil and then place it in a freezer bag for up to 1 month.
Reheating: To reheat, place the chicken in an oven preheated to 375°F (190°C) for 10–15 minutes, ensuring it’s crispy again without losing moisture. Avoid using the microwave, as it may make the chicken soggy.
Assembling Later: For best results, store buns and any toppings separately to keep everything fresh; combine them right before serving for optimal taste and texture.
Crispy Lemon Pepper Chicken Variations
Embrace your inner chef with these delightful twists on the classic Crispy Lemon Pepper Chicken Sandwich! Each suggestion is a playful way to enhance flavors and textures.
- Gluten-Free: Substitute all-purpose flour with a gluten-free flour blend or cornstarch for a crispy coating that everyone can enjoy.
- Spicy Kick: Add diced jalapeños to the sauce or sprinkle red pepper flakes into the flour mixture to elevate the heat level.
Creamy and spicy can harmonize beautifully! Imagine the burst of heat hitting your taste buds, complementing that crispy exterior.
- Herb-Infused: Mix fresh chopped herbs like thyme or rosemary into the breadcrumb coating for an aromatic twist.
- Different Protein: Swap chicken for fish fillets or even eggplant slices for a lighter, vegetarian-friendly option, maintaining that crunchy coating.
Feel the diversity in texture and flavor; it’s not just a sandwich anymore, it’s an adventure on a bun!
- Citrusy Garlic: Mix lemon zest and minced garlic in the mayonnaise for a rich, zesty sauce that invigorates the senses.
- Smoky Flavor: Use smoked paprika and add some BBQ sauce in place of mustard for a smoky, sweet delight.
BBQ and lemon pepper create a beautiful duet, adding layers of flavor that make you keep coming back for more!
- Loaded Toppings: Amplify the sundried tomatoes, crispy bacon, and provolone cheese for an indulgent spin that transforms your sandwich into a luxurious feast.
If you’re exploring more chicken options, try our Mushroom Chicken Soup for another satisfying meal, or check out Chicken Caesar Wraps for a fresh, fun bite!
Expert Tips for Crispy Lemon Pepper Chicken Sandwich
-
Hot Oil is Key: Make sure your oil is hot enough (around 350°F) to achieve that irresistible crispy texture; if it’s too cool, the chicken might absorb excess oil and become soggy.
-
Don’t Overcrowd the Pan: Fry in batches to avoid steaming the chicken; overcrowding can lead to uneven cooking and make it difficult to achieve that perfect, crispy lemon pepper crust.
-
Maintain the Crunch: For leftover sandwiches, store components separately. Keep fried chicken separate from buns and veggies to maintain their crispy texture.
-
Flavor Balance: Taste your seasoning mix before coating the chicken; adjust salt, pepper, or spice levels to match your preferences and ensure that every bite of the crispy lemon pepper chicken is packed with flavor.
-
Bake for Health: For a lighter version, consider baking the chicken instead of frying. This still gives you a crispy coating without all the oil—perfect for a healthier twist!
What to Serve with Crispy Lemon Pepper Chicken Sandwich?
Delight in creating a complete meal that beautifully complements the crunchy zest of your chicken sandwich.
- Crispy Fries: Serve hot and golden, they provide a classic crunch that pairs well with the sandwich’s texture.
- Refreshing Coleslaw: The cool, creamy slaw contrasts the savory chicken, adding a delightful crunch and fresh flavor.
- Sweet Potato Wedges: Baked until tender, their sweetness enhances the zesty notes of the chicken, providing a wholesome side option.
- Garden Salad: Tossed with colorful vegetables and a light dressing, it adds vibrancy and freshness to your plate.
- Zesty Lemonade: A perfect thirst-quencher, its tangy sweetness echoes the citrusy notes of the lemon pepper chicken, elevating your meal.
- Garlic Bread: Warm and buttery, it brings a savory element to the table, perfect for soaking up any extra sauce from your sandwich.
- Mini Cheesecakes: These decadent treats add a sweet finale to your meal, balancing the savory flavors with a creamy sweetness.
Crispy Lemon Pepper Chicken Sandwich Recipe FAQs
How do I choose the right chicken breasts?
Absolutely! When selecting chicken breasts for your Crispy Lemon Pepper Chicken Sandwich, look for pieces that are firm and plump with no dark spots or bruises. If you prefer even more juiciness, boneless, skinless chicken thighs are a fantastic alternative.
What is the best way to store leftovers?
To enjoy your leftovers at their best, store the crispy lemon pepper chicken in an airtight container in the fridge for up to 2 days. It’s best to keep the chicken separate from the buns and toppings to maintain their texture and flavor.
Can I freeze the crispy chicken?
Very! To freeze the crispy lemon pepper chicken, wrap it tightly in plastic wrap or foil, and then place it in a freezer bag. It will stay fresh for up to 1 month. When you’re ready to enjoy it again, simply reheat in an oven preheated to 375°F (190°C) for 10–15 minutes to restore its crispiness.
Why is my chicken not crispy?
If your chicken isn’t coming out crispy, ensure your oil is hot enough—around 350°F (175°C)—before adding the chicken pieces. Crowding the pan can lower the oil temperature, causing the chicken to steam instead of fry. Always fry in small batches for the best results.
Any dietary considerations for this sandwich?
Of course! For a healthier twist, you can bake the chicken instead of frying, and substitute the mayonnaise with Greek yogurt for a lighter sauce. Always check for allergies, especially with ingredients like eggs or breadcrumbs, and make sure to communicate any dietary restrictions if serving guests or family.
How do I customize my sandwich toppings?
The more the merrier! You can tailor your sandwich to suit your tastebuds. Fresh veggies like shredded lettuce and tomato are great, but consider adding creamy avocado slices or switching out mayonnaise for a spicy aioli for a flavor boost. Embrace creativity!
Crispy Lemon Pepper Chicken: A Flavorful Homemade Delight
Ingredients
Equipment
Method
- Slice the chicken breasts horizontally into thinner filets, then marinate in buttermilk for at least 15 minutes.
- In a shallow bowl, whisk together all-purpose flour, salt, pepper, garlic powder, onion powder, paprika, and cayenne pepper.
- In another bowl, whisk the egg with a splash of water for the egg wash.
- Dredge each marinated chicken piece in the seasoned flour, dip in the egg wash, and coat thoroughly with breadcrumbs.
- Heat about an inch of vegetable oil in a large skillet over medium-high until shimmering.
- Fry the coated chicken pieces for about 4-5 minutes on each side until golden brown and cooked through.
- Drain the chicken on paper towels to absorb excess oil.
- Toast the hamburger buns until golden and slightly crispy.
- Mix mayonnaise, Dijon mustard, lemon juice and zest to create the zesty sauce.
- Assemble the sandwich with the sauce on the bottom bun, layer with crispy chicken, shredded lettuce, tomato slices, and parsley.
- Serve immediately while warm and crispy.
Leave a Reply