
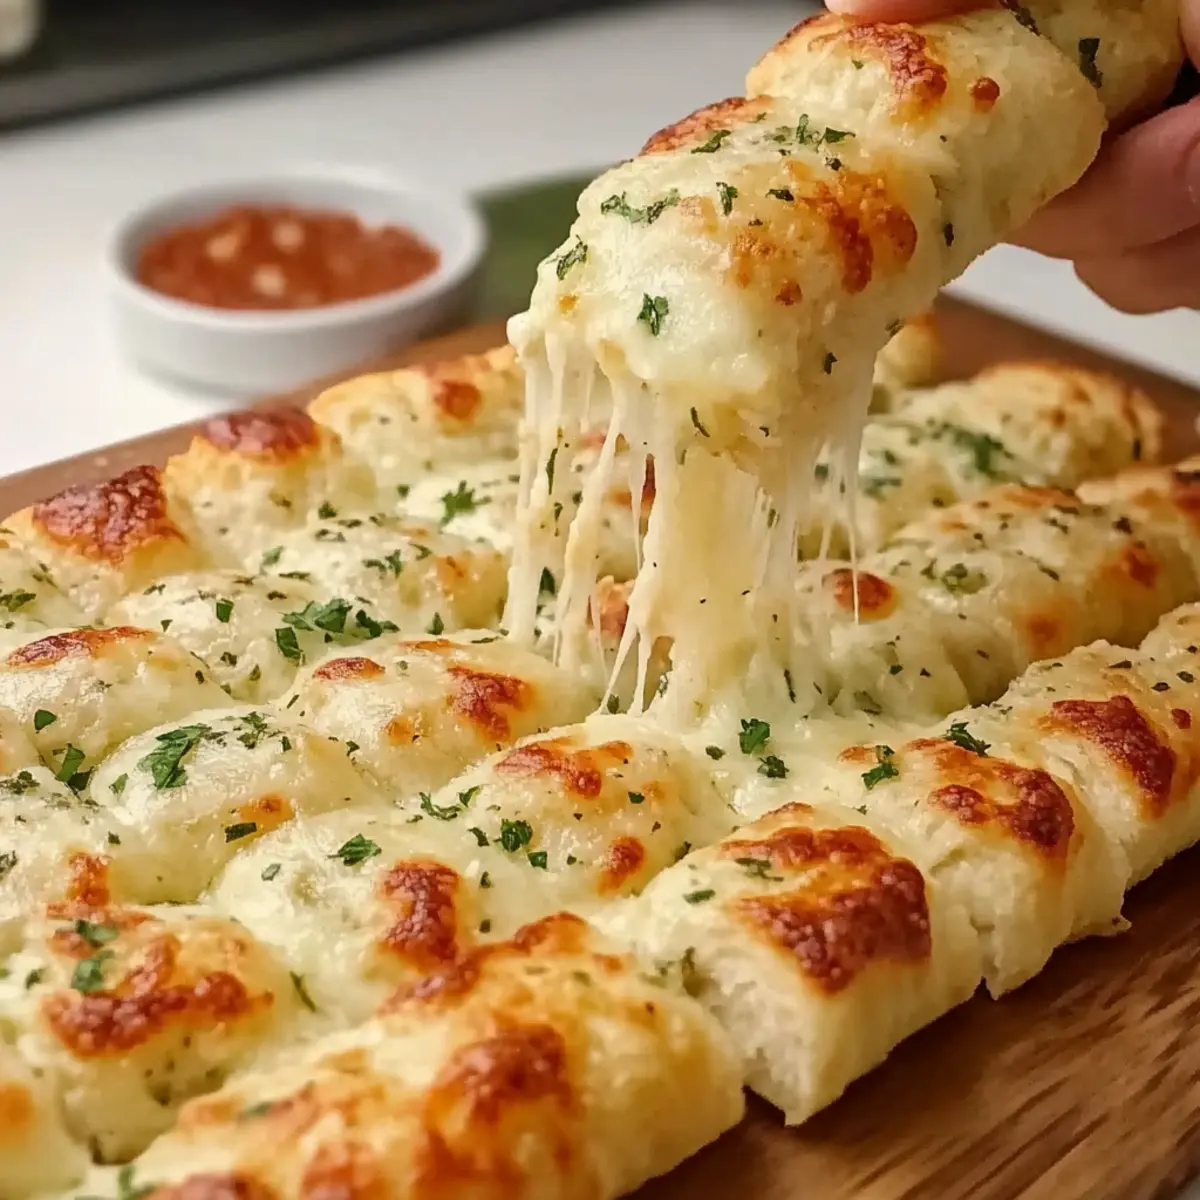
As I stood in my kitchen, the intoxicating aroma of melted cheese mingled with the buttery scent of garlic, transporting me straight back to cozy family gatherings. The star of the evening? My beloved Homemade Cheesy Breadsticks Recipe, which has quickly become a staple for all occasions. With a pillowy pizza crust and an irresistible blend of mozzarella and Parmesan, these breadsticks are not just a treat—they’re a true comfort food that everyone will adore. The beauty of this recipe lies not only in its delightful flavors but also in its quick prep time—ready in under 30 minutes! Plus, you can easily customize it to fit your cheese preferences or dietary needs. As they come out of the oven, golden and crispy on the outside yet perfectly soft inside, you’ll find it hard to resist snagging one (or three!). Ready to elevate your snack game? Let’s dive into this cheesy adventure!
Why Make Homemade Cheesy Breadsticks?
Irresistible Flavor: The combination of gooey mozzarella and savory Parmesan strikes the perfect balance of taste that will have everyone coming back for seconds.
Quick & Easy: With just a 30-minute prep time, this recipe is perfect for busy weeknights or last-minute gatherings.
Customizable Options: Whether you prefer a spicy kick with Pepper Jack or a twist with sundried tomatoes, feel free to get creative, just like with these Peach Pie Cruffins.
Crowd-Pleaser: These cheesy sticks are guaranteed to impress guests at parties or family movie nights—ideal alongside marinara sauce or ranch dressing!
Homey Comfort: Dig into the nostalgic flavors reminiscent of dining out without the fast-food guilt. Plus, leftovers are a great snack, so make extra!
Homemade Cheesy Breadsticks Ingredients
For the Dough
- Refrigerated Pizza Dough – This forms the delightful base of your cheesy breadsticks; you can opt for homemade dough for a richer flavor!
For the Topping
- Melted Butter – Adds a buttery richness and helps the toppings adhere; swap it with olive oil for a lighter option.
- Crushed Garlic – Invites a savory garlic kick into the breadsticks; fresh garlic is ideal for sharpness, while garlic powder is a convenient substitute.
- Mozzarella Cheese – Offers that perfect stretch and melt; Colby Jack can add a sharper flavor, or Pepper Jack for a spicy twist.
- Parmesan Cheese – Brings in a nutty and salty depth, enhancing browning; Pecorino Romano is a great alternative for a different taste.
- Dried Oregano (optional) – Infuses an Italian flair into the mix if you’re feeling herby; feel free to skip it if herbs aren’t your thing.
- Fresh Parsley (for garnish) – Adds a pop of color and freshness; it’s an optional finishing touch that can be skipped for simplicity.
Enjoy whipping up this Homemade Cheesy Breadsticks Recipe, and watch as they disappear before your eyes!
Step‑by‑Step Instructions for Homemade Cheesy Breadsticks Recipe
Step 1: Preheat the Oven
Begin your cheesy adventure by preheating your oven to 425°F (220°C). While the oven warms up, prepare a baking sheet by lining it with parchment paper and giving it a light spritz of cooking spray. This will prevent your delicious Homemade Cheesy Breadsticks from sticking later on, ensuring they slide right off after baking.
Step 2: Roll Out the Dough
Unroll the refrigerated pizza dough onto the prepared baking sheet, stretching it gently into an even rectangle about 1/2 inch thick. Use your hands or a rolling pin to ensure uniformity throughout to help them bake evenly. The dough should look smooth and ready to hold all those cheesy toppings.
Step 3: Prepare the Garlic Butter
In a small bowl, combine melted butter and crushed garlic, stirring until well mixed. This aromatic blend will elevate your Homemade Cheesy Breadsticks. Brush the mixture evenly across the rolled-out dough, making sure to cover all corners and edges for a burst of flavor in every bite.
Step 4: Add the Cheeses
Sprinkle a generous layer of mozzarella cheese evenly over the dough, ensuring every inch has that stretchy goodness. Follow with a layer of Parmesan cheese for that nutty bite! If using dried oregano, now’s the time to add a dusting for a lovely Italian flair. Your cheesy base is coming together beautifully!
Step 5: Pre-Score the Dough
With a pizza cutter or sharp knife, carefully pre-score the dough into 16 rectangles. This technique makes it easy to break apart after baking and gives the Homemade Cheesy Breadsticks a polished look. Be gentle with your scoring to avoid cutting all the way through, allowing them to stay connected while baking.
Step 6: Bake the Breadsticks
Place the baking sheet in the preheated oven and bake for about 12 minutes, or until the cheese is bubbly and the edges are a gorgeous golden brown. Keep an eye on them during the final minutes, as the baking time may vary by oven. The delicious aroma will fill your kitchen, promising a delightful treat!
Step 7: Cool and Serve
Once baked, take the breadsticks out of the oven and let them cool for a couple of minutes. This helps to set the cheese as well as ease handling. After cooling, re-score if needed and serve warm for the best experience. Pair them with marinara sauce or your favorite dip, and enjoy the deliciousness of your Homemade Cheesy Breadsticks!
Make Ahead Options
These Homemade Cheesy Breadsticks are perfect for meal prep enthusiasts! You can prepare the pizza dough up to 24 hours in advance; simply roll it out and store it covered in the refrigerator to prevent drying. Additionally, you can mix the garlic butter and cheese toppings ahead of time, keeping them refrigerated until you’re ready to bake. When you’re ready to serve, just preheat the oven, assemble your prepped components, and bake as directed for about 12 minutes. This way, you’ll have a fresh, warm snack that tastes just as delicious, saving you time during busy weeknights!
Storage Tips for Homemade Cheesy Breadsticks
Refrigeration: Store leftover Homemade Cheesy Breadsticks in an airtight container in the refrigerator for up to 5 days to maintain freshness and flavor.
Freezing: For longer storage, wrap cooled breadsticks in parchment paper and place them in a freezer-safe bag. They will keep well for up to 2 months.
Reheating: To enjoy again, reheat the breadsticks in a preheated oven at 350°F for 5-7 minutes. This method will restore their crispy edges and melty cheese texture; microwaving is quicker but may soften them.
What to Serve with Homemade Cheesy Breadsticks?
As the warmth of freshly baked cheese begins to fill your kitchen, it’s the perfect time to think about delightful accompaniments that will enhance your experience.
-
Zesty Marinara Sauce: A classic pairing, this tangy sauce complements the richness of the breadsticks, creating a perfect dip for each buttery bite. The balance of flavors is absolutely divine!
-
Creamy Ranch Dressing: If you’re looking for a cool complement, ranch dressing adds a creamy, herb-infused flavor that brings an exciting twist to your cheese indulgence. Encourage everyone to dip, share, and enjoy!
-
Garlic Butter Dip: Elevate the breadstick experience with a garlic butter dip—it’s warm, garlicky, and utterly irresistible. Just a drizzle will have everyone reaching for more!
-
Fresh Garden Salad: Serve a light and refreshing garden salad alongside to add a crisp, fresh element to your meal. The crunch pairs beautifully with the soft, cheesy goodness.
-
Roasted Vegetables: Enhance your dining table with an array of roasted vegetables, adding texture and earthy flavors that balance the indulgence of the cheesy breadsticks. It’s a delicious contrast!
-
Italian Chianti: A glass of red Chianti elevates this simple snack to a delightful dining experience. Its bold flavors beautifully complement the richness of the cheeses.
-
Sweet Fruit Chutney: Pair your breadsticks with a dollop of sweet fruit chutney for an exciting contrast. The sweetness will play beautifully against the savory cheese.
-
Chocolate Chip Cookies: For dessert, end your meal on a sweet note with freshly baked chocolate chip cookies. It’s a comforting way to finish off a cheesy night!
Mix and match these delightful options for a meal that’s not just satisfying, but memorable!
Expert Tips for Homemade Cheesy Breadsticks
-
Even Thickness: Ensure your pizza dough is rolled out to a uniform thickness. This promotes even baking and prevents any parts from overcooking.
-
Watch the Oven: Baking times can vary, so keep an eye on your breadsticks during the last few minutes to avoid burning.
-
Cheese Choice: Experiment with different cheese blends, like Gouda or Feta, to customize your Homemade Cheesy Breadsticks Recipe based on your taste preferences.
-
Garlic Freshness: Fresh garlic adds a sharper flavor; if using garlic powder, remember it’s more concentrated, so adjust accordingly for preferred taste.
-
Storage Solutions: Store leftovers in an airtight container in the refrigerator for up to five days, or freeze for later enjoyment wrapped in parchment and in a freezer-safe bag.
-
Reheating Tips: For the best texture, reheat in a 350°F oven for 5-7 minutes to revive their crispy edges and melty cheese.
Homemade Cheesy Breadsticks Recipe Variations
Feel free to make this Homemade Cheesy Breadsticks recipe your own with these delicious tweaks and swaps that will elevate your snack experience!
-
Dairy-Free: Use a dairy-free cheese blend to create a vegan version that’s still creamy and satisfying. You’ll love how well the flavors come together while keeping to dietary needs.
-
Gluten-Free: Opt for a gluten-free pizza dough to cater to gluten sensitivities without sacrificing taste. With this simple swap, everyone can enjoy the cheesy goodness!
-
Spicy Kick: Add Jalapeños or Pepper Jack cheese for a fiery twist. This variation brings a vibrant punch, delighting those who love a little heat in their snacks.
-
Herb-Infused: Mix fresh basil or thyme into the melted butter for an aromatic upgrade. The fragrant herbs will transform your breadsticks into a gourmet delight that everyone will rave about!
-
Cheesy Mix-Up: Swap in Gouda or Feta cheese for a unique flavor profile that takes your breadsticks to new heights. You’ll be pleasantly surprised by how these cheeses elevate the dish!
-
Vegetable Boost: Incorporate sundried tomatoes or roasted red peppers for added flavor and texture. This twist not only enhances the taste but also brings colorful visual appeal.
-
Sweet Treat: Try adding a sprinkle of cinnamon and sugar before baking for a dessert-like twist. Pair these sweet sticks with chocolate sauce for an irresistible treat similar to my Churro Bites Healthier!
-
Unique Dips: Serve with pesto, hummus, or garlic butter to complement the cheesy flavor with fresh, vibrant dipping sauces. These add not just flavor but also a touch of excitement to every bite!
Experimenting with these variations will make your Homemade Cheesy Breadsticks a go-to staple for any gathering, fun family night, or casual lunch. Enjoy diving into your cheesy adventure!

Homemade Cheesy Breadsticks Recipe FAQs
How do I choose the right pizza dough?
Absolutely! Using refrigerated pizza dough is convenient, but if you have the time, homemade dough can elevate the flavor significantly. Look for dough that is smooth and pliable without any dark spots or dryness. Freshness is key for the best result!
What’s the best way to store leftover breadsticks?
Very good question! Store leftover Homemade Cheesy Breadsticks in an airtight container in the refrigerator for up to 5 days. This helps retain their flavor and texture. Just make sure they cool completely before sealing.
Can I freeze these breadsticks for later?
Absolutely! To freeze, wrap your cooled Homemade Cheesy Breadsticks in parchment paper. Then, place them in a freezer-safe bag, squeezing out excess air. They will keep well for up to 2 months. To reheat, simply pop them in a preheated oven at 350°F for 5-7 minutes until warmed through.
What should I do if my breadsticks are too doughy or undercooked?
No worries! If your Homemade Cheesy Breadsticks turn out too doughy, it may be due to uneven thickness or not enough baking time. I recommend checking your oven calibration; sometimes, ovens can run cooler. If this happens, you can leave them in for an additional 1-2 minutes. For best results in the future, ensure an even thickness when rolling out the dough.
Are there any dietary considerations I should keep in mind?
Great question! If you’re accommodating dietary needs, you can easily make this Homemade Cheesy Breadsticks Recipe gluten-free by using a gluten-free pizza dough option. Also, keep in mind any dairy allergies; try different dairy-free cheese alternatives to make it accessible for everyone!

Homemade Cheesy Breadsticks Recipe You'll Love in Minutes
Ingredients
Equipment
Method
- Preheat your oven to 425°F (220°C) and prepare a baking sheet with parchment paper and a light spritz of cooking spray.
- Unroll the refrigerated pizza dough onto the baking sheet, stretching it into an even rectangle about 1/2 inch thick.
- In a bowl, mix melted butter and crushed garlic, then brush the mixture evenly across the rolled-out dough.
- Sprinkle mozzarella cheese evenly over the dough, followed by Parmesan cheese. If using, add dried oregano now.
- Pre-score the dough into 16 rectangles with a pizza cutter, being careful not to cut all the way through.
- Bake in the preheated oven for about 12 minutes, or until cheese is bubbly and edges are golden brown.
- Cool for a couple of minutes, then serve warm, optionally with marinara sauce or a favorite dip.
Leave a Reply