
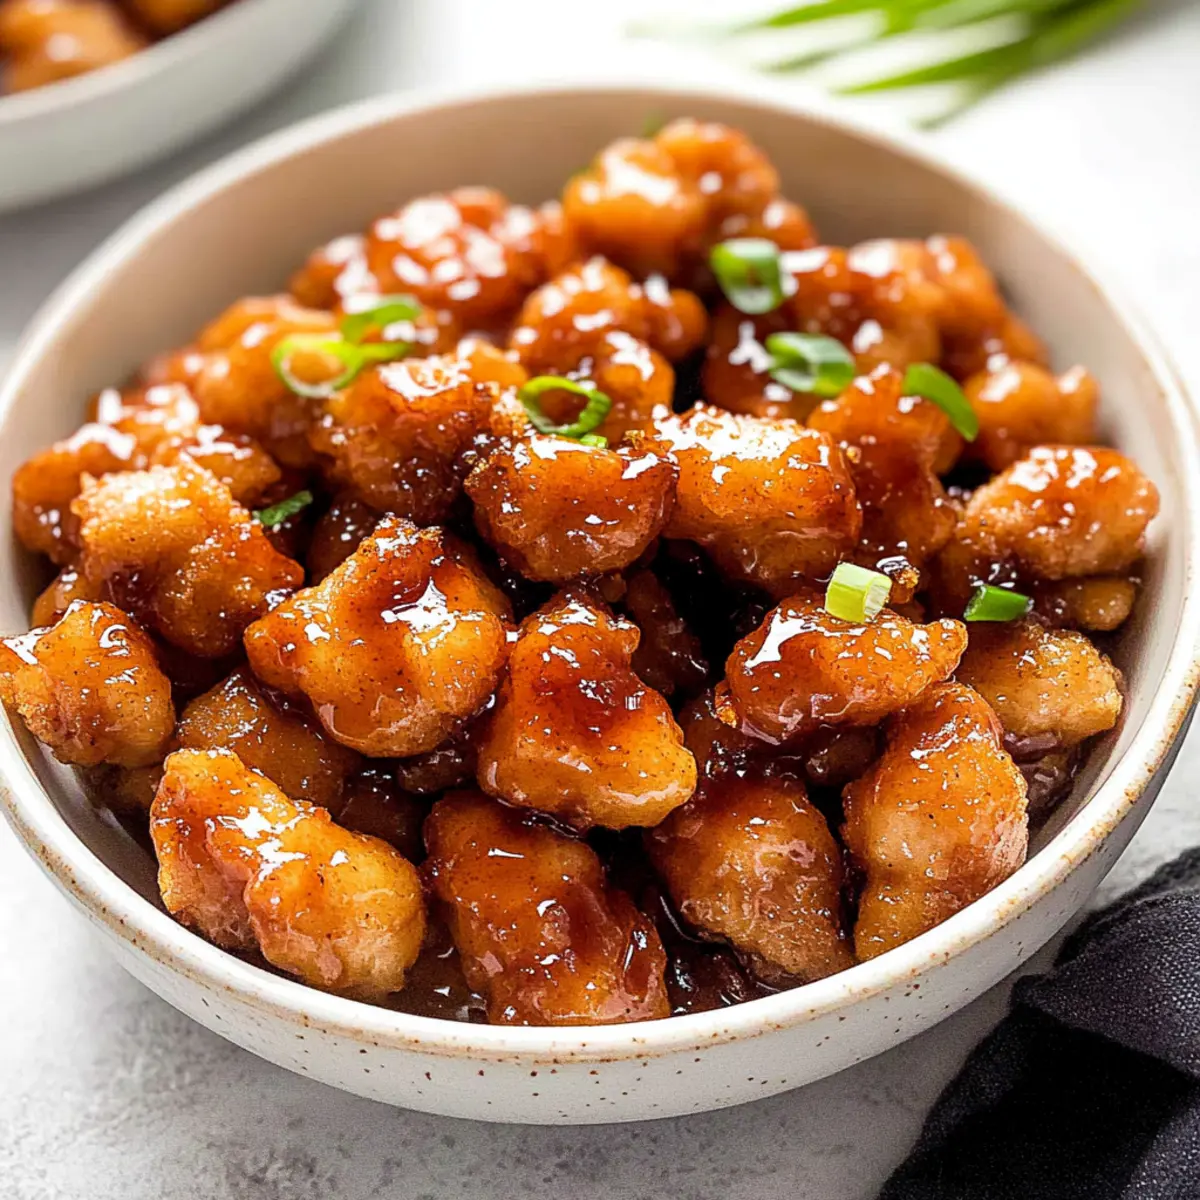
You won’t believe how a little honey can transform a simple chicken dish into a weeknight superstar! This Honey Butter Garlic Chicken doesn’t just look delicious; it’s ready in just 30 minutes, making it perfect for those busy nights when takeout seems like the only option. With options for gluten-free and dairy-free adaptations, everyone at the table can indulge in this crispy, sweet creation. Imagine crispy chicken coated in a luscious honey butter sauce that strikes the perfect balance between savory and sweet. It’s an instant crowd-pleaser your family will rave about! Curious about how to whip up this 30-minute marvel? Let’s dive into the recipe!
Why Is Honey Butter Chicken a Must-Try?
Quick and Easy: This dish comes together in just 30 minutes, perfect for those busy weeknights when you’re craving something homemade without all the fuss.
Sweet and Savory Delight: The melody of flavors from honey and garlic creates a deliciously sticky sauce that perfectly complements crispy chicken, tantalizing your taste buds with every bite.
Versatile Options: Want to cater to dietary needs? No problem! Easily make it gluten-free or dairy-free so the whole family can enjoy it.
Texture Sensation: Experience the contrast of crispy chicken enveloped in a luscious sauce, offering an irresistible bite that’s both tender and crunchy.
Crowd-Pleasing Appeal: It’s not just a meal, but a dish that turns any dinner into a celebration! Pair it with rice or your favorite roasted veggies, and watch everyone rave about this delectable dinner.
Don’t forget to check out my other favorites like Garlic Butter Dinner Rolls or Honey Garlic Carrots for a deliciously complete meal!
Honey Butter Garlic Chicken Ingredients
For the Chicken
• Boneless Chicken Thighs or Tenders – Tender and flavorful, chicken thighs keep the dish moist and delicious.
For the Coating
• Flour – Provides a crispy crust, and gluten-free flour works beautifully as a substitute for the best Honey Butter Garlic Chicken.
• Kosher Salt – Enhances the flavor of the dish; feel free to use sea salt if you prefer.
• Black Pepper – Adds a mild warmth; adjust to your liking for the perfect balance.
• Garlic Powder – Infuses a wonderful savory note; fresh garlic can amplify the flavor if you desire more intensity.
For Cooking
• Olive Oil (or Canola/Veg Oil) – Essential for frying; extra virgin olive oil imparts a richer taste.
• Unsalted Butter – Serves as the base for the delicious honey glaze; avoid substitutes like margarine for the best results.
For the Sauce
• Honey – Lending sweetness and richness; select your favorite brand to enhance the flavor.
• Minced Garlic – Adds a fresh garlic kick to the sauce; fresh is always best to brighten the flavor.
• Light Soy Sauce – Delivers an umami depth, perfectly balancing the sweet components of the dish.
Step‑by‑Step Instructions for Honey Butter Garlic Chicken
Step 1: Prepare the Coating
In a mixing bowl, combine flour, kosher salt, black pepper, and garlic powder to create a flavorful coating. Make sure the mixture is well-blended for even seasoning. Set the bowl aside while you prep the chicken, ensuring you’re ready to coat each piece thoroughly for that irresistible Honey Butter Garlic Chicken crispiness.
Step 2: Coat the Chicken
Cut boneless chicken thighs or tenders into bite-sized chunks. Dredge each piece in the flour mixture, making sure to coat them well. Shake off any excess flour before placing the chicken pieces on a plate. This step is crucial for achieving that crunchy outer layer as the chicken fries to golden perfection.
Step 3: Heat the Oil
In a large skillet, heat about 1/4 inch of olive oil over medium-high heat. Once the oil is shimmering and hot, add the chicken pieces in a single layer, being careful not to overcrowd the pan. Fry the chicken for approximately 5 minutes on each side or until they reach a golden-brown color. This sizzling moment creates the crispy exterior that will perfectly complement the sweet sauce.
Step 4: Remove and Set Aside
Once the chicken is beautifully golden brown, carefully remove the pieces from the skillet and let them drain on a plate lined with paper towels. This step retains the delicious crispy texture of the Honey Butter Garlic Chicken while you prepare the savory sauce, keeping it warm in a low oven if needed.
Step 5: Make the Honey Butter Sauce
In the same skillet, reduce the heat to medium and add unsalted butter. Allow it to melt fully, scraping up any browned bits from the bottom of the pan for extra flavor. Mix in honey, light soy sauce, and minced garlic, stirring all the ingredients together. Let the sauce come to a gentle bubble for about 2 minutes until it thickens slightly, filling your kitchen with mouthwatering aromas.
Step 6: Combine Chicken with Sauce
Return the crispy chicken back to the skillet, gently tossing it in the honey butter sauce until the pieces are well-coated. Let them simmer together for about an additional minute, allowing the chicken to absorb that sweet and savory goodness. You’ll notice the chicken glistening with the tantalizing glaze of Honey Butter Garlic Chicken.
Step 7: Serve and Enjoy
Remove the skillet from heat and transfer the Honey Butter Garlic Chicken to a serving platter. The dish is best enjoyed hot, so serve it immediately with your favorite sides, like rice or roasted vegetables. Each bite promises a delightful crunch melded with an irresistible sticky sweetness that will leave everyone wanting more!
Expert Tips for Honey Butter Garlic Chicken
-
Coating Consistency: Ensure your flour mixture is evenly combined. Uneven coating can lead to inconsistent crispiness in your Honey Butter Garlic Chicken.
-
Frying Temperature: Keep the oil at medium-high heat. If the oil isn’t hot enough, the chicken will absorb too much and become soggy instead of crispy.
-
Don’t Overcrowd: Fry the chicken in batches if necessary. Overcrowding the pan lowers the oil temperature, preventing a nice golden crust from forming.
-
Sauce Timing: Add the chicken back to the sauce until just heated through to maintain the crunch. Excessive cooking in the sauce can make the coating soggy.
-
Check Doneness: Utilize a meat thermometer to ensure chicken reaches an internal temperature of 165°F for safe consumption while keeping it juicy.
Make Ahead Options
These Honey Butter Garlic Chicken bites are fantastic for meal prep, saving you precious time during busy weeknights! You can coat the chicken up to 24 hours in advance and refrigerate it in a sealed container to enhance flavor and maintain moisture. The sauce can also be prepared a day ahead—simply store it in the fridge after cooking. When you’re ready to serve, reheat the sauce gently and cook the chicken as instructed. This way, you will enjoy crispy, succulent chicken that tastes just as delicious as if you made it fresh, transforming your dinner into a quick and satisfying masterpiece with minimal effort!
What to Serve with Honey Butter Chicken
Imagine a dinner table filled with the aroma of sweet, garlicky chicken paired with comforting sides that complete your meal.
- Steamed Rice: A fluffy bed of rice absorbs the sticky honey sauce, making every bite a delightful balance of flavors.
- Garlic Mashed Potatoes: Creamy, buttery potatoes add a rich texture, making them a perfect partner for the crispy chicken.
- Roasted Vegetables: Colorful, caramelized veggies bring freshness and a slight char, complementing the sweetness of the dish beautifully.
- Crispy Green Salad: Crisp lettuce with a tangy vinaigrette refreshes the palate, offering a light contrast to the richness of the chicken.
- Honey-Glazed Carrots: Sweet and tender, these carrots mirror the honey flavor in the chicken, creating a delicious harmony.
- Biscuits or Dinner Rolls: Soft, fluffy rolls provide a delightful way to scoop up sauce and pair wonderfully with the savory notes of the chicken.
- Chilled White Wine: A glass of chilled Sauvignon Blanc perfectly balances the dish’s sweetness, enhancing the overall dining experience.
- Fruit Salad: A fresh mix of seasonal fruits adds a sweet and tangy element, brightening your meal with vibrant colors and flavors.
Honey Butter Garlic Chicken Variations
Feel free to get creative and make this dish your own with these delightful variations that cater to different tastes and preferences.
-
Chicken Choices: Swap chicken thighs for breasts or tenders depending on your family’s favorite cut. Each option brings a unique texture and flavor to the dish.
-
Gluten-Free Option: Use gluten-free flour instead of regular flour for a crispy coating that everyone can enjoy. This way, no one has to miss out on the deliciousness!
-
Dairy-Free Delight: Replace unsalted butter with vegan butter or coconut oil for a friendly dairy-free version. You’ll still achieve that luscious sauce without compromising on taste.
-
Spicy Kick: Add a pinch of cayenne pepper or red pepper flakes to the flour mixture for some heat. This will elevate the flavor profile and appeal to those who love a little spice!
-
Herbal Infusion: Toss in some fresh herbs like thyme or rosemary into the honey butter sauce for an aromatic twist. The fresh notes will add depth and character to the dish.
-
Zesty Lemon: Squeeze a bit of fresh lemon juice over the finished chicken for a bright, tangy flavor that cuts through the sweetness. It’s a refreshing addition that pairs beautifully with the honey.
-
Sweet Variants: Try using maple syrup or agave nectar instead of honey for a different kind of sweetness. Each alternative gives the dish a unique flavor while maintaining that delectable glaze.
-
Sauce Elevation: For an extra punch, consider adding a tablespoon of Dijon mustard to the sauce. It brings a delightful tang that complements the sweetness of the honey beautifully.
As you explore these variations, don’t forget to pair your Honey Butter Garlic Chicken with a side of Garlic Butter Dinner Rolls for the ultimate comfort food experience! Enjoy creating your perfect meal!
Storage Tips for Honey Butter Garlic Chicken
Fridge: Store leftovers in an airtight container for up to 3 days. This keeps the chicken moisture intact while preventing any unpleasant odors from the fridge.
Freezer: For longer storage, freeze the cooled chicken in an airtight container or freezer bag for up to 2 months. Thaw in the fridge overnight before reheating.
Reheating: To maintain the crispy texture, gently reheat in an oven at 350°F (175°C) for about 10–15 minutes, or until heated through. Avoid the microwave, as it may make the coating soggy.
Serving Fresh: For the best experience, try to enjoy your Honey Butter Garlic Chicken fresh after cooking. However, if savoring leftovers, follow these tips for a delightful meal.
Honey Butter Garlic Chicken Recipe FAQs
How can I choose the best chicken for this recipe?
Absolutely! For the juiciest flavors, I recommend boneless chicken thighs or tenders. Thighs have more fat, keeping them moist during cooking. If you prefer leaner cuts, feel free to use chicken breasts, though they may require a bit less cooking time to avoid dryness.
What’s the best way to store leftovers?
After enjoying your Honey Butter Garlic Chicken, store leftovers in an airtight container in the refrigerator for up to 3 days. This helps keep the chicken moist and flavorful. When ready to enjoy again, gently reheat in the oven at 350°F (175°C) for about 10-15 minutes to maintain the crispiness!
Can I freeze this dish?
Yes, you can freeze your Honey Butter Garlic Chicken for up to 2 months! Allow the chicken to cool completely, then place it in an airtight container or freezer bag. Label it with the date, and when you’re ready to eat, thaw it overnight in the fridge before reheating.
What if I want to make it dairy-free?
Very! To make this Honey Butter Garlic Chicken dairy-free, simply replace the unsalted butter with a high-quality vegan butter alternative. It should work well in the sauce while keeping that delicious sweet and savory flavor balance. You won’t miss a beat!
How do I avoid soggy chicken when reheating?
To keep your Honey Butter Garlic Chicken crispy, you should avoid the microwave. Instead, reheat it in the oven as mentioned. Spread the chicken out on a baking sheet in a single layer and bake at 350°F (175°C). This will help restore some of that delightful crunch!
Are there any allergens I should be aware of?
When making this dish, keep in mind that soy sauce contains gluten unless you opt for a gluten-free version. Additionally, if you’re cooking for someone with a garlic allergy, you could try substituting the garlic powder and minced garlic with a dash of onion powder for a different but tasty flavor.
Honey Butter Garlic Chicken — Sweet, Savory, and Oh-So Easy!
Ingredients
Equipment
Method
- In a mixing bowl, combine flour, kosher salt, black pepper, and garlic powder to create a flavorful coating. Set aside while prepping the chicken.
- Cut boneless chicken thighs or tenders into bite-sized chunks. Dredge each piece in the flour mixture, shaking off excess flour.
- In a large skillet, heat about 1/4 inch of olive oil over medium-high heat. Fry the chicken for approximately 5 minutes on each side until golden brown.
- Once the chicken is golden brown, remove from skillet and let drain on a plate lined with paper towels.
- In the same skillet, reduce heat to medium and add unsalted butter. Melt and mix in honey, light soy sauce, and minced garlic. Let bubble for about 2 minutes.
- Return the crispy chicken to the skillet, gently tossing in the honey butter sauce until well-coated. Let simmer for an additional minute.
- Remove from heat and transfer to a serving platter. Serve immediately with favorite sides.
Leave a Reply