
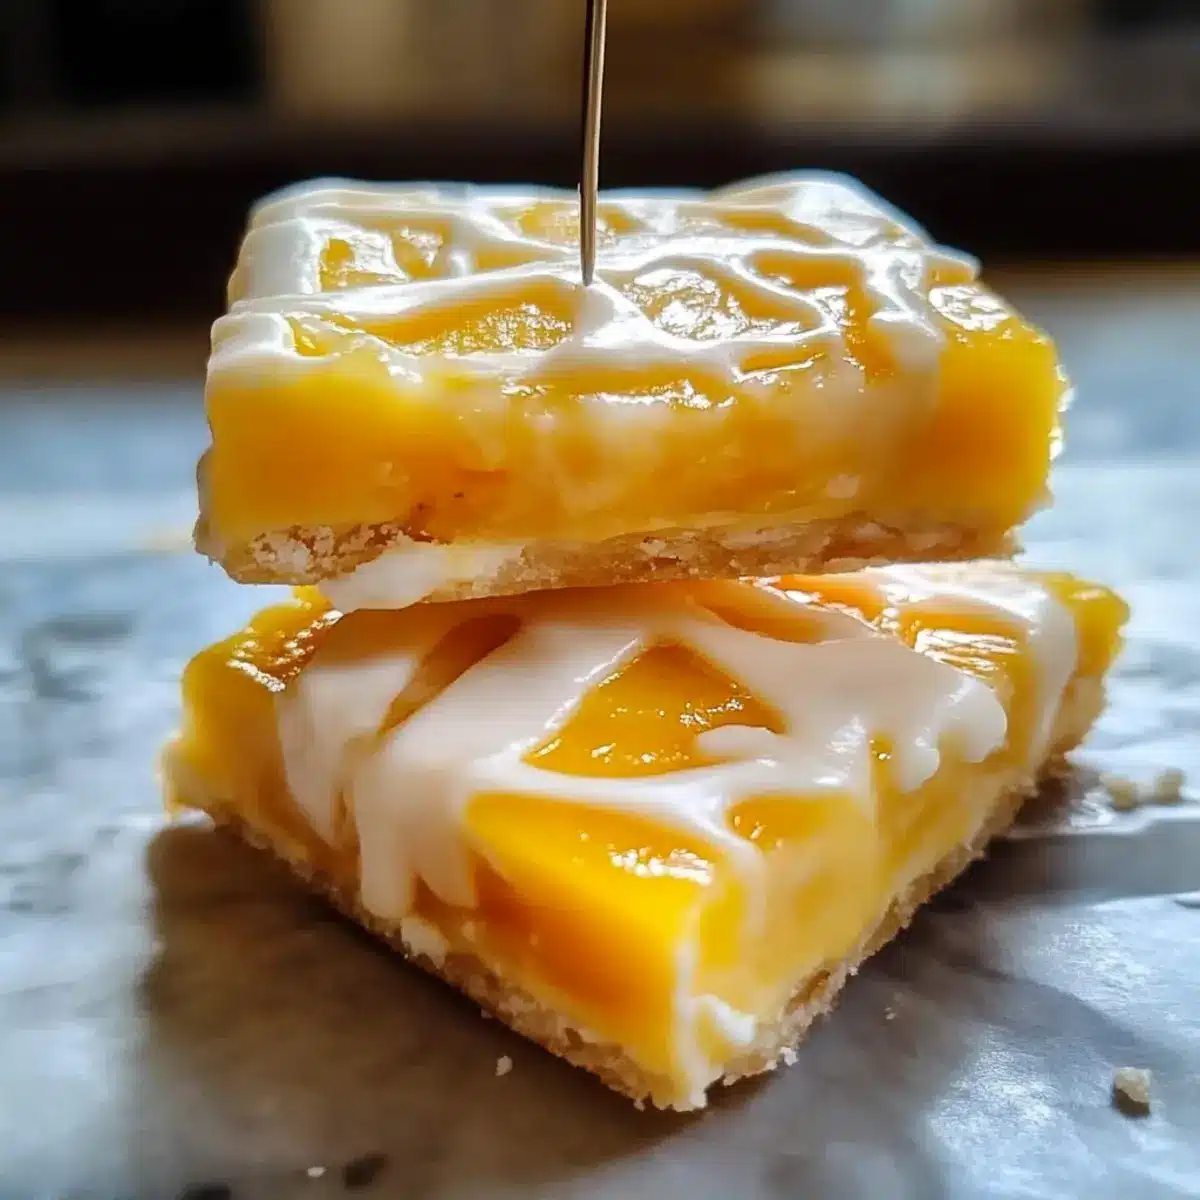
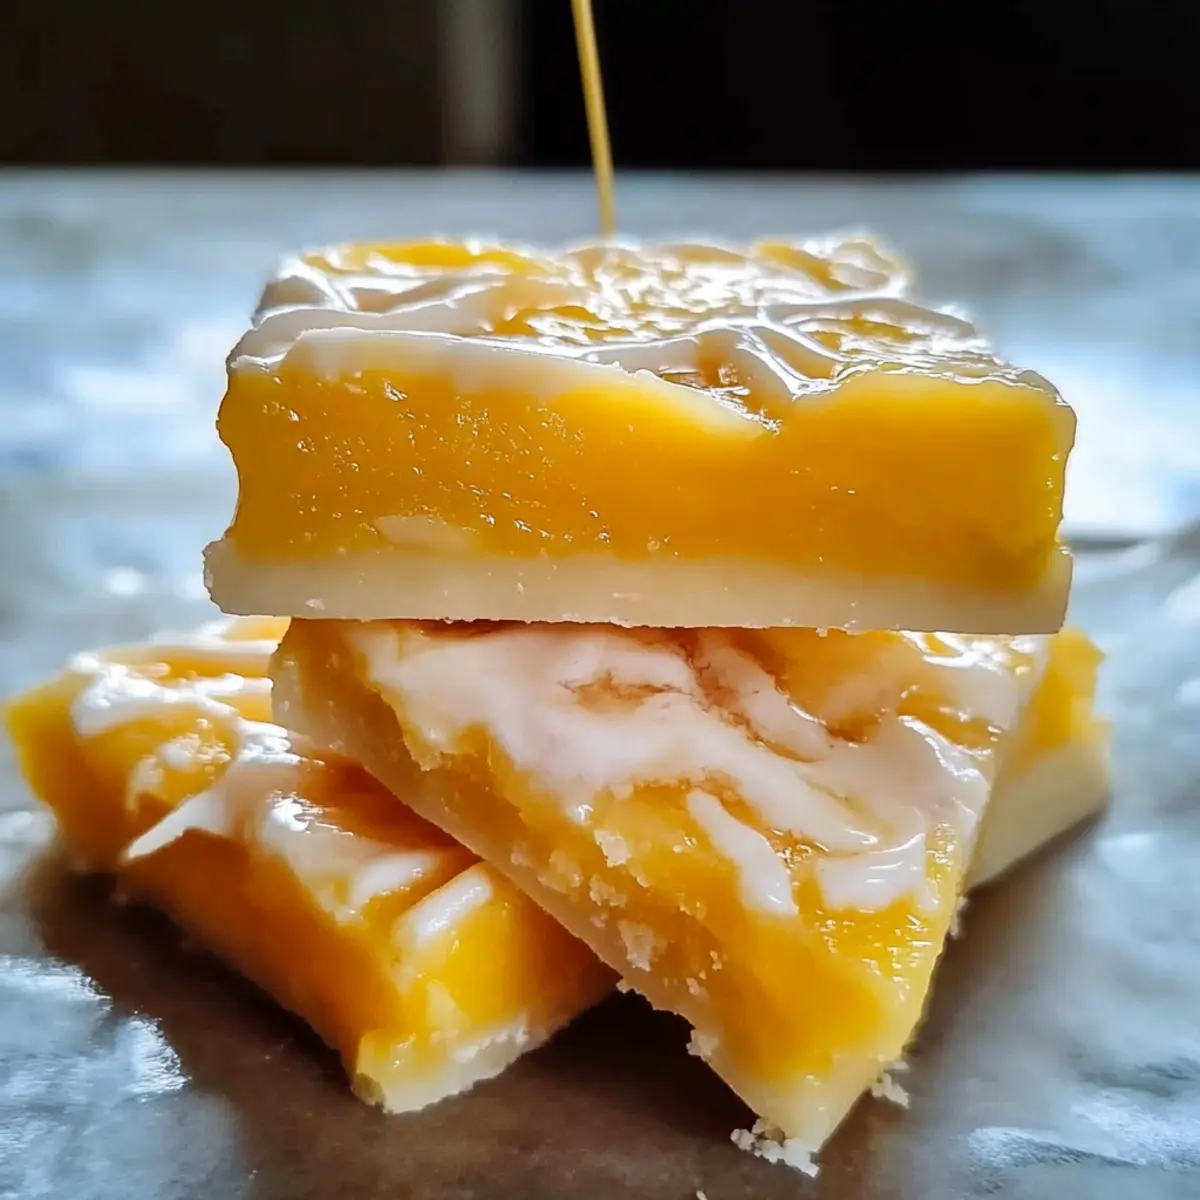
As I savored the first bite of a sun-kissed Mango Dream Bar, it felt like a mini-vacation right in my kitchen. The way the creamy mango filling danced atop a buttery crust took me straight to the tropics! These delightful bars are not just a treat for the taste buds; they come together with simple ingredients and just a hint of kitchen magic—making them a breeze to whip up. Perfect for summer gatherings or a refreshing afternoon pick-me-up, they offer a sweet yet tangy joy, tailored for anyone tired of the same old dessert routine. Plus, with a gluten-free option available, there’s no reason to hold back! Are you ready to transport your senses with this tropical dessert? Let’s dive into the recipe!
Why are Mango Dream Bars so irresistible?
Simplicity at Its Best: With just a handful of ingredients, you can create a stunning dessert that impresses without the fuss.
Tropical Escape: Each bite of these bars is like a mini-vacation, wrapped in the refreshing sweetness of mango—perfect for warm, sunny days.
Crowd Pleaser: Whether it’s a family gathering or a friendly get-together, these bars are sure to be the star of the dessert table—everyone will be asking for the recipe!
Versatile Options: Feel free to swap in other fruit purees or even add a splash of rum extract for a unique twist—your taste buds deserve an adventure!
Health Conscious: Packed with vitamins A and C, you can indulge without the guilt; these bars are a refreshing alternative to heavier desserts.
If you’re also on the hunt for something equally delightful, check out my recipe for Mango Sticky Rice or some classic Chocolate Chip Cookies to balance out your dessert repertoire!
Mango Dream Bars Ingredients
• Your tropical dessert adventure starts here!
For the Crust
- All-Purpose Flour – Provides structure; substitute with gluten-free flour if needed.
- Unsalted Butter – Offers richness and flavor; ensure it’s softened for easy mixing.
- Granulated Sugar – Sweetens both the crust and filling; can be replaced with a sugar alternative for a lower-calorie option.
- Vanilla Extract – Enhances flavor; use pure vanilla for best results.
- Salt – Balances sweetness; a pinch is sufficient.
For the Filling
- Mango Puree – Key flavor component; brings sweetness and tropical essence. Fresh is ideal, but frozen or canned puree can substitute.
- Large Eggs – Bind ingredients and provide richness; can be swapped with flax eggs for a vegan version.
- Cornstarch – Sets the filling, providing a smooth texture; substitute with arrowroot starch if needed.
- Lemon Juice – Adds acidity to balance flavors; fresh juice is preferred.
Optional Garnish
- Shredded Coconut – Adds texture and a coconut flavor; can be omitted if not desired.
Gather these simple ingredients, and let the tropical vibes begin as you create your Mango Dream Bars!
Step‑by‑Step Instructions for Mango Dream Bars
Step 1: Preheat the Oven
Begin by preheating your oven to 350°F (175°C). While it warms up, prepare an 8×8-inch baking pan by greasing it with a bit of butter or lining it with parchment paper for easy removal later. This step will ensure your Mango Dream Bars have a perfect crust that won’t stick.
Step 2: Make the Crust
In a mixing bowl, combine all-purpose flour, granulated sugar, salt, softened unsalted butter, and a splash of vanilla extract. Use a fork or pastry cutter to blend until the mixture becomes crumbly and resembles wet sand. Transfer this mixture into the prepared pan, pressing it down firmly and evenly to create a solid base for your bars.
Step 3: Bake the Crust
Place the crust in the preheated oven and bake for 12-15 minutes or until it turns lightly golden around the edges. Keep an eye on it to ensure it doesn’t overbake. Once ready, remove the pan from the oven and let the crust cool slightly while you prepare the luscious filling.
Step 4: Prepare the Filling
In a medium saucepan over medium heat, whisk together mango puree, granulated sugar, cornstarch, lemon juice, and a pinch of salt. Stir continuously for about 5-7 minutes until the mixture thickens and bubbles gently. Remove it from the heat and allow it to cool for a few minutes, ensuring the filling will blend smoothly with the eggs.
Step 5: Incorporate Eggs and Vanilla
Once the mango mixture has cooled slightly, add in the large eggs and an additional splash of vanilla extract. Mix well until the filling is completely smooth and evenly combined. This step infuses your Mango Dream Bars with creamy richness and vibrant flavor, setting them apart from ordinary desserts.
Step 6: Pour the Filling
Carefully pour the prepared mango filling over the cooled crust in the baking pan. Use a spatula to spread the filling evenly, ensuring every bite of your Mango Dream Bars is filled with that tropical essence. This layer of filling is what makes these bars truly dreamy!
Step 7: Bake the Mango Dream Bars
Return the pan to the oven and bake for 20-25 minutes. You’ll know they are ready when the filling is set and no longer jiggles in the center. The edges should be lightly browned, offering a beautiful contrast to the creamy filling.
Step 8: Cool Completely
Remove the bars from the oven and let them cool completely at room temperature. For best results, refrigerate the pan for at least 1-2 hours, allowing the flavors to meld beautifully and helping the bars firm up for easier slicing.
Step 9: Serve Chilled
Once chilled, slice the Mango Dream Bars into squares or rectangles. Serve them as is, or add a sprinkle of shredded coconut or a light glaze on top for an extra tropical touch. These chilled bars are the perfect refreshing treat to share or enjoy solo!
Expert Tips for Mango Dream Bars
• Perfect Crust: Ensure your butter is softened to create a crumbly texture in the crust. Overmixing can lead to a dense base.
• Ripe Mangoes: Choose ripe mangoes for the filling; under or overripe fruit can change the flavor profile. Fresh is best, but frozen will work too.
• Cooling Time: Allow the bars to cool completely before slicing. This helps achieve clean cuts and a more attractive presentation.
• Flavor Boost: For extra flavor, consider adding a splash of rum extract to the filling. This small addition can elevate your Mango Dream Bars!
• Storage Solutions: Store the bars in the refrigerator for optimal freshness. They can last up to a week and freeze well for longer storage.
Mango Dream Bars Variations & Substitutions
Feel free to get creative with your Mango Dream Bars—we all know that a dash of personal touch makes a recipe truly special!
-
Gluten-Free: Substitute all-purpose flour with your favorite gluten-free flour blend for a delightful gluten-free treat.
-
Lower Sugar: Swap granulated sugar with a sugar alternative like erythritol or stevia to cut down on calories without sacrificing sweetness.
-
Vegan Delight: Replace eggs with flax eggs (1 tablespoon ground flaxseed mixed with 3 tablespoons water) and use a dairy-free butter for a vegan version. It’s surprisingly easy, and just as delicious!
-
Coconut Infusion: Mix some shredded coconut into the crust for added texture and tropical flavor—it’s like a vacation in every bite!
-
Tropical Twist: Try using other fruit purees like passion fruit or pineapple for an exciting fruity adventure. Each variation lends a fresh and unique twist to the classic bars.
-
Chocolate Layer: Drizzle a layer of chocolate ganache on top for a sweet contrast. The combination of mango and chocolate will definitely tempt your palate.
-
Creamy Layer: Top your bars with a dollop of whipped cream or coconut cream for extra richness. This adds a lovely creaminess that complements the bars perfectly.
-
Zesty Flavor: Add a splash of lime juice alongside the lemon juice for a zesty kick that sends these bars over the top in flavor.
If you enjoy this refreshing dessert, you might also want to explore my delightful Fudgy Chewy Brookies or indulge in the romantic flavors of Mango Sticky Rice. Happy cooking!
Make Ahead Options
Mango Dream Bars are perfect for meal prep enthusiasts! You can prepare the crust up to 24 hours in advance, keeping it tightly wrapped in plastic wrap in the refrigerator to maintain its crumbly texture. The mango filling can also be made up to 3 days ahead; simply store it in an airtight container, and be sure to let it cool completely before sealing to prevent condensation. When you’re ready to bake, pour the filling over the crust and bake as instructed. This allows the flavors to deepen, ensuring your Mango Dream Bars are just as delicious when served! With these prep tips, you’ll save time and enjoy a delightful dessert with minimal effort.
Storage Tips for Mango Dream Bars
Fridge: Store leftovers in an airtight container in the refrigerator for up to 1 week. This keeps the bars fresh and their flavors intact.
Freezer: For longer storage, freeze the Mango Dream Bars wrapped tightly in plastic wrap followed by aluminum foil. They can be frozen for up to 3 months.
Thawing: When ready to enjoy, transfer the bars from the freezer to the fridge and let them thaw overnight for the best texture.
Reheating: If desired, gently reheat individual bars in the microwave for about 10-15 seconds to enjoy them warm, but they’re delightful chilled too!
What to Serve with Mango Dream Bars
These delightful tropical treats are perfect for creating a full, refreshing meal experience.
- Fresh Fruit Salad: A medley of seasonal fruits enhances the tropical vibe, offering a burst of juicy flavors alongside the bars.
- Coconut Whipped Cream: Light and creamy, this topping complements the bars’ texture and adds another layer of coconut goodness.
- Minted Iced Tea: A cool, herbal drink that refreshes the palate, balancing the sweetness of the Mango Dream Bars perfectly.
- Tropical Smoothie: Blend mango, pineapple, and banana for a creamy drink that mirrors the dessert’s flavors while keeping things light.
- Grilled Pineapple: The warm caramelization draws out natural sugars, creating a sweet contrast to the chilled bars—an unexpected harmony!
- Key Lime Pie: This tart dessert offers a zesty kick, making it an excellent counterpoint to the sweet richness of the Mango Dream Bars.
- Sparkling Water with Lime: A bubbly option that cleanses the palate, making each bite of dessert even more enjoyable.
- Chocolate Dipped Strawberries: The slight bitterness of chocolate creates a decadent pairing that elevates the tropical sweetness of the bars.
- Pineapple Sorbet: A light, frozen treat that echoes the tropical flavors of the bars while providing a refreshing way to cool off.
- Rum Punch: For a spirited option, this fruity cocktail will enhance the tropical atmosphere of your gathering—perfect for summer fun!
Mango Dream Bars Recipe FAQs
What type of mangoes should I use for Mango Dream Bars?
Absolutely, using ripe mangoes is key to achieving the best flavor in your Mango Dream Bars! Look for ones that are slightly soft to the touch and have a sweet aroma. If ripe mangoes aren’t available, you can substitute with frozen or canned mango puree. For an even fresher taste, pureeing your own mangoes is a delightful option!
How should I store leftover Mango Dream Bars?
Very easy! Store any leftover Mango Dream Bars in an airtight container in the refrigerator for up to 1 week. If you’re like me and want to enjoy them later, they can also be frozen! Just wrap them tightly in plastic wrap and then in aluminum foil. This way, they can last for up to 3 months without losing flavor.
Can I freeze Mango Dream Bars? If so, how?
Absolutely! To freeze your Mango Dream Bars, allow them to cool completely after baking. Slice them into squares or rectangles, then wrap each piece tightly in plastic wrap. Place them in a freezer-safe container or bag to avoid freezer burn. When you’re ready to enjoy, simply thaw them in the refrigerator overnight for the best texture.
What if my filling doesn’t set properly?
If your Mango Dream Bars filling doesn’t set, it may not have cooked long enough. Make sure to cook it over medium heat until it thickens and bubbles gently, which generally takes about 5-7 minutes. Additionally, ensure that you’ve incorporated the eggs well and that the mixture is fully smooth before pouring it over the crust. If you face this issue, a quick fix is to gently reheat the bars in the oven at a low temperature (around 300°F) until set.
Are Mango Dream Bars gluten-free?
Yes, indeed! You can make your Mango Dream Bars gluten-free by substituting all-purpose flour with gluten-free flour blends. I often use a 1:1 gluten-free baking mix, and it gives fantastic results. Just be sure to check the labels of all your ingredients, especially the baking powder, for any gluten present.
Can I use other fruits besides mango?
The more the merrier! While mangoes create that unique tropical flavor, feel free to experiment with other fruit purees like passion fruit or pineapple. Simply replace the mango puree with an equal amount of your chosen fruit puree to tailor the bars to your liking. The vibrant flavors can turn this recipe into your next favorite dessert!
These Mango Dream Bars will surely take you on a tropical adventure, and with these tips, you can make them even more delightful and suited to your taste!
Mango Dream Bars: Your Go-To Refreshing Tropical Treat
Ingredients
Equipment
Method
- Preheat your oven to 350°F (175°C) and prepare an 8x8-inch baking pan by greasing it or lining with parchment paper.
- In a mixing bowl, combine all-purpose flour, granulated sugar, salt, softened unsalted butter, and vanilla extract. Blend until crumbly.
- Press the mixture into the prepared pan to create a solid crust.
- Bake the crust for 12-15 minutes until lightly golden and let it cool slightly.
- In a medium saucepan, whisk together mango puree, granulated sugar, cornstarch, lemon juice, and a pinch of salt over medium heat until thickened.
- Remove from heat and let cool slightly before folding in the eggs and vanilla until smooth.
- Pour the mango filling over the cooled crust and spread evenly.
- Bake for 20-25 minutes until set and lightly browned around the edges.
- Let cool completely at room temperature, then refrigerate for 1-2 hours before slicing.
- Slice and serve chilled, optionally garnished with shredded coconut.
Leave a Reply