
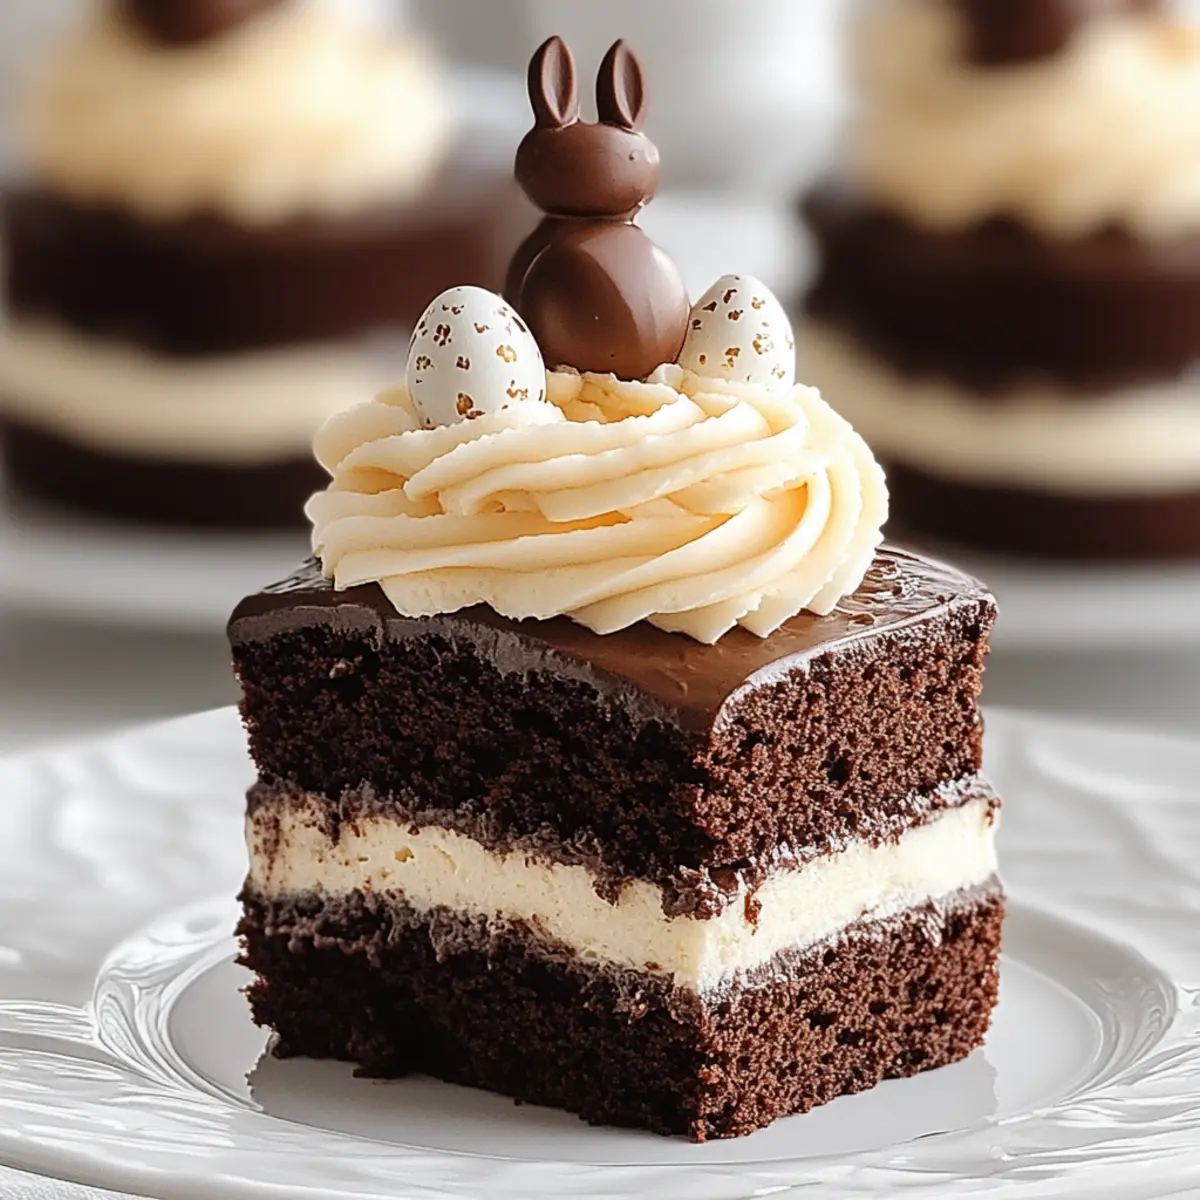
Spring has arrived, and with it comes the magic of Easter! As colorful eggs fill baskets and flowers blossom, nothing brings joy to the festivities like my Mini Easter Layer Cakes. These delightful treats are not just visually stunning; they’re rich, chocolatey wonders layered with creamy buttercream frosting that make them the ultimate festive dessert. Perfect for sharing with family and friends during your Easter gatherings, these mini cakes offer a charmingly manageable size—ideal for satisfying sweet cravings without overwhelming portions. Plus, they’re completely customizable, allowing each chef to unleash their creativity with toppings and colors. Ready to dive into a cake-making adventure that’s both fun and delicious? Let’s get started!
Why Choose Mini Easter Layer Cakes?
Versatile: These mini cakes allow for endless customization! From pastel-tinted frostings to delightful fillings like fruit jam or frosting, you’ll find a combination that fits every taste or theme.
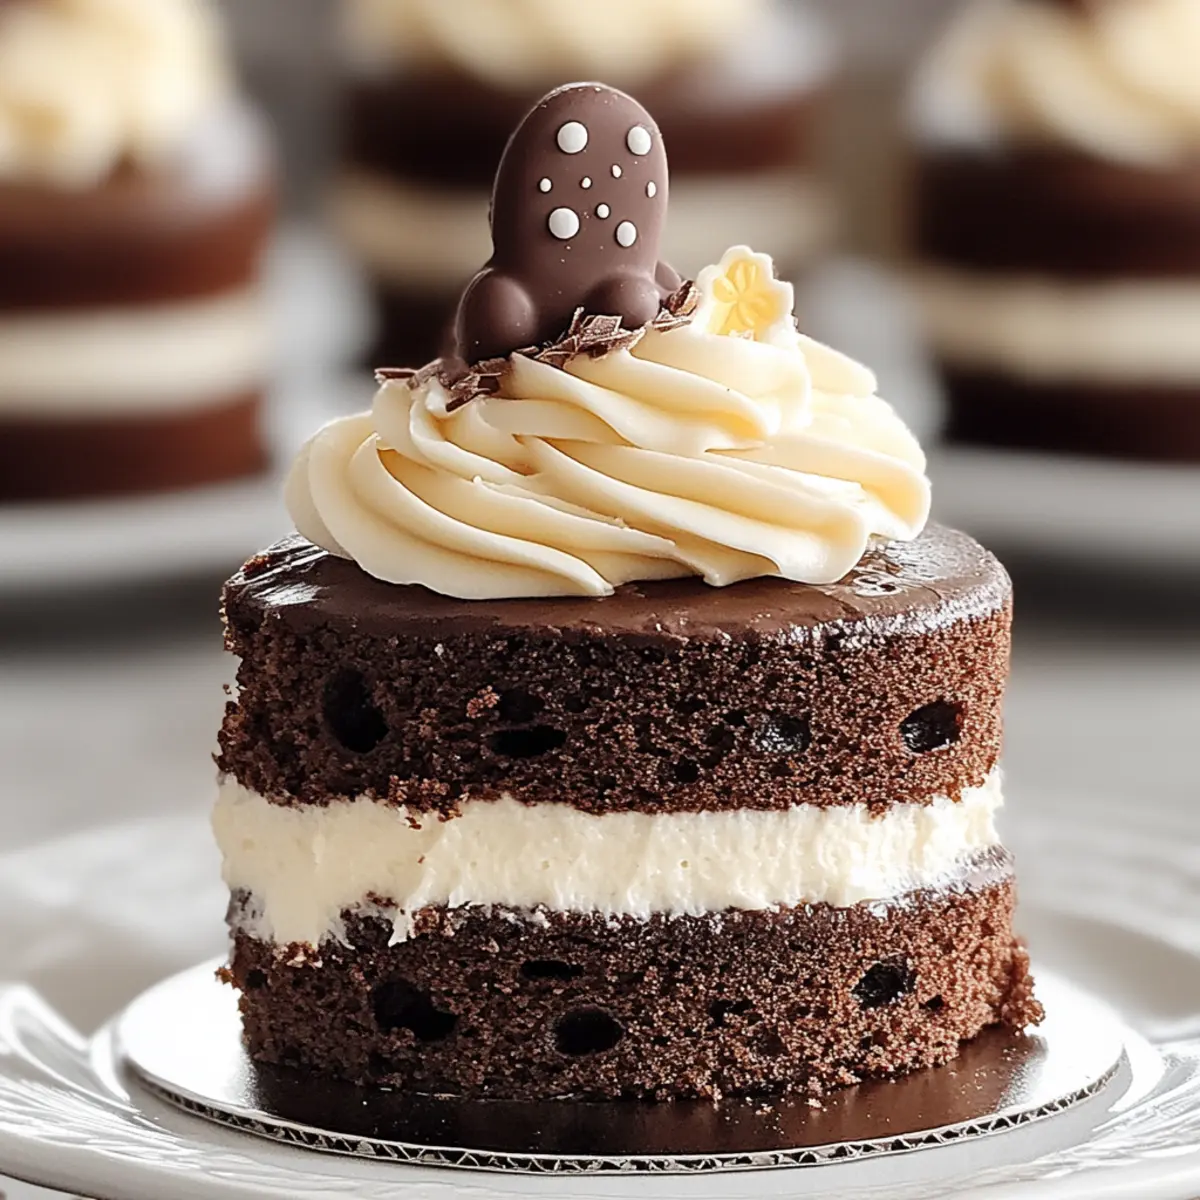
Visually Stunning: Impress your guests with the beauty of these layered cakes. Their vibrant colors and elegant presentation make them the highlight of any dessert table!
Quick Preparation: With straightforward steps, you’ll be basking in chocolatey goodness without spending hours in the kitchen. Plus, they can be made ahead of time, which is perfect for busy Easter preparations!
Crowd-Pleasing Dessert: They’re the perfect bite-sized indulgence, satisfying sweet cravings while staying light and manageable. Don’t forget to pair them with other festive treats like Mini Pumpkin Pies or Mini Cheesecake Sweet.
Fun to Make: Get the whole family involved! Decorating these mini cakes can turn into a creative bonding experience, making your Easter celebrations even more memorable.
Get ready to enjoy these flavorful delights that truly celebrate the season!
Mini Easter Layer Cakes Ingredients
For the Cake
- Ghirardelli Sweet Ground Chocolate and Cocoa – Provides the rich chocolate flavor; substitute with regular cocoa powder (add an extra 1/4 cup sugar) if needed.
- All-purpose flour – Acts as the structure for the cake; no substitutions necessary.
- Granulated sugar – Sweetens the cake and can be adjusted based on personal preference.
- Baking soda – Helps the cake rise; ensure it’s fresh for best results.
- Cream of tartar – Stabilizes egg whites and enhances volume; omit if unavailable.
- Salt (optional) – Balances sweetness; use to taste.
- Buttermilk – Adds moisture and acidity for tenderizing; milk mixed with vinegar can be substituted.
- Butter (softened) – Enriches flavor and moisture; shortening can be used for a firmer texture.
- Eggs – Provide structure and richness; no direct substitutes recommended.
- Pure vanilla extract – Enhances all the other flavors; use imitation vanilla if necessary.
For the Buttercream Frosting
- Shortening – Provides stability to frosting; unsalted butter can be used for a creamier flavor.
- Butter (softened) – Contributes to a rich, creamy texture in frosting; margarine can be an alternative.
- Vanilla extract – Adds flavor; can be substituted with almond extract for a different twist.
- Confectioners’ sugar – Sweetens and thickens the frosting; sift before using to prevent lumps.
- Milk – Adjusts frosting consistency; heavy cream can be used for a richer texture.
These Mini Easter Layer Cakes are sure to become your new favorite festive dessert, perfectly combining charm and amazing flavors!
Step‑by‑Step Instructions for Mini Easter Layer Cakes
Step 1: Prepare the Cake
Preheat your oven to 350°F (175°C) and gather two 8- or 9-inch round cake pans. Grease each pan thoroughly and line the bottoms with wax paper for easy removal later. This will ensure your Mini Easter Layer Cakes come out beautifully without sticking.
Step 2: Mix Dry Ingredients
In a large mixing bowl, sift together the all-purpose flour, Ghirardelli Sweet Ground Chocolate and Cocoa, granulated sugar, baking soda, cream of tartar, and salt. Mix well until everything is evenly combined. This step is crucial as it ensures a rich, chocolaty flavor throughout your cake layers.
Step 3: Combine Ingredients
Add in the buttermilk and softened butter to the dry mixture. Using an electric mixer, beat on medium speed for about 2 minutes until smooth and creamy. Next, incorporate the remaining buttermilk, eggs, and pure vanilla extract, mixing until just combined. Your batter will be thick and luscious—just what you want for these delightful cakes!
Step 4: Bake
Carefully pour the cake batter equally into the prepared pans, smoothing the tops for even baking. Place the pans in the preheated oven and bake for 30–45 minutes. You’ll know they are done when a toothpick inserted in the center comes out clean. Once baked, let them cool in the pans for 10–15 minutes before transferring to wire racks.
Step 5: Make Buttercream Frosting
In a separate bowl, cream together the softened butter and shortening using an electric mixer until fluffy. Gradually add the sifted confectioners’ sugar, mixing well after each addition. Once incorporated, stir in the milk and vanilla extract, beating until smooth and spreadable. This buttercream will be the perfect topping for your Mini Easter Layer Cakes.
Step 6: Assemble & Decorate
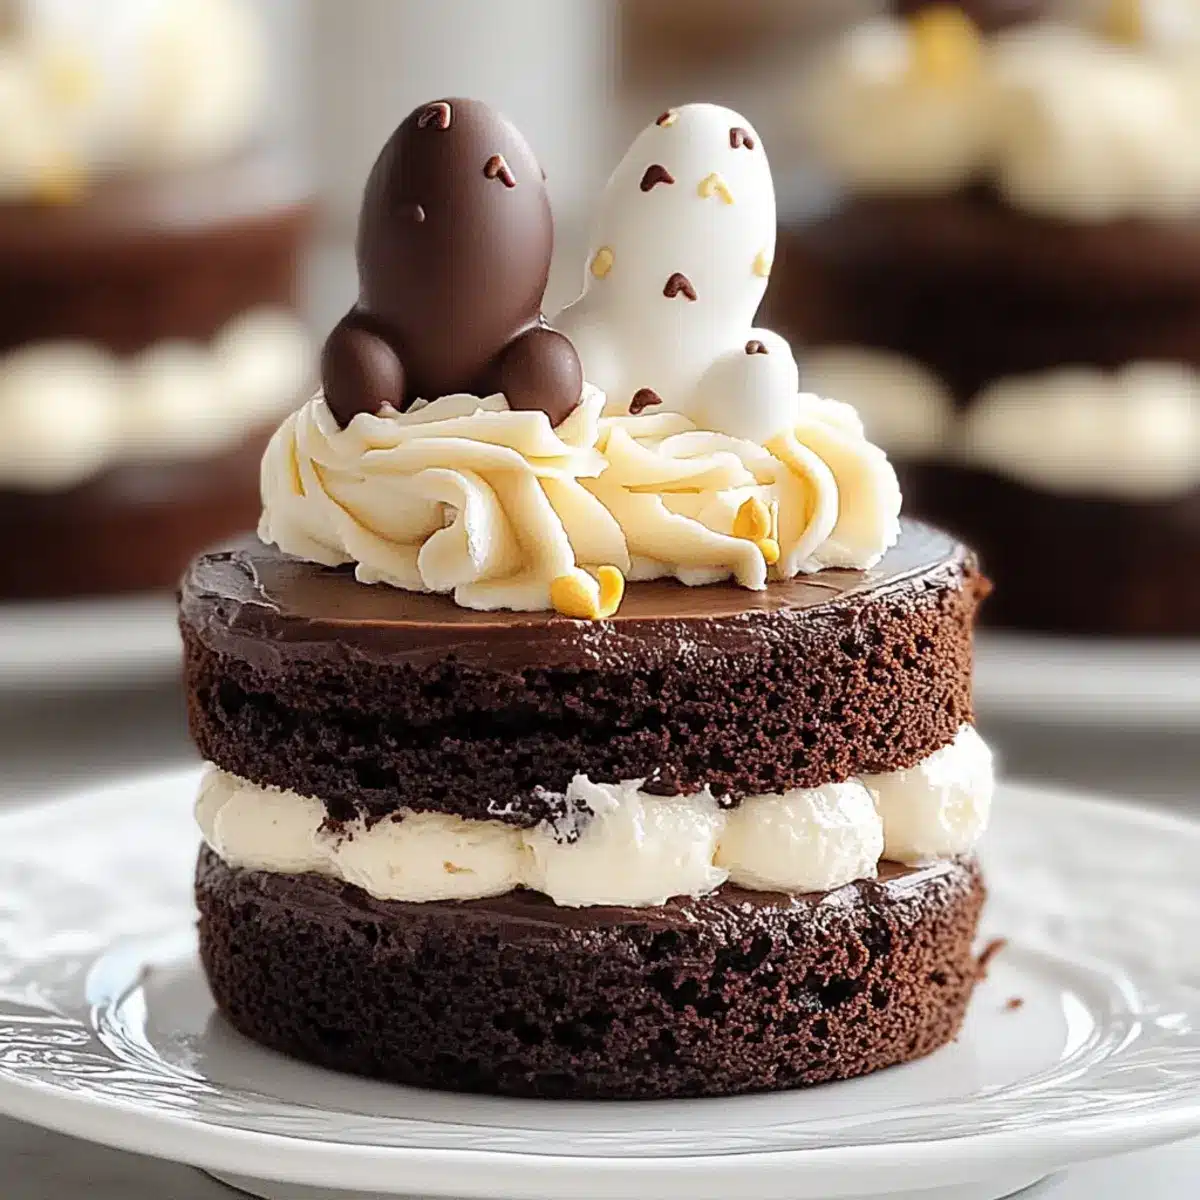
Once the cakes have cooled completely, use a sharp knife or cookie cutter to cut mini layers from the cakes. Stack each layer with a generous amount of frosting in between. After assembling, frost the outside of the stacked cakes, smoothing the buttercream for a beautiful finish. Get creative and decorate with festive sprinkles or mini chocolate eggs for that Easter flair!
How to Store and Freeze Mini Easter Layer Cakes
Fridge: Store your assembled Mini Easter Layer Cakes in an airtight container for up to 3 days to maintain their freshness. Bring them to room temperature before serving for the best flavor and texture.
Freezer: If you’d like to extend their life, freeze individual layers or whole cakes wrapped tightly in plastic wrap and then in aluminum foil. They can be kept in the freezer for up to 2 months.
Frosting Storage: Keep any leftover buttercream frosting in the fridge for up to 5 days, sealed in an airtight container. For easy future use, you can also freeze it for up to 3 months.
Reheating: If served from frozen, thaw the cakes in the fridge overnight before decorating or serving. Enjoy the delightful layers just as they were meant to be—fresh and flavorful!
Expert Tips for Mini Easter Layer Cakes
Uniform Layers: Use a sharp metal cookie cutter or knife to ensure your mini cakes are the same size, creating a visually appealing stack.
Avoid Crumbs: Chill your cake layers for at least 30 minutes before frosting. This helps prevent pesky crumbs from mixing into your buttercream, ensuring a smooth finish.
Creamy Frosting: For the best buttercream consistency, gradually add confectioners’ sugar after beating the butter and shortening. This will create a fluffy, easily spreadable frosting that complements the rich chocolate flavor of your Mini Easter Layer Cakes.
Make Ahead: Consider baking the cake layers in advance and wrapping them tightly. They can be stored for up to two days, while the frosting can last up to five days in the fridge.
Decorate Creatively: Personalize your cakes with festive toppings. Use pastel-colored frosting or playful sprinkles—let your creativity shine and make your mini cakes stand out!
Mini Easter Layer Cakes Variations
Feel free to let your creativity shine by customizing these Mini Easter Layer Cakes with fun twists that cater to your taste!
-
Pastel Frosting: Create a whimsical look by tinting your buttercream frosting in soft pastel shades using gel food coloring. This makes your cakes sparkle with springtime fun!
-
Jam Filling: Swap traditional frosting between layers with fruity jam for a refreshing surprise. Strawberry or raspberry jam offers a delightful contrast to the rich chocolate cake.
-
Cupcake Transformation: Make these cakes into delightful cupcakes! Simply adjust the baking time to 20-25 minutes for perfectly portable treats that are sure to delight party guests.
-
Nutty Crunch: Add crushed nuts (like almonds or hazelnuts) between layers or as a topping for an added crunch and flavor contrast. This gives a fantastic texture to enjoy with the creamy frosting.
-
Coconut Cream: For a tropical twist, mix shredded coconut into the frosting or sprinkle it on top. This will give your Mini Easter Layer Cakes a delightful, beachy vibe—a great way to welcome spring!
-
Minty Freshness: Incorporate peppermint extract into the frosting for a refreshing flavor boost that pairs beautifully with chocolate. Top with mini chocolate eggs for a festive touch!
-
Spicy Chocolate: Add a pinch of cayenne pepper or a dash of cinnamon into your cake batter for a warm and slightly spicy chocolate flavor that is sure to intrigue your taste buds.
-
Vegan Option: Use plant-based butter and a flaxseed egg substitute for a vegan-friendly version of these delightful cakes. With the right adjustments, everyone can join in the Easter fun!
For more inspiration, consider making some delightful Mini Cheesecake Sweet or festive Mini Pumpkin Pies alongside these treats for a well-rounded dessert table!
Make Ahead Options
These Mini Easter Layer Cakes are perfect for meal prep enthusiasts! You can bake the cake layers up to 24 hours in advance; simply wrap them tightly in plastic wrap once they have cooled to avoid drying out. For the buttercream frosting, it can be made ahead and stored in an airtight container in the refrigerator for up to 5 days. When you’re ready to assemble, just rewhip the frosting to restore its creamy texture. To finish, stack the layers with frosting in between, frost the outside, and decorate just before serving. With these make-ahead tips, you’ll have festive treats ready to impress with minimal last-minute effort!
What to Serve with Mini Easter Layer Cakes?
Elevate your Easter gathering with complementary dishes that harmonize beautifully with these delightful mini treats.
- Fresh Fruit Salad: A burst of seasonal fruits balances the rich chocolate flavors, adding a refreshing, juicy contrast to the sweet indulgence.
- Light Vanilla Ice Cream: The smooth and creamy vanilla ice cream pairs perfectly with the dense cake, offering a delightful temperature contrast.
- Chocolate Dipped Strawberries: These vibrant, decadent bites echo the chocolate theme while providing a fun and interactive element for guests.
- Sparkling Lemonade: Refreshing and bubbly, this drink adds a zesty kick that elevates the festive atmosphere, making it a hit among both kids and adults.
- Pistachio Macarons: Their delicate texture and nutty flavor offer a sophisticated addition to your dessert table, beautifully complimenting the chocolate layers of the cakes.
- Mini Easter Cookies: Keep with the festive theme! These delightful cookies can be decorated to match the mini cakes, making for a cohesive and eye-catching display.
- Chocolate Milk: A nostalgic beverage choice that echoes the cake’s flavors, creating a comforting and cozy pairing.
- Whipped Cream: Light and airy, a dollop of freshly whipped cream enhances the presentation and adds a soft, creamy texture amidst the rich layers.
- Herbal Tea: For a calming finish to the meal, a light herbal tea can help cleanse the palate after your sweet indulgence.
Mini Easter Layer Cakes Recipe FAQs
What type of chocolate should I use for the best flavor in Mini Easter Layer Cakes?
Absolutely! I recommend using Ghirardelli Sweet Ground Chocolate and Cocoa for a rich flavor. If it’s unavailable, you can substitute with regular cocoa powder; just remember to add an extra 1/4 cup of sugar to balance the taste.
How should I store Mini Easter Layer Cakes to keep them fresh?
Store your assembled Mini Easter Layer Cakes in an airtight container in the refrigerator for up to 3 days. Before serving, let them sit at room temperature for about 30 minutes to bring back their delightful flavors and texture.
Can I freeze Mini Easter Layer Cakes?
Yes, you can! To freeze, either wrap individual layers or whole cakes tightly in plastic wrap, followed by aluminum foil. They can last in the freezer for up to 2 months. When ready to enjoy, simply thaw in the fridge overnight, then frost or serve as desired.
What are some common mistakes to avoid when making these mini cakes?
One pitfall is not chilling the cake layers before frosting, which can cause crumbs to mix into your buttercream. I often suggest chilling the cakes for at least 30 minutes after baking. Additionally, using a sharp cookie cutter or knife helps ensure uniform cake layers while stacking.
Is there a safe way to enjoy Mini Easter Layer Cakes if I have allergies?
Very! You can customize the ingredients to cater to various dietary needs. For example, use gluten-free flour instead of regular flour for those with gluten sensitivities. Always check the chocolate and frosting ingredients for potential allergens, especially if serving to guests.
How long will leftover buttercream frosting last?
I recommend storing any leftover buttercream frosting in an airtight container in the refrigerator for up to 5 days. If you want to save it for a longer time, you can freeze it for up to 3 months. Just thaw it in the fridge overnight before using!

Mini Easter Layer Cakes That Wow Your Taste Buds
Ingredients
Equipment
Method
- Preheat your oven to 350°F (175°C) and gather two 8- or 9-inch round cake pans. Grease each pan thoroughly and line the bottoms with wax paper for easy removal.
- In a large mixing bowl, sift together the all-purpose flour, Ghirardelli Sweet Ground Chocolate and Cocoa, granulated sugar, baking soda, cream of tartar, and salt. Mix well until everything is evenly combined.
- Add in the buttermilk and softened butter to the dry mixture. Using an electric mixer, beat on medium speed for about 2 minutes until smooth and creamy. Incorporate the eggs and vanilla extract.
- Carefully pour the cake batter equally into the prepared pans, smoothing the tops. Bake for 30–45 minutes, or until a toothpick comes out clean. Let them cool in the pans for 10–15 minutes before transferring to wire racks.
- In a separate bowl, cream together the softened butter and shortening until fluffy. Gradually add the sifted confectioners' sugar, mixing well after each addition. Stir in the milk and vanilla extract, beating until smooth.
- Once cooled, cut mini layers from the cakes using a knife or cookie cutter. Stack each layer with frosting in between and frost the outside. Decorate with festive sprinkles or mini chocolate eggs.
Leave a Reply