
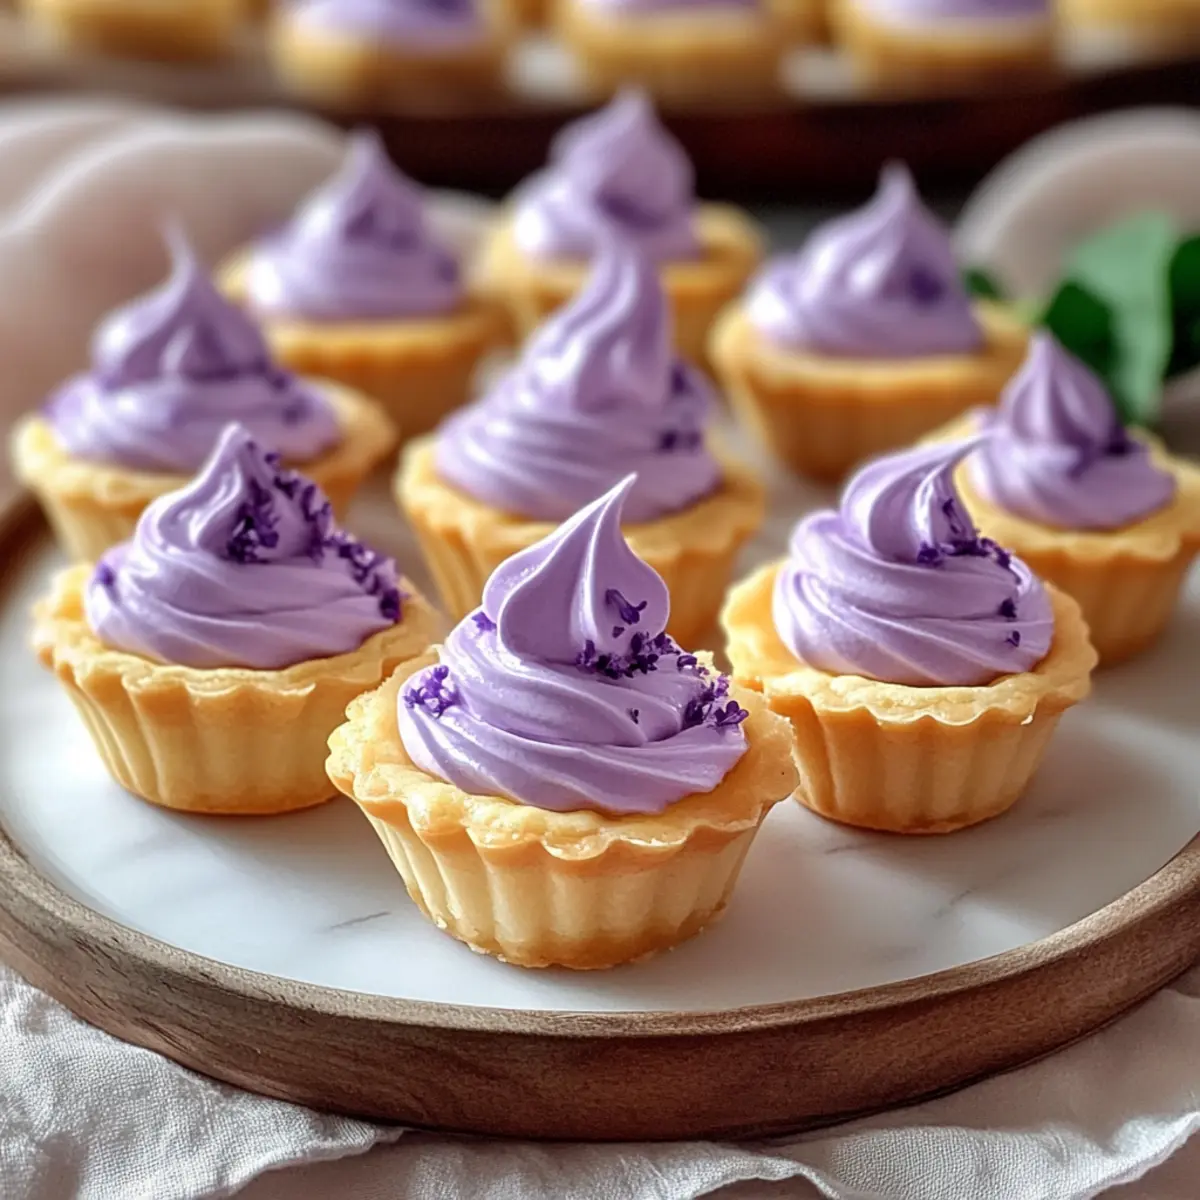
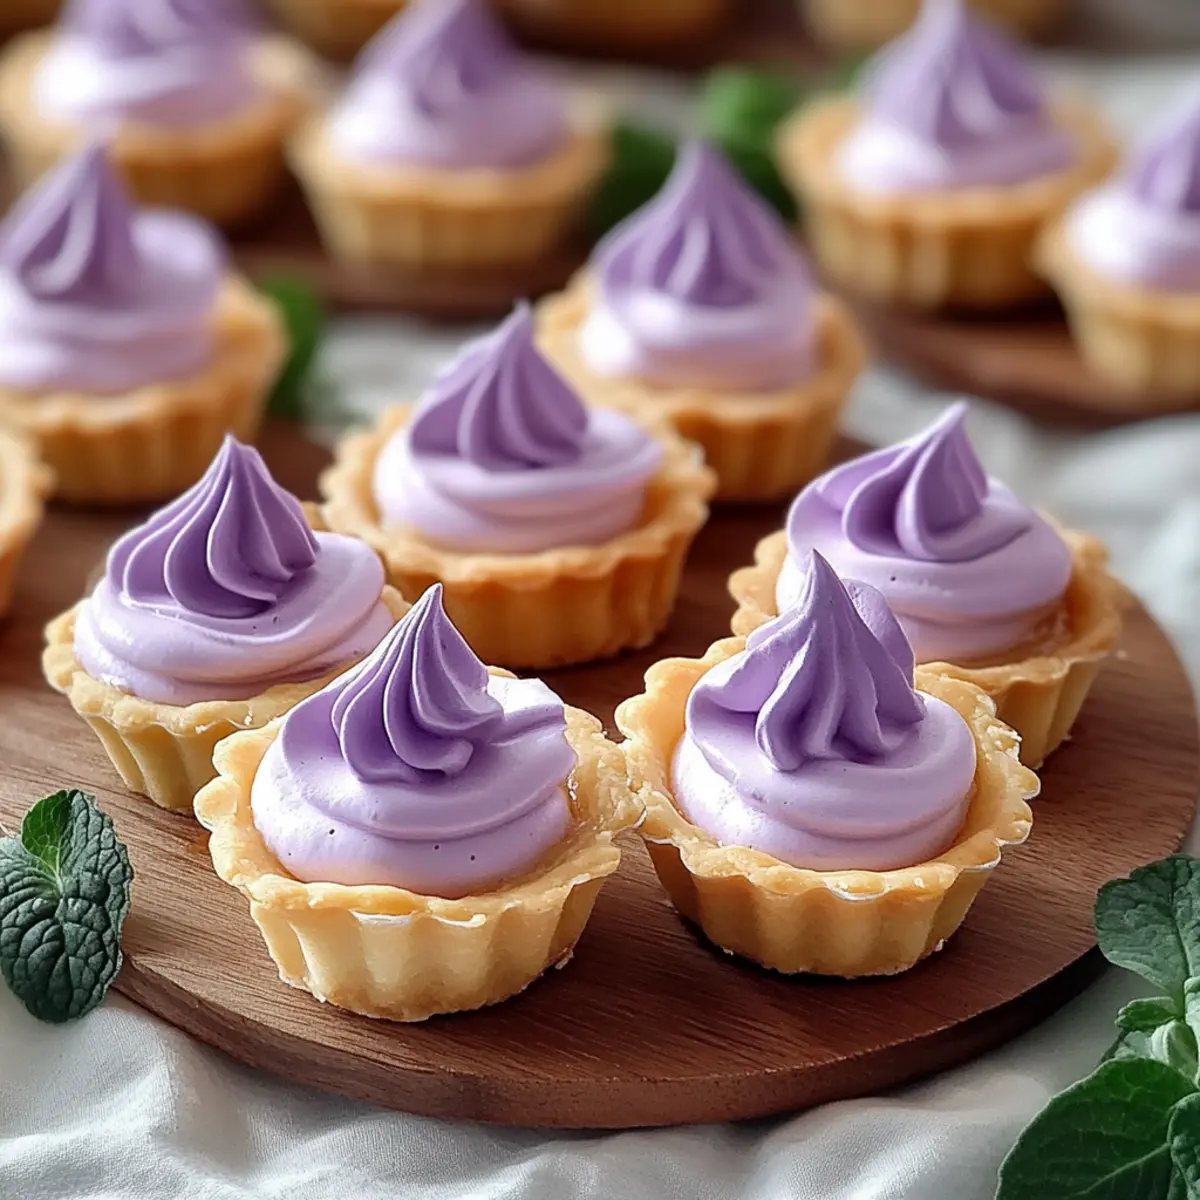
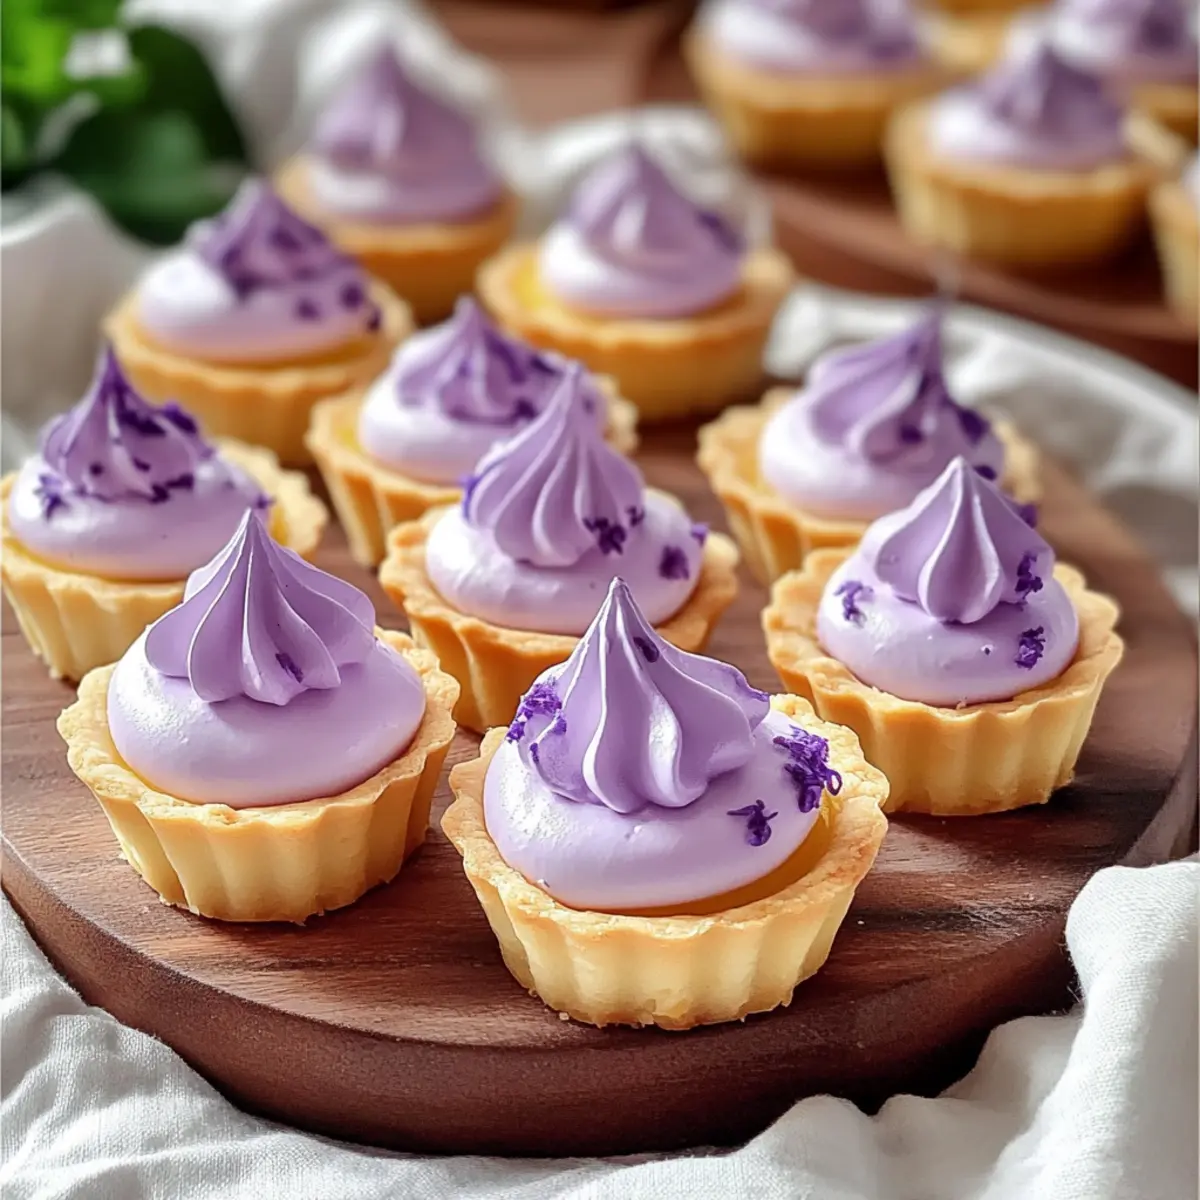
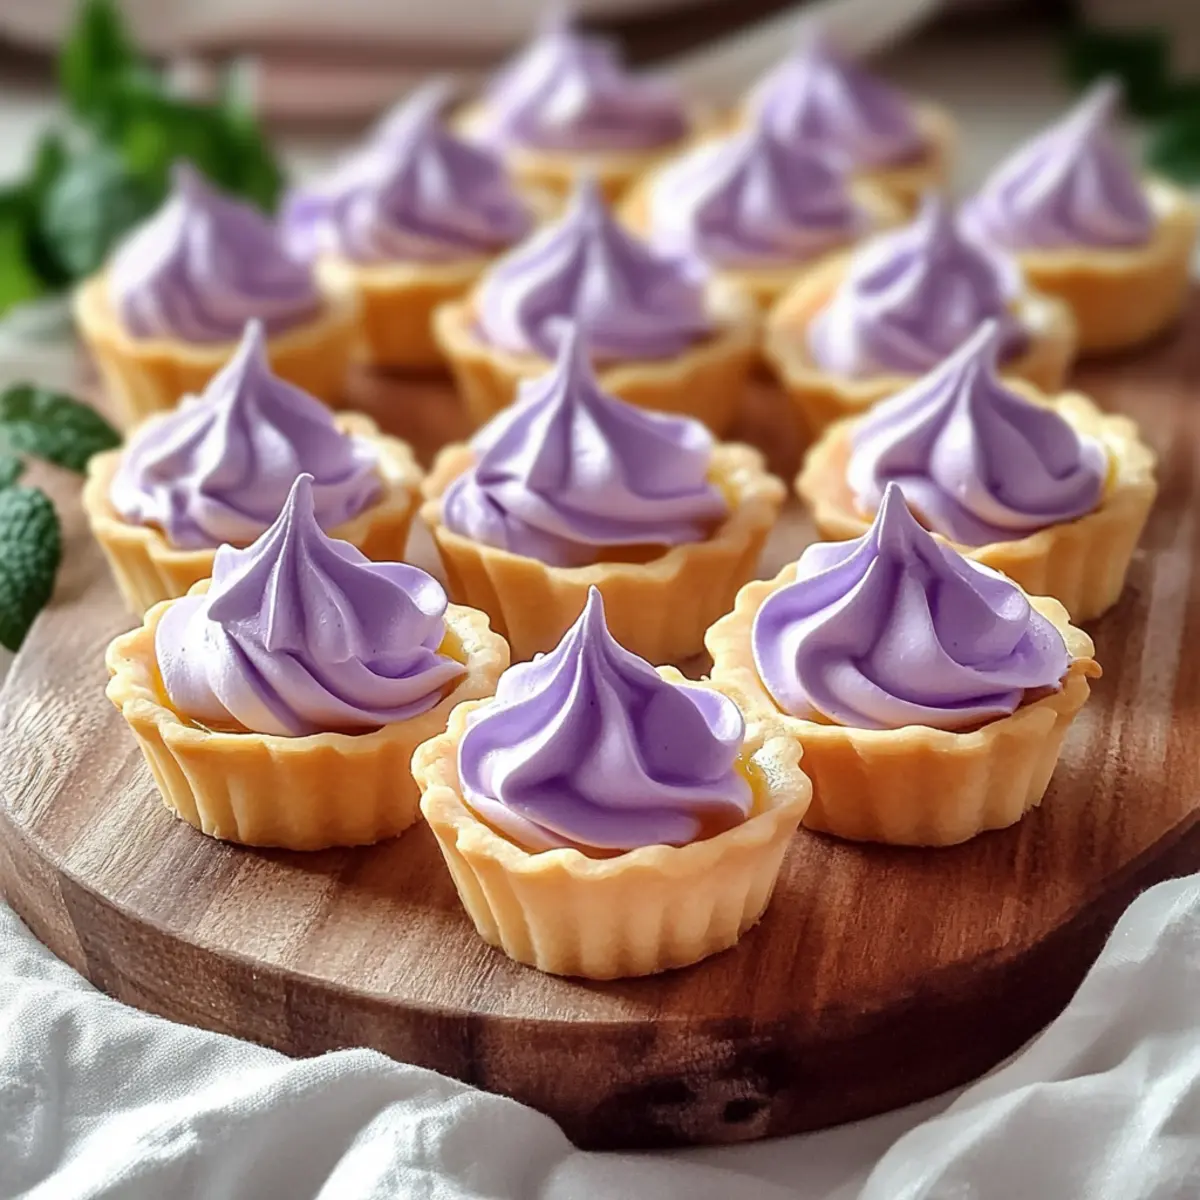
The moment I first tasted a mini lemon tart, I knew I’d stumbled upon a dessert that would steal my heart forever. With their delightfully tangy filling nestled in a buttery, flaky crust, these Mini Lemon Tarts with Lilac Meringue are not just a feast for the senses—they’re a gastronomic triumph! The whimsical lilac meringue adds a beautiful flair, making these tarts visually stunning as well as delicious. One of the best parts? They’re surprisingly easy to whip up, perfect for impressing your guests or enjoying during a cozy evening at home. Whether you stick to the classic flavors or explore variations like lavender or ginger, these tarts are bound to brighten your day. Are you ready to dive into a world of zest and whimsy?
Why are Mini Tarts so Irresistible?
Elegant Presentation: These Mini Lemon Tarts with lilac meringue are the perfect treat to impress at any gathering, showcasing your culinary skills with a charming aesthetic.
Bursting Flavor: Enjoy the zesty lemon curd paired with a light, sweet meringue that dances on your palate, making each bite a memorable experience.
Versatile Creations: Whether you stick to the classic flavor or explore variations like lavender or ginger, you have endless possibilities to satisfy your cravings.
Easy to Master: While they look gourmet, the simplicity of the recipe means even novice bakers can achieve stunning results.
Perfect for Any Occasion: Whether it’s a cozy night in or a festive celebration, these tarts are an ideal sweet treat that everyone will love—just like our Mini Pumpkin Pies that add a festive touch!
Mini Lemon Tart with Lilac Meringue Ingredients
For the Tart Shell
- All-Purpose Flour – Provides structure; consider gluten-free flour blends for dietary preferences.
- Powdered Sugar – Adds sweetness and ensures a smooth texture for the crust.
- Salt – Enhances flavor; use sea salt or kosher salt as a lovely alternative.
- Chilled Butter – Creates flakiness in the crust; keep it cold for the best results.
For the Lemon Curd
- Fresh Lemon Juice – Gives that essential zesty tartness; opt for fresh juice over bottled for maximum flavor.
- Granulated Sugar – Sweetens the curd and meringue beautifully; feel free to use coconut sugar for a lower glycemic index.
- Eggs – Provide richness and stability; substitute with flax eggs for a vegan version if desired.
- Lemon Zest – Intensifies the fresh lemon flavor; dried zest can be a last-minute option if fresh isn’t available.
- Vanilla Extract – Adds another layer of flavor; almond extract makes a delightful substitute if you’re feeling adventurous.
For the Lilac Meringue
- Egg Whites – Essential for structure and stability; consider using aquafaba for a vegan-friendly alternative.
- Lilac Food Coloring – Provides aesthetic appeal; optional, but can be replaced with natural dyes like beet juice for a pop of color.
Step‑by‑Step Instructions for Mini Lemon Tart with Lilac Meringue
Step 1: Prepare the Tart Shell
In a large mixing bowl, whisk together the all-purpose flour, powdered sugar, and a pinch of salt. Cut in the chilled butter using a pastry cutter or your fingers until the mixture resembles coarse crumbs. Gather the dough into a ball, flatten it into a disk, wrap it in plastic, and refrigerate for about 30 minutes until firm.
Step 2: Bake the Shells
Preheat your oven to 350°F (175°C). Roll out the chilled dough on a floured surface to about 1/8-inch thick. Using a round cutter, cut out circles to fit your mini tart pans. Press the dough into the pans, prick the bottoms with a fork, and bake for 15-18 minutes, or until golden brown. Allow them to cool completely.
Step 3: Make Lemon Curd
In a medium saucepan over medium heat, combine fresh lemon juice, granulated sugar, eggs, lemon zest, and vanilla extract. Whisk constantly until the mixture thickens and coats the back of a spoon, which takes about 10-12 minutes. Remove from heat and let it cool slightly before pouring into the cooled tart shells.
Step 4: Prepare Lilac Meringue
In a clean mixing bowl, whip the egg whites using an electric mixer on medium speed until soft peaks form, about 2-3 minutes. Gradually add granulated sugar, continuing to beat on high speed until stiff peaks develop and the mixture becomes glossy, roughly 5 minutes. Gently fold in the lilac food coloring until blended.
Step 5: Pipe the Meringue
Transfer the lilac meringue to a piping bag fitted with your desired tip. Pipe the meringue onto each mini lemon tart, creating beautiful swirls or peaks that will add a whimsical touch to the presentation. Be generous with the meringue for a delightful contrast to the tangy lemon curd.
Step 6: Toast the Meringue
Using a kitchen torch, lightly toast the meringue tops until golden brown, which should take only a few seconds per tart. Alternatively, you can place the tarts under the broiler for 1-2 minutes, but watch closely to prevent burning. This step enhances the flavor and adds a lovely toasted appearance.
Step 7: Garnish & Serve
For an elegant touch, consider garnishing your mini lemon tarts with fresh mint leaves or edible flowers. Arrange them on a decorative platter for serving. These Mini Lemon Tarts with Lilac Meringue are perfect for impressing guests or enjoying a sweet treat in your own home.
How to Store and Freeze Mini Lemon Tart with Lilac Meringue
Fridge: Keep your mini lemon tarts stored in an airtight container in the refrigerator for up to 3 days. This helps maintain their freshness and flavor.
Freezer: You can freeze the baked tart shells without the filling for up to 1 month. Wrap them tightly in plastic wrap and then in aluminum foil for best protection.
Meringue: For optimal texture, the lilac meringue is best served fresh. If you need to prepare it ahead of time, make it a few hours before serving and keep it at room temperature until ready to enjoy.
Reheating: If the tarts have been frozen, thaw them in the fridge overnight and let them come to room temperature before serving for the best taste and texture.
What to Serve with Mini Lemon Tart with Lilac Meringue
Each bite of this sweet treat inspires delightful pairings that elevate your dessert experience.
- Fresh Berries: Juicy raspberries or strawberries add a pop of freshness, beautifully complementing the tartness of the lemon curd. They bring a burst of color to your plate and a juicy contrast to the creamy meringue.
- Vanilla Ice Cream: Creamy and sweet, a scoop of vanilla ice cream is the perfect companion, providing a balance of cold and rich flavors alongside the tangy tarts.
- Mint Tea: A warm cup of mint tea enhances the citrus notes and adds a soothing touch, making it an ideal beverage for afternoon gatherings or cozy evenings.
- Whipped Cream: Lightly sweetened whipped cream on the side adds a velvety texture that pairs wonderfully with the tart’s zesty flavor, delivering an extra creaminess to each bite.
- Chocolate Covered Almonds: The nutty flavor and slight crunch of chocolate-covered almonds provide a nice contrast to the vibrant lemon tart and bring a touch of indulgence to the table.
- Lemonade: A refreshing glass of homemade lemonade complements the tartness of the tarts, bringing a delightful balance of sweet and sour flavors to your dessert spread.
- Savory Appetizers: Serve alongside light appetizers, like goat cheese crostini or cucumber bites, to create a delightful savory-sweet contrast that prepares your palate for the desserts.
Make Ahead Options
These Mini Lemon Tarts with Lilac Meringue are fantastic for meal prep, letting you enjoy delightful desserts without the last-minute rush! You can prepare the tart shells and lemon curd up to 3 days in advance. Simply bake and cool the tart shells, then store them in an airtight container at room temperature. The lemon curd can be refrigerated for up to 24 hours before filling the tart shells (to maintain a fresh taste). When you’re ready to serve, fill the tart shells with the cooled lemon curd and prepare the lilac meringue just before serving to ensure it stays fluffy and visually stunning. This way, you achieve restaurant-quality results while saving precious time for your busy schedule!
Mini Lemon Tart with Lilac Meringue Variations
Feel free to explore your creativity with these delightful tarts, adding a personal touch to your dessert experience!
-
Lavender Infusion: Add dried lavender to the lemon curd for a floral twist. This pairing elevates the flavor to something truly special.
-
Ginger Zing: Incorporate freshly grated ginger into your lemon curd to excite the taste buds. The warmth of ginger harmonizes beautifully with tangy lemon.
-
Citrus Medley: Swap in lime or grapefruit zest for a different citrus profile. Each fruit brings its unique brightness, offering a refreshing alternative.
-
Colorful Meringue: Use assorted food gels or natural dyes for the meringue. From vibrant pinks to deep greens, it can match any occasion beautifully.
-
Fruit Topping: Top each tart with a slice of fresh fruit like strawberries or blueberries. This not only adds color but also a burst of juicy flavor.
-
Coconut Whip: For a tropical touch, replace the meringue with whipped coconut cream. It’s lighter and lends an exotic flair to the tarts.
-
Chocolate Drizzle: Drizzle melted dark chocolate over the cooled tarts. The richness of chocolate contrasts enticingly with the zesty lemon filling.
-
Nut Crust Option: Use ground almonds or pecans instead of flour for the crust. This twist offers a nutty flavor and a gluten-free option for nut lovers.
Feel inspired? By experimenting with these variations, you’ll discover your favorite flavor combinations. Consider serving them alongside our charming Mini Cheesecake Sweet for an impressive dessert spread that will leave your guests in awe!
Expert Tips for Mini Lemon Tart with Lilac Meringue
-
Ingredients Matter: Ensure all ingredients, especially the butter and eggs, are cold and at room temperature according to their specific needs for the tart and meringue respectively. This will help achieve the perfect textures.
-
Precision is Key: Avoid overbaking the tart shells. Keep an eye on them; a golden color is what you’re aiming for to prevent any burnt flavor in your mini lemon tart.
-
Meringue Texture: When whipping the egg whites, make sure your mixing bowl is completely clean and dry. Any grease can prevent the meringue from reaching stiff peaks for your delightful topping.
-
Gentle Folding: When adding lilac food coloring to the meringue, fold gently to avoid deflating the mixture while still achieving that charming hue for your mini lemon tarts.
-
Toasting Technique: Watch carefully when toasting the meringue; it takes mere seconds to go from golden brown to burnt. A kitchen torch grants more control, so use it for the best results.
Mini Lemon Tart with Lilac Meringue Recipe FAQs
How do I select the best lemons for this recipe?
Absolutely! When choosing lemons, look for ones that are firm, bright yellow, and slightly heavy for their size. Avoid lemons with dark spots or wrinkles, as they can indicate overripeness or dryness. Fresh, juicy lemons will give you that perfect tangy flavor for your curd, enhancing the overall taste of your mini lemon tart.
What is the best way to store Mini Lemon Tarts?
Very! Store your mini lemon tarts in an airtight container in the refrigerator for up to 3 days. This precaution locks in their freshness and maintains that delightful taste. If you’ve made a batch for a party or special occasion, it’s a great way to prep in advance!
Can I freeze the mini tarts?
Absolutely! To freeze, store only the baked tart shells without filling in an airtight container wrapped tightly in plastic wrap, followed by aluminum foil, to prevent freezer burn. They can last for up to 1 month. When ready to enjoy, simply thaw in the refrigerator overnight and fill them with lemon curd before adding the meringue.
What should I do if my meringue doesn’t reach stiff peaks?
Don’t worry! If your meringue isn’t reaching stiff peaks, it could be due to any grease in your mixing bowl or if your egg whites are not at room temperature. Ensure your mixing bowl is completely clean and dry before whipping. Start by beating the egg whites until soft peaks form, and then gradually add sugar while increasing the speed to high. This technique should help you achieve that delightful texture for your lilac meringue.
Are there any dietary considerations for this dessert?
Absolutely! If you’re accommodating dietary restrictions, you can modify certain ingredients. Use gluten-free flour blends for the tart shell, and for a vegan version, substitute regular eggs with flax eggs in the lemon curd and aquafaba for the meringue. These substitutions will still ensure a delicious and visually stunning dessert that everyone can enjoy!
Can I make the meringue in advance?
Sort of! The lilac meringue is best served fresh to ensure its lightness and fluffiness. However, if you need to prepare it a few hours ahead, you can whip it up and leave it at room temperature until you’re ready to serve. Just remember that meringue can lose quality if stored for long periods, so make it as close to serving time as possible for optimal texture!
Mini Lemon Tart with Lilac Meringue: A Sweet Delight to Share
Ingredients
Equipment
Method
- Prepare the Tart Shell: In a large mixing bowl, whisk together flour, powdered sugar, and salt. Cut in the chilled butter until coarse crumbs form. Gather dough into a ball, flatten into a disk, wrap in plastic, and refrigerate for 30 minutes.
- Bake the Shells: Preheat oven to 350°F. Roll out the chilled dough to 1/8-inch thick. Cut circles for mini tart pans. Press into pans, prick bottoms, and bake for 15-18 minutes until golden. Allow to cool.
- Make Lemon Curd: Combine lemon juice, sugar, eggs, lemon zest, and vanilla in a saucepan. Whisk constantly until thickened (10-12 min). Cool slightly before pouring into tart shells.
- Prepare Lilac Meringue: Whip egg whites in a clean bowl until soft peaks form. Gradually add sugar, then beat at high speed until stiff peaks form and glossy. Fold in lilac coloring gently.
- Pipe the Meringue: Transfer lilac meringue to a piping bag. Pipe onto each tart in swirls or peaks to contrast with lemon curd.
- Toast the Meringue: Lightly torch meringue tops until golden (seconds). Alternatively, broil for 1-2 minutes, watching closely.
- Garnish & Serve: Garnish with fresh mint or edible flowers. Arrange on a platter to serve.
Leave a Reply