
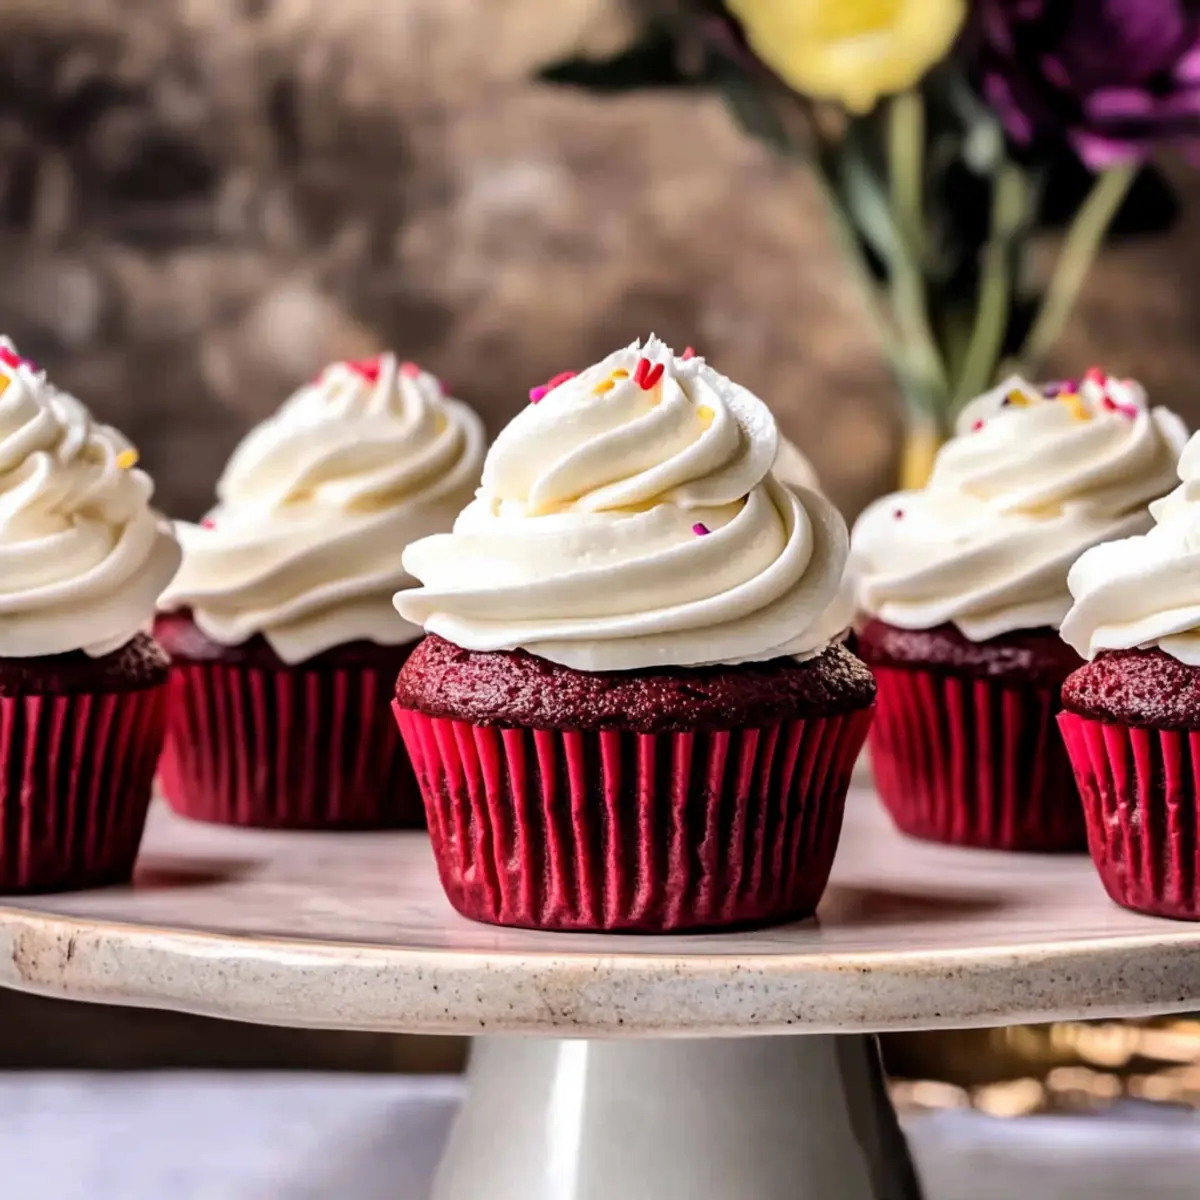
“What’s your go-to dessert for special occasions?” I asked my friend while rummaging through her beautifully decorated kitchen. Without hesitation, she exclaimed, “Red velvet cupcakes, of course!” It’s no wonder these moist and vibrant treats have stolen hearts—especially with a luscious cream cheese frosting gracing their tops. Perfect for celebrations like Valentine’s Day or Christmas, these Red Velvet Cupcakes are not only visually stunning but also incredibly easy to whip up. With every bite, you’ll enjoy a tender crumb and a hint of cocoa, making them a delightful alternative to fast food desserts. Plus, they can be made ahead, so you can focus on celebrating instead of stressing! Curious how to make these charming cupcakes? Let’s dive into the recipe!
Why Are Red Velvet Cupcakes So Loved?
Irresistible Flavor: The rich, cocoa undertones paired with the cream cheese frosting create a flavor profile that’s simply unmatched.
Stunning Presentation: Their vibrant red color makes them a showstopper for any occasion, ensuring your dessert table looks fabulous.
Easy to Make: Even novice bakers can ace this recipe, as it only requires basic skills!
Versatile for Celebrations: Whether it’s Valentine’s Day or a festive gathering, these cupcakes are the perfect sweet touch.
Make-Ahead Convenience: Prep them in advance, leaving you stress-free to enjoy your time with friends and family.
If you’re looking for more delicious treats or want to try something new, check out my Chicken Pot Pie for a delightful savory option!
Red Velvet Cupcake Ingredients
Here’s everything you need to create those moist Red Velvet Cupcakes that everyone loves!
For the Cupcakes
- All-Purpose Flour – Provides structure; spoon and level to avoid excess.
- Dutch Process Cocoa Powder – Adds a rich chocolate flavor and deeper color; regular cocoa can be used but will affect hue.
- Baking Powder – Important leavening agent to help cupcakes rise properly.
- Baking Soda – Works alongside buttermilk for effective leavening.
- Salt – Enhances flavors, making every bite enjoyable.
- Unsalted Butter – Adds moisture and richness; make sure it’s softened for easy mixing.
- Granulated Sugar – Sweetness that also contributes to the cupcake’s delightful texture.
- Egg – Essential for moisture and binding; use room temperature for even mixing.
- Egg Yolk – Enriches texture and boosts moisture significantly.
- Vanilla Extract – Adds depth to the flavor profile.
- Buttermilk – Provides tanginess and moisture; must be at room temperature.
- Red Gel Food Coloring – For that iconic deep red color; gel is preferable for vibrant results.
For the Cream Cheese Frosting
- Cream Cheese – The base for the frosting; keep it cold for a smooth texture.
- Powdered Sugar – Sweetens and thickens the frosting; be sure to sift for a lump-free consistency.
- Sprinkles (optional) – Add a touch of whimsy and fun to your finished cupcakes!
With these ingredients on hand, you’re one step closer to impressing your guests with delicious Red Velvet Cupcakes!
Step‑by‑Step Instructions for Moist and Delicious Red Velvet Cupcakes with Cream Cheese Frosting
Step 1: Preheat the Oven
Begin by preheating your oven to 350°F (175°C). While the oven warms, line a cupcake pan with 12 paper liners. This ensures an easy release of the cupcakes once they’re baked, giving them a delightful appearance, ready to be frosted.
Step 2: Mix the Dry Ingredients
In a small bowl, whisk together the all-purpose flour, Dutch process cocoa powder, baking powder, baking soda, and salt until evenly combined. This step is crucial for distributing the leavening agents, which will help your Red Velvet Cupcakes rise beautifully and achieve that perfect tender crumb.
Step 3: Cream the Butter and Sugar
In a large mixing bowl, use an electric mixer to cream the softened unsalted butter and granulated sugar together until the mixture is light and fluffy, about 1-2 minutes. This aeration introduces air into the batter, promoting fluffy cupcakes.
Step 4: Incorporate Eggs and Vanilla
Add one egg, followed by the egg yolk, and the vanilla extract to the butter and sugar mixture. Mix until the batter is smooth and pale, which typically takes about another minute. The addition of eggs enriches the texture, making your Red Velvet Cupcakes moist and delightful.
Step 5: Combine Dry Ingredients and Buttermilk
Gradually add the previously set aside dry ingredients to the wet mixture, alternating with the buttermilk. Mix on low speed until just combined—be cautious not to overmix, as this can toughen your cupcakes. Aim for a batter that’s smooth, with minimal lumps remaining.
Step 6: Add Red Gel Food Coloring
Gently fold in the red gel food coloring with a spatula, ensuring it’s evenly distributed throughout the batter. The deep red color is essential for those classic Red Velvet Cupcakes, making them visually stunning once baked.
Step 7: Fill the Cupcake Liners
Carefully divide the batter evenly among the lined cupcake wells, filling each about three-quarters full. This allows them enough room to rise without overflowing during baking. Use a scoop or measuring cup for even portions, achieving a uniform look.
Step 8: Bake the Cupcakes
Place the filled cupcake pan in the preheated oven and bake for 17-20 minutes. You’ll know they’re done when a toothpick inserted into the center comes out clean or with a few moist crumbs attached. This is the perfect moment to achieve moist yet fluffy Red Velvet Cupcakes.
Step 9: Cool the Cupcakes
Once baked, remove the cupcakes from the oven and let them cool in the pan for 10 minutes. Afterward, transfer them to a wire rack to cool completely. This step is critical – cooling prevents the frosting from melting when you’re ready to decorate.
Step 10: Prepare the Cream Cheese Frosting
In a mixing bowl, beat the cold cream cheese with an electric mixer until it becomes pale and fluffy. Gradually add the sifted powdered sugar, mixing until the frosting is smooth and creamy. This rich topping will complement the cupcakes perfectly, adding a tangy sweetness.
Step 11: Frost the Cool Cupcakes
Once the cupcakes are completely cooled, use a piping bag or a knife to generously spread the cream cheese frosting on each cupcake. For an extra touch of whimsy, sprinkle with your favorite colored sprinkles if desired, making your Red Velvet Cupcakes irresistible!
Step 12: Serve and Store
Your moist and delicious Red Velvet Cupcakes with creamy frosting are ready to enjoy! If you have leftovers, store them in an airtight container for up to three days. Serve at room temperature for the best flavor and texture that your family and friends will love!
Red Velvet Cupcakes Variations & Substitutions
Feel free to explore your creativity and personalize these cupcakes to suit any flavor preference or dietary need!
-
Gluten-Free: Substitute all-purpose flour with a gluten-free blend for a delicious alternative.
Swap in a 1:1 gluten-free flour mix, and you won’t even miss the gluten! -
Dairy-Free: Use dairy-free milk and vegan butter in place of buttermilk and unsalted butter.
Coconut milk can add a delightful flavor, making these cupcakes suitable for everyone. -
Less Sugar: Reduce the sugar by half for a lighter treat.
This option still produces moist cupcakes while offering a healthier indulgence. -
Chocolate Lovers: Mix in semi-sweet chocolate chips to the batter for an extra chocolatey flavor.
This adds a sweet surprise in every bite, perfect for chocoholics! -
Mini Cupcakes: Make them bite-sized by preparing mini versions and baking for 10-12 minutes.
These delightful morsels are ideal for sharing at parties or gatherings! -
Layered Cake: Transform into a stunning red velvet layer cake.
Just bake in larger round pans, frosted between layers, for an impressive centerpiece. -
Spice it Up: Add a pinch of cinnamon or nutmeg for a warm flavor twist.
These spices can elevate the classic red velvet experience to new heights! -
Fruit Surprise: Incorporate crushed pineapple for extra moisture and a touch of sweetness.
The fruitiness will surprise your palate while rounds out the richness of the cupcake.
Looking for more dessert inspiration? You might enjoy these delightful 4-ingredient no-bake crispy chocolate oat cookies or my extravagant chocolate oat cookies.
What to Serve with Moist and Delicious Red Velvet Cupcakes
What pairs perfectly with these vibrant, luscious treats?
Indulging in red velvet cupcakes is one thing, but creating a full meal or experience around them elevates the whole moment into a celebration.
- Smooth Creamy Ice Cream: Vanilla or cream cheese flavors bring additional sweetness, creating a delightful contrast to the tangy frosting.
- Fruity Berry Compote: A bright berry compote adds a fresh burst of flavor, balancing the rich cupcakes beautifully. Serve it alongside for a fun, interactive touch!
- Rich Chocolate Fondue: Dip fresh strawberries or graham crackers in chocolate fondue, inviting guests to explore flavors alongside their cupcakes.
- Classic Milkshake: A thick vanilla milkshake pairs wonderfully, echoing the creamy notes while adding a fun, nostalgic element to the meal.
- Sparkling Rosé: A chilled glass of sparkling rosé offers a refreshing effervescence that complements the sweetness of the cupcakes without overwhelming them.
- Chocolate-Covered Strawberries: These bite-sized delights not only taste great but also match beautifully with the elegant theme of red velvet.
- Coffee or Espresso: A rich cup of coffee enhances the flavors, especially if you want to contrast the sweetness of the cupcakes.
- Meringue Kisses: Light and airy, these provide a delightful textural contrast and offer a sweet touch without overshadowing the main dessert.
With these pairings in mind, your red velvet cupcake experience can become a cherished moment for friends, family, or any festive occasion!
How to Store and Freeze Red Velvet Cupcakes
Airtight Container: Store cupcakes in an airtight container at room temperature for up to 3 days. This helps maintain their moisture and keeps the cream cheese frosting fresh.
Refrigeration: For longer storage, place the cupcakes in the fridge, where they will stay fresh for up to a week. Allow them to come to room temperature before serving for the best flavor.
Freezing: To freeze, wrap unfrosted cupcakes individually in plastic wrap and place them in a freezer-safe container. They can be stored for up to 3 months. Thaw in the refrigerator before frosting.
Frosting Storage: If you have leftover frosting, store it in the fridge for up to 5 days in an airtight container. When ready to use, re-whip for a smooth texture before frosting your Red Velvet Cupcakes.
Make Ahead Options
These Red Velvet Cupcakes are perfect for meal prep, allowing you to enjoy stress-free baking! You can prepare the cupcake batter up to 24 hours in advance by mixing and storing it in the refrigerator. Alternatively, bake the cupcakes and keep them unfrosted in an airtight container for up to 3 days to maintain their moist texture. For the cream cheese frosting, it can be made a day ahead and stored in the fridge; just let it sit at room temperature for about 30 minutes before using. When ready to serve, frost the cooled cupcakes to restore that fresh-baked flavor, ensuring they remain just as delicious for your special occasions!
Expert Tips for Red Velvet Cupcakes
• Measure Flour Correctly: Too much flour can lead to dense cupcakes. Use the spoon and level method to ensure accuracy.
• Room Temperature Ingredients: Allow eggs, buttermilk, and butter to reach room temperature for a creamier batter, resulting in perfectly moist Red Velvet Cupcakes.
• Don’t Overmix: Mix the batter just until combined. Overmixing can activate gluten and make the cupcakes tough.
• Quality Food Coloring: For vibrant results, opt for high-quality gel food coloring instead of liquid. It gives your cupcakes that iconic red hue without altering consistency.
• Cool Completely: Make sure cupcakes are fully cooled before frosting to prevent melting and ensure a beautiful finish.
• Store Properly: Keep leftovers in an airtight container at room temperature for up to three days to maintain their moisture and flavor.
Red Velvet Cupcakes Recipe FAQs
How do I select ripe ingredients for my Red Velvet Cupcakes?
Absolutely! For the best cupcakes, use room temperature eggs and buttermilk, as they blend more smoothly into the batter. Choose unsalted butter that’s soft to the touch, which allows for better creaming with sugar. When selecting cocoa powder, opt for Dutch-process for a richer flavor, and for the red gel food coloring, pick a high-quality brand for vibrant results.
What’s the best way to store leftover Red Velvet Cupcakes?
Very! Store your Red Velvet Cupcakes in an airtight container at room temperature for up to 3 days. This helps retain their moistness and keeps the cream cheese frosting from becoming too soft. If refrigerating, they can last up to a week—just make sure to let them come back to room temperature before indulging for the best flavor!
Can I freeze Red Velvet Cupcakes? How?
Absolutely! To freeze your Red Velvet Cupcakes, first let them cool completely. Then, wrap each unfrosted cupcake individually in plastic wrap and place them in a freezer-safe container or a zip-top bag. They will stay fresh for up to 3 months. When you’re ready to enjoy them, simply thaw them in the refrigerator overnight before frosting. If you have leftover cream cheese frosting, that can be stored in the fridge for up to 5 days and re-whipped before use.
What should I do if my Red Velvet Cupcakes are dense or dry?
The more the merrier! If your cupcakes turn out dense, it may be due to overmixing or too much flour. Make sure to spoon and level your flour and mix just until the ingredients are combined. If they are dry, be sure to avoid overbaking—check for doneness around 17 minutes. A toothpick inserted should come out with a few moist crumbs, not clean.
Are Red Velvet Cupcakes safe for people with allergies?
Always a wise question! This recipe contains common allergens such as eggs, dairy, and wheat, so be cautious if your guests have allergies. For dairy-free options, you can substitute buttermilk with plant-based milk mixed with a bit of vinegar, and use a dairy-free cream cheese for the frosting. Always double-check labels to ensure all ingredients meet your dietary needs.
How can I enhance the flavor of my Red Velvet Cupcakes?
Great inquiry! To take your cupcakes to the next level, consider adding about a teaspoon of espresso powder to the batter. This will deepen the chocolate flavor without making them taste like coffee. Also, a dash of cinnamon or a teaspoon of almond extract can introduce a lovely, warm note to the overall flavor profile. Enjoy experimenting with these delicious tweaks!
Irresistibly Moist Red Velvet Cupcakes with Creamy Frosting
Ingredients
Equipment
Method
- Preheat your oven to 350°F (175°C) and line a cupcake pan with 12 paper liners.
- In a small bowl, whisk together the all-purpose flour, Dutch process cocoa powder, baking powder, baking soda, and salt until combined.
- In a large mixing bowl, cream the softened butter and granulated sugar together until light and fluffy, about 1-2 minutes.
- Add the egg, egg yolk, and vanilla extract to the butter and sugar mixture and mix until smooth.
- Gradually add the dry ingredients to the wet mixture, alternating with buttermilk, mixing until just combined.
- Fold in the red gel food coloring until evenly distributed.
- Fill the cupcake liners about three-quarters full with the batter.
- Bake for 17-20 minutes or until a toothpick comes out clean.
- Cool in the pan for 10 minutes, then transfer to a wire rack to cool completely.
- Beat the cold cream cheese until pale and fluffy, then gradually add the sifted powdered sugar until smooth.
- Frost the cooled cupcakes and top with sprinkles if desired.
- Enjoy your Red Velvet Cupcakes!
Leave a Reply