
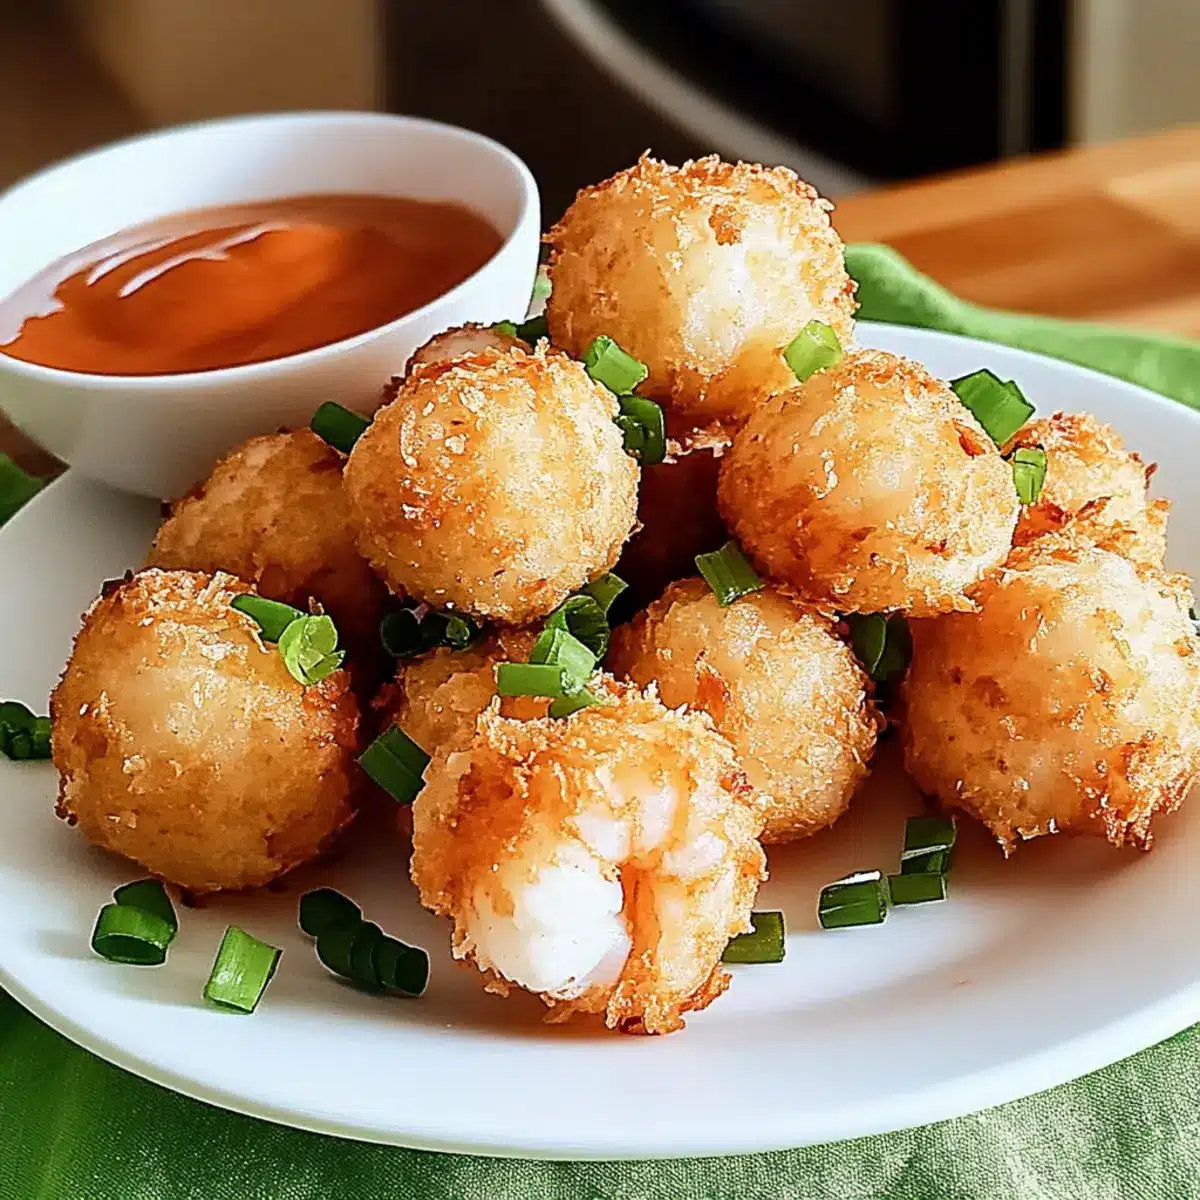
As I stood in my kitchen, the aroma of sizzling seafood wafted through the air, making my mouth water in anticipation. There’s something magical about the sound of shrimp crackling in hot oil, and today, I’m thrilled to share my favorite Shrimp Balls recipe with you. These crispy delights are not just a snack; they shine as an appetizer and can even steal the spotlight as the main dish. What I love most is how quickly they come together—perfect for those evenings when time is tight but you still crave something special. Plus, their versatility means you can customize each batch to suit your taste buds. Want to spice things up or add a cheesy surprise? The possibilities are endless! Ready to dive into this seafood adventure with me? Let’s get cooking!
Why are Shrimp Balls a Game Changer?
Crispy Goodness: This recipe delivers a delightful crunch with every bite, making them a perfect snack or party appetizer.
Quick & Easy: Perfect for busy evenings, these Shrimp Balls can be whipped up in no time, without sacrificing flavor.
Customizable: Explore endless variations by adding your favorite spices, fresh herbs, or even stuffing them with cheese.
Delight for Everyone: Serve as a main dish or an appetizer; they’re sure to impress family and guests alike! Plus, if you love seafood, these shrimp delights will rival your favorite Churro Bites for attention.
Nutrition-Friendly: Each serving packs a satisfying protein punch while remaining guilt-free at around 200-250 calories. Get ready to enjoy a seafood experience like no other!
Shrimp Balls Recipe Ingredients
For the Base Mixture
• Shrimp – Fresh or frozen shrimp provide a sweet, tender filling; if using frozen, ensure they are completely thawed.
• Breadcrumbs – Use panko breadcrumbs for an ultra-crispy exterior that will elevate your shrimp balls.
• Egg – The perfect binder to hold everything together; substitute with a flax egg if you’re looking for a vegan option.
• Garlic Powder – Adds a wonderful depth of flavor; feel free to use fresh garlic instead, just adjust the quantity to your taste.
• Green Onions – These add a fresh zest to the mixture; you can easily swap them out for chives or shallots for a different flair.
• Salt & Pepper – Essential for seasoning; adjust to your personal preference.
For Frying
• Cooking Oil – A high smoke point oil like vegetable or canola is ideal for achieving that crispy finish when frying.
This Shrimp Balls Recipe can easily be customized to your liking with additional seasonings or ingredients, so get creative and enjoy the process!
Step‑by‑Step Instructions for Crispy Shrimp Balls Recipe
Step 1: Prepare Shrimp
Start by finely chopping about a pound of fresh or thawed shrimp and placing it in a mixing bowl. You want the shrimp pieces to be small enough to blend well with the other ingredients but still retain some texture. This should take around 5 minutes, and you’ll know it’s ready when the shrimp looks uniformly minced without large chunks.
Step 2: Mix Ingredients
Add 1 cup of panko breadcrumbs, one beaten egg, 1 teaspoon of garlic powder, 1/4 cup of finely chopped green onions, and salt and pepper to taste into the bowl with the shrimp. Using a fork or your hands, mix everything well until you achieve a cohesive mixture. This process should take about 3-4 minutes, and the mixture is ready when it’s easy to form into balls without falling apart.
Step 3: Shape Balls
With wet hands to prevent sticking, take a small portion of the shrimp mixture and shape it into balls about 1 inch in diameter. Place the formed balls on a plate lined with parchment paper to keep them from sticking together. This should take 10 minutes, and you’ll want to be gentle yet firm to ensure each shrimp ball holds its shape.
Step 4: Heat Oil
In a frying pan, pour about 1/2 inch of vegetable or canola oil and heat over medium heat until it reaches about 350°F (175°C). You can test the oil’s readiness by dropping in a small piece of the shrimp mixture; it should sizzle immediately. This heating process may take around 5-7 minutes, ensuring a crispy exterior when frying.
Step 5: Fry Shrimp Balls
Carefully add the shrimp balls to the hot oil, making sure not to overcrowd the pan to maintain the oil temperature. Fry them for 3-4 minutes on each side, or until they turn a beautiful golden brown. You’ll know they are done when they float to the top and have a crisp exterior, which should take a total of about 8 minutes for each batch.
Step 6: Drain
Using a slotted spoon, carefully remove the shrimp balls from the oil and transfer them to a plate lined with paper towels. This step allows excess oil to drain off and keeps the balls from becoming greasy. Let them sit for about 2-3 minutes, ensuring they maintain that delightful crunch.
Step 7: Serve
Now that your crispy shrimp balls are ready, serve them warm with your choice of dipping sauces such as spicy mayo or sweet chili sauce. Arrange them on a platter to impress your guests or enjoy them as a cozy family meal. These shrimp balls are not only delicious but also versatile, making them a wonderful addition to any gathering.
What to Serve with Crispy Shrimp Balls?
Indulging in shrimp balls opens the door to a delicious meal, inviting a variety of flavors and textures to your table.
-
Garlic Butter Noodles: The buttery, garlicky goodness of these noodles complements the crispy shrimp balls beautifully, creating a rich and savory dish. Pairing them brings a harmonious balance of textures and tastes.
-
Tangy Coleslaw: A zesty coleslaw adds a refreshing crunch that contrasts with the warmth of the shrimp balls. The acidity brightens the meal, ensuring a vibrant dining experience.
-
Creamy Avocado Dip: This rich and velvety dip enhances the shrimp balls while adding a creamy, luscious element. It creates a perfect marrying of flavors when dipped or spread alongside.
-
Sweet Chili Sauce: Offering a delightful sweetness with a hint of heat, this sauce is the ultimate dip for shrimp balls. It perfectly elevates the seafood flavor, delivering an irresistible bite.
-
Lemon Herb Rice: Light and fragrant, lemon herb rice serves as a fantastic base, enhancing the seafood while soaking up flavors. This dish balances the richness of the shrimp balls quite well!
-
Chilled White Wine: A crisp, chilled white wine like Sauvignon Blanc pairs splendidly, cutting through the richness, refreshing your palate with each sip and bite.
-
Savory Miso Soup: This warm, umami-packed miso soup adds a comforting element when served as a starter. It prepares the taste buds for the delicious shrimp balls ahead.
-
Fried Rice: A tasty fried rice with mixed vegetables provides a satisfying textural contrast and is a filling accompaniment to your shrimp balls.
-
Tropical Fruit Salad: A sweet, refreshing fruit salad filled with mangoes and pineapples offers a delightful contrast, making every meal feel like a bright, sunny day.
-
Coconut Flan: To finish, a smooth and creamy coconut flan brings a sweet finish that perfectly rounds out the seafood experience with a touch of tropical charm.
Shrimp Balls Recipe Variations
Get ready to personalize your shrimp balls and make them uniquely yours with these enticing variations!
-
Spicy Twist: Add 1-2 teaspoons of chili powder or red pepper flakes to the mixture for a flavorful kick. The heat lingers, enhancing the savory shrimp flavor beautifully.
-
Herbaceous Delight: Incorporate fresh herbs like cilantro or parsley into the mix for a pop of color and brightness. Their fresh aroma will lift the shrimp balls to a new level of deliciousness!
-
Cheesy Surprise: Stuff the shrimp balls with a small cube of cheese like cheddar or pepper jack before frying. The molten cheese center adds a delightful creaminess to each bite.
-
Zesty Citrus: Squeeze in a tablespoon of lime or lemon juice to the shrimp mixture for a refreshing burst of acidity. This zesty addition complements the shrimp perfectly!
-
Crunchy Coating: Instead of breadcrumbs, try crushed tortilla chips for a Tex-Mex twist! This will give your shrimp balls an irresistible crunch and a loveable flavor twist.
-
Asian Influence: Mix in some soy sauce and sesame oil instead of traditional seasonings for an Asian-inspired take. Serve with a side of soy dipping sauce for the ultimate flavor experience.
-
Sweet & Sticky: Drizzle some honey or teriyaki sauce over your finished shrimp balls before serving. The sweet glaze adds an unexpected but delightful flavor contrast to the savory notes.
While you explore these variations, you might also want to check out the delightful Pineapple Christmas Balls or have a bite of creamy Cheesecake Truffle Balls for a sweet ending!
Expert Tips for Making Shrimp Balls
• Fresh is Best: Always opt for fresh shrimp if possible. If you use frozen shrimp, make sure they are completely thawed for optimal flavor in your Shrimp Balls recipe.
• Don’t Overmix: Mix the ingredients just until combined. Overmixing can make your shrimp balls tough instead of tender; you want that juicy filling!
• Oil Temperature: Ensure your oil is hot enough before frying. This prevents the balls from absorbing too much oil and losing their crispiness.
• Batch Frying: Avoid overcrowding the pan. Fry shrimp balls in smaller batches to maintain the oil temperature, resulting in evenly cooked, crispy balls.
• Flavor Experimentation: Feel free to get creative! Adding in spices or herbs, like Old Bay or cilantro, can elevate your Shrimp Balls recipe to new heights of deliciousness.
• Taste Test: Always fry one shrimp ball first to check for seasoning and texture before cooking the entire batch. Adjust the mixture if needed!
Make Ahead Options
These Crispy Shrimp Balls are perfect for meal prep, allowing you to save time on busy days! You can mix the shrimp mixture and form the balls up to 24 hours in advance. Simply cover the plate with plastic wrap and refrigerate until you’re ready to fry them. This ensures they maintain their freshness and flavor. If you want to prep even further ahead, you can freeze the shaped shrimp balls for up to 3 months; just ensure they are arranged in a single layer on a baking sheet before transferring them to a freezer bag. When it’s time to serve, fry them straight from the freezer, adding a couple of extra minutes to the cooking time for delicious results with minimal effort!
Storage Tips for Shrimp Balls Recipe
Refrigerator: Store uncooked shrimp balls in an airtight container in the fridge for up to 24 hours before frying. This helps maintain their freshness and flavor.
Freezer: For longer storage, freeze the shaped shrimp balls in a single layer on a baking sheet, then transfer to an airtight container or freezer bag for up to 3 months.
Reheating: To reheat cooked shrimp balls, place them in a preheated oven at 350°F (175°C) for about 10-15 minutes until they’re heated through and crispy again.
Avoiding Moisture: Ensure the shrimp balls are completely cooled before storing to prevent condensation, which can make them soggy. Enjoy these crispy delights whenever you want!

Shrimp Balls Recipe FAQs
How should I select shrimp for this recipe?
Absolutely! When choosing shrimp, opt for fresh if available. Look for shrimp that are firm, translucent, and have a mild sea smell. If using frozen shrimp, make sure they’re completely thawed and have no dark spots, which can indicate freezer burn.
What’s the best way to store leftover shrimp balls?
For cooked shrimp balls, store them in an airtight container in the refrigerator for up to 3 days. To keep them crispy, reheating in the oven at 350°F (175°C) for about 10-15 minutes is ideal. If they’ve been uncooked, you can keep them in the fridge for up to 24 hours before frying.
Can I freeze shrimp balls? If so, how?
Yes! To freeze shrimp balls, arrange the uncooked balls in a single layer on a baking sheet lined with parchment paper and place them in the freezer for about 1-2 hours until firm. Once frozen, transfer them to a freezer bag or airtight container, where they can be stored for up to 3 months. Just fry them straight from the freezer when you’re ready to enjoy them!
What can I do if my shrimp balls are falling apart while cooking?
Very! If your shrimp balls are falling apart, it could be due to too much moisture in the mixture or not enough binding agent. Ensure that you’re using the right amount of breadcrumbs and egg. If it’s too wet, you can mix in a little more breadcrumbs. Alternatively, let the mixture chill in the refrigerator for 20-30 minutes before shaping to help with binding.
Are shrimp balls safe for pets or those with shellfish allergies?
No, shrimp balls are not recommended for pets, especially dogs or cats, as shellfish can be harmful. Additionally, if anyone in your household has a shellfish allergy, it’s crucial to avoid this recipe altogether as it can trigger serious reactions. Always check for allergies before serving!
Irresistibly Crunchy Shrimp Balls Recipe for Seafood Lovers
Ingredients
Equipment
Method
- Finely chop about a pound of shrimp and place in a mixing bowl.
- Add breadcrumbs, beaten egg, garlic powder, green onions, salt, and pepper; mix well until cohesive.
- Shape the mixture into 1-inch balls and place on a parchment-lined plate.
- Heat oil in a frying pan over medium heat until 350°F (175°C).
- Carefully add shrimp balls to hot oil and fry for 3-4 minutes on each side until golden brown.
- Drain on a plate lined with paper towels to remove excess oil.
- Serve warm with dipping sauces of choice.
Leave a Reply