
As I strolled through a cozy Irish pub, the air filled with the delicious aroma of fried potatoes smothered in cheese and toppings, I couldn’t help but daydream about creating that authentic dish at home. Enter Irish Nachos, a fun twist on the beloved classic that swaps tortillas for crispy potato slices, bringing a comforting touch to your table. Not only are these Irish Nachos gluten-free, catering to those of us with dietary restrictions, but they’re also incredibly easy to whip up, making them a crowd-pleaser for any gathering. With melty cheese, zesty toppings, and a hint of Ireland in every bite, they promise to become your new favorite party snack. Ready to elevate your appetizer game? Let’s dive into this mouthwatering recipe!
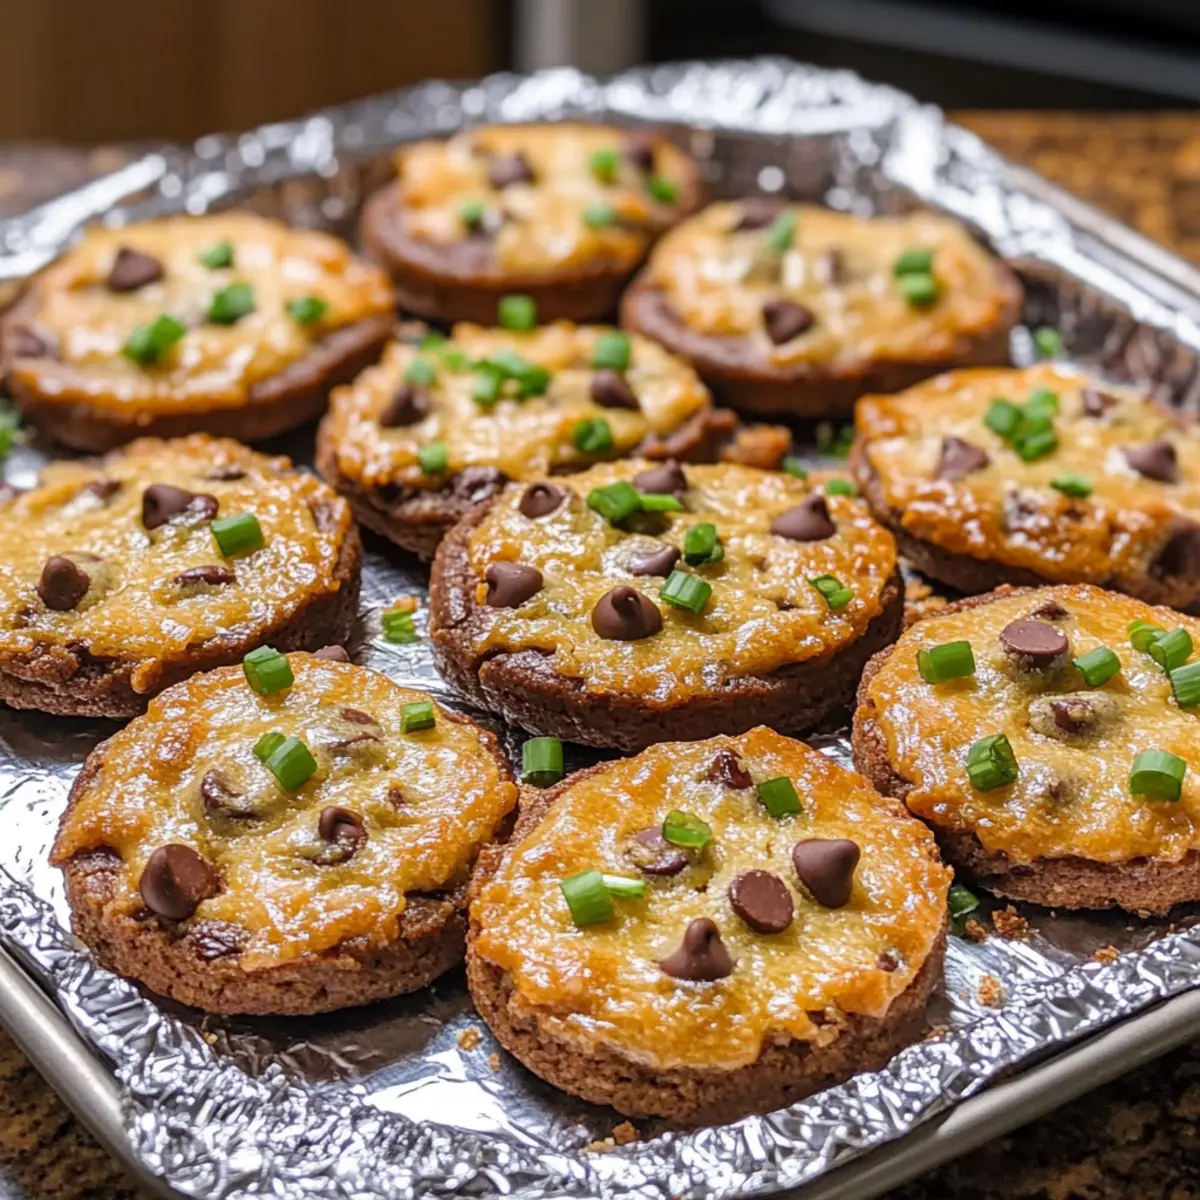
Why Try These Irish Nachos?
Irresistible Flavor: The combination of crispy potatoes and cheesy toppings provides a delightful taste explosion that everyone will enjoy.
Crowd-Pleaser: These nachos are perfect for gatherings, ensuring everyone feels included with a gluten-free twist.
Easy to Make: With just a few simple steps, you can have this savory dish ready in no time—ideal for busy weeknights or impromptu get-togethers.
Customizable Toppings: From zesty jalapeños to fresh veggies, you can tailor these nachos to suit your preferences or dietary needs, adding your unique flair.
Comforting Treat: Each bite delivers a warm, hearty experience that’s reminiscent of your favorite pub snack, making them a comforting option for any occasion.
For more delicious ideas, check out our Gluten-Free Chocolate Chip Cookies for a sweet finish to your snack platter!
Irish Nachos Ingredients
• Dive into these Irish Nachos with this simple ingredient list that brings comfort and flavor to your table!
For the Potatoes
- Potatoes – Choose Yukon Gold or Russet for a creamy texture when baked.
- Olive Oil – Drizzle for crispiness and flavor; can substitute with avocado oil if preferred.
- Salt – A must for enhancing flavor; consider using sea salt for an extra burst.
For the Toppings
- Shredded Cheese – Use a mix of cheddar and Monterey Jack for optimal meltiness; feel free to go dairy-free with alternatives!
- Jalapeños – Fresh or pickled for a little heat; omit if you prefer a milder flavor.
- Sour Cream – Complements perfectly for a creamy finish; can swap with Greek yogurt for added tang.
For Garnishing
- Green Onions – Chop finely to add freshness and color.
- Chopped Cilantro – Adds a pop of flavor; can omit if you’re not a fan.
- Guacamole – For an extra layer of creaminess and healthy fats; store-bought works fine if you’re short on time.
Now you’re all set to create these scrumptious Irish Nachos that everyone will love!
Step‑by‑Step Instructions for Irish Nachos
Step 1: Preheat the Oven
Begin by preheating your oven to 425°F (220°C). This temperature is perfect for achieving that golden, crispy texture on your potato slices. While the oven heats, prepare a large baking sheet by lining it with parchment paper for easy cleanup and to prevent sticking.
Step 2: Slice the Potatoes
Wash and dry your Yukon Gold or Russet potatoes thoroughly. Using a sharp knife or a mandoline, slice the potatoes into 1/4-inch thick rounds. Aim for even thickness to ensure consistent cooking. Place the potato slices in a large bowl and drizzle with olive oil, tossing them until evenly coated.
Step 3: Season the Potatoes
Sprinkle the potato slices generously with salt, ensuring every piece is well-seasoned for maximum flavor. Arrange the slices in a single layer on the prepared baking sheet, leaving space between each slice for optimal crispiness. This layout allows them to bake evenly and develop that delightful crunchy texture.
Step 4: Bake the Potatoes
Place the baking sheet in the preheated oven and bake the potato slices for 20-25 minutes, flipping them halfway through to achieve a golden-brown finish on both sides. Keep an eye on them during the last few minutes, as oven temperatures can vary; you’ll want them crispy but not burnt.
Step 5: Prepare the Toppings
While the potatoes are baking, gather and chop all your toppings. Dice jalapeños (if using), chop green onions, and prepare the shredded cheese mix of cheddar and Monterey Jack. This step ensures that you’re ready to assemble your delicious Irish Nachos as soon as the potatoes are done.
Step 6: Assemble the Nachos
Once the potato slices are baked and golden, remove them from the oven and immediately sprinkle a generous amount of shredded cheese over the hot potatoes. Follow with your jalapeños and any other toppings you desire for those flavorful Irish Nachos.
Step 7: Bake Until Cheesy
Return the loaded potato slices to the oven and bake for an additional 5-7 minutes, or until the cheese is melted and bubbly. Watch for a nice golden color on the cheese as an indicator that they are ready to come out. The irresistible aroma will guide you as well!
Step 8: Garnish and Serve
After removing the Irish Nachos from the oven, let them cool for a couple of minutes. Finish by dolloping sour cream and sprinkling chopped green onions and cilantro on top for a fresh burst of flavor. Serve your savory nachos warm, allowing everyone to dig in and enjoy this comforting dish!

What to Serve with Gluten-Free Chocolate Chip Cookies
There’s nothing quite like the warmth of freshly baked cookies paired with delightful accompaniments to elevate your sweet experience.
- Fresh Milk: Creamy and refreshing, a classic pairing that complements the rich chocolate while balancing sweetness dramatically.
- Vanilla Ice Cream: Melting atop a warm cookie creates a heavenly dessert experience, combining textures in a blissful blend.
- Coffee: A cup of brewed coffee harmonizes beautifully with chocolate, adding warmth and depth to every bite.
- Berry Medley: A mix of fresh berries introduces a tart contrast, brightening your palate after the sweet cookies.
- Nut Butter Dip: dabbing your cookies in almond or peanut butter adds richness and a touch of savory, enhancing flavors wonderfully.
- Chocolate Sauce Drizzle: Elevate your cookies’ indulgence with a warm chocolate drizzle, creating a decadent dessert party.
- Whipped Cream: Light and airy, this simple addition offers a delightful contrast to the dense cookies, making for a fancy finish.
- Fruit Smoothie: A refreshing smoothie made with bananas and spinach creates a nourishing side offering balance and energy.
- Chai Tea: The aromatic spices in chai beautifully complement the warm flavors of chocolate, ensuring a cozy indulgence.
Variations & Substitutions for Irish Nachos
Let your creativity shine and customize these Irish Nachos with these delightful twists and substitutions!
-
Low-Calorie: Swap out potatoes for baked sweet potato slices, adding a nutritious bonus and a hint of sweetness.
-
Spicy Kick: Add diced jalapeños or a sprinkle of crushed red pepper flakes to your cheese for an extra burst of heat that’ll tingle your taste buds.
-
Plant-Based: Use a blend of vegan cheese and Greek yogurt as a dairy-free alternative for a deliciously creamy finish that everyone can enjoy.
-
Protein-Packed: Top your nachos with shredded chicken, beef, or black beans for a heartier version that satisfies hunger. It’s a great way to boost nutrition while keeping it comforting!
-
Mediterranean Twist: Incorporate sliced olives, feta cheese, and sun-dried tomatoes for a fresh, Mediterranean flavor profile that brings a unique taste to your nachos.
-
Herb & Garlic: Infuse some garlic and fresh herbs like rosemary or thyme on your potatoes before baking for an aromatic touch that elevates every bite.
For pairing ideas, check out our delicious Gluten-Free Chocolate Chip Cookies for a sweet way to end your gathering, or consider trying out various toppings to enhance your own unique experience!
How to Store and Freeze Irish Nachos
Airtight Container: After allowing the Irish Nachos to cool completely, store leftovers in an airtight container at room temperature for up to 2 days for optimal freshness.
Refrigerator: For longer storage, place the nachos in the fridge, where they can stay fresh for up to 5 days. Reheat in the oven to restore crispiness.
Freezer: For extended storage, freeze baked potato slices without toppings for up to 2 months. When ready to enjoy, bake from frozen, then add toppings as you wish.
Reheating Tips: To reheat, place nachos under a broiler for a few minutes or in the oven until warmed through and the cheese is melty again, ensuring they retain their delicious texture.
Make Ahead Options
These Irish Nachos are perfect for meal prep and can be assembled ahead of time, saving you precious minutes! You can slice the potatoes and toss them with olive oil and salt up to 24 hours in advance, storing them in an airtight container in the refrigerator to maintain crispness. When you’re ready to enjoy, simply bake the prepped potato slices as directed, then layer with cheese and toppings before returning them to the oven for that irresistible melt. By prepping these components ahead of time, you’ll have a delicious and satisfying snack ready to serve with minimal effort—perfect for busy weeknights or unexpected guests!
Expert Tips for Irish Nachos
• Potato Choice: Use Yukon Gold or Russet potatoes for a creamy texture. Avoid waxy potatoes, as they won’t crisp up properly.
• Crispiness Guide: Don’t overcrowd the baking sheet; leaving space between potato slices allows them to crisp up nicely during baking.
• Flavor Boost: For extra flavor, toss the potato slices with garlic powder or smoked paprika before baking, enhancing the overall taste of your Irish Nachos.
• Cheese Layering: Layer cheese between potato slices for a gooey, melty goodness throughout. A mix of cheddar and Monterey Jack provides the best melt.
• Watch the Bake: Keep an eye on the nachos towards the end; cheese can go from bubbly to burnt quickly.
• Customize Freely: Feel free to switch up toppings such as using different cheeses or adding proteins like pulled chicken or beef for a heartier option!

Irish Nachos Recipe FAQs
What type of potatoes work best for Irish Nachos?
Absolutely! Yukon Gold or Russet potatoes are ideal for Irish Nachos. They provide a creamy texture when baked, which enhances the overall taste. Avoid waxy potatoes because they won’t crisp up as well. If you’re in a pinch, you can also use frozen potato slices, but fresh is always better for that homemade touch!
How should I store leftover Irish Nachos?
For sure! After allowing the Irish Nachos to cool completely, store any leftovers in an airtight container at room temperature for up to 2 days for the best freshness. If you want to keep them longer, place the nachos in the fridge, where they can last up to 5 days. Just remember to reheat them in the oven to restore crispiness—no one likes soggy nachos!
Can I freeze Irish Nachos?
Yes, indeed! To freeze your Irish Nachos, it’s best to freeze the baked potato slices without any toppings for up to 2 months. When you’re ready to enjoy, bake the frozen slices at 425°F (220°C) for about 15-20 minutes until heated through and crispy again. After that, add your toppings and bake for a few more minutes until the cheese is melted and bubbly.
How do I reheat Irish Nachos without losing their crispiness?
Great question! To reheat your Irish Nachos, I recommend using the oven or broiler. Preheat your oven to 350°F (175°C), then place the nachos on a baking sheet. Bake them for about 5-7 minutes, just enough to warm everything through and get that cheese nice and melty. Alternatively, you can use the broiler for a few minutes, which will give you that crispiness that feels like fresh out of the oven!
Are Irish Nachos gluten-free?
Absolutely! Irish Nachos are gluten-free by nature when you use proper potato slices instead of traditional tortilla chips. Ensure that all your toppings, including cheese and any additional ingredients, are labeled gluten-free, especially if you’re serving them to guests with dietary restrictions. They’re a delightful option that everyone can enjoy!
What toppings can I use to customize my Irish Nachos?
The more the merrier! You can get really creative with toppings. Aside from the traditional jalapeños, consider adding black olives, diced tomatoes, or even cooked ground beef or chicken for a heartier version. You can also swap out the cheese for your favorite dairy-free alternative if needed. Don’t shy away from your personal flair—experiment with what you love!

Irresistible Irish Nachos: A Fun Twist on a Classic Snack
Ingredients
Equipment
Method
- Preheat the oven to 425°F (220°C) and line a large baking sheet with parchment paper.
- Wash and dry the potatoes, slice them into 1/4-inch thick rounds, and place in a bowl with olive oil.
- Season potato slices with salt, arranging them in a single layer on the prepared baking sheet.
- Bake for 20-25 minutes, flipping halfway until golden brown and crispy.
- While baking, prepare toppings: dice jalapeños, chop green onions, and mix cheese.
- Remove baked potato slices from the oven, sprinkle cheese, add jalapeños and desired toppings.
- Bake for an additional 5-7 minutes until cheese is melted and bubbly.
- Let cool for a couple of minutes, then garnish with sour cream, green onions, and cilantro before serving.
Leave a Reply