
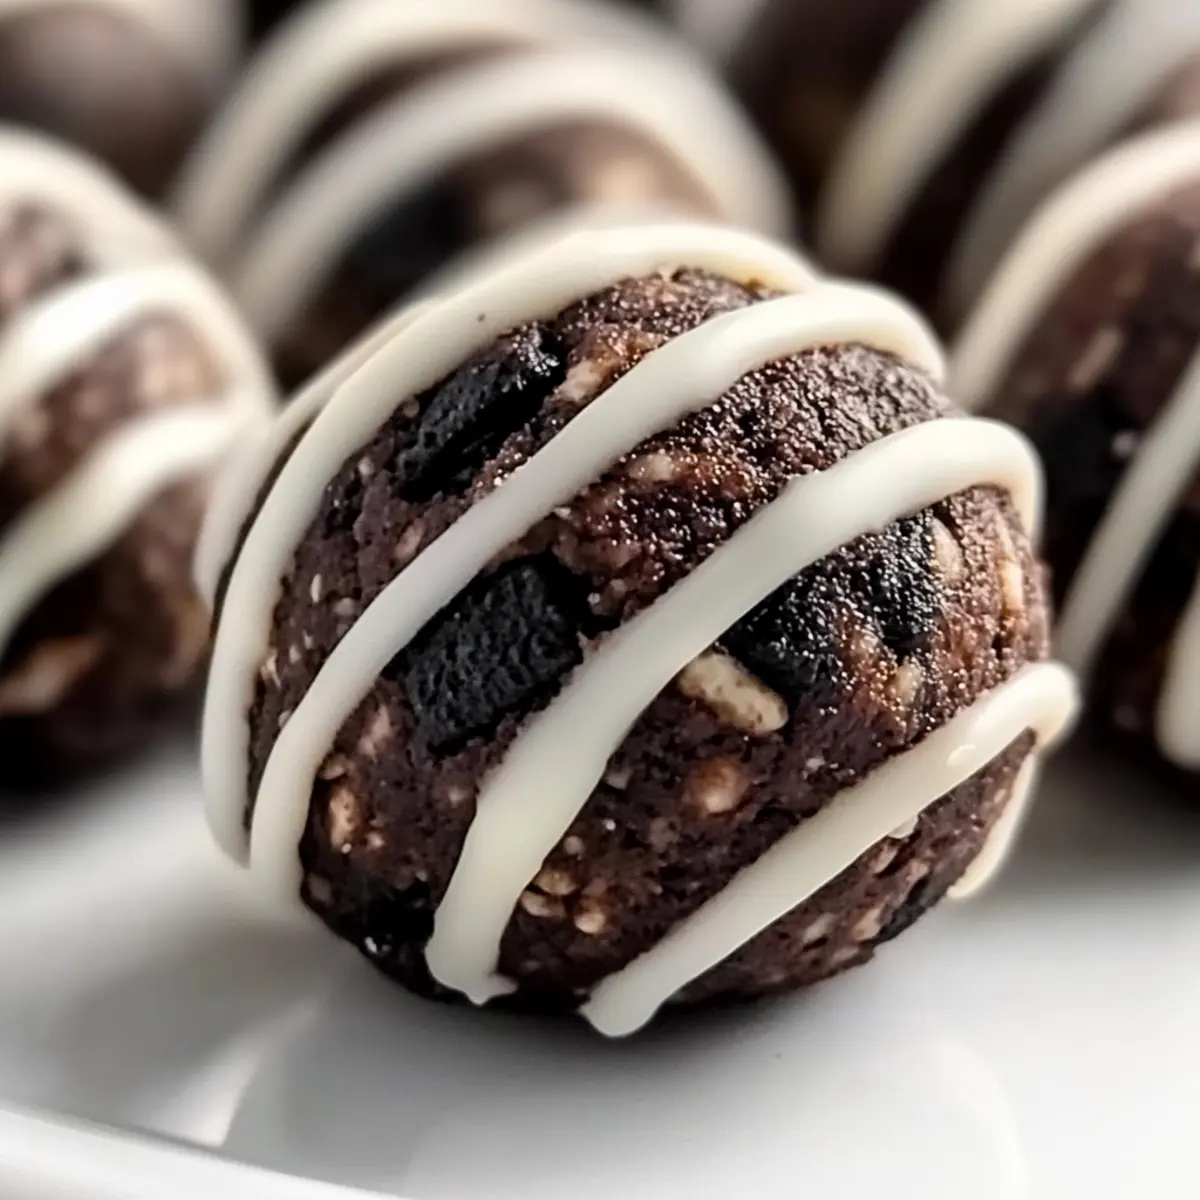
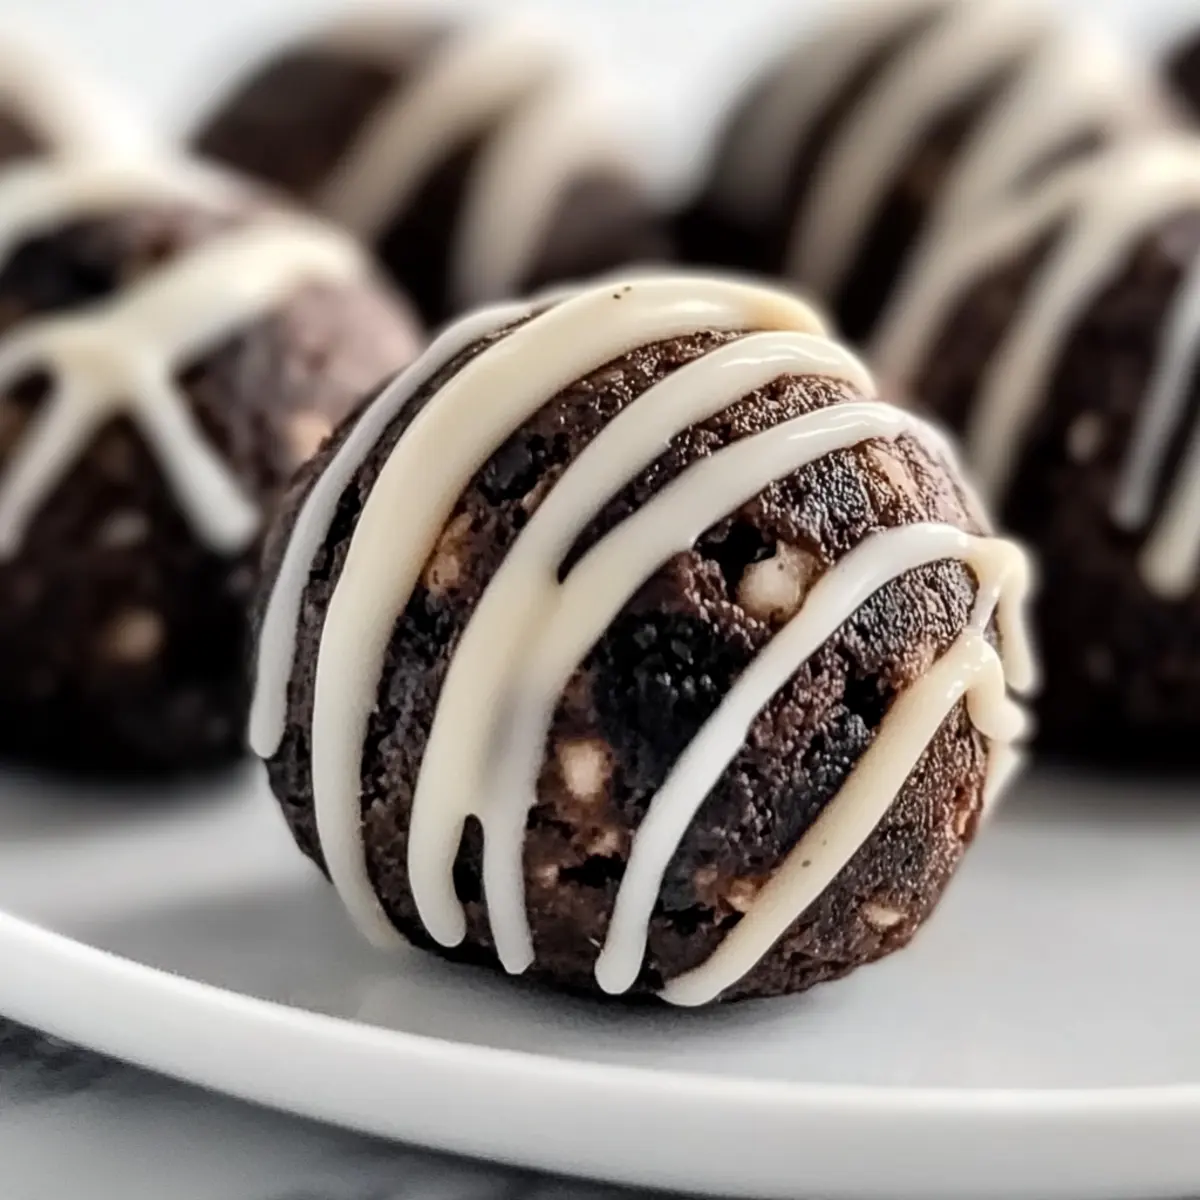
Stumbling upon a delightful treat that perfectly balances indulgence and nutrition feels like striking gold in the kitchen! Today, I’m excited to share my Oreo Protein Balls Recipe, a no-bake wonder that combines the beloved flavors of Oreos and cream cheese with a protein punch. These bite-sized delights are not only quick to whip up, making them ideal for busy days, but they also satisfy sweet cravings without the guilt. Whether you’re looking for a post-workout snack or a quick energy boost during those afternoon slumps, these protein balls are here to save the day. Plus, the best part is how easily you can customize them to fit your taste! Are you ready to elevate your snacking game?
Why Are Oreo Protein Balls So Great?
Irresistible Flavor: The magical combination of crushed Oreos and creamy cheese brings a sweet nostalgia that’s hard to resist.
No-Bake Convenience: Whip them up quickly without turning on the oven—perfect for busy weeknights or last-minute snacking!
Protein-Packed Treat: Each ball is loaded with protein, helping you stay energized and satisfied throughout your day.
Customizable Goodness: Feel free to try different protein powders or even swap Oreos with other favorites for unique flavor twists, making each batch truly yours!
Fun for Everyone: These make an excellent group snack; serve them at parties or pack them in lunchboxes for a cheerful surprise! Try pairing them with a refreshing Winter Salad Festive for a balanced meal.
Oreo Protein Balls Recipe Ingredients
Explore the essential ingredients needed to create these delightful treats!
For the Base
• Oreos – Adds rich flavor and structure; consider using gluten-free Oreos for a gluten-free option.
• Cream Cheese – Provides creaminess and depth; choose reduced-fat cream cheese for a lighter treat.
• Protein Powder – Essential for that protein boost; chocolate or vanilla flavors are fantastic choices.
For the Binding
• Almond Milk – Acts as a binding agent; adjust the amount based on the protein powder type for ideal texture.
• Coconut Oil – Helps smooth melted chocolate; can be substituted with any neutral oil if needed.
For the Coating
• Chocolate Chips – Adds sweetness and an attractive finish; opt for dark chocolate for a richer taste.
Step‑by‑Step Instructions for Oreo Protein Balls Recipe
Step 1: Prepare Baking Sheet
Line a baking sheet with wax paper, creating a non-stick surface where your Oreo protein balls will chill. This will prevent them from sticking together and make cleanup effortless later. Ensure the sheet is large enough to hold all the balls without crowding, allowing them to set evenly as they cool.
Step 2: Mix Dry Ingredients
In a medium-sized mixing bowl, combine the protein powder, coconut flour, cocoa powder, and your sweetener of choice. Stir well until everything is evenly incorporated, creating a uniform dry mixture. This step is crucial to ensure that every bite of your Oreo protein balls has the same delightful flavor, making your preparation time worthwhile.
Step 3: Combine Wet Ingredients
Next, add the cream cheese and almond milk to the dry mixture. Use a spatula or a hand mixer to blend everything together until you achieve a smooth and cohesive dough. The mixture should be pliable yet slightly sticky, which will help you shape it into perfect balls later. If it feels too dry, add a splash more almond milk.
Step 4: Shape Protein Balls
With your hands, take about a heaping tablespoon of the mixture and roll it into a ball. Place each ball on the prepared baking sheet, ensuring they’re spaced evenly apart. They should be about 1 inch in diameter for a perfect bite-sized treat. This step lets you turn your delicious mixture into the irresistible Oreo protein balls everyone will love.
Step 5: Melt Chocolate
In a microwave-safe bowl, add the chocolate chips and coconut oil together. Heat the mixture in the microwave in 20-second intervals, stirring in between until it’s completely melted and smooth. This decadent coating will add a rich touch to your protein balls, making them even more appealing and delightful to eat.
Step 6: Drizzle & Chill
Using a spoon or a fork, drizzle the melted chocolate over each protein ball on the baking sheet. Once coated, pop the tray into the freezer for about 10 minutes, allowing the chocolate to set. The chocolate should firm up, creating a glossy finish that enhances the overall presentation of your Oreo protein balls for that perfect treat.
Oreo Protein Balls Recipe Variations
Feeling inspired to customize your Oreo protein balls? There are endless possibilities to elevate these tasty treats!
- Gluten-Free: Substitute regular Oreos with gluten-free Oreos to make these treats safe for gluten-sensitive folks.
- Nutty Delight: Incorporate chopped nuts like almonds or walnuts for an added crunch and nutritional boost. Nuts provide both flavor and texture, making each bite even more delightful!
- Dairy-Free: Use coconut cream instead of cream cheese and dairy-free protein powder for a dairy-free treat everyone can enjoy. This variation is creamy and blissful without sacrificing flavor!
- Flavor Bomb: Experiment with assorted flavored protein powders such as cookie dough, or even matcha for a unique twist that surprises the taste buds. It’s a fun way to discover new favorites!
- Cocoa Bliss: Just like in your favorite desserts, add cocoa powder to the mix for an extra chocolate punch, intensifying the overall chocolatey goodness. Who doesn’t love more chocolate?
- Spiced Up: Sprinkle in a pinch of cinnamon or nutmeg for a warm flavor profile that complements the sweetness beautifully. The aroma alone will have your kitchen smelling heavenly!
- Fruity Fusion: Add dried fruits like cranberries or cherries to the mixture for a burst of sweetness and chewy texture, enhancing the flavor and nutrition.
- Chocolate Coating: Instead of just a drizzle, fully coat the protein balls in melted chocolate for an indulgent treat that’s hard to resist. Each bite becomes decadent, ensuring that no one can stop at just one!
Have fun mixing and matching these ideas! And while you’re in the mood for delightful no-bake treats, why not check out our sweet Cheesecake Truffle Balls or crunchy Churro Bites? Your taste buds will thank you!
Make Ahead Options
These Oreo Protein Balls are perfect for busy home cooks looking to save time! You can prepare the mixture up to 24 hours in advance by rolling the protein balls and storing them in an airtight container in the refrigerator. For even longer storage, feel free to freeze them for up to three months—just layer parchment paper between the balls to prevent sticking. When you’re ready to enjoy them, simply drizzle the melted chocolate over the frozen balls and let it set before serving. This way, you’ll have a protein-packed treat at your fingertips, just as delicious as if you’d made them fresh!
Helpful Tricks for Oreo Protein Balls
-
Ingredient Temperature: Use room temperature cream cheese and almond milk for smoother blending; cold ingredients can lead to clumps in your batter.
-
Stick-Free Rolling: Lightly coat your hands with coconut oil when shaping the balls to prevent sticking and ensure a smooth finish on your Oreo protein balls.
-
Perfect Consistency: Start with a small amount of almond milk and gradually add more until the mixture is moldable. Too much liquid can make shaping difficult.
-
Taste Test: Always taste the batter before rolling them into balls. This way, you can adjust the sweetness or flavor to your liking, ensuring every bite is delicious!
-
Chilling Time: Don’t skip the chilling step! Letting your Oreo protein balls firm up in the freezer for about 10 minutes is crucial for the best texture and coating.
How to Store and Freeze Oreo Protein Balls
Fridge: Store your Oreo protein balls in an airtight container for up to 1 week. They make an easy grab-and-go snack to keep you energized throughout the day.
Freezer: For longer storage, freeze the protein balls for up to 3 months. Layer them between sheets of parchment paper in a freezer-safe container to prevent sticking.
Thawing: When ready to enjoy, simply remove from the freezer and let them thaw at room temperature for about 10-15 minutes. Delicious and satisfying!
Reheating: If desired, you can warm them slightly in the microwave for 10-15 seconds to soften the chocolate drizzle, making them even more irresistible!
What to Serve with Oreo Protein Balls?
Elevate your snack game with delightful pairings that accentuate these sweet and satisfying bites.
- Almond Milk: A creamy, nutty classic that complements the rich flavors of the protein balls, making for a wholesome snack experience.
- Fresh Berries: Juicy strawberries or blueberries add a refreshing contrast, enhancing the dessert’s sweetness with a burst of fruity freshness.
- Greek Yogurt: Creamy and protein-rich, it’s perfect for dipping or dolloping, offering a smooth balance to the chewy texture of your protein balls.
- Coffee: Serving your protein balls with a warm cup of coffee creates a delightful afternoon pick-me-up that tantalizes the senses.
- Fruit Smoothie: A fruity blend with your favorite herbs or proteins can round out the meal while adding brightness and a refreshing vibe to the snack.
- Dark Chocolate Dipping Sauce: For those extra indulgent moments, a simple melted dark chocolate dip makes everything even more decadent, enhancing that rich Oreo flavor!
- Honey Drizzle: A touch of honey drizzled over the protein balls intensifies their sweetness and elevates the overall flavor balance.
- Trail Mix: This crunchy, nutty side brings additional textures to your snack, making it a fun combination with the soft Oreo protein balls.
- Caramel Sauce: A drizzle of caramel creates a sweet contrast that works wonders with the chocolate and cookie flavors, making your snack feel indulgent.
- Ice-Cream Float: For a decadent treat, pair them with a scoop of vanilla ice cream or a light soda float, creating a fun dessert experience.
Oreo Protein Balls Recipe FAQs
What kind of Oreos should I use for this recipe?
Absolutely! You can use any type of Oreos you prefer—classic, double-stuffed, or even gluten-free Oreos if you’re looking for a gluten-free version. Just remember that the choice of cookie will impact the flavor and texture slightly, so feel free to experiment!
How should I store leftover Oreo protein balls?
Store your Oreo protein balls in an airtight container in the refrigerator for up to 1 week. They are perfect for on-the-go snacking and make a delightful treat for those busy days. For longer storage, consider freezing them!
Can I freeze Oreo protein balls?
Yes! To freeze your protein balls, arrange them in a single layer on a baking sheet and freeze until solid. Then, transfer them to a freezer-safe container, layering them with parchment paper to prevent sticking. They can be frozen for up to 3 months. When you’re ready to enjoy them, simply thaw at room temperature for about 10-15 minutes.
What if my protein ball mixture is too dry?
If you find your mixture is too dry and crumbly, no worries! Gradually add a splash of almond milk, mixing until the desired consistency is reached. Start with just a tablespoon at a time; this way, you can control the moisture level without making it too sticky.
Are Oreo protein balls safe for pets?
It’s important to keep these protein balls away from pets, especially since they contain chocolate and are not suitable for animals. Always check ingredient labels for any items that may be harmful to your furry friends.
Can I modify the recipe to be dairy-free or vegan?
Very! To make a dairy-free or vegan version of the Oreo protein balls, simply opt for dairy-free cream cheese and use a plant-based protein powder like pea or brown rice protein. Ensure the chocolate chips you use are dairy-free as well. This way, you can maintain that delicious flavor while sticking to dietary preferences!
Oreo Protein Balls Recipe: Delicious No-Bake Energy Boost
Ingredients
Equipment
Method
- Line a baking sheet with wax paper to create a non-stick surface.
- In a medium-sized mixing bowl, combine the protein powder, coconut flour, cocoa powder, and sweetener. Stir well.
- Add the cream cheese and almond milk to the dry mixture and blend until smooth.
- Take a heaping tablespoon of the mixture and roll it into a ball, placing it on the prepared baking sheet.
- In a microwave-safe bowl, combine chocolate chips and coconut oil. Heat in 20-second intervals, stirring until melted.
- Drizzle the melted chocolate over each protein ball and chill in the freezer for about 10 minutes.
Leave a Reply