
As I opened my fridge one sunny morning, I spotted a carton of organic eggs, and a lightbulb moment struck me: why not whip up some shirred eggs? These delightful little creations wrap each perfectly baked egg in a creamy embrace, enhanced with fresh chives and a sprinkle of Parmesan. This shirred eggs recipe is not only simple and quick to prepare, but it also offers a brunch-friendly twist that can easily cater to any dietary preferences, including dairy-free options! Whether you’re looking for a cozy breakfast or an elegant brunch dish, this combination guarantees satisfaction for you and your guests. What exciting variations might you try to make this dish truly your own?
Why You’ll Crave Shirred Eggs?
Simplicity Made Delicious: This recipe is incredibly easy, allowing you to whip up a gourmet dish with minimal fuss.
Customizable Flavors: Personalize your shirred eggs by swapping in different cheeses or adding your favorite veggies; the possibilities are endless!
Dairy-Free Delight: With simple substitutions, everyone can enjoy this dish, even those following a dairy-free lifestyle.
Brunch Showstopper: Impress your friends and family at your next gathering with a dish that looks as good as it tastes. Pair with Air-Fryer Toast for dipping to elevate your brunch spread!
Quick Cooking Time: In just 15 minutes, you can have a stunningly creamy breakfast ready to savor. Don’t forget to check out these fantastic Deviled Eggs Deliciously for more brunch inspiration!
Shirred Eggs Ingredients
• For the Egg Base
- Unsalted Butter – Adds richness and prevents sticking; substitute with cooking spray for a lighter option.
- Heavy Cream – Creates a silky texture; swap for high-fat oat milk for a delicious dairy-free shirred eggs version.
- Large Eggs – The stars of the dish, providing protein and creaminess; opt for local, farm-fresh eggs for the best flavor.
• For the Seasoning
- Salt – Enhances flavor; adjust to your personal taste preference.
- Freshly Ground Black Pepper – Adds a touch of spice; sprinkle to your liking.
• For the Garnish
- Minced Fresh Chives – Provides a mild onion flavor and freshness; green onions can be a great substitute.
- Grated Parmesan Cheese – Adds creaminess and umami; try a vegan cheese alternative for those avoiding dairy.
Step‑by‑Step Instructions for Creamy Shirred Eggs with Parmesan and Chives
Step 1: Preheat the Oven
Begin your journey to creamy shirred eggs by preheating your oven to 375°F (190°C). This temperature is essential for achieving the optimal balance of cooked whites and gooey yolks. Ensure the oven is fully heated before placing the ramekin inside for even cooking.
Step 2: Prepare the Ramekin
Take a 6-ounce ramekin and generously grease it with unsalted butter to prevent the eggs from sticking. This step not only enhances the flavor but also contributes to the silky texture of the shirred eggs. Ensure the butter covers the bottom and sides evenly for best results.
Step 3: Add the Cream
Pour a layer of heavy cream into the greased ramekin, creating a luxurious base that adds richness to the shirred eggs. The cream should fill the ramekin to about halfway, ensuring that the eggs will have a creamy environment to cook in. This initial step lays the foundation for a delightful texture.
Step 4: Crack the Eggs
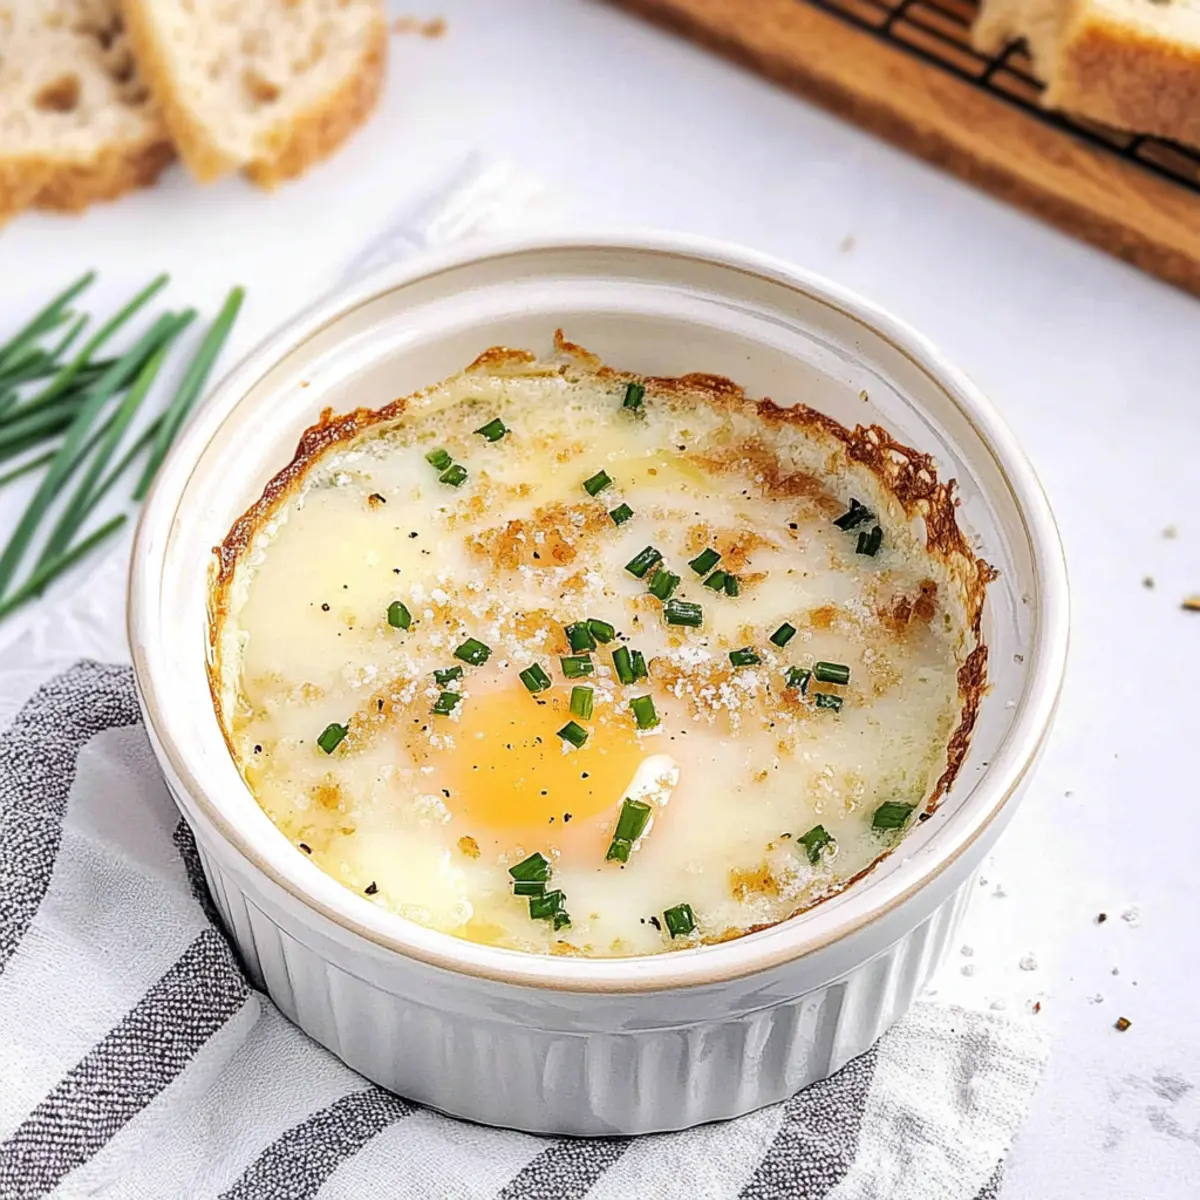
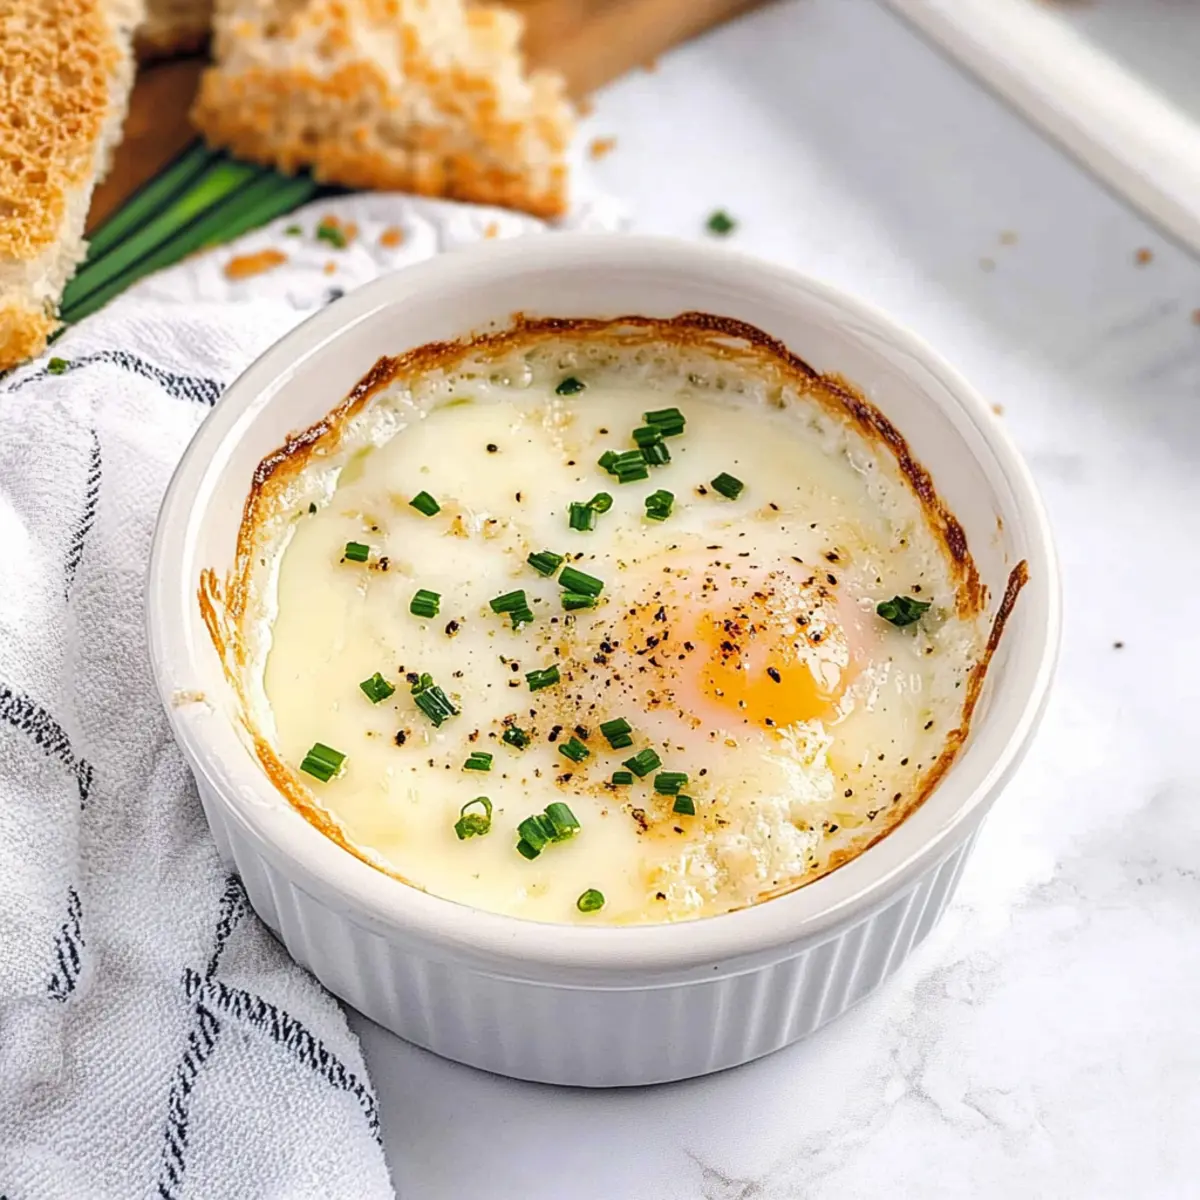
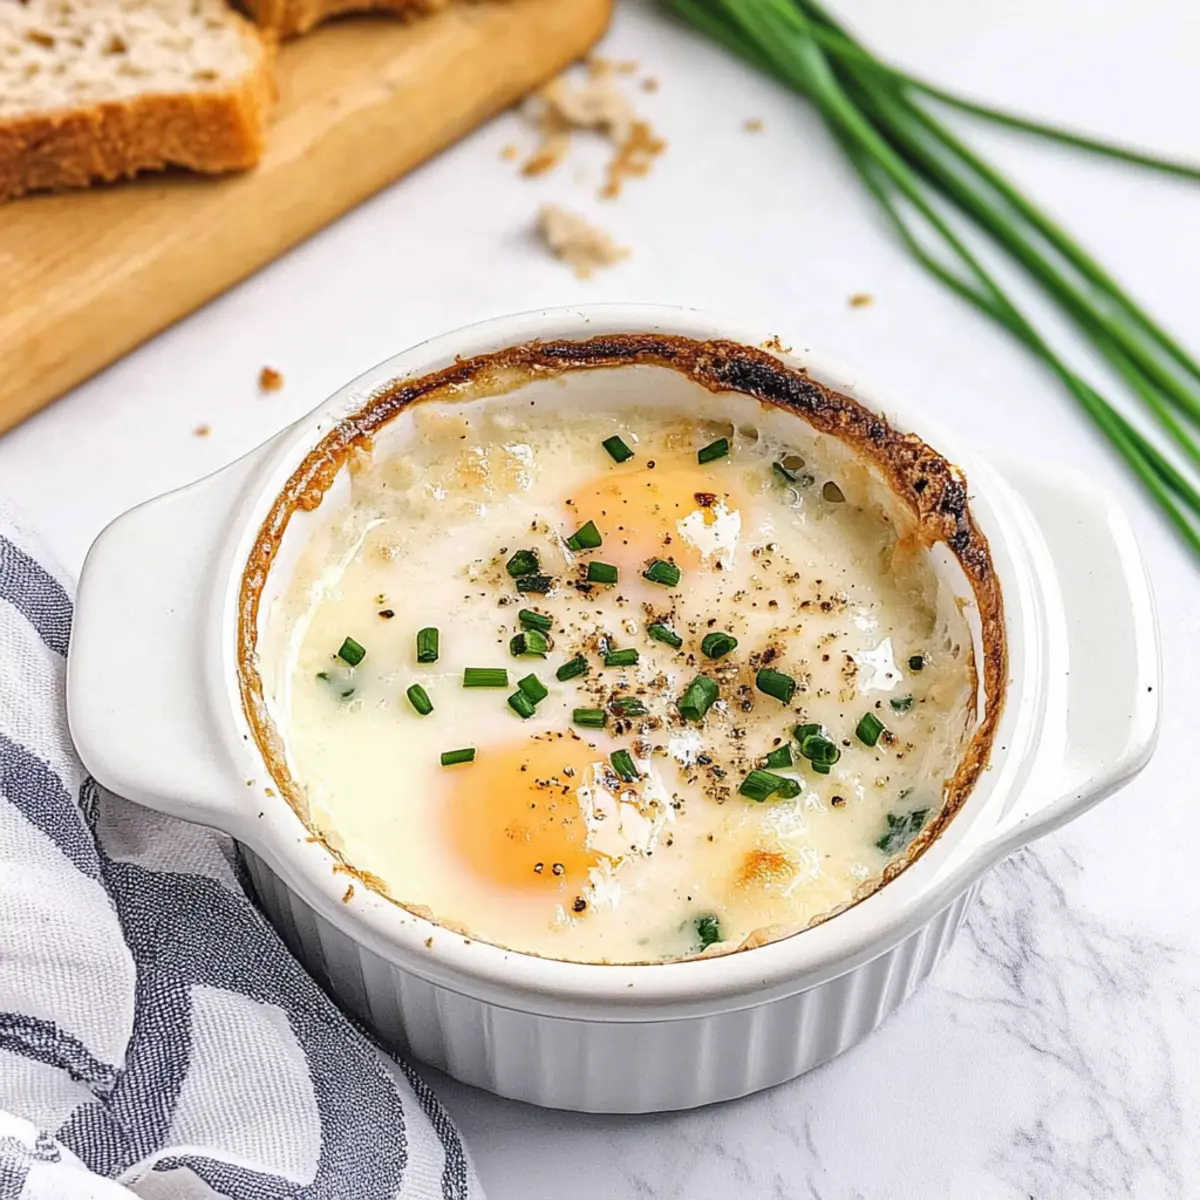
Gently crack the large eggs on top of the cream, taking special care not to break any yolks for that perfect runny center. The yolks should rest nestled in the cream, creating a beautiful display. This is the heart of your shirred eggs recipe, so handle each egg with care.
Step 5: Season and Garnish
Sprinkle the eggs with salt and freshly ground black pepper to enhance their natural flavors. Next, add a handful of minced fresh chives and a generous quantity of grated Parmesan cheese, which will melt into the dish and elevate the taste extravagantly. Adjust the seasoning according to your preference!
Step 6: Bake the Eggs
Place the ramekin on a baking sheet to catch any drips, and carefully set it in the preheated oven. Bake for 12-15 minutes, or until the whites are fully set but the yolks remain beautifully runny. Keep an eye on the oven, as visual cueing is crucial for achieving that perfectly creamy result.
Step 7: Cool and Serve
Once baked, remove the ramekin from the oven and allow the creamy shirred eggs to cool for a couple of minutes. This brief cooling time allows the flavors to meld beautifully and the dish to be safe to handle. Serve your masterpiece warm, alongside toast for dipping, making it a delightful brunch option.
What to Serve with Creamy Shirred Eggs with Parmesan and Chives?
Indulge in a delightful brunch experience with perfectly paired accompaniments that enhance your shirred eggs.
-
Air-Fryer Toast: Crispy and golden, this toast makes a perfect vessel for dipping into those luscious yolks.
-
Breakfast Potatoes: Roasted or crispy air-fried, these potatoes add heartiness and pair beautifully with the creamy texture of the eggs.
-
Fresh Fruit Salad: A refreshing mix of seasonal fruits brightens the meal, providing sweet contrast to the savory shirred eggs.
-
Herbed Salad: A light, citrusy salad with mixed greens and a tangy vinaigrette offers a fresh and zesty balance to your rich dish.
-
Sautéed Spinach: A simple side of sautéed spinach brings earthy flavors and nutrients, making for a comforting yet healthy addition.
-
Mimosas: Celebrate brunch with this classic cocktail; the bright, bubbly sweetness complements the richness of the eggs perfectly!
Shirred Eggs Variations & Substitutions
Feel free to take this delightful dish in new directions and make it uniquely yours!
- Dairy-Free: Replace heavy cream with high-fat oat milk or a plant-based cream for a silky finish without dairy.
- Cheese Change: Swap Parmesan for feta or goat cheese to explore different flavors; both will add a delightful touch!
- Veggie Boost: Mix in sautéed spinach, mushrooms, or roasted bell peppers for an extra layer of texture and nutrition.
- Herb Infusion: Experiment with fresh herbs like dill or parsley instead of chives for a fragrant twist that brightens the dish.
- Heat It Up: Add a pinch of red pepper flakes or a dash of hot sauce for those who crave a little spice in their shirred eggs.
- Savory Accent: Incorporate diced ham or crispy bacon for a heartier meal that’s sure to satisfy meat lovers.
- Tomato Tang: Place sliced cherry tomatoes on top before baking to introduce a sweet and juicy contrast to the creaminess.
- Baked Eggs for a Group: Multiply the recipe and bake in a larger dish for a family-style brunch, adjusting the cooking time accordingly.
These variations make it easy to cater to everyone’s taste at your brunch table. If you’re looking for more inspiration, try these wonderful Deviled Eggs Deliciously or pair your shirred eggs with some crispy Air-Fryer Toast for dipping!
Expert Tips for Perfect Shirred Eggs
High-Quality Eggs: Use fresh, farm eggs for a richer flavor and better texture in your shirred eggs.
Watch the Baking: Keep a close eye on your shirred eggs in the oven; if overbaked, the yolks will firm up instead of remaining runny.
Grease Well: Make sure to generously grease your ramekin with butter or cooking spray to prevent sticking and ensure a smooth release.
Experiment with Toppings: Elevate your dish by adding sautéed vegetables or different cheeses to customize your shirred eggs experience.
Serve Immediately: Shirred eggs are best enjoyed fresh out of the oven for a delightful creamy texture; reheating can alter their quality.
Make Ahead Options
These creamy shirred eggs are a fantastic make ahead option for busy mornings! You can prepare the ramekins with cream, eggs, and seasonings up to 24 hours in advance. To maintain the quality, cover the assembled ramekins with plastic wrap and refrigerate them until you’re ready to bake. When you’re set to serve, simply remove the wraps and bake in a preheated oven for 12-15 minutes, checking closely to ensure the yolks remain runny. This way, you can have a delightful, gourmet breakfast on the table in no time, making your mornings smoother and more enjoyable!
How to Store and Freeze Shirred Eggs
Fridge: Store leftover shirred eggs in an airtight container for up to 3 days. To maintain texture, reheat gently in the microwave or oven until warmed through.
Freezer: If you want to freeze shirred eggs, cool completely, then wrap individual portions in plastic wrap and place in a freezer-safe bag. They can be frozen for up to 1 month.
Reheating: To reheat frozen shirred eggs, thaw overnight in the fridge, then bake in the oven at 350°F (175°C) until heated through.
Quality Tip: For the best flavor and texture, enjoy your shirred eggs fresh, but know that with proper storage, you can savor them later too!

Shirred Eggs Recipe FAQs
What type of eggs should I use for shirred eggs?
Absolutely! For the best flavor and texture, I recommend using high-quality, fresh eggs. Local, farm-fresh eggs are ideal as they provide a richer taste and creaminess that elevates your shirred eggs. The fresher the egg, the better the overall result!
How should I store leftover shirred eggs?
Very! To store leftover shirred eggs, transfer them to an airtight container and keep them in the fridge for up to 3 days. When reheating, do so gently in the microwave or oven to preserve the creamy texture.
Can I freeze shirred eggs?
The more the merrier! If you wish to freeze shirred eggs, allow them to cool completely first. Wrap each portion in plastic wrap, then place them in a freezer-safe bag. They’ll stay fresh in the freezer for up to 1 month. To reheat, simply thaw them overnight in the fridge and bake at 350°F (175°C) until thoroughly warm.
What can I do if my shirred eggs turn out overcooked?
Oops! If your shirred eggs are overcooked, it’s good to note that the texture will be firmer, and the yolks will no longer be runny. To prevent this in the future, monitor them closely while baking, as even an extra minute can change the outcome dramatically. Aim for a baking time of 12-15 minutes, and consider using a timer for precision.
Are there any dietary concerns for shirred eggs?
Absolutely! If you’re following a dairy-free diet, simply substitute the heavy cream with a plant-based alternative, such as high-fat oat milk or a vegan cream option. For egg allergies, unfortunately, this dish isn’t suitable, but you might explore chickpea flour egg substitutes as a creative alternative for a similar texture. Always keep an eye on the individual dietary needs of your guests for a delightful brunch experience!
How can I avoid sticking when baking shirred eggs?
Very! To prevent shirred eggs from sticking, generously grease the ramekin with unsalted butter or a non-stick cooking spray prior to adding the cream and eggs. This will ensure easy removal after baking, providing you with a beautifully presented dish.
Irresistibly Creamy Shirred Eggs for Your Perfect Brunch
Ingredients
Equipment
Method
- Preheat your oven to 375°F (190°C) for optimal cooking.
- Grease a 6-ounce ramekin with unsalted butter to prevent sticking.
- Pour heavy cream into the greased ramekin until halfway full.
- Gently crack the large eggs on top of the cream, taking care not to break yolks.
- Sprinkle with salt, black pepper, chives, and Parmesan cheese.
- Bake in the oven for 12-15 minutes until whites are set and yolks are runny.
- Allow to cool for a couple of minutes before serving warm.
Leave a Reply