
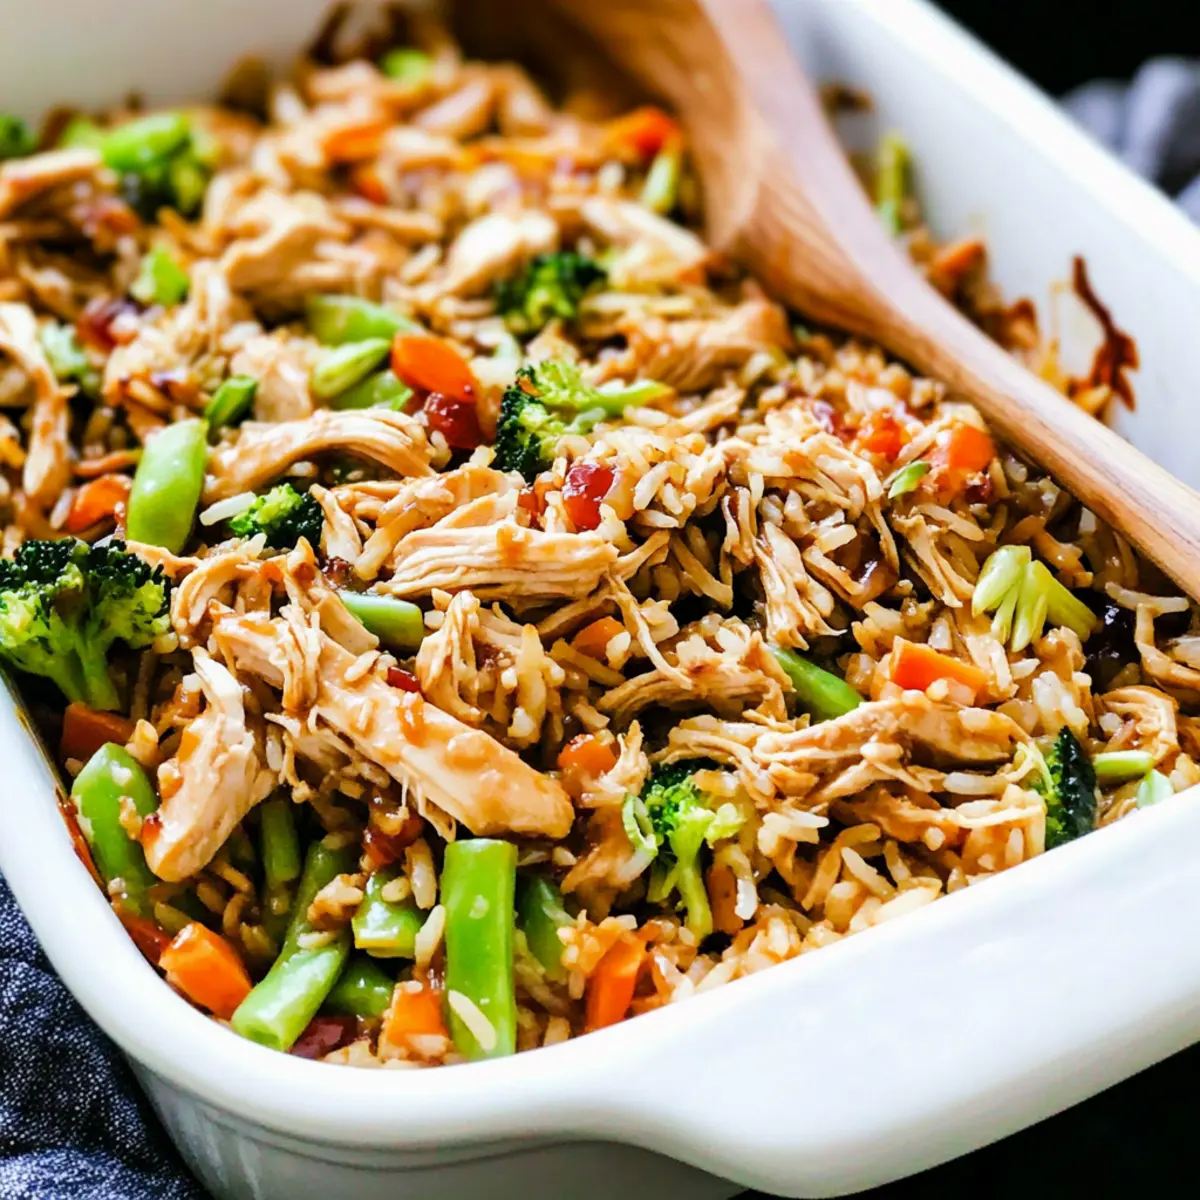
The aroma wafting through the kitchen transported me straight to a bustling Asian street market, where savory dishes spark joy and warmth. This Easy Teriyaki Chicken Casserole is my go-to for those busy weeknights when indulging in a homemade, wholesome meal feels like a luxury. Not only is it quick to whip together, but it also combines tender chicken, vibrant vegetables, and fluffy rice—all enveloped in a rich, flavorful teriyaki sauce. It’s the perfect crowd-pleaser that even the pickiest eaters will devour. Plus, this dish is a fantastic way to sneak in some extra nutrition while avoiding takeout temptation! Curious about how to make the most mouthwatering comfort food at home? Let’s dive into this delightful recipe!
Why Is This Casserole So Loved?
Simplicity: This Teriyaki Chicken Casserole is designed for busy lives—just one pan and a handful of ingredients create magic!
Family-Friendly: The combination of chicken, rice, and veggies makes it a hit for both kids and adults, so say goodbye to mealtime tantrums.
Flavor Explosion: Rich teriyaki sauce elevates every bite, making dinner feel special without the fuss!
Versatile Ingredients: Feel free to switch up the veggies or proteins, like with a delightful Chicken Caesar Wraps twist, if you’re looking for a bit of variety.
Quick and Easy: In just under an hour, you can have a wholesome meal on the table, saving you from the fast food rut.
Texture Delight: Enjoy the tender chicken and crunchy veggies that create a delightful balance in every serving!
Teriyaki Chicken Casserole Ingredients
• For the best results, use fresh ingredients for a vibrant and flavorful dish!
For the Sauce
- Low-sodium soy sauce – Adds saltiness and umami depth to the dish; opt for tamari for a gluten-free version.
- Water – Adjusts the sauce’s consistency; can be replaced with chicken broth for more flavor.
- Brown sugar – Provides sweetness to balance the savory soy sauce; honey or coconut sugar can be used as alternatives.
- Ground ginger – Adds warmth and spice; fresh ginger can be a zesty substitute.
- Minced garlic – Introduces aromatic flavor; freshly minced garlic is preferred for taste.
- Cornstarch & water – Used as a thickener for the sauce; flour can serve as a substitute, though it will change the texture slightly.
For the Casserole
- Boneless skinless chicken breasts – The main protein adding rich flavor and substance; chicken thighs can offer more juiciness if preferred.
- Refrigerated stir-fry vegetables (12 ounces) – A mix of healthy veggies like broccoli, carrots, and snow peas; frozen vegetables can also work in a pinch.
- Cooked brown or white rice (3 cups) – Serves as the base, absorbing the sauce; quinoa or cauliflower rice can be healthier alternatives.
Step‑by‑Step Instructions for Teriyaki Chicken Casserole
Step 1: Preheat the Oven
Begin by preheating your oven to 350°F (175°C). While it warms up, grab a 9×13-inch baking pan and generously coat it with non-stick spray to prevent the casserole from sticking. This step ensures your Teriyaki Chicken Casserole bakes evenly and allows for easy cleanup later on.
Step 2: Make the Sauce
In a medium saucepan, combine ¾ cup low-sodium soy sauce, 1 cup water, ½ cup brown sugar, 1 teaspoon ground ginger, and 2 cloves minced garlic. Bring this mixture to a boil over medium heat, stirring frequently. Once boiling, mix 2 tablespoons of cornstarch with 2 tablespoons of water until smooth, then add it to the sauce. Stir continuously until the sauce thickens and becomes glossy.
Step 3: Arrange Ingredients
Now, place 1.5 pounds of boneless skinless chicken breasts in the prepared baking pan. Surround the chicken with 12 ounces of refrigerated stir-fry vegetables. Pour 1 cup of the thickened teriyaki sauce over the chicken and vegetables, ensuring everything is well coated. Cover the pan tightly with aluminum foil to trap the steam and flavors.
Step 4: Bake the Casserole
Carefully place the covered casserole in the preheated oven and bake for 30 minutes. This step allows the chicken to cook through, reaching an internal temperature of 165°F (75°C). You’ll know it’s ready when the chicken is no longer pink in the center and the vegetables are tender.
Step 5: Shred the Chicken
Once baking is complete, remove the casserole from the oven and carefully discard the foil. Using two forks, shred the chicken directly in the pan for easy mixing. The chicken should break apart easily, absorbing the flavors of the sauce and hiding among the vibrant vegetables.
Step 6: Combine Rice and Sauce
Stir in 3 cups of cooked brown or white rice into the casserole, along with the remaining teriyaki sauce. Gently toss everything together, ensuring the rice is evenly coated with sauce and mixed with the chicken and vegetables. This is what transforms your dish into a creamy, hearty Teriyaki Chicken Casserole that’s sure to please everyone.
Step 7: Bake Again
Return the casserole to the oven and bake uncovered for an additional 10 minutes. This time is crucial for allowing the flavors to meld and the casserole to heat through. After this, it should be bubbling and aromatic, ready to be served.
Step 8: Serve and Enjoy
Let your Teriyaki Chicken Casserole sit for about 5 minutes after taking it out of the oven. Drizzle with any reserved sauce, if desired, for an extra flavor boost. Serve warm, and enjoy the delightful blend of tender chicken, crisp vegetables, and fluffy rice at your family dinner table!

Expert Tips for Teriyaki Chicken Casserole
-
Shred Warm Chicken: Shred the chicken while it’s warm for easier handling and better absorption of flavors—this step is crucial for a delicious casserole.
-
Check Temperature: Always use a meat thermometer to ensure the chicken reaches at least 165°F (75°C); undercooking can lead to food safety issues.
-
Fresh Ingredients Matter: For optimal taste and nutrition, choose fresh vegetables and proteins, as they elevate the overall quality of your Teriyaki Chicken Casserole.
-
Avoid Overcrowding: If you’re using a smaller baking pan, be sure not to overcrowd the ingredients, as this can prevent even cooking and lead to a soggy casserole.
-
Customize Sauces: Feel free to add a splash of sriracha or red pepper flakes for a spicy kick; just start with a little and adjust to taste.
-
Rest Before Serving: Allowing the casserole to sit for about 5 minutes before serving lets the flavors meld beautifully and makes it easier to dish out.
What to Serve with Teriyaki Chicken Casserole
Creating a delightful meal experience is all about the right pairings that complement that comforting, savory flavor.
-
Steamed Broccoli: The bright, earthy taste of steamed broccoli enhances the dish’s freshness and adds a satisfying crunch.
-
Garlic Bread: Who can resist warm, buttery garlic bread? It’s perfect for soaking up extra teriyaki sauce, making every bite a joy!
-
Crispy Asian Salad: Crisp greens with a zingy sesame dressing offer a refreshing contrast to the rich casserole; it’s a delightful way to add crunch.
-
Coconut Rice: This subtly sweet, fragrant rice harmonizes beautifully with the teriyaki sauce, elevating your meal to an exotic feast.
-
Edamame Pods: Lightly salted edamame provides a fun finger-food element; it’s a healthy snack that pairs perfectly with the casserole.
-
Mango Chutney: A spoonful of this sweet and spicy condiment can enhance the flavors of the casserole, adding an exciting twist to the meal.
-
Sparkling Water with Lime: This refreshing drink cleanses the palate and keeps your dining experience light and enjoyable.
These pairings not only complete your meal but also enhance the delicious essence of the Teriyaki Chicken Casserole, bringing joy to your dining table!
Teriyaki Chicken Casserole Variations
Feel free to experiment with these delightful twists to make this dish uniquely yours!
-
Dairy-Free: Swap regular soy sauce for a gluten-free tamari, ensuring it stays friendly for those with dietary restrictions.
-
Add Veggies: Toss in colorful bell peppers or snap peas for an extra crunch and vibrant hue. Fresh veggies elevate the dish both visually and nutritionally.
-
Protein Swap: Substitute chicken with tofu or shrimp to cater to different taste preferences or dietary needs. Tofu soaks up the teriyaki sauce wonderfully, while shrimp cooks quickly, making it a speedy option.
-
Rice Alternatives: Use cauliflower rice or quinoa instead of traditional rice for a low-carb variation. Both options add their unique textures and flavors, making the dish feel fresh and light.
-
Sweetness Boost: Consider adding pineapple chunks for a hint of fruitiness and natural sweetness. It brings a tropical twist that perfectly complements the savory teriyaki sauce.
-
Spice it Up: Add red pepper flakes or a drizzle of sriracha to the sauce for a spicy kick that will excite your taste buds. Just remember, a little goes a long way!
-
One-Pan Wonder: For a truly compact meal, add some canned chickpeas along with your vegetables for a heartier dish loaded with protein. The added texture makes every bite satisfying.
-
Flavor Fusion: Experiment with swapping the teriyaki sauce for a homemade orange sauce for a citrusy twist that pairs harmoniously with chicken. It’s like bringing a burst of sunshine to your dinner table!
These variations offer plenty of ways to get creative, ensuring that your homemade Teriyaki Chicken Casserole is anything but boring. For even more delightful chicken recipes, check out my Garlic Parmesan Chicken Pasta or Pretzel Chicken Mustard — each dish captures bold flavors that your family will adore!
How to Store and Freeze Teriyaki Chicken Casserole
Fridge: Store leftovers in an airtight container for up to 3 days. Reheat in the oven or microwave until warmed through.
Freezer: For longer storage, freeze portions in airtight containers for up to 3 months. Thaw overnight in the fridge before reheating.
Reheating: When ready to enjoy, reheat in the oven at 350°F (175°C) for about 20 minutes or until heated through. This helps maintain the casserole’s texture.
Wrap Well: If freezing, wrap the casserole tightly with plastic wrap before placing it in a container to prevent freezer burn and preserve flavor.
Make Ahead Options
These scrumptious Teriyaki Chicken Casserole is perfect for meal prep, saving you time on busy weeknights! You can prepare the sauce and shred the chicken up to 24 hours in advance, storing them separately in airtight containers in the refrigerator to maintain freshness. The rice can be cooked and kept for 3 days in advance, too! When you’re ready to serve, simply assemble the casserole, combining the chicken, vegetables, and sauce with the already cooked rice, and bake as directed. This way, you’ll have a delicious homemade meal with just a bit of finishing effort, ensuring your family enjoys the same great taste they’re accustomed to!
Teriyaki Chicken Casserole Recipe FAQs
What type of chicken should I use for the casserole?
Absolutely! I recommend using boneless, skinless chicken breasts for this Teriyaki Chicken Casserole. They offer a great balance of flavor and tenderness. However, chicken thighs can be a delightful alternative if you prefer more juiciness.
How do I store leftovers?
Leftovers should be stored in an airtight container in the refrigerator for up to 3 days. I always ensure it’s sealed tightly to keep the flavors intact. When reheating, use the oven or microwave until it’s heated through for the best taste.
Can I freeze the Teriyaki Chicken Casserole?
Yes, you can! For freezing, portion out the casserole into airtight containers or freezer bags. It can last up to 3 months in the freezer. Just be sure to thaw it overnight in the fridge before reheating. This method prevents mushiness and maintains the delicious textures of the dish.
What if my sauce isn’t thickening properly?
If you find your sauce isn’t thickening, don’t worry! Simply mix an additional tablespoon of cornstarch with a tablespoon of cold water until smooth, then stir it back into the sauce over medium heat. Keep stirring until it thickens to your desired consistency. This will help give your casserole that delightful sauce texture!
Are there any allergy considerations with this dish?
Yes, it’s essential to consider allergies. The use of soy sauce makes this dish unsuitable for those with gluten sensitivities unless you opt for gluten-free tamari. Also, if anyone has an egg allergy, ensure that the refrigerated stir-fry vegetables do not contain any egg-based sauces or additives.
Can I add other vegetables or proteins?
Very much so! This casserole is highly versatile. You can incorporate different veggies like bell peppers, snap peas, or even mushrooms. If you’d like to swap out the chicken, tofu, or shrimp can make for excellent alternatives, providing unique flavors that can please everyone at the table.
Savory Teriyaki Chicken Casserole for Easy Family Nights
Ingredients
Equipment
Method
- Preheat your oven to 350°F (175°C). Coat a 9x13-inch baking pan with non-stick spray.
- In a medium saucepan, combine low-sodium soy sauce, water, brown sugar, ground ginger, and minced garlic. Bring to a boil over medium heat.
- Mix cornstarch with water until smooth and add to the sauce, stirring continuously until thickened.
- Place the chicken in the prepared baking pan, surround with stir-fry vegetables, and pour the thickened teriyaki sauce over everything.
- Cover the pan tightly with aluminum foil and bake for 30 minutes.
- Remove the casserole and shred the chicken directly in the pan using two forks.
- Stir in the cooked rice and remaining teriyaki sauce, mixing gently to combine.
- Return the casserole to the oven and bake uncovered for an additional 10 minutes.
- Let sit for 5 minutes before serving. Drizzle with reserved sauce if desired.
Leave a Reply